Join Us On Social Media!

|

|

|
Download The App!
Login To
Remove Ads
Remove Ads
Login To
Remove Ads
Remove Ads
Model Boats Website
Deans Marine Kristina
11 Posts · 8 Followers · 48 Photos · 40 Likes
Began 2 years ago by
 United States
Follow This Thread
Not currently following
> Click to follow
> Click to follow
Latest Post 2 years ago by
| Oldest posts shown first (Show Newest First) | (Print Booklet) |
📝 Deans Marine Kristina
2 years ago by 🇺🇸 Cashrc ( Vice Admiral)
Vice Admiral)✧ 141 Views · 6 Likes · 2 Comments
Flag
💬 Add Comment
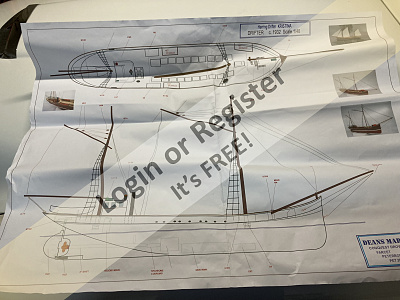
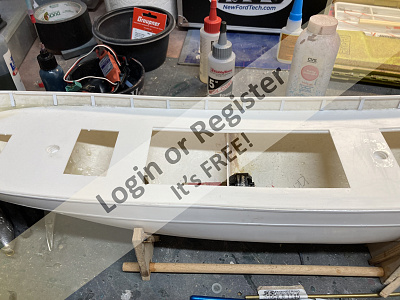
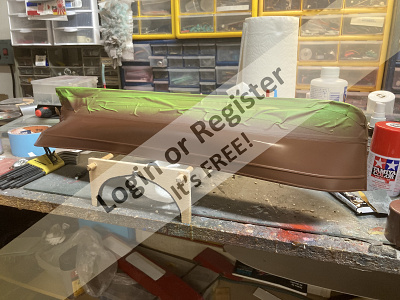
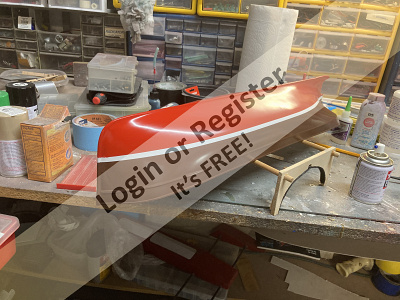
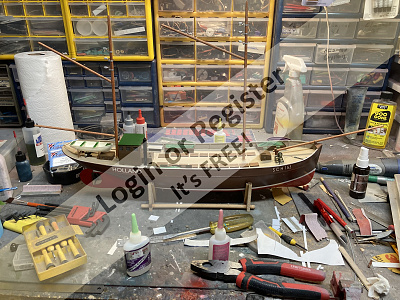
Hi y’all. I decided to get to work on a kit I received last Christmas, a Deans Marine herring drifter. This will be the second Deans kit I’ve built, the first being the PBR from a much older kit.
First things first. Many people tend to badmouth the Deans line, but this kit is markedly improved from the PBR I built a couple of years ago. The hull is gel coated fiberglass, the plans are readable and in color. The instructions while not great, are much improved from what I’ve seen before. Most of the plastic sheet parts are machine or laser cut. The fittings are..okay. And….it comes with a picture dvd that show a lot of details not in the written instructions. What I don’t like, I won’t use. The prop supplied is a rough casting, I’m using a Graupner prop and I’ll set the kit prop to practice on later. It’s designed for a five pole brushed 385 and 5 nimh cells….who uses 5 cell packs these days? I. Using a 1000 kv 28 mm outrunner and a 2 cell lipo for power. From my calculations I’ll be a little overpowered, but not much. Some of the fittings I’ll use, some I won’t.
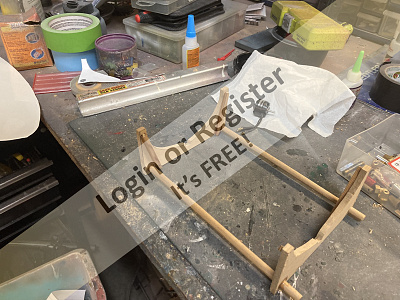
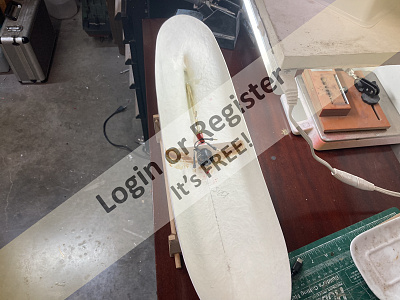
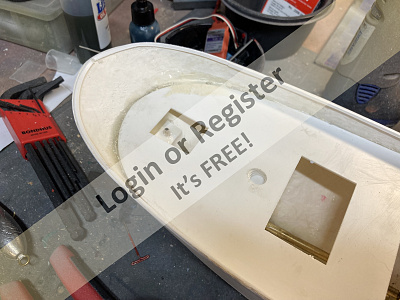
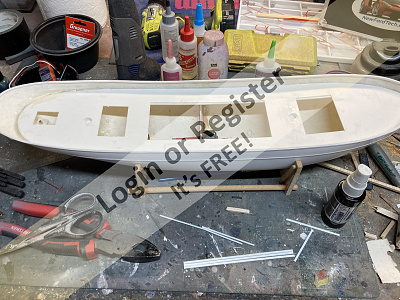
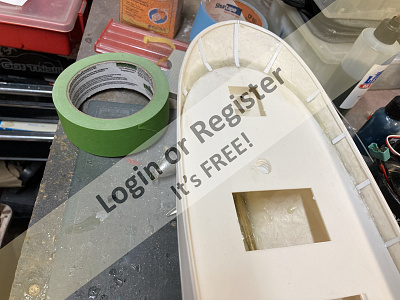
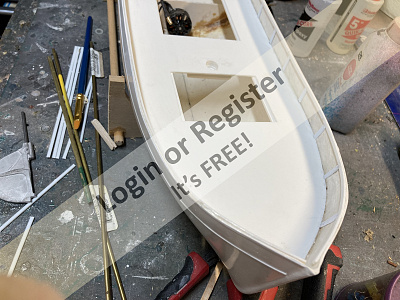
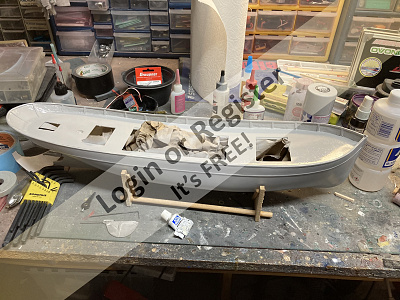
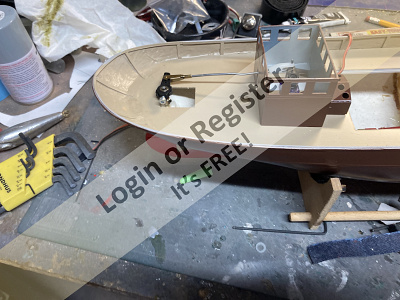
Anyway, it’s a pretty straightforward kit. I’ll just go over a few things for now. After the hull gets cleaned up and the edges sanded, the next step is to sand the inside, as it’s a little rough. I sanded the upper side where the bulwarks rise above the deck. Once the rudder tube and stuffing box is in place, you glue the deck on….and build a stand. I had some thickish basswood I wanted to use up, so I built the stand from that, and glued hardwood strip across the grain for strength. The deck is another place I veered away from the instructions. The kit uses layered 2mm thick plastic strip for the deck supports, I used 1/4 triangle balsa stock for all but the aft end, there I used 2mm plastic rod. The rod bends around the stern curve easily, and once glued in place and blended with the triangle stock the deck set down nicely. The mas supports were made up on the bottom of the deck then the assembly was epoxied in place. The aft edge of the deck is just a bit shy of the hull, the instructions call for filler, I used filled epoxy. After that it’s time for the bulwark rail and supports.
That’s where I’m at as of now. I have to have a cornea transplant in my left eye (Fuch’s Dystrophy) but the consultation isn’t till late September, so my goal is to have her ready by then, before the surgery. I’ll do more this week and post the progress.
Cash

First things first. Many people tend to badmouth the Deans line, but this kit is markedly improved from the PBR I built a couple of years ago. The hull is gel coated fiberglass, the plans are readable and in color. The instructions while not great, are much improved from what I’ve seen before. Most of the plastic sheet parts are machine or laser cut. The fittings are..okay. And….it comes with a picture dvd that show a lot of details not in the written instructions. What I don’t like, I won’t use. The prop supplied is a rough casting, I’m using a Graupner prop and I’ll set the kit prop to practice on later. It’s designed for a five pole brushed 385 and 5 nimh cells….who uses 5 cell packs these days? I. Using a 1000 kv 28 mm outrunner and a 2 cell lipo for power. From my calculations I’ll be a little overpowered, but not much. Some of the fittings I’ll use, some I won’t.
Anyway, it’s a pretty straightforward kit. I’ll just go over a few things for now. After the hull gets cleaned up and the edges sanded, the next step is to sand the inside, as it’s a little rough. I sanded the upper side where the bulwarks rise above the deck. Once the rudder tube and stuffing box is in place, you glue the deck on….and build a stand. I had some thickish basswood I wanted to use up, so I built the stand from that, and glued hardwood strip across the grain for strength. The deck is another place I veered away from the instructions. The kit uses layered 2mm thick plastic strip for the deck supports, I used 1/4 triangle balsa stock for all but the aft end, there I used 2mm plastic rod. The rod bends around the stern curve easily, and once glued in place and blended with the triangle stock the deck set down nicely. The mas supports were made up on the bottom of the deck then the assembly was epoxied in place. The aft edge of the deck is just a bit shy of the hull, the instructions call for filler, I used filled epoxy. After that it’s time for the bulwark rail and supports.
That’s where I’m at as of now. I have to have a cornea transplant in my left eye (Fuch’s Dystrophy) but the consultation isn’t till late September, so my goal is to have her ready by then, before the surgery. I’ll do more this week and post the progress.
Cash
▲
⟩⟩
River Rat
quattroo
Colin H
RonBMK2
boatmam
Graham93
|
💬 Re: Deans Marine Kristina
2 years ago by 🇬🇧 quattroo (
 Chief Petty Officer 1st Class) Chief Petty Officer 1st Class)✧ 143 Views · 1 Like
Flag
Never done or owned a Dean's kit but always fancied the D class MTB they do but it's pricey
▲
⟩⟩
Cashrc
|
|
💬 Re: Deans Marine Kristina
2 years ago by 🇬🇧 RonBMK2 (
 Petty Officer 1st Class) Petty Officer 1st Class)✧ 135 Views · 1 Like
Flag
It looks like it will be a good project, I look forward to seeing it's progress.
▲
⟩⟩
Cashrc
|
Login To
Remove Ads
Remove Ads
📝 Rear skeg and primer
2 years ago by 🇺🇸 Cashrc ( Vice Admiral)
Vice Admiral)✧ 128 Views · 3 Likes
Flag
💬 Add Comment
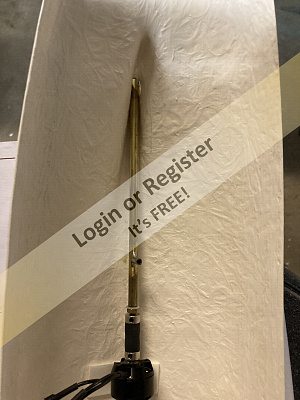
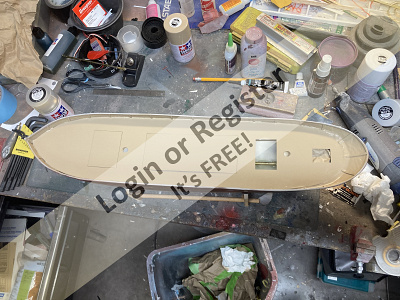
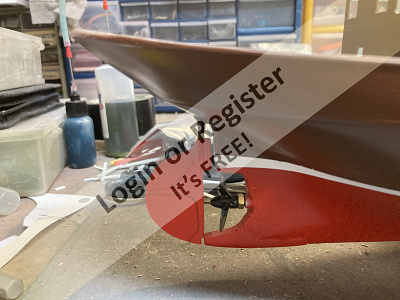
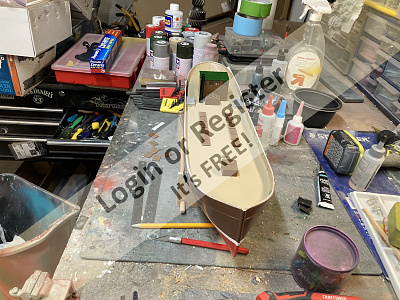
Hi y’all. Quick update. I made a rear skeg about of 4 layers of 2mm plastic sheet. I felt like I could get it to blend in better than the white metal one supplies in the kit. It’s been sanded and filled, but I need to sand one side again. I also primered the hull with Tamiya primer. At this stage anything I need to sand or fill will be more prominent, thus easier to see and correct. Once I clean her up and reprise, she’ll be ready for paint.
Cash
Cash
▲
⟩⟩
MouldBuilder
jbkiwi
RonBMK2
📝 Starting hull paint
2 years ago by 🇺🇸 Cashrc ( Vice Admiral)
Vice Admiral)✧ 125 Views · 5 Likes · 2 Comments
Flag
💬 Add Comment
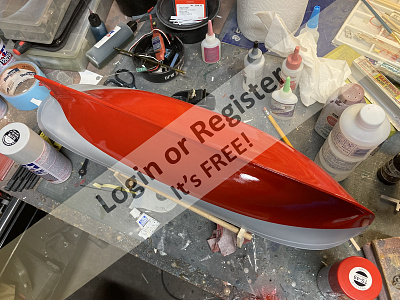
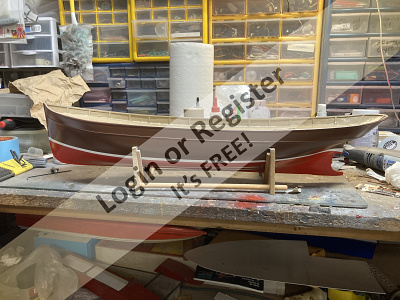
Just a quick update. I did a little more work on the skeg on the aft hull. Once the primer was dry I painted the lower hull with Tamiya bright red. I like the Tamiya rattle cans. They’re a little pricey, but being synthetic lacquer it goes on well and dries quickly. My goal is to have the hull and maybe the deck painted by this weekend, then I’ll turn attention to superstructure and other on deck details.
▲
⟩⟩
Norway
robbob
Len1
MouldBuilder
RonBMK2
|
💬 Re: Starting hull paint
2 years ago by 🇺🇸 Cashrc (
Vice Admiral)✧ 118 Views · 0 Likes
Flag
I don’t seal it, it’s a pretty hard finish. Since it’s lacquer, it’s a “hot” paint, dries fast and hard. You can handle it in 15-20 minutes and I’d say it’s fully cured in a day. The military flat paints dry even faster😀
▲
⟩⟩
No likes yet
This member will receive 1 point for every like received |
|
💬 Re: Staring hull paint
2 years ago by 🇬🇧 RonBMK2 (
Petty Officer 1st Class)✧ 126 Views · 0 Likes
Flag
It looks like a good finish, do you seal it with any thing ,or dose it dry hard enough as it is?
▲
⟩⟩
No likes yet
This member will receive 1 point for every like received |
📝 Hull and deck paint
2 years ago by 🇺🇸 Cashrc ( Vice Admiral)
Vice Admiral)✧ 114 Views · 3 Likes
Flag
💬 Add Comment
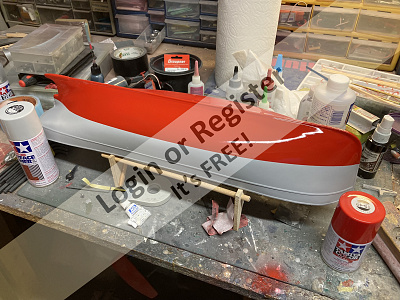
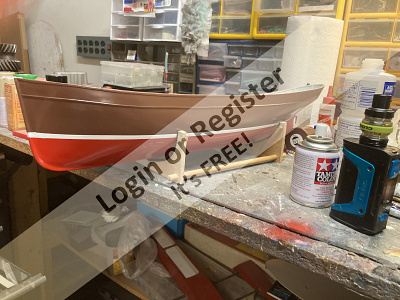
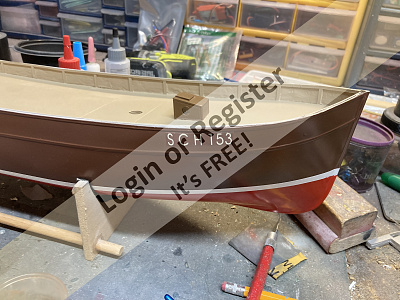
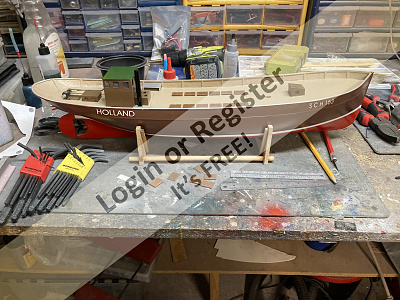
Hi y’all. I decided to finish painting the hull after getting groceries early this morning. I used Tamiya NATO Brown for the upper part of the hull. I then used Tamiya Pure White for the waterline stripe. I’ve never painted the waterline before, always used trim tape. Anyway, once that was dry I shot the hull with semigloss clear. The brown is almost flat, the red very glossy, so the semigloss evened the colors out. I went ahead and painted the deck too. It looks good but I have a couple of places to fill and touch up, plus I need to clean up the bulwarks upper rail and paint that with a brush. I’m close to getting ready to do the superstructure, masts and details.
Cash
Cash
▲
⟩⟩
Dumaspittman
Norway
Peejay
📝 Skylights, cabin and etc
2 years ago by 🇺🇸 Cashrc ( Vice Admiral)
Vice Admiral)✧ 100 Views · 1 Like
Flag
💬 Add Comment
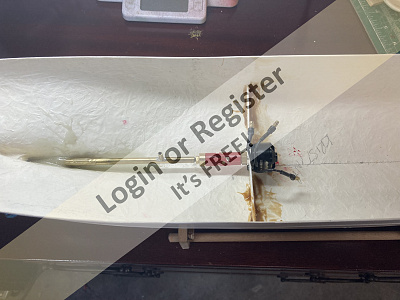
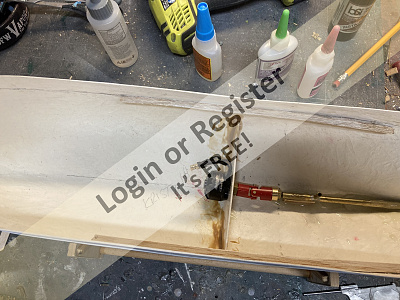
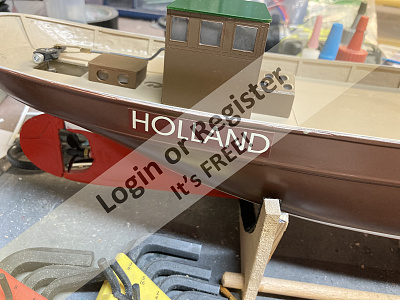
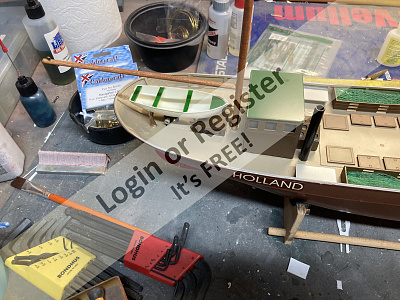
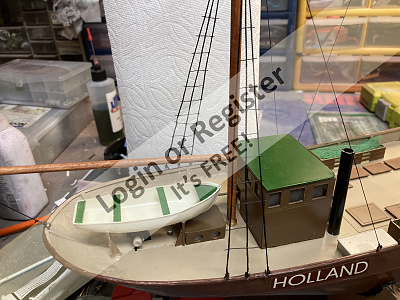
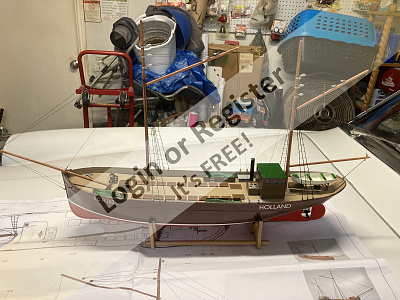
Hi everybody. Got a bit more done this week on the Kristina. The rudder, servo and linkage are in place. Now, the rudder linkage on this boat is external, and designed that way. It’s mostly hidden by the ships boat on the fantail. I COULD have changed it up, kept the linkage under the deck, but the slope of the hull at the stern and the rudder placement would have precipitated an odd setup and a larger aft hatch for access, so I left it be. The skylights and cabin are built up from the laser cut sheet, the forward part of the cabin is embossed with the outline of the attached skylight. So that’s where I glued the assembly to. It’s offset just a bit, and the plans show it centered, but this is not the first time I’ve had plans and parts placement not jive. Not a dig at Deans, I’ve seen the same thing where plans and instructions do not match up in other boat kits and aircraft kits too. Anyway, the cut parts went together nicely. The fish gutting tables and most of the fish hold hatches are done, those are simple to build up but there’s a lot of them, I still have 4 more to install.I went ahead and glued the furthermost small access hatch in place as I don’t need it, my internal setup of battery and esc will be accessed by the main hatch.
The decals that came with the kit are cut and peel vinyl, the lettering is on a brown background, and I was delighted to find that the brown almost matched the NATO brown exactly…just a touch off. Once I had them in place and clear coated with semigloss they blended right in. A happy accident, as the kit calls out Humbrol paints and I’m using Tamiya. Anyway, I still have nets, net boxes, masts , etc to do, plus some touching up, buts she’s taking shape.
Cash
▲
⟩⟩
jbkiwi
📝 Masts!!!! Arrrgh
2 years ago by 🇺🇸 Cashrc ( Vice Admiral)
Vice Admiral)✧ 92 Views · 3 Likes · 2 Comments
Flag
💬 Add Comment
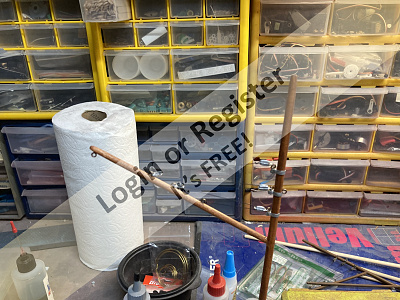
Hi y’all. Started working the masts today. This is where I really don’t know what I’m doing, but I’m pressing on regardless. Two things. I’m not great at tapering masts, and I’m not great at rigging. I’ve built and rigged 4 Micro Magics, a DF65 and a Sterling Sailfish that I built with operable main and jib rigging, but this is….different….🤔
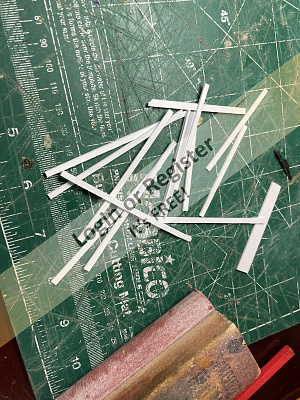
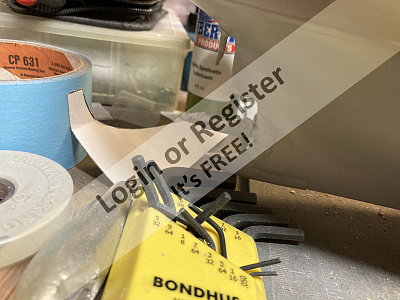
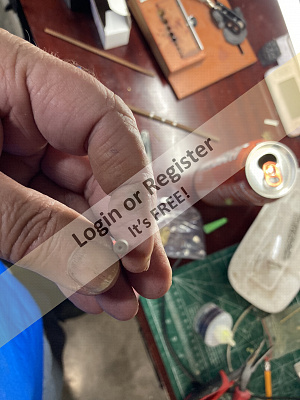
Anyway, I got the mast built up and did the rigging best I could. I didn’t care for the thread that came with the kit, so I used what I had on hand. I think it’s a bit too small in diameter, but I’ll live with it for now. The instructions call for making small split rings with round nosed pliers, but all I have are small needle nose, so I used cut down brass cotter pins. It turned out okay, might go by the craft store and get more dowel and slightly larger thread and have a go at it again, but this is what I’ve come up with for now.
Cash
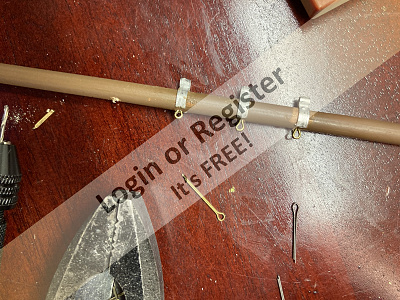
▲
⟩⟩
Peejay
jbkiwi
Graham93
|
💬 Re: Masts!!!! Arrrgh
2 years ago by 🇺🇸 Cashrc (
Vice Admiral)✧ 78 Views · 0 Likes
Flag
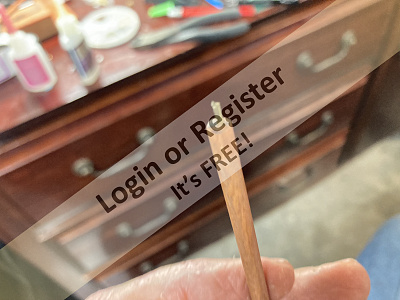
Thought about that, but since I decided to stain instead of paint the masts stripping the paint off the brush handle would have been a lot of work. I came upon a way that works for tapering. I use a Dremel with a sanding band and rough the taper, then chuck the mast in my drill and finish it with sandpaper. Works okay so far. Thanks for the idea though, when I need a tapered mast that’s painted I might give that a go.
▲
⟩⟩
No likes yet
This member will receive 1 point for every like received |
|
💬 Re: Masts!!!! Arrrgh
2 years ago by 🇨🇦 Rowen (
 Captain) Captain)✧ 88 Views · 1 Like
Flag
Find that cheap artists type paint brushes make a good base for a tapered mast
▲
⟩⟩
Cashrc
|
📝 Masts, Aargh take 2
2 years ago by 🇺🇸 Cashrc ( Vice Admiral)
Vice Admiral)✧ 84 Views · 1 Like · 2 Comments
Flag
💬 Add Comment
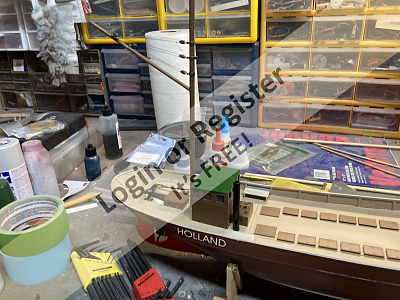
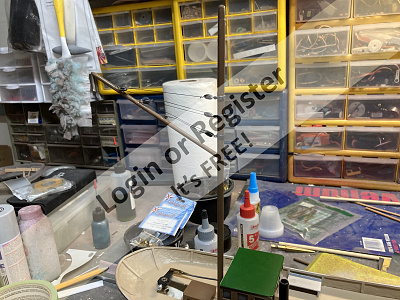
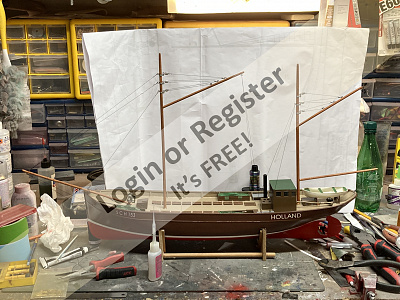
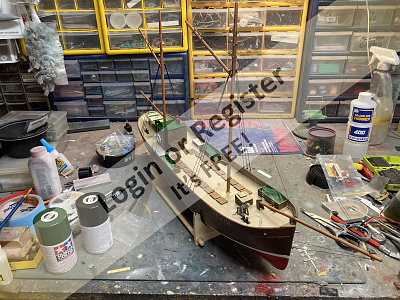
Hi y’all. I wasn’t happy with the way the first mast came out, so I decided to make another go of it. Luckily for me I had to visit Home Depot for a toilet flapper valve, so I bought a small can of stain while I was there. I then swung by Hobby Lobby (US chain craft and almost hobby store) for some dowel and embroidery thread. I felt that the kit supplied rigging thread was too coarse, and the thread I used originally was too thin, the embroidery thread was just about right. I had also ordered a container of 4mmx8mm screw eyes that are the perfect size for the brass rings called for in the kit, and they worked out nicely.
I did a better job of tapering the wood this time, and once finish sanded, I gave the spars and masts 2 coats of gun stock stain, once that dries I shot all of the wood with Tamiya semi-gloss clear, then built up the masts. I like the way they look, much better than the painted one I did before. I still have to make up, paint and install the spar to mast “crutches” and then it’s time to step the masts, build the bowsprit, and rig the whole thing.
Cash
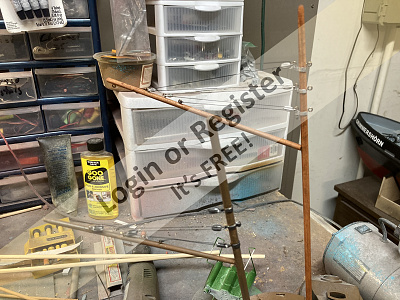
▲
⟩⟩
Colin H
|
💬 Re: Masts, Aargh take 2
2 years ago by 🇺🇸 Cashrc (
Vice Admiral)✧ 78 Views · 0 Likes
Flag
Good idea!! I’ll have to remember that. Thanks!!
▲
⟩⟩
No likes yet
This member will receive 1 point for every like received |
|
💬 Re: Masts, Aargh take 2
2 years ago by 🇺🇸 River Rat (
Captain)✧ 83 Views · 1 Like
Flag
I have used old fishing poles for masts and flag poles in the past. The taper is already there. Just cut at the diameter you need. if you bump them they are very flexible. Very hard to break. The down side is you have to paint them to match you boat. Dave
▲
⟩⟩
DWBrinkman
|
📝 Most details done
2 years ago by 🇺🇸 Cashrc ( Vice Admiral)
Vice Admiral)✧ 70 Views · 1 Like
Flag
💬 Add Comment
Quick update. I have the ships boat, nets, net boxes and anchor winch built, painted and installed. I also did a leak/ballast check in the tub, no leaks, might have to add an ounce or two of ballast depending on what battery I use. I have to make a decision on whether or not to add nav lights. After that decision is made and lights or faux lights are installed, I’ll permanently step the masts then rig her, including the ratlines. Stay tuned, the ratlines are gonna make this an R rated program for language, just wait🤣🤣
Cash
Cash
▲
⟩⟩
Colin H
📝 Bowsprit, rigging, ratlines..
2 years ago by 🇺🇸 Cashrc ( Vice Admiral)
Vice Admiral)✧ 66 Views · 5 Likes · 5 Comments
Flag
💬 Add Comment
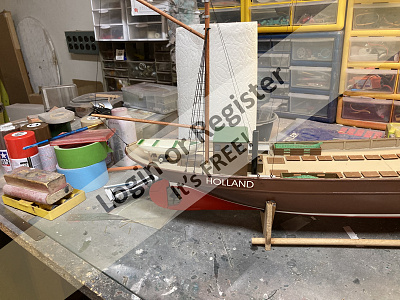
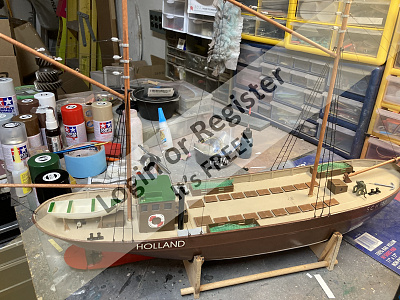
Hi y’all. I got the aft ratlines completed over the weekend, I did the mast rigging and bowsprit a week before. Before I go on, I must say that modelers who build static models of full rigged sailing vessels have my undying admiration. I’m telling y’all, my next boat might be a piece of pine plank with one coat of Krylon, a motor and rudder…🤣
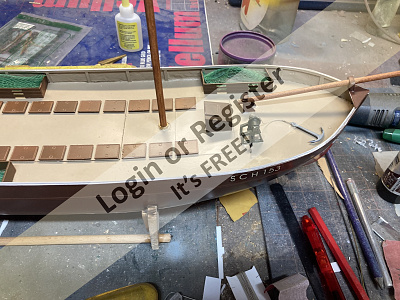
Anyway, the rigging actually went pretty easy, for the attachment points I used 4x8 mm screw eyes that came in an assortment from Amazon. I used a pin vise to drill the hull, mast and bowsprit, added a drop of glue and screws them in place. The bowsprit is interesting, as the aft end is offset from the ships centerline and then angles over to where the fwd tip is in line with the bow. The plans show it, as does the instructions..thought it was odd but that’s what the plans show….
The ratlines. Let’s get to that. I used cut down 1/2 inch brass cotter pins for the attach points on the top of the bulwarks, and the aforementioned screw eyes on the masts. I had a little issue where my drilling on one hole went awry and got too close to the outside edge of the hull. So, after the shroud attach points were installed I had to sand, fill, repaint and recoat that spot.
I tried tying the steps (?) on the first four rungs of the first ratlines, they looked okay, but not great. I had read about using contact adhesive to build the ratlines up off model, then installing as a unit. What I came up with is to install and tension the shrouds first. Then I took a length of thread and tied it off so I could spool out a foot or so. I then applied thin ca. once cured I was able to cut my “steps” to length, and glued in place on the shrouds. This worked well. I did the forward shrouds last night, all went well except I had a drop of ca run down the hull. I had to quickly clean that off, then sand, repaint, re clear coat and sand again, then polished out. Most people won’t notice, it’s not perfect but still looks good. I have to add the cross pieces of the forward ratlines and add lights to the cabin. Then she’s ready to float.
Cash
▲
⟩⟩
pressonreguardless
DWBrinkman
RNinMunich
Colin H
Graham93
|
💬 Re: Bowsprit, rigging, ratlines..
2 years ago by 🇺🇸 pressonreguardless (
 Rear Admiral) Rear Admiral)✧ 27 Views · 0 Likes
Flag
I've had that problem more than once. thin CA goes everywhere!!
Trev ▲
⟩⟩
No likes yet
This member will receive 1 point for every like received |
|
Login To
Remove Ads 💬 Re: Bowsprit, rigging, ratlines..
2 years ago by 🇺🇸 Cashrc (
Vice Admiral)✧ 58 Views · 1 Like
Flag
Thanks Doug. Only time I almost lost my mind was when the errant drop of CA hit the hull😮 But, I’m still sane, mostly🤣 Again, thanks for the compliment, it’s appreciated!!
Cash ▲
⟩⟩
pressonreguardless
|
|
💬 Re: Bowsprit, rigging, ratlines..
2 years ago by 🇩🇪 RNinMunich (
 Fleet Admiral) Fleet Admiral)✧ 64 Views · 1 Like
Flag
Good job Cash👍
Glad to see you didn't get too 'ratty' over the ratlines 😁 Cheers, Doug 😎 ▲
⟩⟩
Cashrc
|
|
💬 Re: Bowsprit, rigging, ratlines..
2 years ago by 🇺🇸 Cashrc (
Vice Admiral)✧ 63 Views · 0 Likes
Flag
Thank you Colin! I appreciate the comments.
▲
⟩⟩
No likes yet
This member will receive 1 point for every like received |
|
💬 Re: Bowsprit, rigging, ratlines..
2 years ago by 🇬🇧 Colin H (
Fleet Admiral)✧ 60 Views · 1 Like
Flag
Cash, ooh what a nice looking vessel, you've done a great job. 👍
Looking forward to seeing her on the water. Cheers Colin ▲
⟩⟩
Cashrc
|
📝 Ready to maiden
2 years ago by 🇺🇸 Cashrc ( Vice Admiral)
Vice Admiral)✧ 49 Views · 5 Likes · 5 Comments
Flag
💬 Add Comment
Quick one y’all. She’s as ready as I can make her, nav lights done today and a few more details. Let y’all know how she floats tomorrow.
Cash
Cash
▲
⟩⟩
pressonreguardless
Ronald
Norway
Colin H
DWBrinkman
|
💬 Re: Ready to maiden
2 years ago by 🇺🇸 Cashrc (
Vice Admiral)✧ 32 Views · 0 Likes
Flag
Trev, there was no fair maiden with champagne, but my buddy’s daughter, Ashley, took the video…and when I pulled up to park she was sailing her dads Micro Magic like an old hand…😀
She’s getting married soon, maybe the club can all chip in get her the new Hacker Micro Magic as a wedding present! Cash ▲
⟩⟩
No likes yet
This member will receive 1 point for every like received |
|
Login To
Remove Ads 💬 Re: Ready to maiden
2 years ago by 🇺🇸 Cashrc (
Vice Admiral)✧ 32 Views · 0 Likes
Flag
Ron, I was fortunate enough to not have to add any extra ballast. I had the same misgivings as you, so I got my battery as low as possible. Shes pretty well behaved so far.
Thanks for your comments, take a look ad the vid see what you think. Cadh ▲
⟩⟩
No likes yet
This member will receive 1 point for every like received |
|
💬 Re: Ready to maiden
2 years ago by 🇺🇸 pressonreguardless (
Rear Admiral)✧ 37 Views · 1 Like
Flag
Looks Good Cash,
Don't forget to have a Fair Maiden break the Champaigne bottle across her bow😉 Good Luck Trev ▲
⟩⟩
Cashrc
|
|
💬 Re: Ready to maiden
2 years ago by 🇨🇦 Ronald (
 Admiral) Admiral)✧ 53 Views · 1 Like
Flag
Be sure to launch on a calm day. These smaller vessels don’t like choppy conditions, plus calm water will help you to see if ballast is good.
▲
⟩⟩
Cashrc
|
|
💬 Re: Ready to maiden
2 years ago by 🇨🇦 Ronald (
Admiral)✧ 53 Views · 1 Like
Flag
Looking forward to seeing her on the water
▲
⟩⟩
Cashrc
|


Login To
Remove Ads
Remove Ads