Join Us On Social Media!

|

|

|
Download The App!
Login To
Remove Ads
Remove Ads
Login To
Remove Ads
Remove Ads
Model Boats Website
VINTAGE MODEL WORKS 36'' THAMES POLICE LAUNCH (2022)
10 Posts · 6 Followers · 32 Photos · 47 Likes
Began 2 years ago by
 United Kingdom
Follow This Thread
Not currently following
> Click to follow
> Click to follow
Latest Post 2 years ago by
| Oldest posts shown first (Show Newest First) | (Print Booklet) |
📝 VINTAGE MODEL WORKS 36'' THAMES POLICE LAUNCH (2022)
2 years ago by 🇬🇧 AndyS ( Petty Officer 2nd Class)
Petty Officer 2nd Class)✧ 157 Views · 4 Likes · 1 Comment
Flag
💬 Add Comment
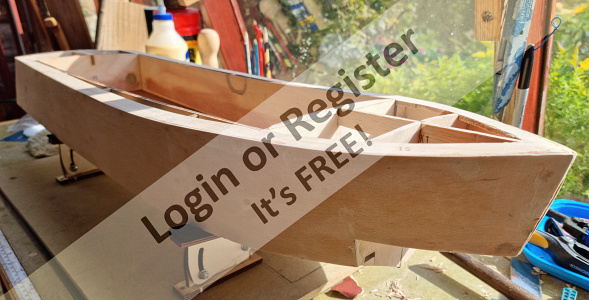
Well the heat has subsided and I am able to get back into the shed....I mean workshop and make a start on this model.
I've studied the plans, the directions and a couple of blogs on this site (Robob's & mturpin's) for the same model.
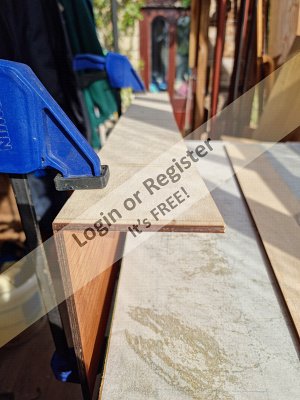
The first small difference is that the base of the box now comes in one piece of 6mm ply.
Initially I found cutting the nibs of the ply sides quite hard, there isn't a lot of blade room, but I found a firm cut with a Stanley knife worked well.
The box was then glued, pinned and clamped and checked for square.
I've made a start on the keel, but at the moment I'm unsure about drilling the prop shaft hole.
I've studied the plans, the directions and a couple of blogs on this site (Robob's & mturpin's) for the same model.
The first small difference is that the base of the box now comes in one piece of 6mm ply.
Initially I found cutting the nibs of the ply sides quite hard, there isn't a lot of blade room, but I found a firm cut with a Stanley knife worked well.
The box was then glued, pinned and clamped and checked for square.
I've made a start on the keel, but at the moment I'm unsure about drilling the prop shaft hole.
▲
⟩⟩
stevedownunder
robbob
KeithL
Colin H
|
💬 Re: VINTAGE MODEL WORKS 36'' THAMES POLICE LAUNCH (2022)
2 years ago by 🇬🇧 mturpin013 (
 Admiral) Admiral)✧ 140 Views · 3 Likes
Flag
Hi Andy glad to see you've made a start I'm sure you will enjoy the build as its a great kit. if you need any help just shout and I'm sure either me or Rob can help out.
Andy this is an extract from my blog provided you follow the keel build instructions it leaves a square hole large enough to accommodate the shaft, just re-read the blog I'm sure it will clear your concern. "I forgot to publish this operation at the correct build point so here it is slightly behind. The angle of the prop shaft is taken from the drawing so it can be transferred to the brass shaft whilst in situ; the hole created by the build leaves a square hole large enough to allow some vertical and lateral movement so I can now position the shaft with the aid of the angle gauge along the centre line and set using epoxy. The underwater part of the prop has a supporting ply quadrant which will be epoxied at the same time, I use some light wedges to position the shaft and hold it whilst the epoxy sets". ▲
⟩⟩
AndyS
stevedownunder
robbob
|
Login To
Remove Ads
Remove Ads
📝 Keel
2 years ago by 🇬🇧 AndyS ( Petty Officer 2nd Class)
Petty Officer 2nd Class)✧ 129 Views · 5 Likes
Flag
💬 Add Comment
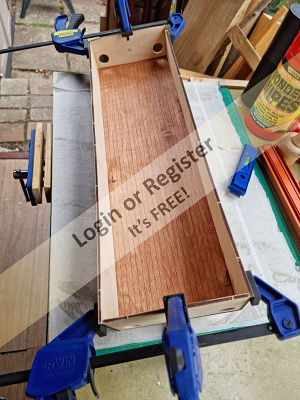
So, apart from the small hiccup over the drilling of the prop-shaft hole (thanks to Michael) the construction of the keel went very smoothly.
I drilled an 8mm wide rectangular hole, the length of the gap between the 2 parts of keel, as shown on the plan.
As said previously the laser cutting is so accurate, apart from sanding the nibs, the various keel parts can be pinned and glued together quite easily. Similarly, the 2 made up sections of the keel are then glued to the centre of the bottom of the box.
The keel is then strengthened around the prop-shaft hole and rear of the box (rudder?) by laminating.
Please excuse my lack of technical knowledge and vocabulary!
▲
⟩⟩
RNinMunich
Colin H
robbob
Peejay
Seaspray
📝 Bulkhead Formers
2 years ago by 🇬🇧 AndyS ( Petty Officer 2nd Class)
Petty Officer 2nd Class)✧ 126 Views · 3 Likes
Flag
💬 Add Comment
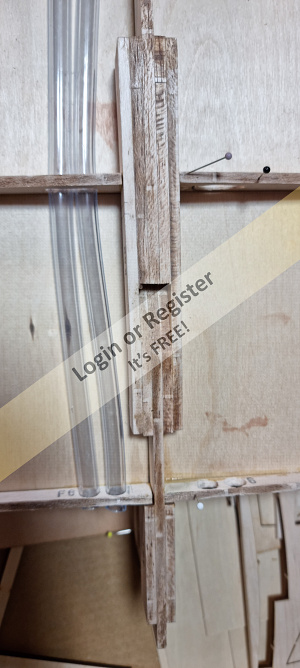
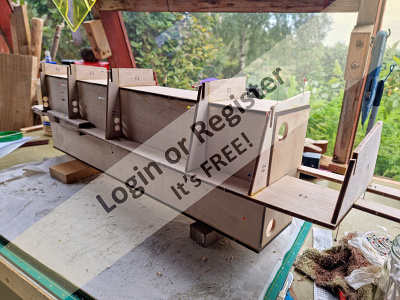
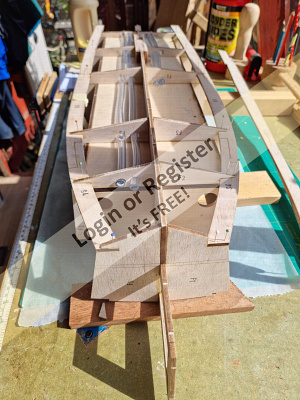
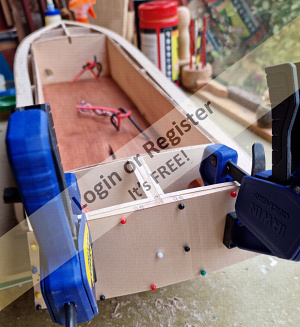
Next stage, the bulkhead formers, there are 6 sets mostly made up of 4 parts: 2 attached either side of the keel and the other 2 to the sides of box, aligned along the laser markings on the box, another 2 pieces fit on the front of the keel.
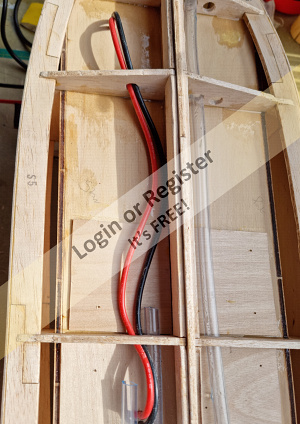
I thought I'd copy Michael's idea of providing conduits for the wiring, but instead of 'homemade tubes', I used some flexible plastic 8mm tubing I had.
However, I started with another schoolboy error (see photo). Having drilled the holes for the tubing through 3 bottom formers (at the same time) a trial fitting (before gluing) proved that the middle one was out of line due to the thickened laminated part of the keel! I was fortunate that this was the side of the keel that only required the shorter tube. So after a bit of filling/sanding and re-drilling all formers pinned and glued as necessary.
▲
⟩⟩
Colin H
Mike Stoney
robbob
📝 The Chines.....
2 years ago by 🇬🇧 AndyS ( Petty Officer 2nd Class)
Petty Officer 2nd Class)✧ 114 Views · 7 Likes · 2 Comments
Flag
💬 Add Comment
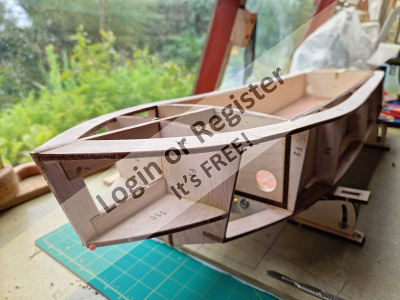
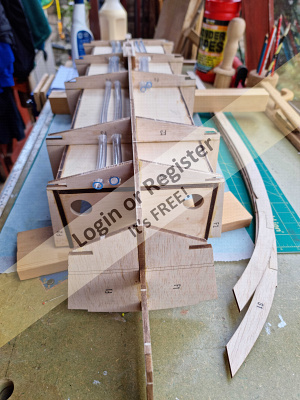
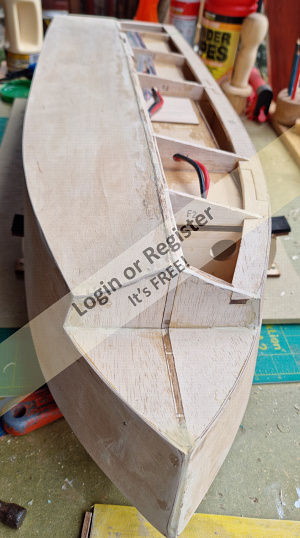
There are 4 chines, 2 upper and 2 lower and each come in 3 separate parts, which have to be glued together prior to fixing to the formers.
As said in previous posts and blogs, although the instructions direct that the parts be pinned to the plan to join them, it isn't actually necessary as they are laser cut so accurately.
So, when set the chines were attached to the formers. I did the bottom set first and when dry the top 2. They fitted very easily, with just a little sanding/rounding where the top set met the front former (F1).
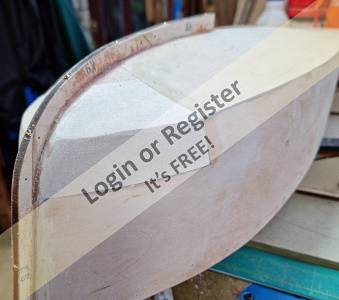
Then I pinned and glued several small detail pieces which give shape to the stern and deck.
The 'box', has now suddenly taken on a boat shape and I'm very pleased to have got this far without a major catastrophe! However, I see the 'skins' ahead and steaming and fixing them looks very daunting!
Think I've downloaded the pics in reverse order...😋
As said in previous posts and blogs, although the instructions direct that the parts be pinned to the plan to join them, it isn't actually necessary as they are laser cut so accurately.
So, when set the chines were attached to the formers. I did the bottom set first and when dry the top 2. They fitted very easily, with just a little sanding/rounding where the top set met the front former (F1).
Then I pinned and glued several small detail pieces which give shape to the stern and deck.
The 'box', has now suddenly taken on a boat shape and I'm very pleased to have got this far without a major catastrophe! However, I see the 'skins' ahead and steaming and fixing them looks very daunting!
Think I've downloaded the pics in reverse order...😋
▲
⟩⟩
Len1
stevedownunder
Colin H
mturpin013
Peejay
Mike Stoney
robbob
|
💬 Re: The Chines.....
2 years ago by 🇬🇧 mturpin013 (
Admiral)✧ 114 Views · 1 Like
Flag
Its coming together really well I see you've used the tubes for the wiring
▲
⟩⟩
Len1
|
|
💬 Re: The Chines.....
2 years ago by 🇺🇸 Peejay (
 Midshipman) Midshipman)✧ 121 Views · 2 Likes
Flag
“Screwing up the order of uploading the pictures of the chines is far better than screwing up the order in which they are attached!
I found your post very understandable. She is looking very good, now that she has that ‘boat shape’. ▲
⟩⟩
RNinMunich
AndyS
|
📝 Tubes/conduits and balsa blocks
2 years ago by 🇬🇧 AndyS ( Petty Officer 2nd Class)
Petty Officer 2nd Class)✧ 99 Views · 4 Likes · 3 Comments
Flag
💬 Add Comment
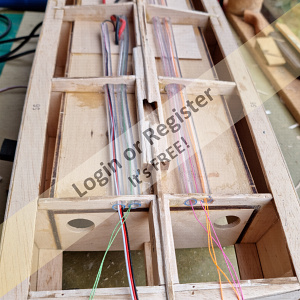
Thanks Michael, yes I installed some clear plastic tubes through which I've fed some pull throughs, the main battery wires and the rudder servo wires, prior to attaching the bottom skins.
I was in a quandary, looking ahead at the step after the skins, which is the balsa block prow/bow. Whereas you had a single block (of balsa) and Rob had to laminate several layers, my kit has 2 bow over size shaped blocks. However, when I positioned them they were shorter than the height of the keel? I remembered from checking the contents on delivery, that there were a few pieces which weren't identified on the list, one being a thinnish rectangular piece with number 3 on it. Having spoken with the nice man at VMW, he confirmed my suspicions that No 3 was part of the bow block set, its addition to give it the necessary height. Apparently, it's a new change and they haven't got round to updating the parts list, instructions or plan.
Now the question is, which way is the best way to orientate the top piece (No 3) or doesn't it matter? I've never carved/shaped balsa before.
▲
⟩⟩
jbkiwi
stevedownunder
Colin H
robbob
|
💬 Re: Tubes/conduits and balsa blocks
2 years ago by 🇬🇧 mturpin013 (
Admiral)✧ 106 Views · 2 Likes
Flag
Hi there, as Derek and Rob say "Fore and Aft" to ease the shaping is the best way. When I did mine I found the balsa to be really soft and fury so I gave it a coat of diluted 50/50 with water of Eze-kote to harden the surface and ease shaping
▲
⟩⟩
RNinMunich
stevedownunder
|
|
Login To
Remove Ads 💬 Re: Tubes/conduits and balsa blocks
2 years ago by 🇬🇧 robbob (
Admiral)✧ 115 Views · 2 Likes
Flag
Hi Andy.
Great progress so far 👍😀. The kit I was supplied with for my test build was a 'pre-production' version and the balsa bow blocks were indeed laminated from various pieces. I think you should really orientate piece 3 with the grain to ensure that it sufficiently extends to the bow to allow for shaping. The piece appears to be slightly thinner than it really could be but then it will be 'flattened' to a degree to form a flat surface for the external keel to sit on. The external keel parts in my kit were supplied in balsa but I re-made them in ply so that they would be more sturdy if knocked. Are they supplied in ply now? Keep up the great work. Robbob. 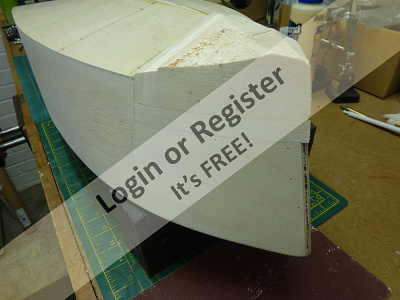

▲
⟩⟩
jbkiwi
Colin H
|
|
💬 Re: Tubes/conduits and balsa blocks
2 years ago by 🇬🇧 Derek 151 (
 Petty Officer 1st Class) Petty Officer 1st Class)✧ 111 Views · 3 Likes
Flag
Hi Andy,
I would suggest that you mount all of the bow blocks with the grain running fore and aft as that way you will find them easier to cut to shape and sand. Looks like it is all coming along very nicely. Derek. ▲
⟩⟩
RNinMunich
Colin H
AndyS
|
📝 Bow blocks....
2 years ago by 🇬🇧 AndyS ( Petty Officer 2nd Class)
Petty Officer 2nd Class)✧ 95 Views · 2 Likes
Flag
💬 Add Comment
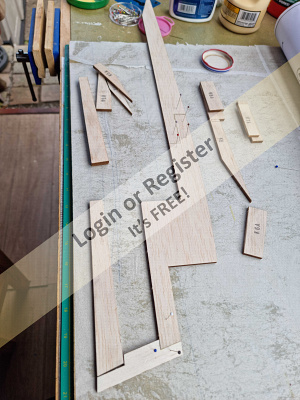
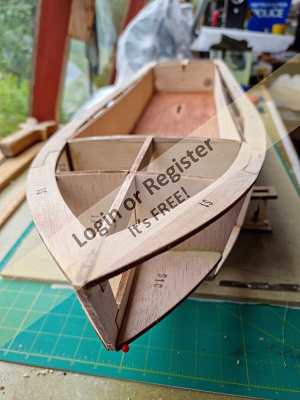
Hi Chaps, thanks for your input, I'll certainly do it the way you suggest.
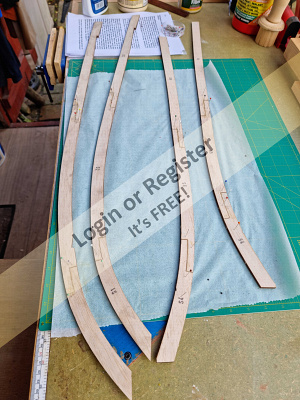
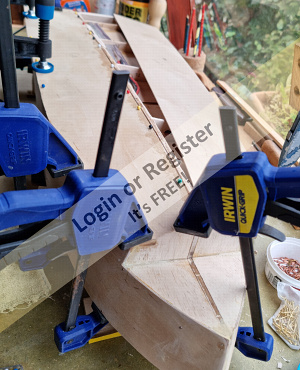
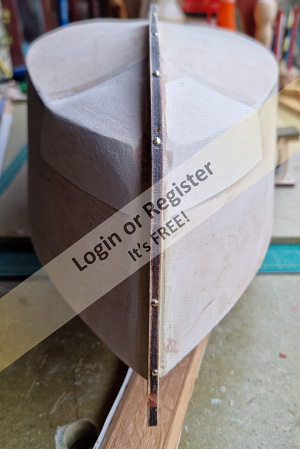
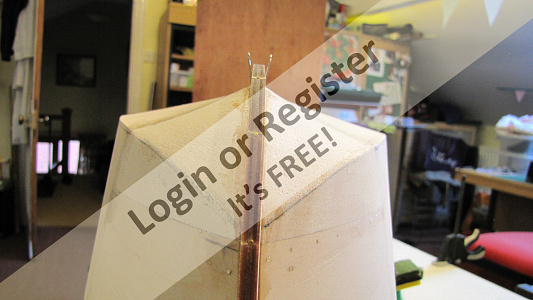
Rob, the keel is supplied in 6mm ply, made up of 4 pieces. The photo shows the front 3, that I'll use to assist shaping the balsa bow blocks.
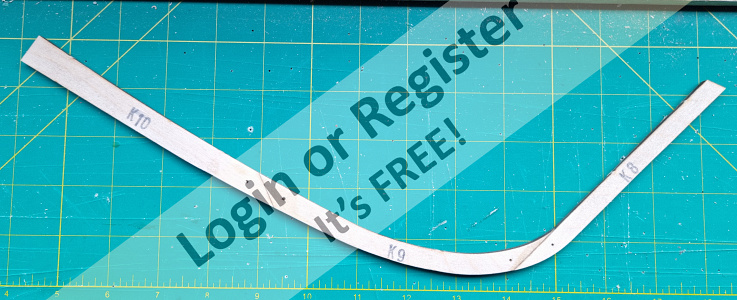
Rob, the keel is supplied in 6mm ply, made up of 4 pieces. The photo shows the front 3, that I'll use to assist shaping the balsa bow blocks.
▲
⟩⟩
Colin H
robbob
📝 SIDE SKINS.......
2 years ago by 🇬🇧 AndyS ( Petty Officer 2nd Class)
Petty Officer 2nd Class)✧ 85 Views · 1 Like
Flag
💬 Add Comment
Whilst I was looking forward to the experience of 'bending' the skins to the shape of the hull, I have to say that I was more than a little nervous when it came to starting this part.
Having read the previous blogs of making this model I had a good idea of what to do and they really helped and gave me confidence.
I started by checking that all the formers were level and in line, gently sanding where necessary.
Next I heated the bow end of the skin with a heat gun and sprayed water onto a cloth covering (afraid of scorching it). It did make the
ply more pliable, but it took a while to do. With the second skin I used the kettle method, which was much quicker and less likely to mark.
Firstly, I positioned the skin onto the hull side. It was quite a bit larger and I tried to leave an even margin all round. I then clamped it in place and when satisfied with the position I drilled a small hole at each end and hammered in brass tacks to act as locators.
On the skin I pencilled the outline and the position of the formers etc.. I was then able to cut away most of the excess skin and drill 1mm pin holes in for fixing to the formers.
BIG mistake here, not discovered until much later and hopefully rectifiable. Without realising it, the excess I cut away included the high bits at the bow with the rope notch (did this on both sides)! Just realised why, the plan shows the skin edges flush with the chines. There are a couple of separate 'rope gunwhale' parts in the kit that I think I can use?
Before gluing the skin in place, I re-steamed
▲
⟩⟩
Colin H
📝 SKINS cont (submitted early in error)
2 years ago by 🇬🇧 AndyS ( Petty Officer 2nd Class)
Petty Officer 2nd Class)✧ 85 Views · 5 Likes
Flag
💬 Add Comment
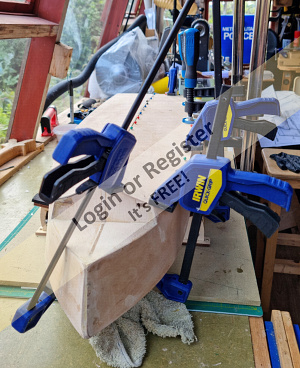
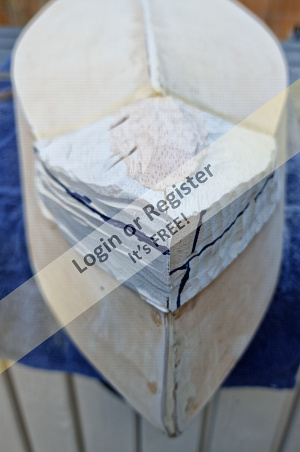
Cont: Before gluing the skin in place, I re-steamed it, then using the locator tacks, glued, clamped and pinned it in place.
After drying all seemed fine, made a little bit of a bodge where the skin right at the bow join didn't look right.....sandable I think?
I repeated the above (bar the bending...kettle this time) producing a far better outcome than the first one.
Planing and sanding both skins to size went well and in the end I felt it wasn't a bad first time attempt. I certainly learned a lot for any future project!
▲
⟩⟩
RNinMunich
Colin H
leonardn
jbkiwi
Graham93
📝 Bottom and rear skins....
2 years ago by 🇬🇧 AndyS ( Petty Officer 2nd Class)
Petty Officer 2nd Class)✧ 78 Views · 8 Likes · 2 Comments
Flag
💬 Add Comment
I'm still following Michael's and Rob's blogs quite closely and apart from their 'off piste' improvements, probably will be to the end of this project.
Although the supplied instructions are comprehensive in telling you what to do, they don't often tell you how!
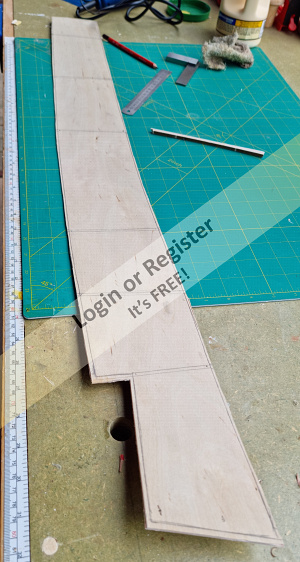
Having completed the side skins without too many problems, I wasn't as apprehensive starting this stage. Before fitting the skins, I made sure the formers were level and in line to prevent bumps and dips in them. I made a template for the bow former, so that I could shape them to the same size and shape.
Also, I had to install the under deck wiring as there would be no access after the skins were in place. I also added some pull throughs in the tubes, just in case. I had to consult my son on the placement of the main wires, battery and rudder servo, he's quite an expert on all things r/c.
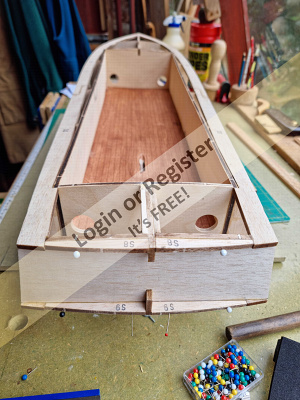
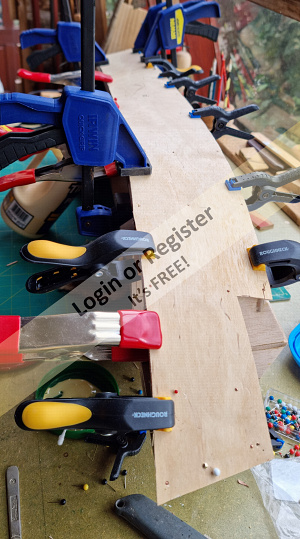
The bottom skins were fitted in much the same way as the sides, steamed (kettle fashion) positioned, marked, excess removed, glued, drilled/pinned and clamped in place. The only difference was that I decided to use epoxy, stronger I think?
I did them one at a time and when set, I planed and sanded them to size. The aft skin was fitted in exactly the same way.
In all I was quite pleased with my work, I feel I am improving my technique, accuracy and confidence.
Although the supplied instructions are comprehensive in telling you what to do, they don't often tell you how!
Having completed the side skins without too many problems, I wasn't as apprehensive starting this stage. Before fitting the skins, I made sure the formers were level and in line to prevent bumps and dips in them. I made a template for the bow former, so that I could shape them to the same size and shape.
Also, I had to install the under deck wiring as there would be no access after the skins were in place. I also added some pull throughs in the tubes, just in case. I had to consult my son on the placement of the main wires, battery and rudder servo, he's quite an expert on all things r/c.
The bottom skins were fitted in much the same way as the sides, steamed (kettle fashion) positioned, marked, excess removed, glued, drilled/pinned and clamped in place. The only difference was that I decided to use epoxy, stronger I think?
I did them one at a time and when set, I planed and sanded them to size. The aft skin was fitted in exactly the same way.
In all I was quite pleased with my work, I feel I am improving my technique, accuracy and confidence.
▲
⟩⟩
RNinMunich
Madwelshman
Colin H
Graham93
robbob
jbkiwi
stevedownunder
pressonreguardless
|
💬 Re: Bottom and rear skins....
2 years ago by 🇬🇧 mturpin013 (
Admiral)✧ 82 Views · 3 Likes
Flag
I'm glad to see you followed my under structure tubing system, it makes any future changes/additions very simple to make.
As you say your skill and confidence are getting better ▲
⟩⟩
Colin H
pressonreguardless
stevedownunder
|
|
💬 Re: Bottom and rear skins....
2 years ago by 🇺🇸 pressonreguardless (
 Rear Admiral) Rear Admiral)✧ 78 Views · 1 Like
Flag
The elect. conduits are a good idea, to facilitate any future changes.
Good progress! Trev ▲
⟩⟩
stevedownunder
|
📝 The Balsa Bow Blocks
2 years ago by 🇬🇧 AndyS ( Petty Officer 2nd Class)
Petty Officer 2nd Class)✧ 55 Views · 8 Likes · 2 Comments
Flag
💬 Add Comment
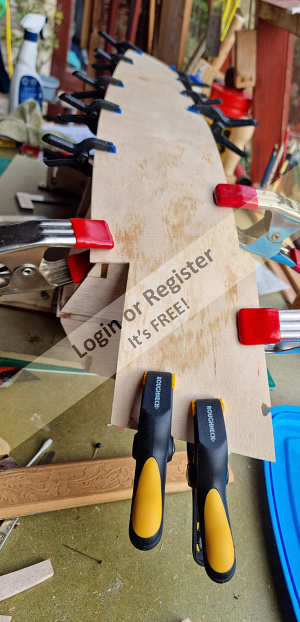
Another stage I felt quite apprehensive about, most of what I had read said the shaping of the balsa was tricky.
I have mentioned previously that there was a slight deviation in the supplied parts and instructions for this stage. There were 2 over large bow shaped blocks and a thin rectangular piece to increase the height in the centre. I was advised, on this forum, to position the top piece with the grain in the same direction as the block....which of course I did.
Positioning, glueing and clamping was quite simple, although I did realise (too late to change) that I missed putting glue between the 2 blocks! Fortunately there's enough glue elsewhere and the top piece ensured a good bond.
Now the shaping.....I'd read several different techniques to do this, I started with trying to cut it with a sharp craft knife, which worked (sort of) but only removed a very small bit each cut and would have taken forever to complete.
So I cheated a little and used a multi tool/sander attachment, which (for me) worked really well and gave much better accuracy and speed.
I used the front part of the assembled keel as a template, which helped shape the centre of the blocks, but the edges still had to be shaped by eye. I will admit to having to use a little filler to completely fit the keel.
I couldn't glue the back end of the keel on yet, as the instructions said that the prop shaft had to be fixed in place prior to doing it.
▲
⟩⟩
RNinMunich
stevedownunder
Madwelshman
Colin H
Graham93
Len1
pressonreguardless
robbob
|
💬 Re: The Balsa Bow Blocks
1 year ago by 🇬🇧 mturpin013 (
Admiral)✧ 40 Views · 1 Like
Flag
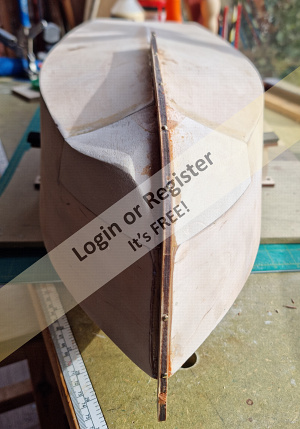
Hi Andy its progressing well, I have just one observation and that is where you have cut the balsa block to.
The chine line should end up about 10 mm below the edge of the balsa block, your is I think too high as you have just followed a straight line along the hull. Have a look at the pictures I have attached of my hull, you can see this on the plan, that the chine line should come to the bottom of the joint of K8 I don't want to be critical but I think you would want your boat to be correct. 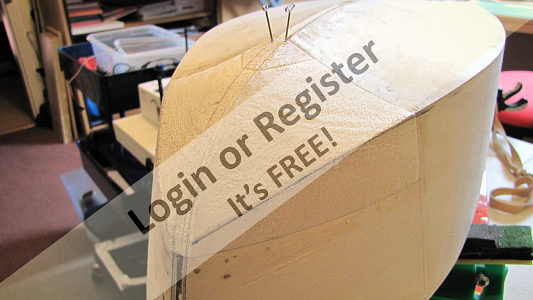

▲
⟩⟩
Len1
|
|
💬 Re: The Balsa Bow Blocks
2 years ago by 🇬🇧 ChrisF (
 Lieutenant Commander) Lieutenant Commander)✧ 47 Views · 5 Likes
Flag
You've done it now Andy and made a fine job of it but the way I do it is to cut it roughly to shape first with a razor saw before sanding to shape with PermaGrit block and cork sanding block. That's the best way I've found of cutting thick balsa as it doesn't tear the balsa as a knife tends to do.
Chris ▲
⟩⟩
RNinMunich
Madwelshman
Colin H
Len1
AndyS
|


Login To
Remove Ads
Remove Ads