Join Us On Social Media!

|

|

|
Download The App!
Login To
Remove Ads
Remove Ads
Login To
Remove Ads
Remove Ads
Model Boats Website
Eventide
5 Posts · 4 Followers · 40 Photos · 19 Likes
Began 1 year ago by
 United Kingdom
Follow This Thread
Not currently following
> Click to follow
> Click to follow
Latest Post 1 year ago by
| Oldest posts shown first (Show Newest First) | (Print Booklet) |
📝 Eventide
1 year ago by 🇬🇧 neilw ( Lieutenant)
Lieutenant)✧ 100 Views · 8 Likes
Flag
💬 Add Comment
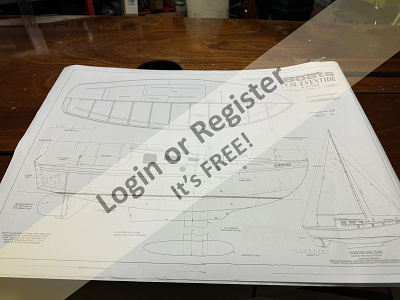
Have to admit to being a fan of Maurice Griffiths so when Model Boat Magazine announced that there was going to to be an 1:12 Eventide plan from Ray Woods in the Jan 2023 edition I was keen to know more.
As a recent subscriber I got my copy before Christmas, read the article and Ray’s forum posts on the Model Boats Magazine forum.
Having restored a number of pond yachts, several r/c yachts and built the Perkasa from an old kit, I thought the time was right to attempt a build from a plan, and the Eventide seems the right boat to start with.
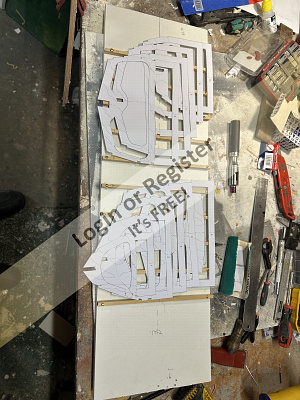
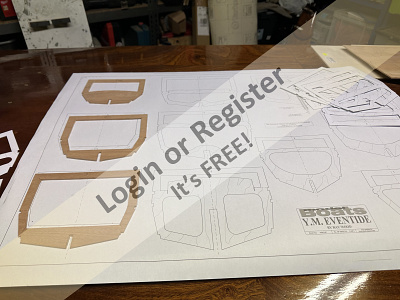
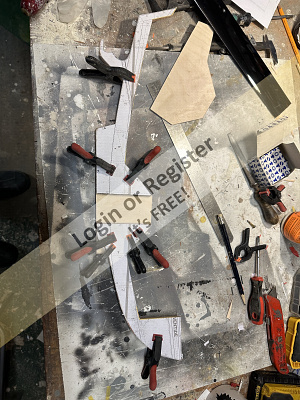
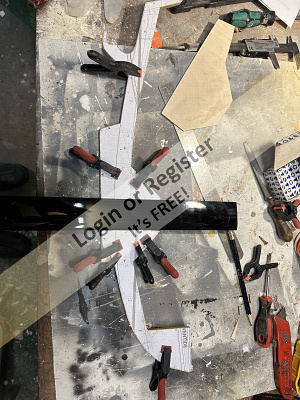
I took the plan to my local copy shop and and a couple of copies made as I wanted to create a set of frame templates and a keel template.
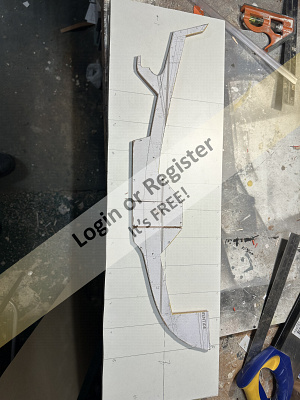
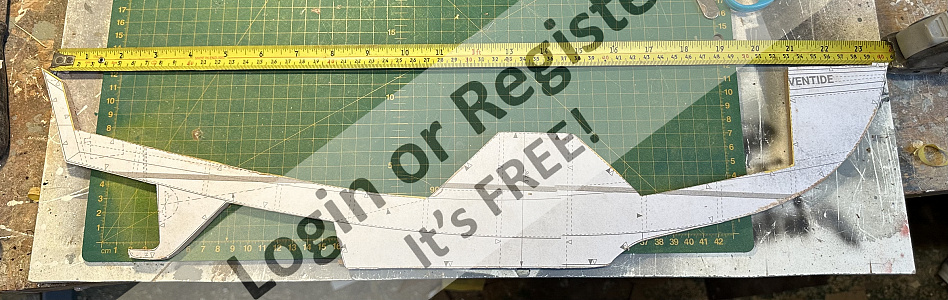
I created a set of frame templates by gluing the frame sheet to a sheet of card and cutting the frames out out with a scalpel. The keel template was cut from the plan and glued directly to some 6mm mahogany ply I had left over from from a vintage dinghy restoration.
I made the decision to fit an auxiliary motor to to boat, so am going off plan straight away.
The last couple of weeks have been spent creating the frame templates, cutting the keel/backbone and sorting out a build board while I put in an order with my local model shop for various thicknesses of ply for the frames and hull skins.

As a recent subscriber I got my copy before Christmas, read the article and Ray’s forum posts on the Model Boats Magazine forum.
Having restored a number of pond yachts, several r/c yachts and built the Perkasa from an old kit, I thought the time was right to attempt a build from a plan, and the Eventide seems the right boat to start with.
I took the plan to my local copy shop and and a couple of copies made as I wanted to create a set of frame templates and a keel template.
I created a set of frame templates by gluing the frame sheet to a sheet of card and cutting the frames out out with a scalpel. The keel template was cut from the plan and glued directly to some 6mm mahogany ply I had left over from from a vintage dinghy restoration.
I made the decision to fit an auxiliary motor to to boat, so am going off plan straight away.
The last couple of weeks have been spent creating the frame templates, cutting the keel/backbone and sorting out a build board while I put in an order with my local model shop for various thicknesses of ply for the frames and hull skins.

▲
⟩⟩
HardyS
Graham93
johnf
TonyAsh
Colin H
Ronald
pressonreguardless
RichardE
Login To
Remove Ads
Remove Ads
📝 Eventide - keel
1 year ago by 🇬🇧 neilw ( Lieutenant)
Lieutenant)✧ 81 Views · 1 Like · 2 Comments
Flag
💬 Add Comment
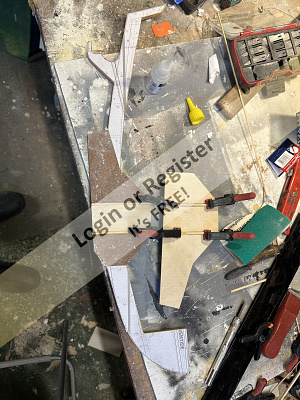
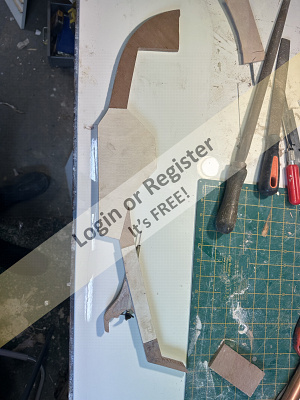
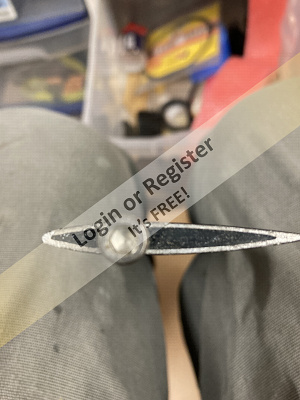
With the keel cut out the next stage was to cut it to make the keel fin box so the keel can be removable. The original plans suggested using 1/8" aluminium with appropriate packing for the fin with a weighted bulb, this would slide into the keel box and be fixed in place with a pin to stop it falling out. The article suggested that a Dragon Force RG65 Fin could also be used.
I decided to go down the route of using the RG65 Fin with the appropriate bulb. The maximum chord thickness of the fin is 6mm, and being an aerofoil section could twist slightly in the keel box. To stop the potential of twist 4 keel runners were made from 3mm obeche and shaped to provide a snug fitting of the keel fin.
I'll be using Clear Penetrating Epoxy Sealer for the hull, so when I apply this I'll make sure the inside of the keel box is coated to provide some waterproofing.
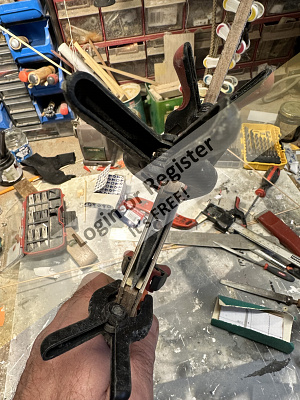
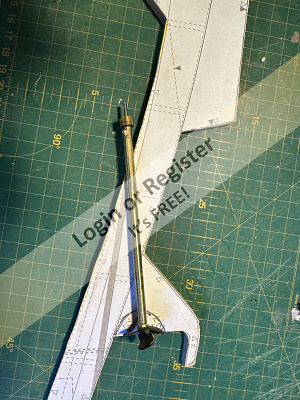
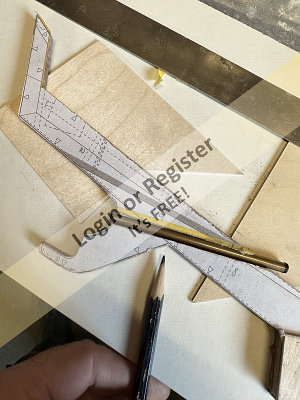
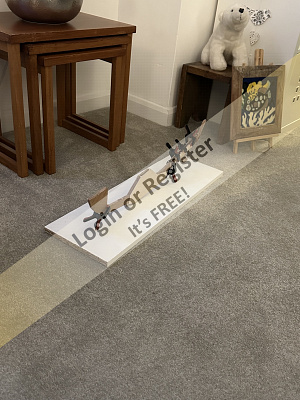
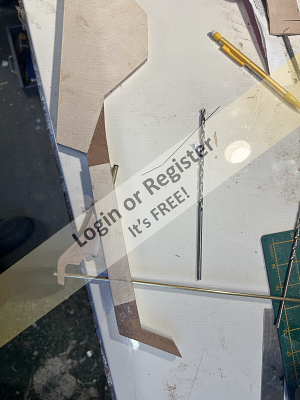
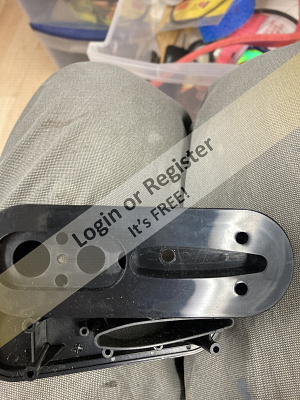
With the fin box sorted it was time to think about the prop shaft. The original plans suggest a small auxiliary motor can be fitted so I found a 4" long 2mm shaft and appropriate prop. Fitting the outer tube did raise an interesting issue, there wasn't much timber between the front of the skeg and the tube (as shown in the picture with the pencil pointed to the tube). In theory this shouldn't be a problem as once the tube is epoxied in and reinforcing cheek pieces added on the keel. I decided to err on the side of caution and fashioned a curved price of ply to sit in front of the skeg.
Now the keel box and prop shaft were fitted it was time to glue on the cheek pieces. thankfully I installed underfloor heating a couple of years ago, the perfect place for getting epoxy to cure.
The last job to do on the keel was to fit the tube for the rudder shaft. I'll be making the rudder by soldering a shaped brass blade to a shaft. The rudder shaft will locate in the skeg (the foot of the skeg will be removable to allow the fitting of the rudder). The photo last shows the tube fitted through the keel and into the skeg. This will be cut off flush with the bottom of the keel and flush to the top and bottom of the skeg.


I decided to go down the route of using the RG65 Fin with the appropriate bulb. The maximum chord thickness of the fin is 6mm, and being an aerofoil section could twist slightly in the keel box. To stop the potential of twist 4 keel runners were made from 3mm obeche and shaped to provide a snug fitting of the keel fin.
I'll be using Clear Penetrating Epoxy Sealer for the hull, so when I apply this I'll make sure the inside of the keel box is coated to provide some waterproofing.
With the fin box sorted it was time to think about the prop shaft. The original plans suggest a small auxiliary motor can be fitted so I found a 4" long 2mm shaft and appropriate prop. Fitting the outer tube did raise an interesting issue, there wasn't much timber between the front of the skeg and the tube (as shown in the picture with the pencil pointed to the tube). In theory this shouldn't be a problem as once the tube is epoxied in and reinforcing cheek pieces added on the keel. I decided to err on the side of caution and fashioned a curved price of ply to sit in front of the skeg.
Now the keel box and prop shaft were fitted it was time to glue on the cheek pieces. thankfully I installed underfloor heating a couple of years ago, the perfect place for getting epoxy to cure.
The last job to do on the keel was to fit the tube for the rudder shaft. I'll be making the rudder by soldering a shaped brass blade to a shaft. The rudder shaft will locate in the skeg (the foot of the skeg will be removable to allow the fitting of the rudder). The photo last shows the tube fitted through the keel and into the skeg. This will be cut off flush with the bottom of the keel and flush to the top and bottom of the skeg.
▲
⟩⟩
Colin H
|
💬 Re: Eventide - keel
1 year ago by 🇬🇧 neilw (
Lieutenant)✧ 79 Views · 0 Likes
Flag
Thanks Ron, I’ll have a look at DF accessories, though having found I have the machine screw I might use some carbon fibre plate I happen to have as a solution. Definitely got me thinking there is a more elegant solution than drilling a hole in the fin and using a pin as suggested in the plans.
▲
⟩⟩
No likes yet
This member will receive 1 point for every like received |
|
💬 Re: Eventide - keel
1 year ago by 🇨🇦 Ronald (
 Admiral) Admiral)✧ 82 Views · 1 Like
Flag
Since you are using a DF65 fin and bulb. You could use the fin securing parts used in a DF65 hull. The fin has a threaded metal plate on the top to receive a securing screw.
▲
⟩⟩
Colin H
|
📝 Eventide - frames
1 year ago by 🇬🇧 neilw ( Lieutenant)
Lieutenant)✧ 79 Views · 4 Likes
Flag
💬 Add Comment
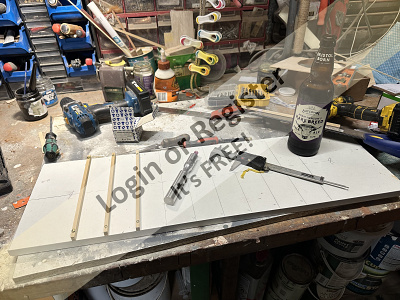
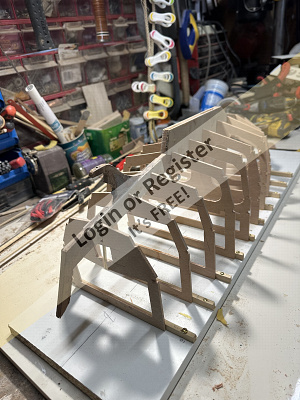
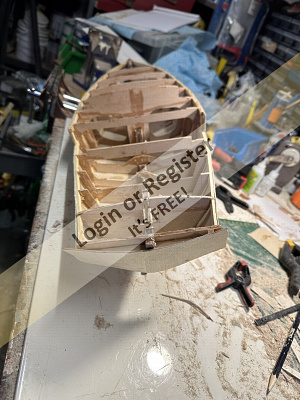
Have spent the last couple of days cutting the frames/bulkheads. 3mm ply and a Stanley knife is not a lot of fun, though it was easier once I found the Irwin Bi-Metal Blue Blades.
The straight cuts were fine but the curves needed another solution. I have a Dremel I mainly use for grinding the edges of GRP mouldings and found that Dremel do a multipurpose cutting kit that turns it into a mini router. So I now have all the frames cut and aligned to the keel.
The bits of plywood are finally looking like a boat.
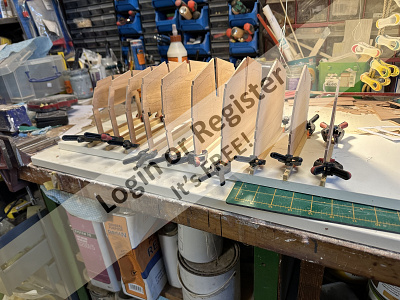
▲
⟩⟩
HardyS
MouldBuilder
Derek 151
Colin H
📝 Stringers and swearing
1 year ago by 🇬🇧 neilw ( Lieutenant)
Lieutenant)✧ 75 Views · 3 Likes
Flag
💬 Add Comment
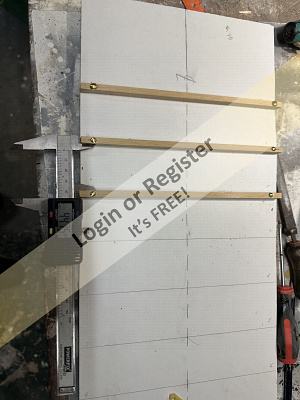
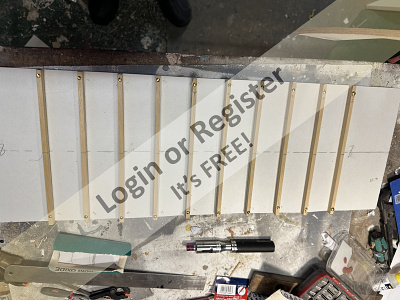
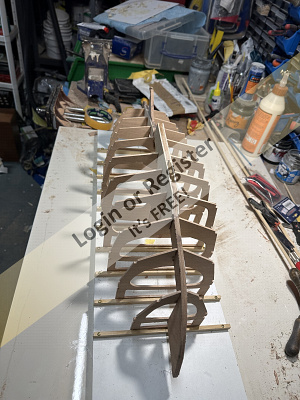
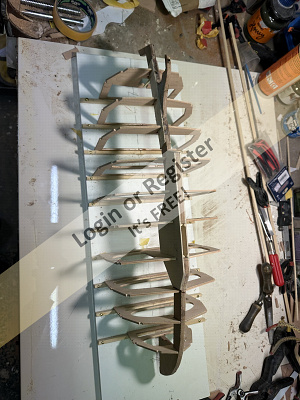
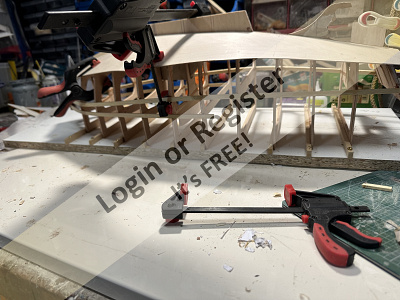
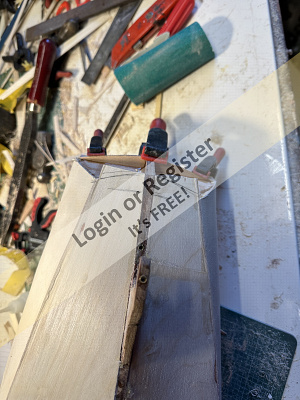
So, with all the frames/bulkheads glued to the keel today was going to be a couple of hours to fit the 6 stringers.
What I thought would be a simple job of slotting the 6mm x 3mm Obeche strips into the cut slots turned out to be more fiddly than anticipated. Managed to break a couple mid glueing, luckily I’d bought spares. Had to chamfer each slot and finally got them all fitted after 5 hours, luckily I could use some of the broken ones for the deck stringer than is only half the length of the boat.
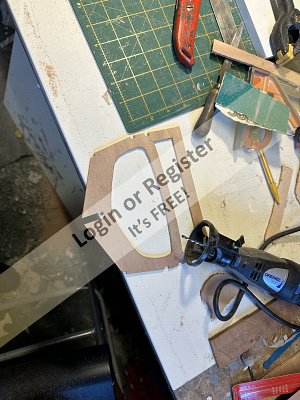
With the stringers in place I could template the inner, flat transom. There will be an outer, curved transom added once the hull skins go on.
Managed to get one of the bilge skins on this afternoon, took the advice of the build article and created a template first. I couldn’t get to grips with using pins to hold the panel in place so opted for change in construction so I’ve tacked the panel in place with CA and when the hull is released from the build board I’ll run fillets of epoxy with 405 filleting blend on each joint.

What I thought would be a simple job of slotting the 6mm x 3mm Obeche strips into the cut slots turned out to be more fiddly than anticipated. Managed to break a couple mid glueing, luckily I’d bought spares. Had to chamfer each slot and finally got them all fitted after 5 hours, luckily I could use some of the broken ones for the deck stringer than is only half the length of the boat.
With the stringers in place I could template the inner, flat transom. There will be an outer, curved transom added once the hull skins go on.
Managed to get one of the bilge skins on this afternoon, took the advice of the build article and created a template first. I couldn’t get to grips with using pins to hold the panel in place so opted for change in construction so I’ve tacked the panel in place with CA and when the hull is released from the build board I’ll run fillets of epoxy with 405 filleting blend on each joint.
▲
⟩⟩
HardyS
MouldBuilder
Colin H
📝 Hull skinning and priming
1 year ago by 🇬🇧 neilw ( Lieutenant)
Lieutenant)✧ 53 Views · 3 Likes · 3 Comments
Flag
💬 Add Comment
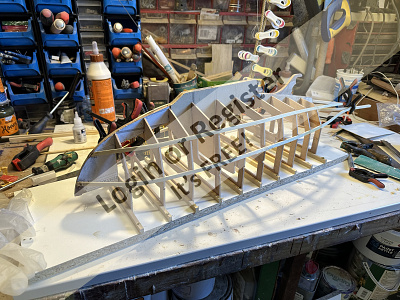
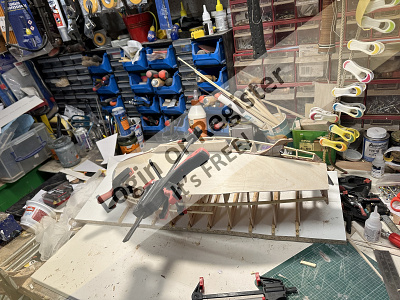
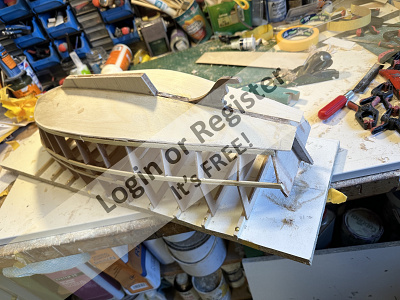
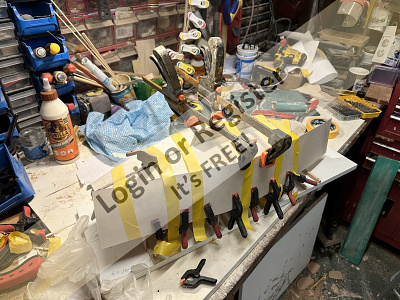
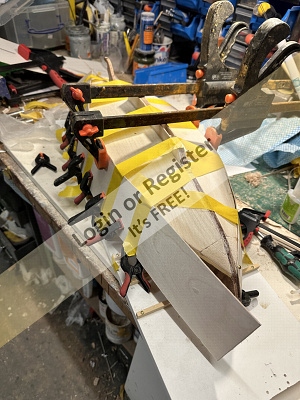
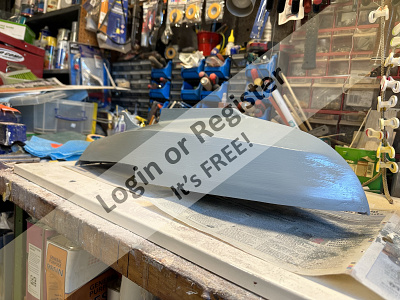
Made a fair bit of progress this week and got the hull skins glued on. The two bilge ones were relatively straight forward. I was getting a bit frustrated with the bow section as I couldn't get it to pull in fair. Realised that the gap at the forefoot between the first two bulkheads needs to be filled with a balsa block, not the hull skin, should have read the instructions first. Using the balsa block certainly made life easier.
The side pieces were a challenge. I attempted to create paper patterns but couldn't get them to work so took the decision to make the panels slightly over size and fix them in place then trim them down. Needed to be creative with tapes and clamps, but they were eventually in the right place.
The smaller cabin top hull skin did require a change of approach so I released the hull from the build board so I could clamp the skin directly the two stringers, this proved to be effective.
I'd left the transom to last, had decided to go for a curved transom, made up a curved top section them trimmed the other panels to fit this curve, came up quite nicely once trimmed back to the hull.
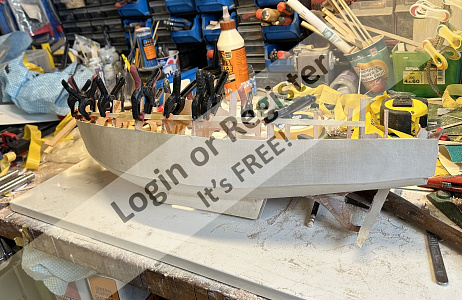
Before the primer went on all the bulkhead to skin joins were reinforced with a small fillet of epoxy, have to say the 0.8mm ply is very robust. I was thinking about sheathing the hull with epoxy and thin cloth but I'm not sure it needs it.
With the hull sanded back a coat of thinned Hempel multicoat was brushed on, this shows a couple of small hollows and the lack of chine definition where the balsa block was used, it looks worse in the pictures as there's a very bright light above the workbench that show every imperfection as I've brushed it on.
After some light sanding this has been some way rectified, so I'll continue with the primer and fairing until the chine is correct.

The side pieces were a challenge. I attempted to create paper patterns but couldn't get them to work so took the decision to make the panels slightly over size and fix them in place then trim them down. Needed to be creative with tapes and clamps, but they were eventually in the right place.
The smaller cabin top hull skin did require a change of approach so I released the hull from the build board so I could clamp the skin directly the two stringers, this proved to be effective.
I'd left the transom to last, had decided to go for a curved transom, made up a curved top section them trimmed the other panels to fit this curve, came up quite nicely once trimmed back to the hull.
Before the primer went on all the bulkhead to skin joins were reinforced with a small fillet of epoxy, have to say the 0.8mm ply is very robust. I was thinking about sheathing the hull with epoxy and thin cloth but I'm not sure it needs it.
With the hull sanded back a coat of thinned Hempel multicoat was brushed on, this shows a couple of small hollows and the lack of chine definition where the balsa block was used, it looks worse in the pictures as there's a very bright light above the workbench that show every imperfection as I've brushed it on.
After some light sanding this has been some way rectified, so I'll continue with the primer and fairing until the chine is correct.
▲
⟩⟩
luckyduck
pressonreguardless
Colin H
|
💬 Re: Hull skinning and priming
1 year ago by 🇬🇧 Colin H (
 Fleet Admiral) Fleet Admiral)✧ 57 Views · 1 Like
Flag
Coating with glass cloth and Ezekote is quicker and cleaner, and no smell.
All my wooden hulled models are done this way. Cheers Colin. ▲
⟩⟩
Rookysailor
|
|
Login To
Remove Ads 💬 Re: Hull skinning and priming
1 year ago by 🇺🇸 pressonreguardless (
 Rear Admiral) Rear Admiral)✧ 49 Views · 1 Like
Flag
I would definitely sheath the hull with epoxy and glass.
Trev ▲
⟩⟩
Colin H
|
|
💬 Re: Hull skinning and priming
1 year ago by 🇨🇦 Rowen (
 Captain) Captain)✧ 56 Views · 2 Likes
Flag
Have previously finished hulls with a layer of glass fibre cloth and epoxy. Then smoothed it all down.
What are the groups thoughts on this technique as will be doing another hull shortly? It is very labour intensive. ▲
⟩⟩
Colin H
pressonreguardless
|


Login To
Remove Ads
Remove Ads