Join Us On Social Media!

|

|

|
Download The App!
Login To
Remove Ads
Remove Ads
Login To
Remove Ads
Remove Ads
Model Boats Website
Brooklyn Tugboat
180 Posts · 4 Followers · 231 Photos · 467 Likes
Began 6 years ago by
 United States
Follow This Thread
Not currently following
> Click to follow
> Click to follow
Latest Post 3 years ago by
| Oldest posts shown first (Show Newest First) | (Print Booklet) |
📝 Brooklyn Tugboat
6 years ago by 🇺🇸 figtree7nts ( Admiral)
Admiral)✧ 2 Views · 1 Like
Flag
💬 Add Comment
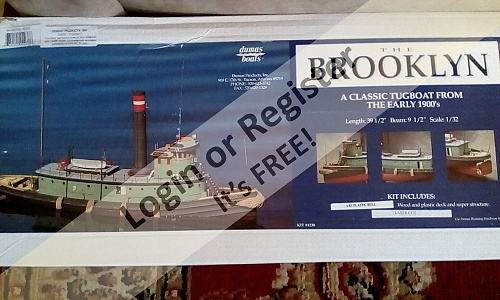
Brooklyn Tug is 1:32 Scale.
She's 39.1/2" L.O.A. x 9.5" Beam. Weight Estimated at 24lbs when completed!
The Brooklyn was built in 1910 and owned by the New York Dock Co. She was steam powered all her life and was never converted over to Diesel. The Brooklyn was one of many railroad tugs designed to transfer railroad cars from one side of New York to the other on barges!
▲
⟩⟩
Martin555
Login To
Remove Ads
Remove Ads
📝 The Hull!
6 years ago by 🇺🇸 figtree7nts ( Admiral)
Admiral)✧ 3 Views · 2 Likes
Flag
💬 Add Comment
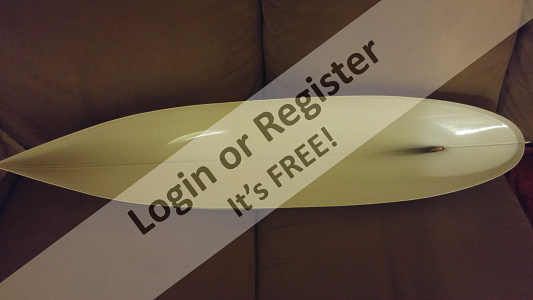
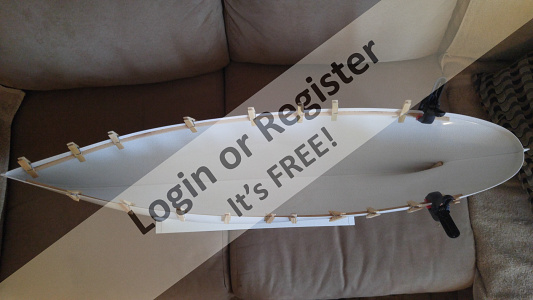
Plastic Hull Version!
Test fitting the Hull halfs together!
Fairly simple task. The hull comes in two half's.
which have to be glued together!
It is important to cut the flange to 1/4" around the Hull half's.
So when you clip the hull together.
it creates enough pressure on the seam that run along the hull far and aft!
As you can see, I need about 10 more clips!
Note:
Don't forget to sand down the flange!
So it has a good bite.
For when you glue the flange together!
Also use enough clips.
To hold the flange tight to one another!
▲
⟩⟩
Martin555
Dave M
📝 Finally the glue arrived
6 years ago by 🇺🇸 figtree7nts ( Admiral)
Admiral)✧ 2 Views · 1 Like
Flag
💬 Add Comment
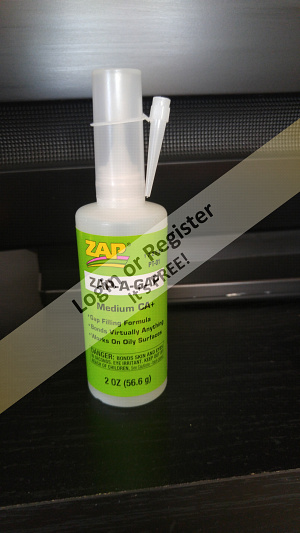
I looked all over town. but no one had the 2oz bottle of Medium. CA. I found some at Horizon Hobbies in Illinois!
I feel the 2oz Bottle of Medium CA is plenty of glue!
although 2oz of Medium CA. was enough for the tug jersey city.
I maybe cutting it close with the Tug Brooklyn.
She's a bigger boat, more glue used than the tug Jersey City!
Note:
The Booklyn will take about 2 1/4 Oz of Zap-a-Gap CA!
I feel the 2oz Bottle of Medium CA is plenty of glue!
although 2oz of Medium CA. was enough for the tug jersey city.
I maybe cutting it close with the Tug Brooklyn.
She's a bigger boat, more glue used than the tug Jersey City!
Note:
The Booklyn will take about 2 1/4 Oz of Zap-a-Gap CA!
▲
⟩⟩
Martin555
📝 Boat Stand
6 years ago by 🇺🇸 figtree7nts ( Admiral)
Admiral)✧ 3 Views · 2 Likes
Flag
💬 Add Comment
Tug Brooklyn comes with a temporary boat stand, included in the kit. it's OK for building the kit. but not for full time use! A wood stand should be created! oh, the Tug Jersey City didn't come with a boat stand! just the outline drawn on paper! Made mine out of form!

▲
⟩⟩
Martin555
Donnieboy
📝 Inside of the Hull and the Flange
6 years ago by 🇺🇸 figtree7nts ( Admiral)
Admiral)✧ 3 Views · 2 Likes
Flag
💬 Add Comment
OK, the inside of the hull is sanded!
Next is Polyester resin about one pint.
and a 1" brush is needed for this step!
In the kit there is a 1" x 40ish" of fiberglass tape.
Use this to reinforce the seam.
After that comes the Flange that goes around the hull.
You must grind down all of the flange that run far and aft.
Be very neat don't gouge or nic the keel!
The next step is to put the false Keel.
Remember be neat working around the Keel....
Note:
After you have glued the flanges together.
And cut down the flange to the keel.
You should sand down the keel.
So that it's nice and flush!
Take the 3/8" plastic used to make up the keel.
And make sure it's nice and flush against the keel it's self!
▲
⟩⟩
Martin555
Donnieboy
📝 Deck position line
6 years ago by 🇺🇸 figtree7nts ( Admiral)
Admiral)✧ 3 Views · 2 Likes
Flag
💬 Add Comment
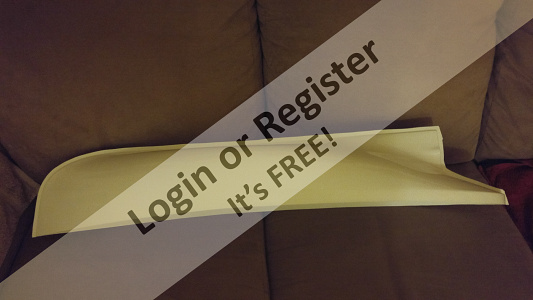
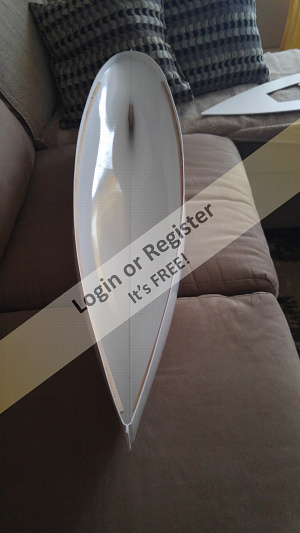
After the hull is glued together.
Draw a line 3/4" below the gunwale!
This is where the deck will be placed.
On this particular model. I noticed
that Port and Starboard aren't symmetrical!
The Starboard side, has got to get sanded down.
3/32" just at the bow area up to amidships!
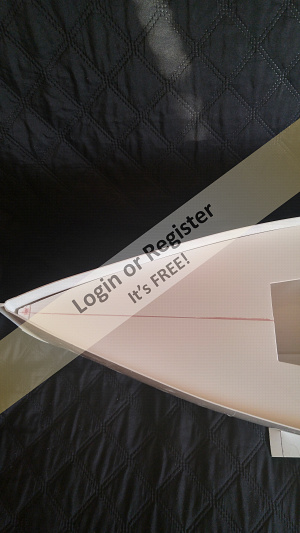
This should be done.
so when you place the deck and Rubrail it is even!
On this model your measurements for the rubrails.
are done using the caprail! so the caprail should be even.
Port and Starboard should be symmetrical....
If NOT when you look at the tug from the bow the rub rails.
will be off and NOT even!

Draw a line 3/4" below the gunwale!
This is where the deck will be placed.
On this particular model. I noticed
that Port and Starboard aren't symmetrical!
The Starboard side, has got to get sanded down.
3/32" just at the bow area up to amidships!
This should be done.
so when you place the deck and Rubrail it is even!
On this model your measurements for the rubrails.
are done using the caprail! so the caprail should be even.
Port and Starboard should be symmetrical....
If NOT when you look at the tug from the bow the rub rails.
will be off and NOT even!
▲
⟩⟩
Martin555
Donnieboy
📝 Deck Support
6 years ago by 🇺🇸 figtree7nts ( Admiral)
Admiral)✧ 2 Views · 1 Like
Flag
💬 Add Comment
While I wait for my resin to arrive in the mail.
I decided to glue the deck support in place!
I used a hand made deck height gauge I made.
To keep the deck at the right height!

I decided to glue the deck support in place!
I used a hand made deck height gauge I made.
To keep the deck at the right height!
▲
⟩⟩
Martin555
📝 Deck test fit
6 years ago by 🇺🇸 figtree7nts ( Admiral)
Admiral)✧ 2 Views · 1 Like
Flag
💬 Add Comment
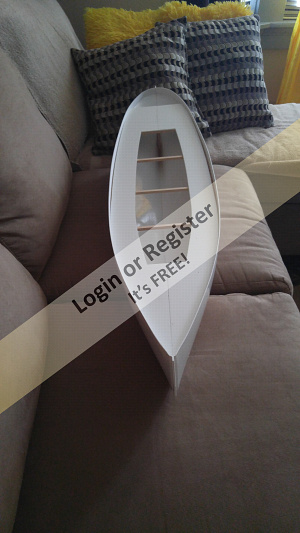
Made up the deck.
fairly simple it's all ABS, so it glue together quickly!
I noticed the deck is wider than the hull.
But it goes in ok, Oh deck supports every 5/12" or so!
Note:
You see the deck support in the middle.
DON'T CUT THAT ONE OUT!😲😱😭
It helps to keep the hull stable!
The hull is 39" and with the weight that has to be added.
If the center support is cut out. The hull could warp!
The supports that are far and aft. Are cut because they get in the way!
Make sure the gussets are glued. Underneath the main deck!
▲
⟩⟩
Martin555
📝 The Deck Seam!
6 years ago by 🇺🇸 figtree7nts ( Admiral)
Admiral)✧ 2 Views · 1 Like
Flag
💬 Add Comment
Bondo the seam, it took longer to sand the seam.
Than to put the Bondo on!
OK, not much done since I last posted.
I'm waiting for the running hardware and resin!

Than to put the Bondo on!
OK, not much done since I last posted.
I'm waiting for the running hardware and resin!
▲
⟩⟩
Martin555
📝 Lost Package!
6 years ago by 🇺🇸 figtree7nts ( Admiral)
Admiral)✧ 2 Views · 1 Like
Flag
💬 Add Comment
OK, my package was sorted and placed on the Postal truck for delivery.
Two days ago, I never received it! it’s lost some how on it’s way to be delivered!
Had to put in a claim. was told it might be at the post office!
Have to wait 24-72 hours for a response. as to where it might be!
Oh, the package contains the stuffing box and prop and shaft!
This is why I prefer UPS or FedEx………..
I forgot to mention the package is worth $131.00.
▲
⟩⟩
Martin555


Login To
Remove Ads
Remove Ads