Join Us On Social Media!

|

|

|
Download The App!
Login To
Remove Ads
Remove Ads
Login To
Remove Ads
Remove Ads
Model Boats Website
Dumas 1203 Coast Guard Lifeboat (RNLI Waveney conversion)
29 Posts · 2 Followers · 121 Photos · 98 Likes
Began 6 years ago by
 United Kingdom
Follow This Thread
Not currently following
> Click to follow
> Click to follow
Latest Post 6 years ago by
| Oldest posts shown first (Show Newest First) | (Print Booklet) |
📝 Dumas 1203 Coast Guard Lifeboat (RNLI Waveney conversion)
6 years ago by 🇬🇧 Skydive130 ( Rear Admiral)
Rear Admiral)✧ 6 Views · 0 Likes
Flag
💬 Add Comment
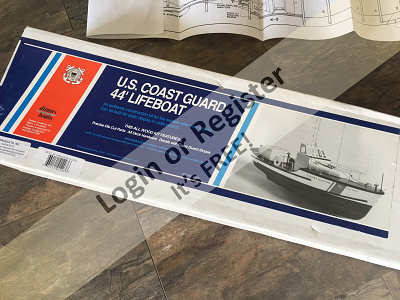
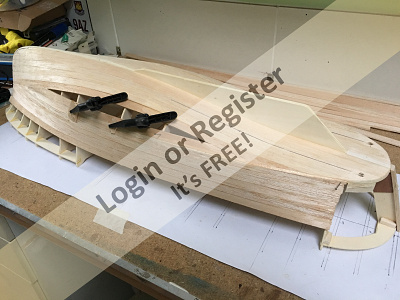
So here we go again! I have decided to give other projects a rest for a time in favour of this little gem. Pick up off eBay for less than £100 NIB posted, couldnt resist!
Its the Dumas (kit no:1203) 44' Coast Guard Lifeboat. I dont know if this kit is still produced by Dumas and having looked at the Die cutting of the parts, certainly seems like an old kit? However, I love my building and the challenges, so I am sure it will turn out nice at the end. Finished length 33".
I shall be converting this to a RNLI Waveney Class Lifeboat and will possibly go with 44-003 named "Khami" which was based in Great Yarmouth and Gorleston, which is local to me here in Suffolk. Sadly very little turns up on this boat via Google, but at some stage may pop out to the Great Yarmouth Lifeboat station and see if I can hunt anymore info on her.
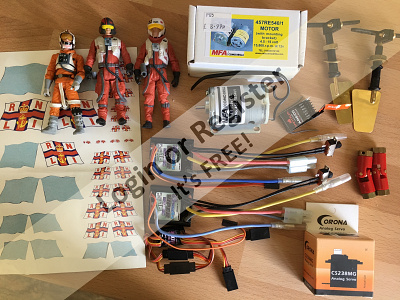
I shall not be using the recommended Dumas running gear for 2 reasons, 1st its a geared set-up (I am going with MFA540 brushed direct drive) and the cost of over £150!
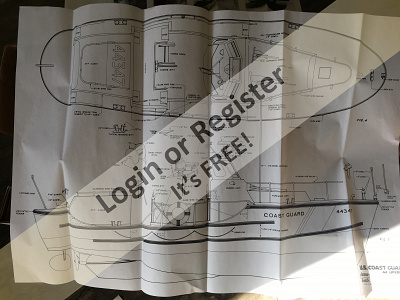
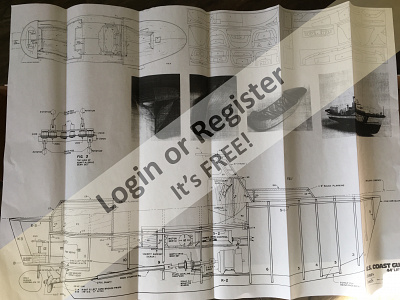
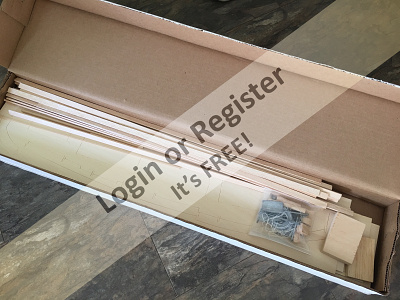
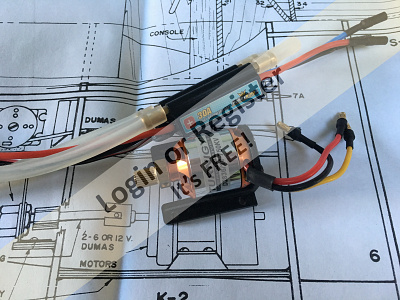
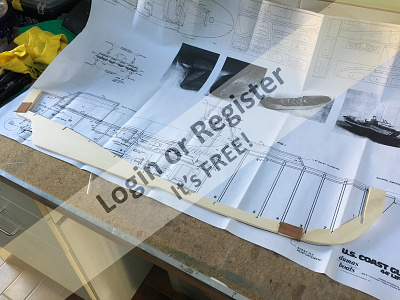
Photos show the box artwork, plans and the included wood. Last photo shows my electrics less propshafts and props that are on order. Note the Star Wars 3.75" figures that with poetic licence could be painted to represent crew. However, at this point the model is approx 1;16 scale and the figures would be 1:18 scale so maybe too small. There are 1:16 scale lifeboat figures available but pricey?
My one issue at this point is going to battery choice? do I go with a small 6v lead acid or perhaps 2 Tamiya type 7.2v NIMH in series. anyone who has built anything like this may want to advise. LIPO not an option as the Mtroniks ESC do not support LIPO. Space inside the hull may also be an issue?
Another issue is going to be fabricating some propshaft struts for the rear next to the props. There is quite a bit of prop shaft exposed outside the hull, so these would be integral to support and strength of the propshafts. is there anything available off the shelf (they are included in the running gear set, but dont seem to be available on there own) of do I need to fabricate from brass tube and sheet/strip brass?
Its the Dumas (kit no:1203) 44' Coast Guard Lifeboat. I dont know if this kit is still produced by Dumas and having looked at the Die cutting of the parts, certainly seems like an old kit? However, I love my building and the challenges, so I am sure it will turn out nice at the end. Finished length 33".
I shall be converting this to a RNLI Waveney Class Lifeboat and will possibly go with 44-003 named "Khami" which was based in Great Yarmouth and Gorleston, which is local to me here in Suffolk. Sadly very little turns up on this boat via Google, but at some stage may pop out to the Great Yarmouth Lifeboat station and see if I can hunt anymore info on her.
I shall not be using the recommended Dumas running gear for 2 reasons, 1st its a geared set-up (I am going with MFA540 brushed direct drive) and the cost of over £150!
Photos show the box artwork, plans and the included wood. Last photo shows my electrics less propshafts and props that are on order. Note the Star Wars 3.75" figures that with poetic licence could be painted to represent crew. However, at this point the model is approx 1;16 scale and the figures would be 1:18 scale so maybe too small. There are 1:16 scale lifeboat figures available but pricey?
My one issue at this point is going to battery choice? do I go with a small 6v lead acid or perhaps 2 Tamiya type 7.2v NIMH in series. anyone who has built anything like this may want to advise. LIPO not an option as the Mtroniks ESC do not support LIPO. Space inside the hull may also be an issue?
Another issue is going to be fabricating some propshaft struts for the rear next to the props. There is quite a bit of prop shaft exposed outside the hull, so these would be integral to support and strength of the propshafts. is there anything available off the shelf (they are included in the running gear set, but dont seem to be available on there own) of do I need to fabricate from brass tube and sheet/strip brass?
▲
⟩⟩
No likes yet
This member will receive 1 point
for every like received
This member will receive 1 point
for every like received
Login To
Remove Ads
Remove Ads
📝 Going brushless after all!
6 years ago by 🇬🇧 Skydive130 ( Rear Admiral)
Rear Admiral)✧ 8 Views · 2 Likes · 1 Comment
Flag
💬 Add Comment
I’ve decided to go brushless instead of brushed with a view to adding brushless at a later date. I had a turnigy motor and Hobbyking ESC sat in the spares box and have ordered another pair. Will run this on 2S lipo to start with and go 3s if needed, depending on the watt meter results?
▲
⟩⟩
Donnieboy
Dave M
|
💬 Going brushless after all!
6 years ago by 🇬🇧 Dave M (
 Vice Admiral) Vice Admiral)✧ 7 Views · 1 Like
Flag
I use two Turnigy 2830 750kv brushless 35amp car type escs 11.1v Lipo and 30mm brass props.
Glad to hear you are using a wattmeter to check the loading. ▲
⟩⟩
Skydive130
|
📝 It’s been a long day!
6 years ago by 🇬🇧 Skydive130 ( Rear Admiral)
Rear Admiral)✧ 7 Views · 1 Like · 4 Comments
Flag
💬 Add Comment
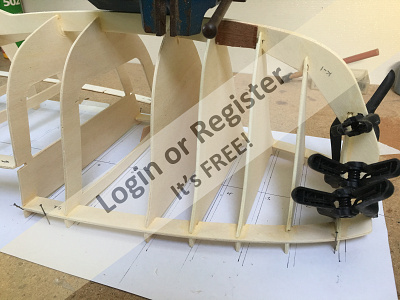
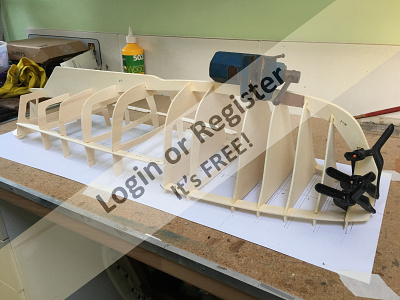
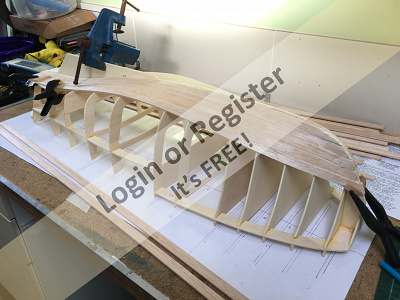
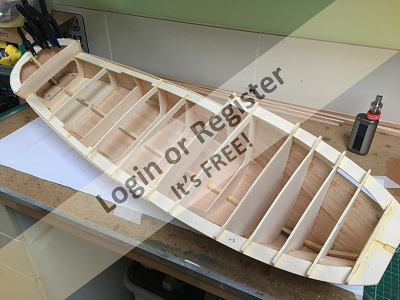
So, most of the day has been taken up with getting the formers cut free from the sheets of semi die-cut liteply. it’s then taken a couple of hours of sanding to get the formers to something like useable.
I’ve jigged formers 1-7, setting the keel in and getting some glue to joints. Will let that set overnight before moving back with glueing formers 8-12 and remaining side formers.
I’ve jigged formers 1-7, setting the keel in and getting some glue to joints. Will let that set overnight before moving back with glueing formers 8-12 and remaining side formers.
▲
⟩⟩
mturpin013
|
💬 It’s been a long day!
6 years ago by 🇬🇧 Skydive130 (
Rear Admiral)✧ 7 Views · 1 Like
Flag
Yes I will be glass clothing the hull, it’s a process I rather enjoy and something I bring over from my aircraft days.
▲
⟩⟩
Colin H
|
|
Login To
Remove Ads 💬 It’s been a long day!
6 years ago by 🇨🇦 Bobatsea (
 Leading Seaman) Leading Seaman)✧ 12 Views · 4 Likes
Flag
Are you planning fibreglassing your hull? I did mine, 1 strip down the keel and around the stern, then both sides. Currently on coat # 5 of resin with sanding in between.

▲
⟩⟩
rcmodelboats
figtree7nts
Colin H
Skydive130
|
|
💬 It’s been a long day!
6 years ago by 🇬🇧 Skydive130 (
Rear Admiral)✧ 7 Views · 1 Like
Flag
Spooooky.....!
I’ve just laid down the first 2 rows of planks with enough excess at the stern to do just that! ▲
⟩⟩
SelwynWilliams
|
|
💬 It’s been a long day!
6 years ago by 🇨🇦 Bobatsea (
Leading Seaman)✧ 11 Views · 3 Likes
Flag
A tip...
My instructions had the planking stop at the stern hull transom boards. I planked the hull over the boards to make a nicer finish. 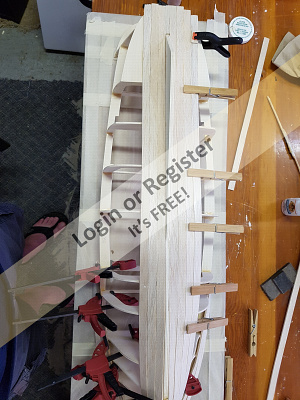
▲
⟩⟩
rcmodelboats
SelwynWilliams
Skydive130
|
📝 Formers in-planking starts!
6 years ago by 🇬🇧 Skydive130 ( Rear Admiral)
Rear Admiral)✧ 11 Views · 5 Likes · 3 Comments
Flag
💬 Add Comment
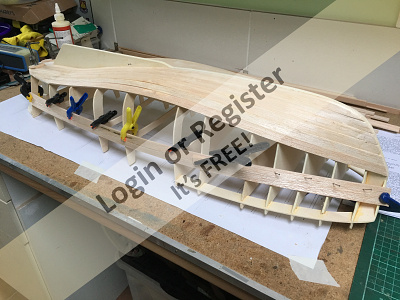
So, this morning saw the remaining formers glued and weighted whilst setting. Have finished the day with laying down the first 2 planks up against the keel. Once I’ve got the 2 planks glued in against the other side of the keel will then add 1 or 2 planks each side at the same time and allow to set before moving on, all the time weighted down with my trusty vice in the hope of a straight hull at the end! All straights so far!

▲
⟩⟩
Colin H
Dave M
SelwynWilliams
figtree7nts
BigAlio
|
💬 Formers in-planking starts!
6 years ago by 🇬🇧 Dave M (
Vice Admiral)✧ 7 Views · 1 Like
Flag
Always good to hear of different makes of adhesive that others use. in a warm room most of these types of wood glue set very quickly to a hold state, developing full strength over 12 hours.
A far cry from the days of Cascamite! which I recall seemed to take 24hrs, a lifetime when you are 5 years old. ▲
⟩⟩
Colin H
|
|
Login To
Remove Ads 💬 Formers in-planking starts!
6 years ago by 🇬🇧 Skydive130 (
Rear Admiral)✧ 8 Views · 2 Likes
Flag
I mostly use Aliphatic PVA in my aircraft builds. Was watching a video on youtube of an aeromodellers channel I subscribe too and he swears by 502! bought 500ml for just over £3 at tool station!
▲
⟩⟩
Dave M
SelwynWilliams
|
|
💬 Formers in-planking starts!
6 years ago by 🇬🇧 BigAlio (
 Petty Officer 2nd Class) Petty Officer 2nd Class)✧ 10 Views · 4 Likes
Flag
nice to see im not alone in using ever build 502 adhesive i find very good and bonus is its cheap.
Just looked it up on ebay £5.48 a litre delivered item no. 112586677548 ▲
⟩⟩
Dave M
SelwynWilliams
Skydive130
Bobatsea
|
📝 Planking progress
6 years ago by 🇬🇧 Skydive130 ( Rear Admiral)
Rear Admiral)✧ 10 Views · 4 Likes · 2 Comments
Flag
💬 Add Comment
Over the past couple of days, planking is moving on. Working on 2 planks per side per day allowing overnight setting time before moving on to next row. Starting nights tonight, so will try an add a couple of planks each day before bed!
▲
⟩⟩
mturpin013
Dave M
RNinMunich
mark36
|
💬 Planking progress
6 years ago by 🇬🇧 Skydive130 (
Rear Admiral)✧ 8 Views · 2 Likes
Flag
I could plank on nights, have done before ha ha! However, managed to get another 2 rows on before and 2 after my day kip, the gaps are closing! Photo update tomorrow.
▲
⟩⟩
figtree7nts
RNinMunich
|
|
💬 Planking progress
6 years ago by 🇩🇪 RNinMunich (
 Fleet Admiral) Fleet Admiral)✧ 7 Views · 1 Like
Flag
So far so good 👍 I admire your patience.
Thinks! if you are on nights again you can carry on planking (sounds vaguely familiar! Sid James & Kenneth Williams & co? 😁) while twiddling your thumbs waiting for the Russkies to attack😉 Cheers Doug 😎 ▲
⟩⟩
Skydive130
|
📝 Planking near finished
6 years ago by 🇬🇧 Skydive130 ( Rear Admiral)
Rear Admiral)✧ 9 Views · 3 Likes · 1 Comment
Flag
💬 Add Comment
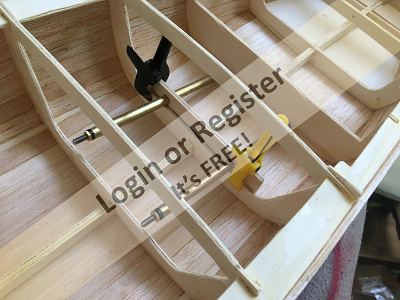
Have added a few more planks over the last couple of days before and after bed as on nights. Gaps should be closed by Friday? Have also marked exit points for prop shafts and marked and drilled rudder mounting holes.
▲
⟩⟩
Dave M
figtree7nts
RNinMunich
|
💬 Planking near finished
6 years ago by 🇩🇪 RNinMunich (
Fleet Admiral)✧ 7 Views · 1 Like
Flag
Aha! Moonlighting methinks 😉
▲
⟩⟩
Skydive130
|
📝 Planking almost very nearly finished!
6 years ago by 🇬🇧 Skydive130 ( Rear Admiral)
Rear Admiral)✧ 12 Views · 6 Likes · 1 Comment
Flag
💬 Add Comment
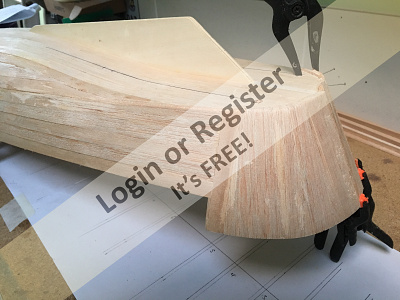
Finished nights this morning, had a couple of hours kip then thrashed some more planking! Stern end finished, main hull finished, just the bow uppers to put in. Once completed, will get some pva squeegee’d into the inside joints between planks and formers then will give the inside a couple of coats of resin. Once that’s done, rough sand the hull and fill the remaining gaps and blemishes with wood filler before final sanding and touch filling prior to glass clothing.
Before I glass cloth, shall install prop shafts, motor mounts, motors, install decks then onwards with clothing.
Before I glass cloth, shall install prop shafts, motor mounts, motors, install decks then onwards with clothing.
▲
⟩⟩
Bobatsea
SelwynWilliams
figtree7nts
RNinMunich
ads90
Colin H
|
💬 Planking almost very nearly finished!
6 years ago by 🇨🇦 Bobatsea (
Leading Seaman)✧ 11 Views · 3 Likes
Flag
Looking good
I set the rudder shaft the same as you,... 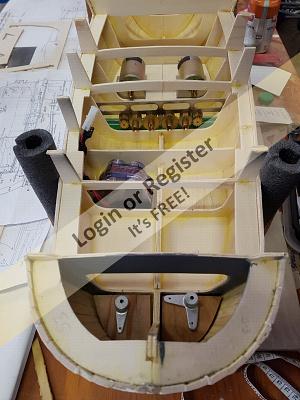
▲
⟩⟩
rcmodelboats
figtree7nts
SelwynWilliams
|
📝 Planking done and other stuff’
6 years ago by 🇬🇧 Skydive130 ( Rear Admiral)
Rear Admiral)✧ 13 Views · 7 Likes · 5 Comments
Flag
💬 Add Comment
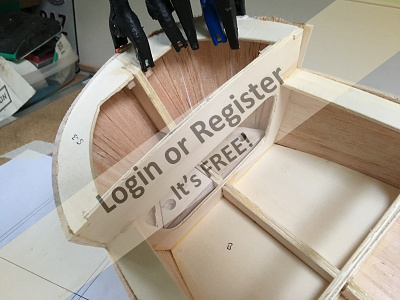
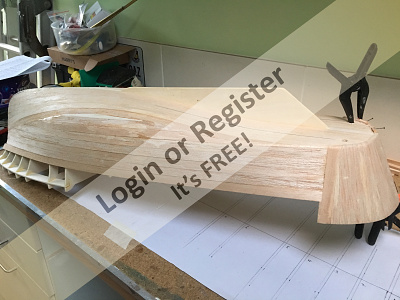
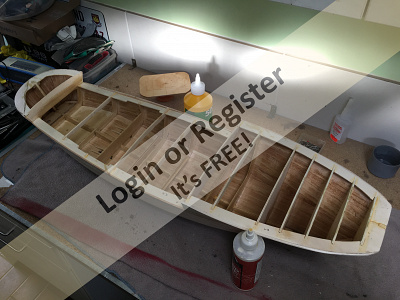
So, after a weekend away with “she who must be obeyed” have managed to do some more over the last couple of days before nights tonight. Planking is now completed, just needs external shaping, sanding and filler before glass clothing.
Have cut holes and added all the fixing points for the prop shafts and made the motor mount. All square and inline. Prop shafts won’t be fitted properly until I’ve clothed the outside. Stuffing boxes will be epoxy and isopon P38 fixed inside the little boxes I’ve made where they exit the hull for added strength.
Last job today was to give the inside of the hull a good dose of resin to seal it all up.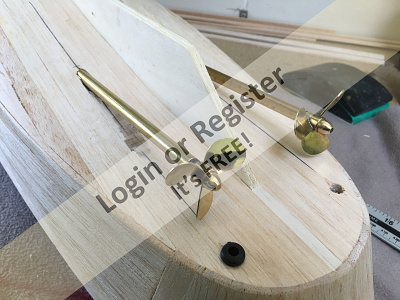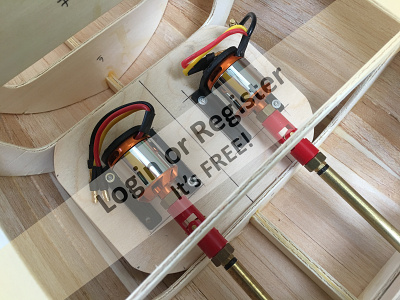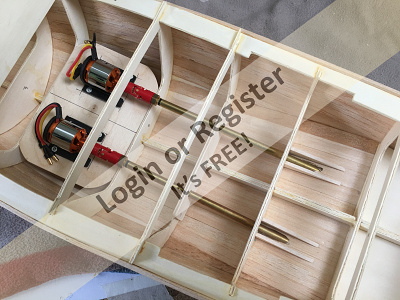
▲
⟩⟩
BOATSHED
teejay
Bobatsea
Colin H
marky
RNinMunich
figtree7nts
|
💬 Planking done and other stuff’
6 years ago by 🇩🇪 RNinMunich (
Fleet Admiral)✧ 6 Views · 0 Likes
Flag
Exactamente Skydive! 👍😉
▲
⟩⟩
No likes yet
This member will receive 1 point for every like received |
|
Login To
Remove Ads 💬 Planking done and other stuff’
6 years ago by 🇬🇧 Gerry1 (
 Able Seaman) Able Seaman)✧ 6 Views · 0 Likes
Flag
OK thanks so much
▲
⟩⟩
No likes yet
This member will receive 1 point for every like received |
|
💬 Planking done and other stuff’
6 years ago by 🇬🇧 Skydive130 (
Rear Admiral)✧ 7 Views · 1 Like
Flag
Hi Gerry, I’m possibly not the right person to ask, especially if you’re considering 3 motors? My best advice is to make your own post asking other more experienced boat builders to advise. I’m fairly new to boats moving over from aircraft.
▲
⟩⟩
RNinMunich
|
|
💬 Planking done and other stuff’
6 years ago by 🇬🇧 Gerry1 (
Able Seaman)✧ 7 Views · 1 Like
Flag
Hi can you help me I want to build a 1:32 pt boat with 3 motors, what props speed control and batteries would I need. Thank you
▲
⟩⟩
Skydive130
|
|
💬 Planking done and other stuff’
6 years ago by 🇩🇪 RNinMunich (
Fleet Admiral)✧ 7 Views · 1 Like
Flag
Nice one 'Cyril' !! 👍👍👍
Lovely job, good tips too. Thanks for that 😊 Cheers, Doug 😎 PS Now you've got all that done don't snore too loud on nights please! 😉 ▲
⟩⟩
Skydive130
|
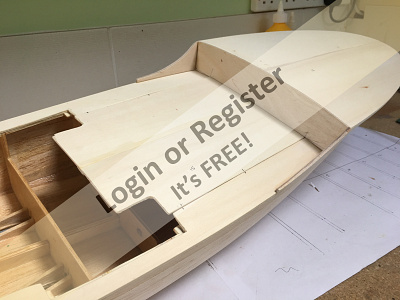
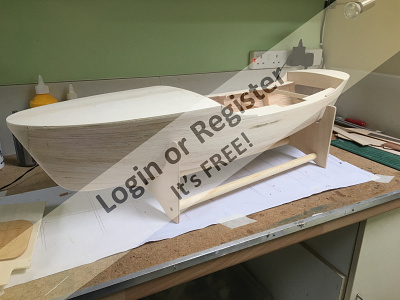
📝 Decks in, ready to sand, fill and cloth!
6 years ago by 🇬🇧 Skydive130 ( Rear Admiral)
Rear Admiral)✧ 13 Views · 4 Likes
Flag
💬 Add Comment
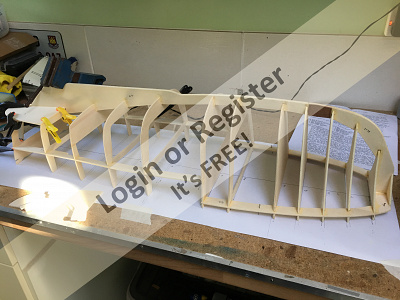
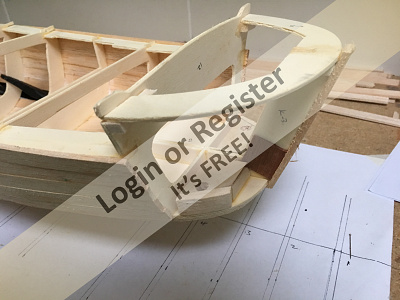
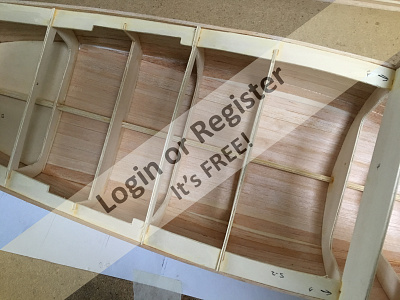
Been a slow few days with work and chores around the house, but managed to get in the workshop today. Fore, centre and aft decks in, nose block rough shaped and glued, gunwales fitted. I’ve faced the rear and fore deck thingys with1:32 ply for a neater finish and replaced the kit gunwale thingys with a sandwich of 1:32 ply and 1:32 balsa.
Tomorrow I have a “me” day as wife at work and I’m off work, so it will be a good chance to sand hull, filler were needed, sanding sealer, more sanding ready to start glass clothing Tuesday all being well.
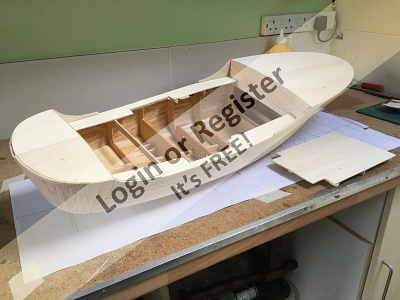
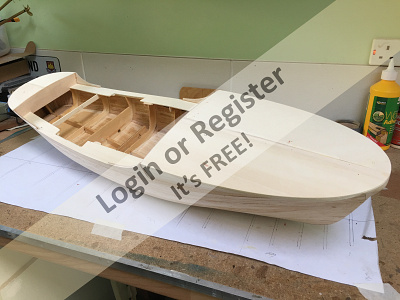
Tomorrow I have a “me” day as wife at work and I’m off work, so it will be a good chance to sand hull, filler were needed, sanding sealer, more sanding ready to start glass clothing Tuesday all being well.
▲
⟩⟩
rolfman2000
BigAlio
RNinMunich
figtree7nts
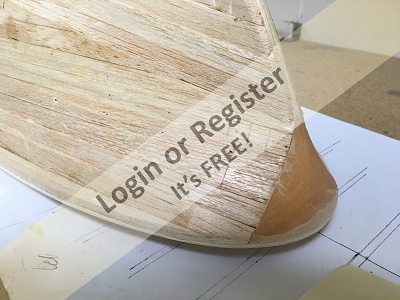
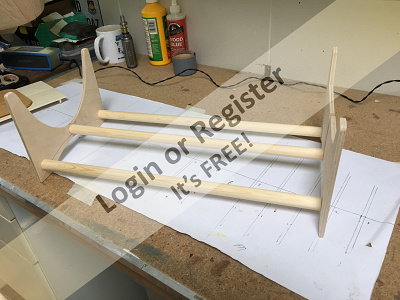
📝 Let’s make a stand!
6 years ago by 🇬🇧 Skydive130 ( Rear Admiral)
Rear Admiral)✧ 13 Views · 4 Likes
Flag
💬 Add Comment
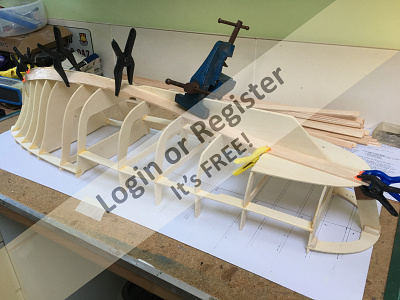
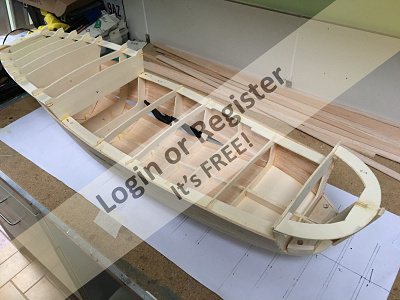
More progress today! First thing was to make a stand from 6mm ply and 18mm dowel using the hull templates as described in the instruction sheet. Was a good excuse to get my scroll saw going! The rear stand will have some more cut-outs to clear the prop shafts, will do that when I’ve installed them.
This was followed by a very messy and dusty couple of hours sanding and flaring the hull external sheeting followed by a good dose of cheap wood filler ( £1.99 from a pound shop in stowmarket, works well, sands nice!) in any gaps, cracks and imperfections. Will leave to dry overnight before sanding back and refilling where required before a couple of coats of sanding sealer, sanding back then on with glass clothing.
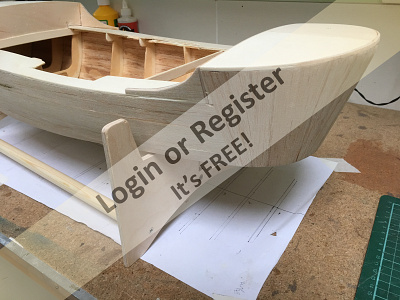
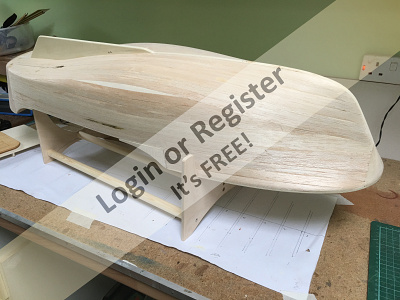
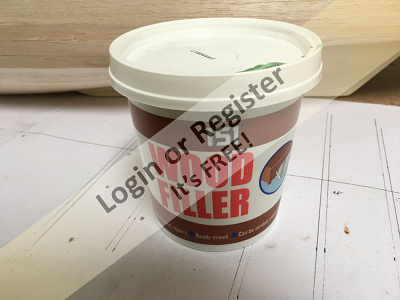
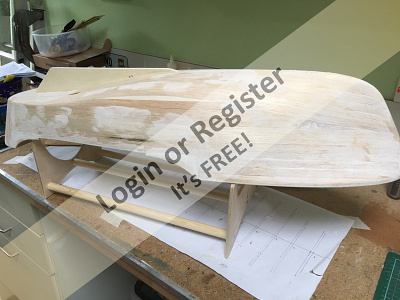
This was followed by a very messy and dusty couple of hours sanding and flaring the hull external sheeting followed by a good dose of cheap wood filler ( £1.99 from a pound shop in stowmarket, works well, sands nice!) in any gaps, cracks and imperfections. Will leave to dry overnight before sanding back and refilling where required before a couple of coats of sanding sealer, sanding back then on with glass clothing.
▲
⟩⟩
mturpin013
marky
RNinMunich
figtree7nts


Login To
Remove Ads
Remove Ads