Join Us On Social Media!

|

|

|
Download The App!
Login To
Remove Ads
Remove Ads
Login To
Remove Ads
Remove Ads
Model Boats Website
Elizabeth
8 Posts · 1 Follower · 63 Photos · 29 Likes
Began 6 years ago by
 United Kingdom
Follow This Thread
Not currently following
> Click to follow
> Click to follow
Latest Post 4 years ago by
| Oldest posts shown first (Show Newest First) | (Print Booklet) |
📝 Elizabeth
6 years ago by 🇬🇧 muddy ( Sub-Lieutenant)
Sub-Lieutenant)✧ 8 Views · 0 Likes
Flag
💬 Add Comment
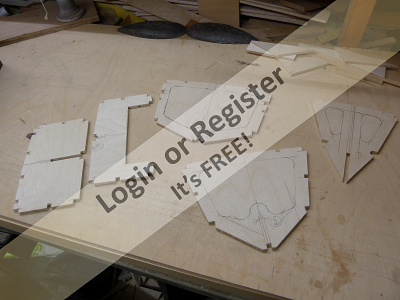
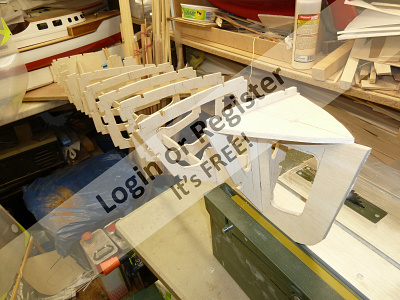
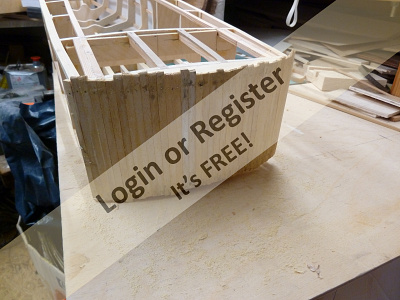
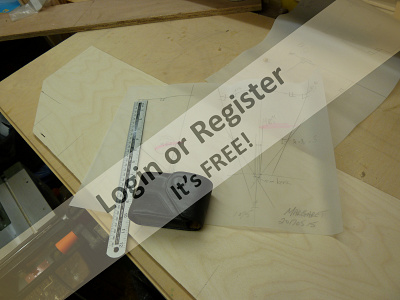
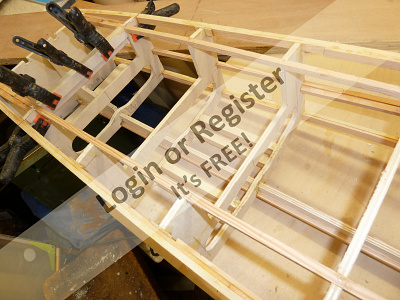
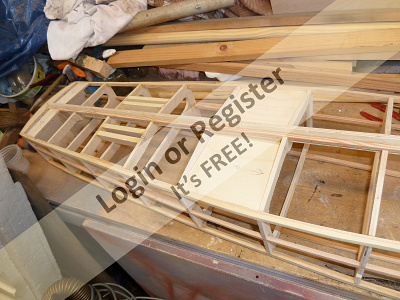
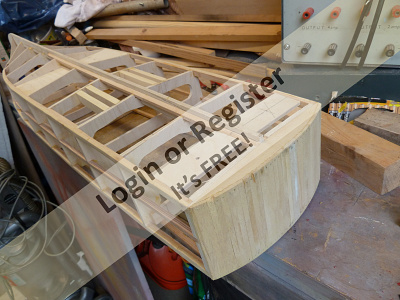
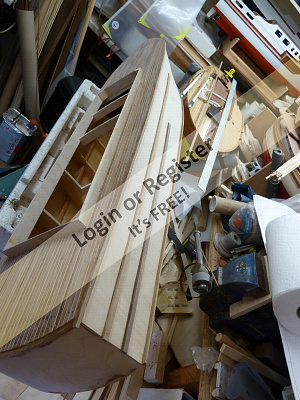
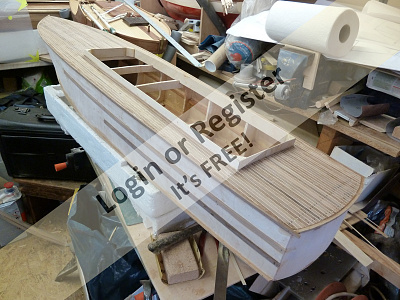
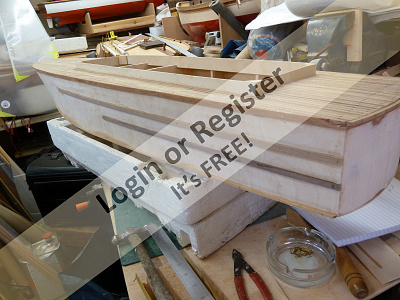
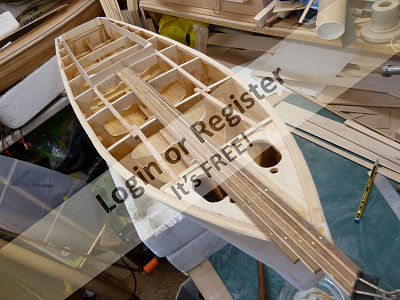
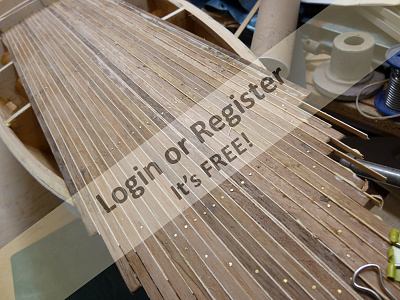
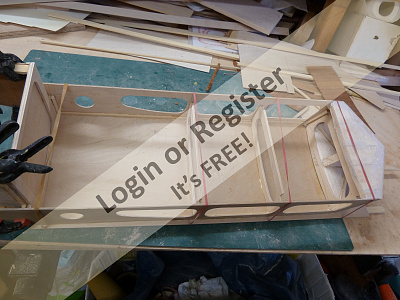
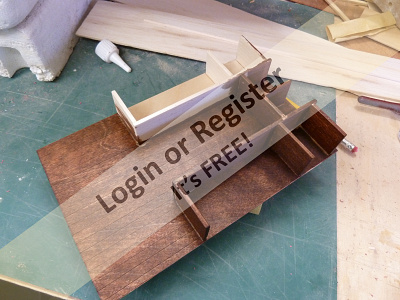
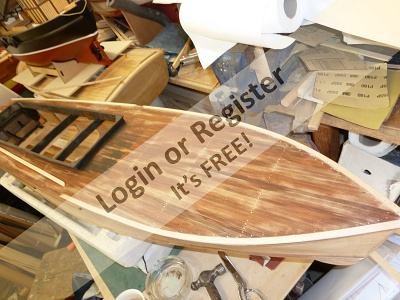
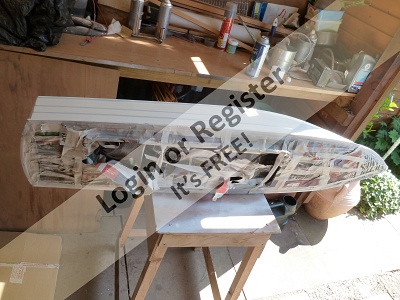
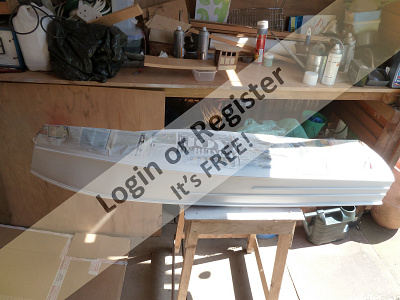
After a long lay-off, not requested or wanted. The call of the sawdust was here again.. Looking back at the Gentlemans Cruiser, i decided to start afresh with its sister ship, Elizabeth.
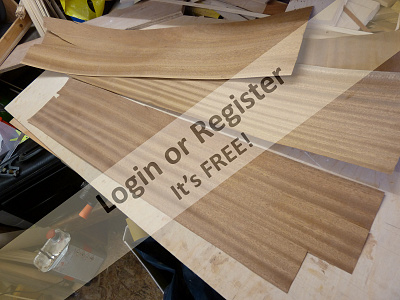
She is a hard chine construction so was hoping to get her to water in record time. But the gremlins set in when the hull had to be skinned.. The bottom skins did not want to play ball, or maybe it was me on a not so good day, but persevered and then planked the bottom in Obechie 6mm x 3mm, and then fitted the side skins vertical grained, and i must admit they fell on, no grunting and moaning with the hull frame in a half nelson trying to bash home a few pins, it was like hanging wallpaper..
The basic hiull is not as drawing with built up bulkheads but the keel and bulkheads are 5mm ply. Chines are 3/8" x 1/8" spruce and Obechie, obechie to the outer edges, easier to work.
▲
⟩⟩
No likes yet
This member will receive 1 point
for every like received
This member will receive 1 point
for every like received
Login To
Remove Ads
Remove Ads
📝 Hull + Deck
6 years ago by 🇬🇧 muddy ( Sub-Lieutenant)
Sub-Lieutenant)✧ 11 Views · 3 Likes
Flag
💬 Add Comment
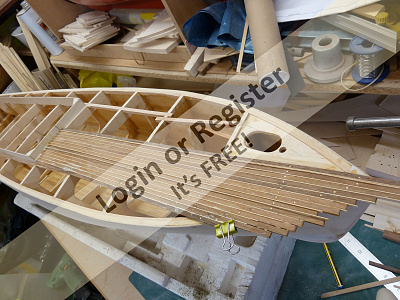
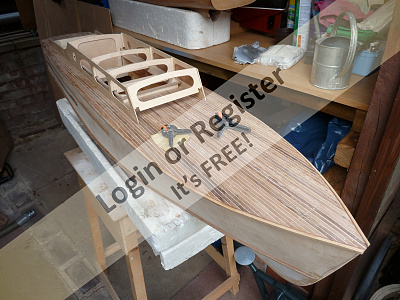
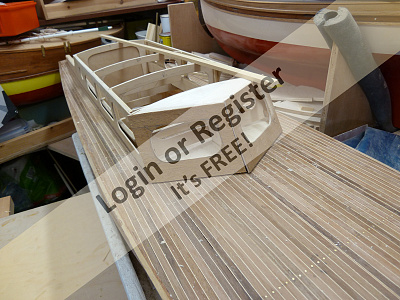
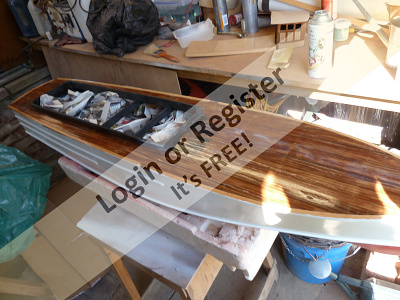
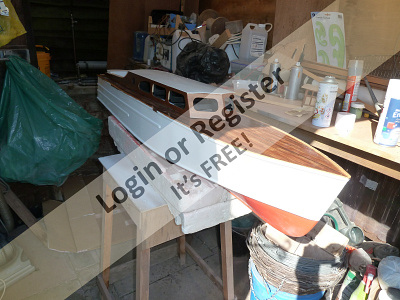
Once the hull was finished, with planking on the base and ply skins on the sides, made a start on the deck.. Decided to go for Walnut 5 x 3mm with pear .5mm as caulking. Quickly found out it was bad choice, as each pin/nail hole had to be pilot drilled.
Using a bradawl just split the Walnut planks. it may have been better using 6 x 3mm for planks.. And what with this weather, not at all helpful in the quickness of construction. The spray strips were added next to the chine and at deck level, plus a couple of reinforcement strips along the sides, i refer to em' as bumper bars. The next thing was the hatch combing, this is .8mm ply with a 3mm square top edging, hoping to improve water ingress improvement.
Regards Muddy
▲
⟩⟩
Inkoust
RNinMunich
figtree7nts
📝 Deck planks
6 years ago by 🇬🇧 muddy ( Sub-Lieutenant)
Sub-Lieutenant)✧ 10 Views · 2 Likes
Flag
💬 Add Comment
Deck Planks, 5 x 3mm Walnut, not a good choice perhaps up a size would have been better Every fixing pin ( .7 x 10 mm Brass Flat head ) had to be pilot drilled. it does sand to a mirror glass type finish but very hard wood, so again a time swallowe'r.
Regards muddy

Regards muddy
▲
⟩⟩
AlanRJU
RNinMunich
📝 Cabin/Superstructure
6 years ago by 🇬🇧 muddy ( Sub-Lieutenant)
Sub-Lieutenant)✧ 13 Views · 5 Likes · 1 Comment
Flag
💬 Add Comment
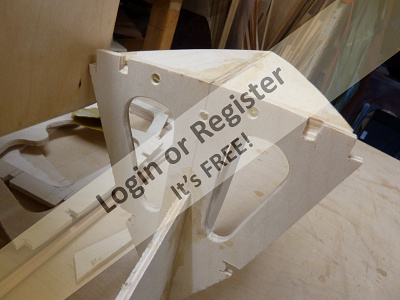
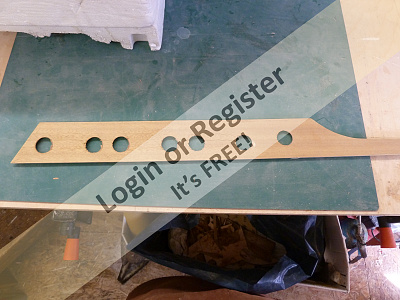
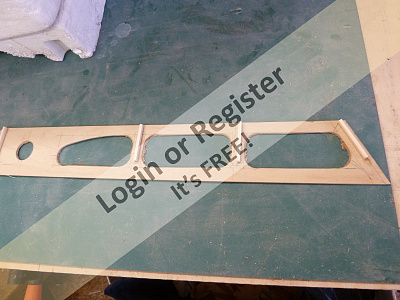
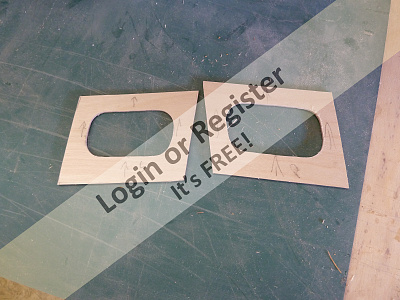
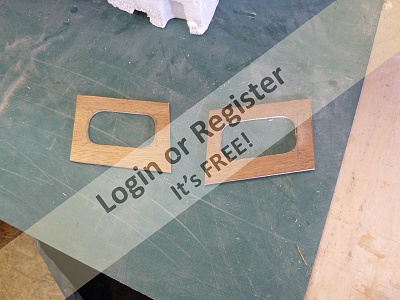
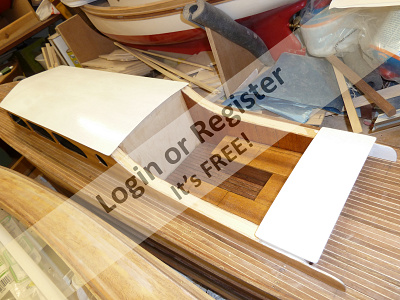
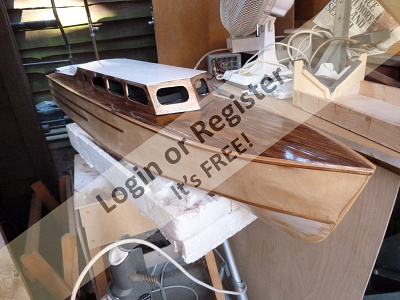
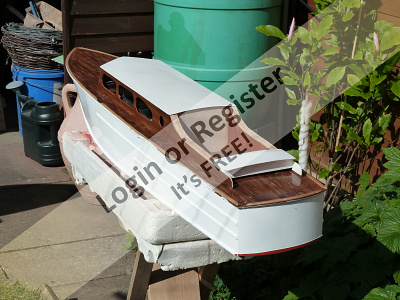
Upperworks, this launch has a long cabin and a well deck ( Gin Parlour ).. Sides were traced out and cut from 1.5mm ply, internal formers are 3mm ply, spacers and struts Obechie, the cabin front is formed with Balsa which will be covered in 1.5mm ply, all the external faces have been veneered in Mahogany, except the roof which will be probable a piece of ply. The old favourite 1 inch ring saw came into play again for the cutting out of the windows. Applied the veneer after cutting out the windows, have found this easier and it tends not to split and crack the veneer, so one has to recut the window openings but its a very quick and easy job if you use a 1/2 inch drum sander in something like a Dremel hobby type drill.
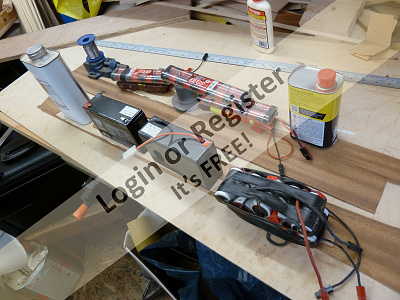
I,m afraid we have the oposite of Rain stopped play , its Sun stopped play at the moment.. You may notice the "Old Batteries" and cans, used as weights to hold down / compress the veneer, also the Jig saw, bolted to a piece of ply and then clamped into the B&D Workmate, I aint got room for a bandsaw which i would love, so this lash up has done me proud for a few years.
Regards Muddy....
▲
⟩⟩
Inkoust
AlanRJU
Donnieboy
RNinMunich
figtree7nts
|
💬 Cabin/Superstructure
6 years ago by 🇨🇦 Donnieboy (
 Warrant Officer) Warrant Officer)✧ 8 Views · 1 Like
Flag
It will be a lovely boat.I like your planking of the deck.
▲
⟩⟩
muddy
|
📝 Cabin
6 years ago by 🇬🇧 muddy ( Sub-Lieutenant)
Sub-Lieutenant)✧ 12 Views · 4 Likes
Flag
💬 Add Comment
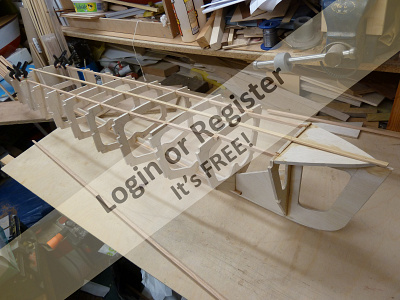
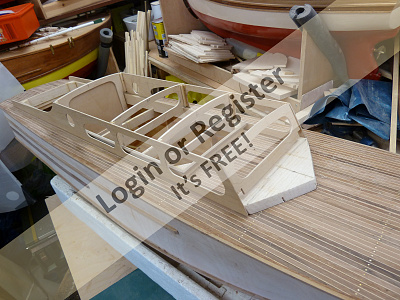
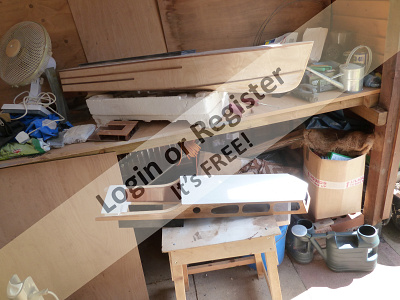
Continuing with the cabin, trying to keep it light in weight.
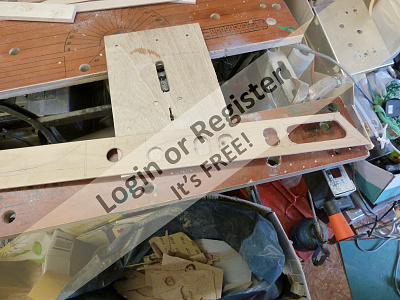
The sides and inner former's made up, started on the front windscreen's. Forgot the procedure about cutting the windows and then fitting the veneer, fitted the veneer and had to cut out the windows veneer and 3mm ply all glued up. Once the apertures were marked out, purposely drilled though from the veneer side just trying to avoid any splitting of the veneer, it worked. Fitted the front screens and reinforced the framework with 5 min epoxy, a quick sand down and all was well. Next item was the roof, as i wanted a light as possible upper works decided on .8mm ply, it looked and felt a little fragile, but once the Titebond glue was applyed all held down with elastic bands, also using 3 strips of 3/8" x 1/8" Obechie longitudinally down the top of the cabin roof to help stop ant edge "Barrelling" at formers.
Regards Muddy.
▲
⟩⟩
Inkoust
AlanRJU
bdyfwang
Donnieboy
📝 Elizabeth Cabin/superstructure
5 years ago by 🇬🇧 muddy ( Sub-Lieutenant)
Sub-Lieutenant)✧ 15 Views · 7 Likes · 1 Comment
Flag
💬 Add Comment
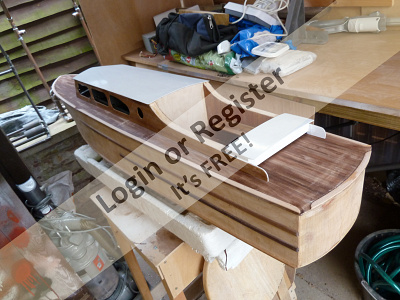
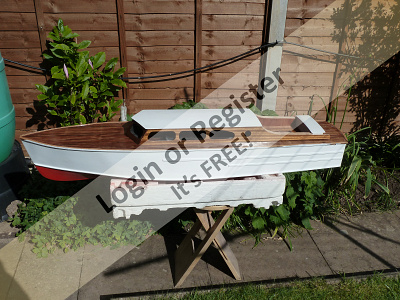
The cabin has now been finished off with a well deck, the well deck is made of balsa mostly, and the floor is oly, the well deck floor is lined as planks ( urghh ), firstly scored with a blunt Stanley type knife blade the the plank lines infilled with pencil, the floorboard nail marks are just scored with a sharp pin with a little cyno rubbed in the hole to colour the pin prick, decided to make this as an all in one removal unit, it still has to be glazed and fittings plus furniture, as in windscreen , door's consul etc: .. The deck and all other woodwork has been varnished and the cabin roof painted white, awaiting suitable weather to paint the hull, as this is done outdoors.. Muddy....


▲
⟩⟩
MouldBuilder
jbkiwi
Inkoust
Sakibian
AlanRJU
Donnieboy
RNinMunich
|
💬 Re: Elizabeth Cabin/superstructure
5 years ago by 🇬🇧 muddy (
Sub-Lieutenant)✧ 8 Views · 0 Likes
Flag
Thank you.. Unfortunately health has been a problem here for about 10 months.. But things are looking good as the weather improves and gets warmer, but not to hot, we hope..
Thank you again Muddy.... ▲
⟩⟩
No likes yet
This member will receive 1 point for every like received |
📝 Elizabeth
4 years ago by 🇬🇧 muddy ( Sub-Lieutenant)
Sub-Lieutenant)✧ 12 Views · 4 Likes · 1 Comment
Flag
💬 Add Comment
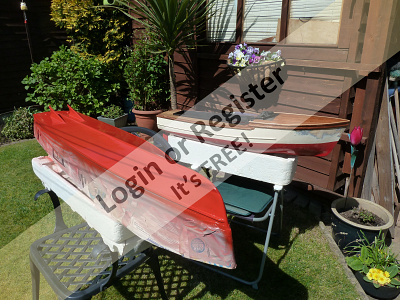
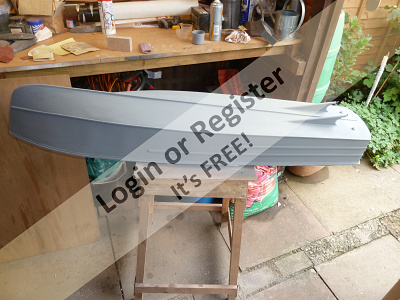
Continuing on - from 2019 October, with this nice sunny weather , thoughts to painting, not my forte' .. The Hull was primed in Halfords Grey primer, a couple of coats with a quick rubdown between coats, but the wood grain was prominent in places, added a "Filler primer" again from Halfords and another couple of coats of Grey Primer. I did want to get on with this project as her sister ship is almost ready if not completed for a test sail ( Margaret ).. no longer owned by me.
Thinking the paint stock was adequate, on inspection found all the wrong colours, except for some Wilko Spray Paint, i think it's Enamel, so give this a whirl. Applied well and it stuck well, a second coat without rubbing down followed quickly and was pleased with the end result. Masking tape removed, ready for masking up for the new paint above the water line.
Muddy ..
▲
⟩⟩
MouldBuilder
ianed57
Joe727
jbkiwi
|
💬 Re: Elizabeth
4 years ago by 🇬🇧 ianed57 (
Sub-Lieutenant)✧ 9 Views · 1 Like
Flag
Looking good. It's at times like this that we are glad we never threw anything away despite encouragement from the domestic authorities!
▲
⟩⟩
Martin555
|
📝 Elizabeth
4 years ago by 🇬🇧 muddy ( Sub-Lieutenant)
Sub-Lieutenant)✧ 11 Views · 4 Likes
Flag
💬 Add Comment
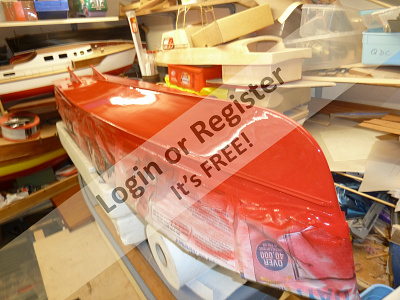
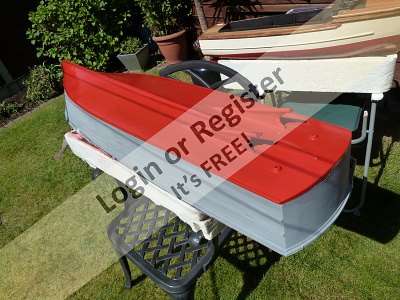
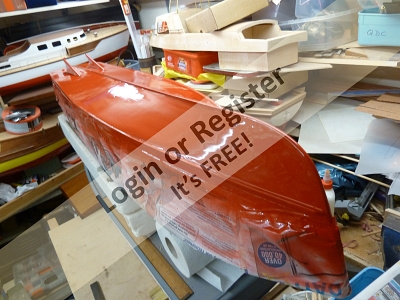
Had to re mask the hull, because the tape adhesive had dryed out, but once this was done, the Paint used was Wilko Spray Enamel, the RED was applied yesterday, this morning masked up again to enable the white primer again by Wilko about 3 coats applied later this afternoon, applied White Gloss, all spary paints from Wilko.. Must admit i was not disa[pointed with the outcome, except some of the masking tape did not want to be removed, we will atttack that tomorrow.. Regards Muddy ..
▲
⟩⟩
markd1
MouldBuilder
ianed57
Martin555


Login To
Remove Ads
Remove Ads