Join Us On Social Media!

|

|

|
Download The App!
Login To
Remove Ads
Remove Ads
Login To
Remove Ads
Remove Ads
Model Boats Website
Aerokits/Jotika Sea Queen
8 Posts · 2 Followers · 15 Photos · 20 Likes
Began 6 years ago by
 South Africa
Follow This Thread
Not currently following
> Click to follow
> Click to follow
Latest Post 6 years ago by
| Oldest posts shown first (Show Newest First) | (Print Booklet) |
📝 Aerokits/Jotika Sea Queen
6 years ago by 🇿🇦 Ianh ( Commander)
Commander)✧ 11 Views · 2 Likes · 2 Comments
Flag
💬 Add Comment
Hi
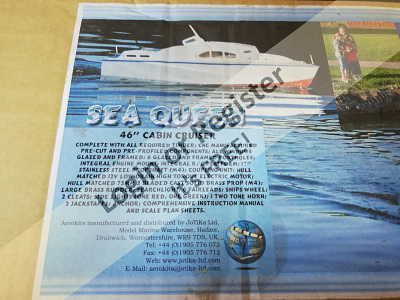
This is being built from the Jotika Sea Queen Kit.
The kit is quite comprehensive but I need to check the fittings supplied as some of the look a bit small for a 1:12 Boat. Also decided to change the Motor from the existing Caldercraft to an MFA Torpedo 850 as I believe the Caldercraft Motor only manages walking pace.
First thing was to built a building board. I need this to also cope with a VMW 46" RAF Crash Tender.
▲
⟩⟩
jacko
doghouse
|
💬 Aerokits/Jotika Sea Queen
5 years ago by 🇿🇦 Ianh (
Commander)✧ 9 Views · 0 Likes
Flag
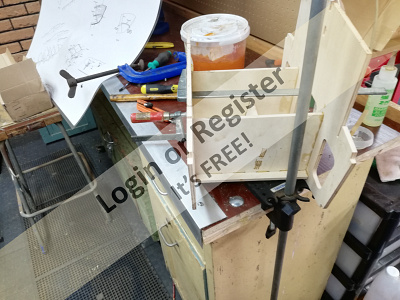
Titebond 3 is a high performance PVA. We can't get Titebond 3 here in South Africa. Gorilla/Gator glue you which is a polyurethane based glue have to Work using Rubber Gloves and have a bottle of rubbing Alcohol handy as it sticks like mad and you won't be able to get it off your hands.
I still have Cascamite! Been using a Sika PVA adhesive but the bulwarks were fitted with ZAP 30 minute Epoxy. I have found an eight hour epoxy to fix the stringers to the bulkheads with with. Why is it we make short worktime adhesives is beyond me. I have always found that the quickset glues are prone to be brittle. The only one I haven't found to be brittle is ZAP. Going to epoxy the inside of the boat before fitting the skins ▲
⟩⟩
No likes yet
This member will receive 1 point for every like received |
|
💬 Aerokits/Jotika Sea Queen
5 years ago by 🇦🇺 vk6tnc (
 Able Seaman) Able Seaman)✧ 10 Views · 0 Likes
Flag
I have carried this exact kit with me for many years. Your blog is my inspiration to start :-) Scared to make a mistake as this is my first build. I bought a bottle of Titebond III a couple of years ago!
▲
⟩⟩
No likes yet
This member will receive 1 point for every like received |
Login To
Remove Ads
Remove Ads
📝 Aerokits/Jotika Sea Queen
6 years ago by 🇿🇦 Ianh ( Commander)
Commander)✧ 10 Views · 1 Like
Flag
💬 Add Comment
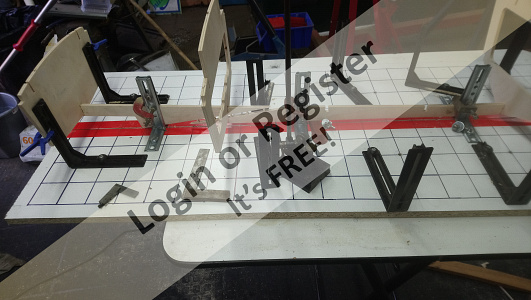
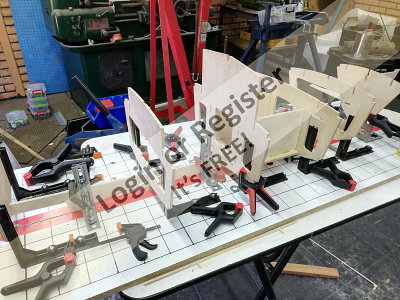
I made this from a 54" long piece of Melamine shelving. shallow cut a centre ine down the middle 1/16" wide.
The board was then marked into 2" squares using a laundry marker. The design concept was from a fuselage jig I had made by SLEC. The holes required for the brackets are M5 with captive ( T nuts) underneath pulled up into the bottom of the board. The red tape down the centre is masking tape ( the high quality stuff) this was to stop the boat glueing itself to the board. As the the keel has a skeg we needed to raise the keel to ensure parallelism I used an Enginerers Marking out block and two doorstops on this.The angles can slide and you then clamp the Bulwarks on I used thirty minute epoxy for this although I would like a longer working time epoxy. Bulwarks 3 and 4 with the motor base was also epoxied together.
This was then located on the keey ( Dryfit along with the other bulkheads. A word of advice here use the cabin sides to ensure alignment. Check with a rule and squares before gluing anything.
▲
⟩⟩
jacko
📝 Kit Quality ETC.
6 years ago by 🇿🇦 Ianh ( Commander)
Commander)✧ 12 Views · 3 Likes · 2 Comments
Flag
💬 Add Comment
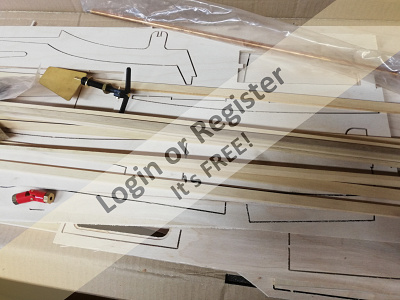
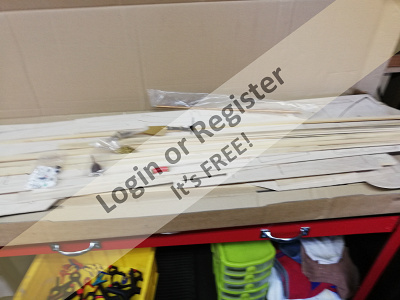
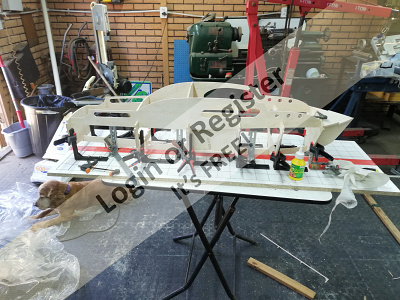
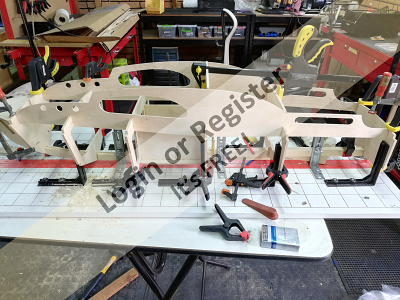
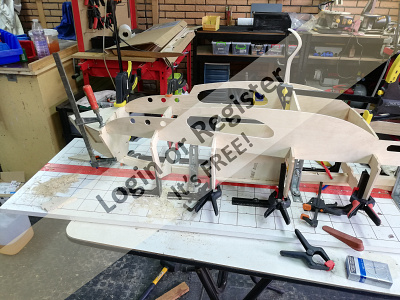
To give you some idea of the quality of this kit. Here are some photos. The quality is excellent and if you have a bit of experience this can easily be built. I don't fancy the all white look as the original had mahogany cabin sides and brass portholes this is what I will do with it,👍👍
▲
⟩⟩
vk6tnc
jacko
doghouse
|
💬 Kit Quality ETC.
6 years ago by 🇿🇦 Ianh (
Commander)✧ 9 Views · 0 Likes
Flag
Hi I have ordered the additional decking material from Jotika. I remember seeing similar boats around Bideford and most cabins had mahogany sides with white rooves and mahogany /teak grab rails
▲
⟩⟩
No likes yet
This member will receive 1 point for every like received |
|
💬 Kit Quality ETC.
6 years ago by 🇦🇺 canabus (
 Midshipman) Midshipman)✧ 9 Views · 0 Likes
Flag
Hi Ian.
A Mahogany deck with light strips between would look better and another colour for the cabin, but, yes to the brass portholes. Canabus ▲
⟩⟩
No likes yet
This member will receive 1 point for every like received |
📝 Assemble the hull
6 years ago by 🇿🇦 Ianh ( Commander)
Commander)✧ 12 Views · 3 Likes
Flag
💬 Add Comment
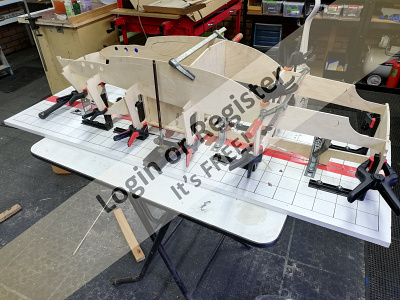
The Bulwarks were out in place on the jig and glued with ZAP 30 minute epoxy. I used the cabin sides to align the bulkheads. By the way Clamps you will need a lot of these
▲
⟩⟩
rikster67
jacko
doghouse
📝 Clamps
6 years ago by 🇿🇦 Ianh ( Commander)
Commander)✧ 10 Views · 1 Like
Flag
💬 Add Comment
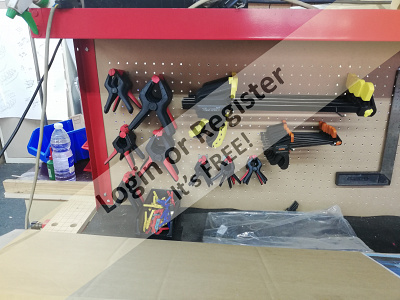
Part of my collection
▲
⟩⟩
doghouse
📝 Electrical
6 years ago by 🇿🇦 Ianh ( Commander)
Commander)✧ 12 Views · 3 Likes
Flag
💬 Add Comment
Hi All
Refer to attached for motor comparison.
I don't like using Cyano so the hull be built using ZAP 30minute epoxy and a weather proof Alphylitic from Sika. I will more than likely use a polyurethane based glue for the skinning. The hole boat will be epoxy coated inside and out to add strength. By the way the epoxy resin will increase the strength by about 2.5😁😁
▲
⟩⟩
boaty
TOWN3810
doghouse
📝 Motors
6 years ago by 🇿🇦 Ianh ( Commander)
Commander)✧ 10 Views · 1 Like · 1 Comment
Flag
💬 Add Comment
Don't know what happened
MOTOR COMPARISON
Model Number Caldercraft CEM 900T MFA Torpedo 850
Nominal Voltage 12v 12v
Operating Range 6-24v 12v
Type Brushed Brushed
Current Cons No Load 0.4A 1.9A
Current Consumption Max Eff 5A 10,8A
Stall Current 20.3A 40A
RPM at Nominal Voltage 3000r/min 9778r/min
Prop Caldercraft 75mm
The Motor I am putting in this Sea Queen is a Torpedo 850. This is due to the Caldercraft motor only manages just above walking pace.
▲
⟩⟩
TOWN3810
|
💬 Motors
5 years ago by 🇬🇧 vortex (
 Master Seaman) Master Seaman)✧ 14 Views · 2 Likes
Flag
Go brushless and let it perform
▲
⟩⟩
BOATSHED
TOWN3810
|
📝 Assembly
6 years ago by 🇿🇦 Ianh ( Commander)
Commander)✧ 15 Views · 6 Likes
Flag
💬 Add Comment
Hi All
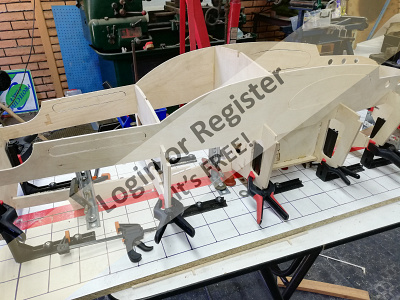
Would suggest you dry assemble with the cabin sides as my forward bulkhead was out by 2 Degrees.
When I cut the pieces out I used a new Dremel Moto Saw as my old srollsaw from Dremel was condemned due to inavailability of blades.
Like I say not enough clamps
Have ordered the decking from Jotika this is extra and allows you to plank the deck and cockpit more realistically.
▲
⟩⟩
hhulscher
jacko
TOWN3810
hrayner
MouldBuilder
suntugs


Login To
Remove Ads
Remove Ads