Join Us On Social Media!

|

|

|
Download The App!
Login To
Remove Ads
Remove Ads
Login To
Remove Ads
Remove Ads
Model Boats Website
Paddle Tug Iona - the hull
8 Posts · 2 Followers · 43 Photos · 40 Likes
Began 5 years ago by
 United Kingdom
Follow This Thread
Not currently following
> Click to follow
> Click to follow
Latest Post 5 years ago by
| Oldest posts shown first (Show Newest First) | (Print Booklet) |
📝 Paddle Tug Iona - the hull
5 years ago by 🇬🇧 Harvey Kitten ( Chief Petty Officer 1st Class)
Chief Petty Officer 1st Class)✧ 4 Views · 2 Likes
Flag
💬 Add Comment
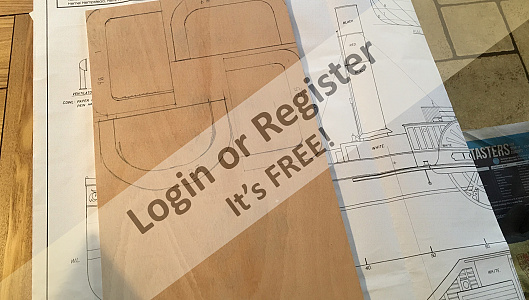
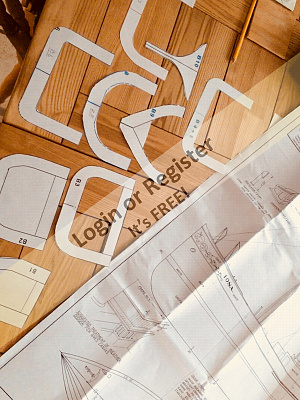
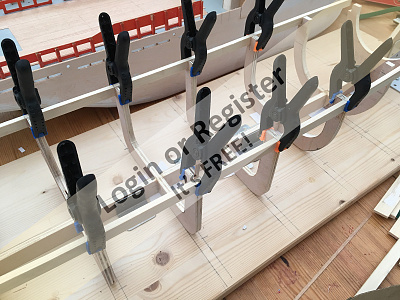
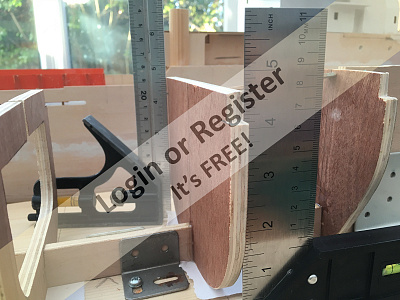
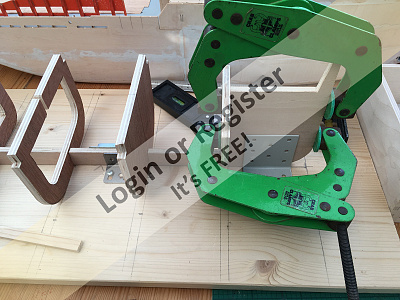
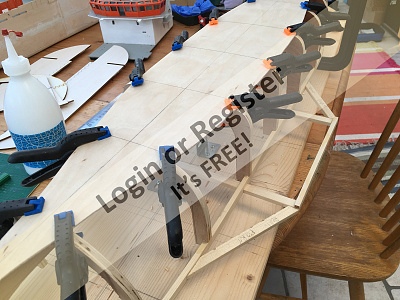
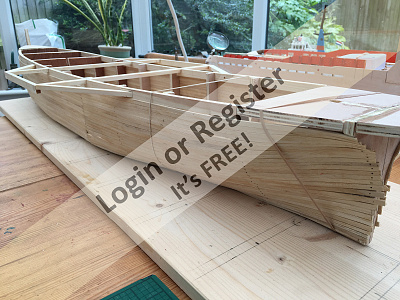
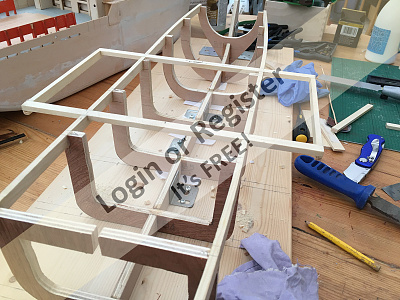
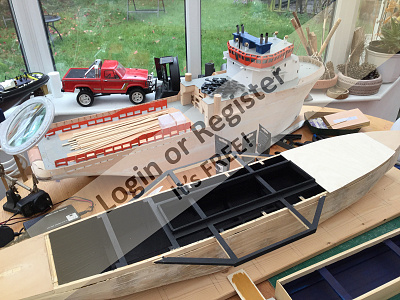
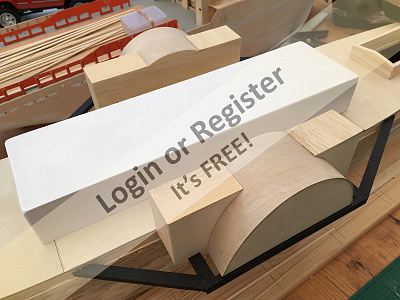
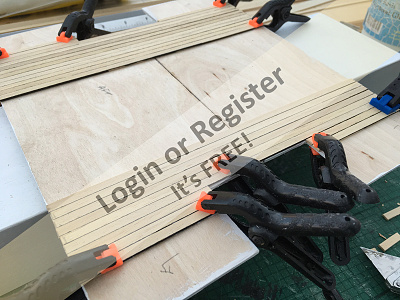
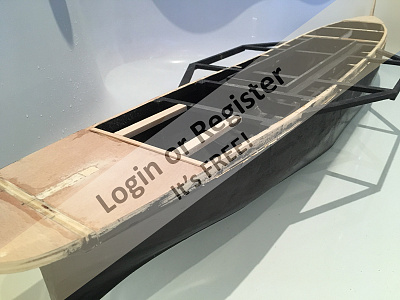
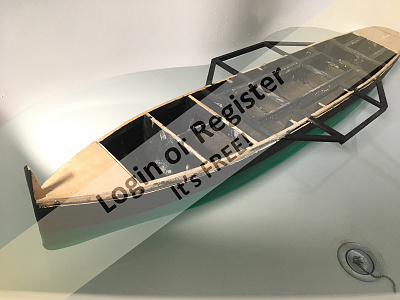
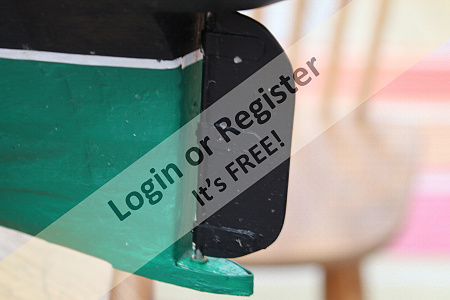
So... here is a compressed build blog of my paddle tug Iona... and I'm playing catch-up as the vessel is 95% complete and has been sailed already, but there may be some interest in what I've done. Iona was scratch-built off plan and has turned out to be the cheapest build so far out of 3 I've made, mainly because I was able to source materials from the leftovers box! it's a 'mixed-media' boat 😜using traditional methods of plank on frame hull, with paddles made on my 3D printer, and other parts turned on the lathe. So starting with the hull, frames were drawn out, transferred to some scrap 9mm ply and cut out on my bandsaw, along with the keel. These were assembled on a build board with some right angle brackets / measuring tools and test fitted before being stuck in place with epoxy. This was quite difficult as the shape of the hull is critical and comes right at the start of the build. I did remake 1 frame to correct alignment. The deck stringers need to bend in 2 directions, so some steaming with a carpet steam cleaner attached to some tubes worked and the wood clamped in place to dry. Outboard sponsons (?) were fitted to make a frame for the paddle boxes to fit on. Then a large sheet of ply forms the bottom of the hull, and the only job left to complete was the (tedious) planking. This was my 1st plank on frame ship... and it took ages. I think it came out reasonably OK but I'm not a perfectionist and I know if I'd spent more time it could be better... but I didn't! Next blog will feature building the paddle boxes and superstructure.🤓
▲
⟩⟩
ianed57
gazza131420
Login To
Remove Ads
Remove Ads
📝 Paddle Tug Iona- paddle boxes & superstructure
5 years ago by 🇬🇧 Harvey Kitten ( Chief Petty Officer 1st Class)
Chief Petty Officer 1st Class)✧ 7 Views · 5 Likes
Flag
💬 Add Comment
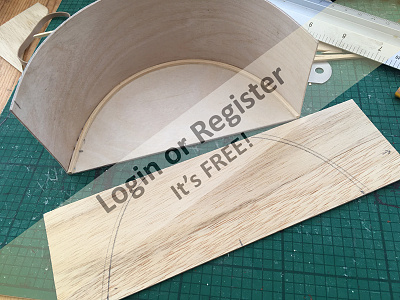
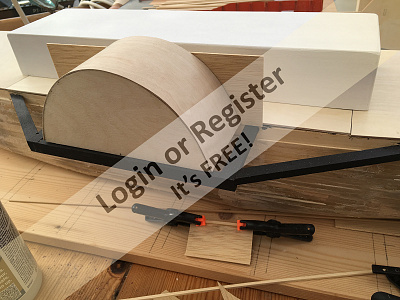
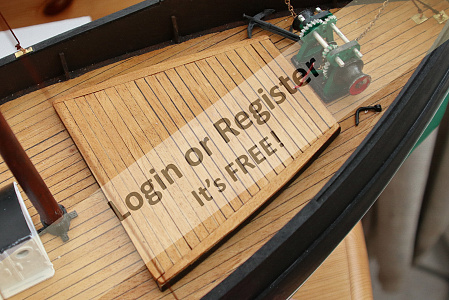
Building the paddle boxes was remarkably easy, once the 1mm ply had been steamed for bending. I decided to build the boxes first and make sure the paddles fitted inside later, the idea being that all this would come apart for maintenance should it be necessary.
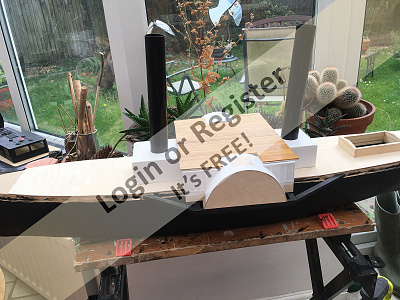
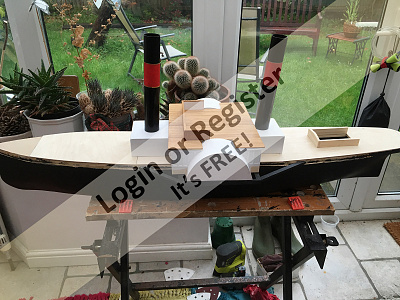
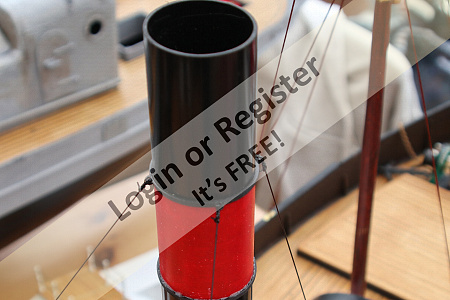
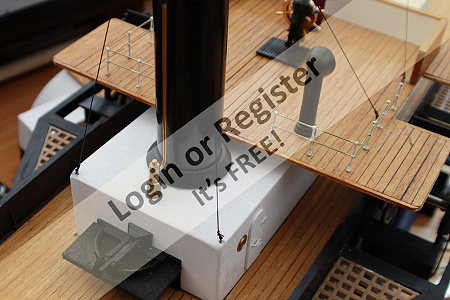
(it usually is!). There are few models to be found on the internet to use as reference and hardly any images of the original tug. And to confuse matters, PS Iona also existed as a passenger ship, as well as tug, and looked a bit different. The superstructure is really simple and quick to build, with some more planking! Am liking planking small areas now. The funnels came from some scrap plastic tubing in the garage... just the right diameter too, a lucky find. These will screwed in place from below once I have the other funnel parts made. I plan to run the tug on batteries rather than steam, as I am a relative novice to model boat building. The whole deck will be fitted with 1mm ply as a base before... more planking! Before all this is glued in place, I thought it best to water test the ship first and see how much ballast I am likely to need.
(it usually is!). There are few models to be found on the internet to use as reference and hardly any images of the original tug. And to confuse matters, PS Iona also existed as a passenger ship, as well as tug, and looked a bit different. The superstructure is really simple and quick to build, with some more planking! Am liking planking small areas now. The funnels came from some scrap plastic tubing in the garage... just the right diameter too, a lucky find. These will screwed in place from below once I have the other funnel parts made. I plan to run the tug on batteries rather than steam, as I am a relative novice to model boat building. The whole deck will be fitted with 1mm ply as a base before... more planking! Before all this is glued in place, I thought it best to water test the ship first and see how much ballast I am likely to need.
▲
⟩⟩
ianed57
gazza131420
Rookysailor
doghouse
Joe727
📝 PS Iona - ballast
5 years ago by 🇬🇧 Harvey Kitten ( Chief Petty Officer 1st Class)
Chief Petty Officer 1st Class)✧ 6 Views · 4 Likes
Flag
💬 Add Comment
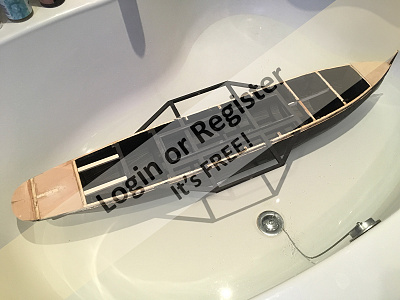
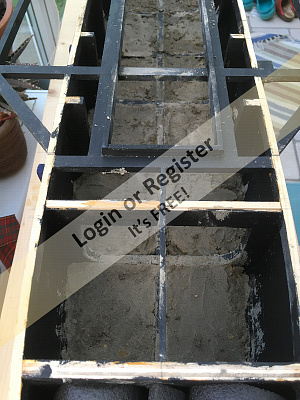
Well I said in blog 1 this was a mixed media ship... I forgot to mention the concrete. The bathtub test showed that the ship sailed ON the water rather than in it, so some serious ballast weight needed to be added. As I don't have any spare lead, and buying the amount needed would be expensive, I discovered an old bag of cement in the shed. Excellent! I roughly calculated how much to use to infill the base of the tug - about 1 inch depth distributed bows to stern, up to the level of the frames, so I could fit a wooden floor to mount the motors / electronics onto. Luckily this came out about right, and the paddles would sit in the water correctly🤓
▲
⟩⟩
ianed57
gazza131420
doghouse
Joe727
📝 PS Iona - Motors
5 years ago by 🇬🇧 Harvey Kitten ( Chief Petty Officer 1st Class)
Chief Petty Officer 1st Class)✧ 8 Views · 6 Likes
Flag
💬 Add Comment
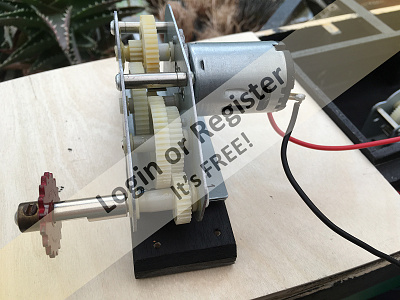
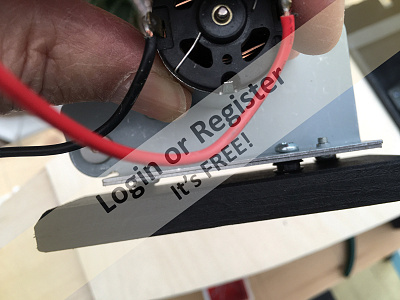
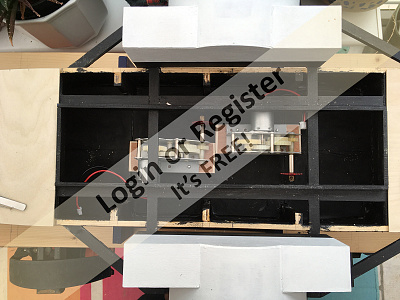
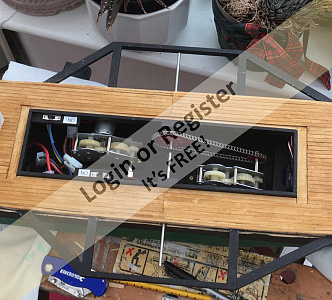
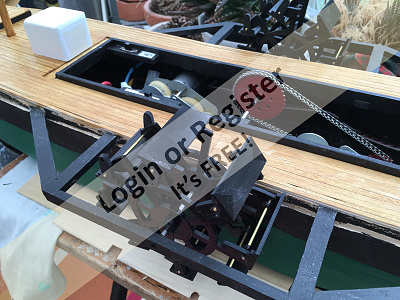
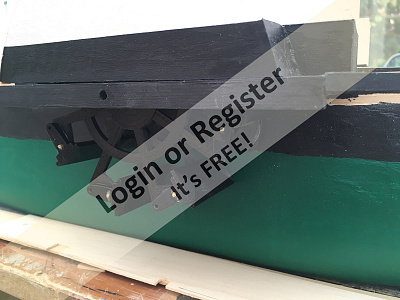
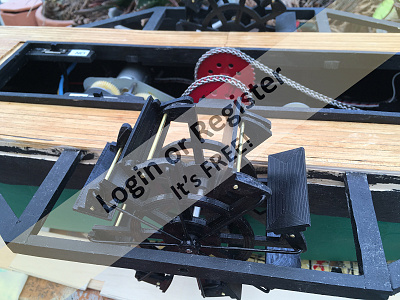
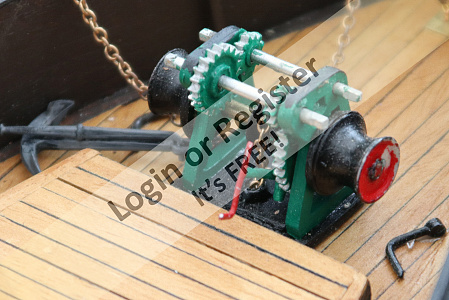
So to power the tug I needed some sort of motor gearbox arrangement, and I wanted 2 of them so I could drive the paddles independently, using 2 ESCs / batteries. The answer came in the form of 1:16 scale model tank motors/gearboxes. I managed to find a couple on a well known selling platform... someone was upgrading their tank to metal gears and had 2 for sale. The gearing got the speed of the output shaft down to almost sensible, so I just needed to reduce it and connect the output to the paddle shafts... using Meccano gears & chains of course. This works well and allows scale speed running of the paddles up to much faster than scale speed!(if it's windy)
Oh, just to mention the motor frames were mounted with grommets to blocks of wood to provide some suspension, and be removable if necessary.🤓
Oh, just to mention the motor frames were mounted with grommets to blocks of wood to provide some suspension, and be removable if necessary.🤓
▲
⟩⟩
ianed57
gazza131420
Rookysailor
doghouse
Joe727
Donnieboy
📝 PS Iona - paddles
5 years ago by 🇬🇧 Harvey Kitten ( Chief Petty Officer 1st Class)
Chief Petty Officer 1st Class)✧ 7 Views · 5 Likes
Flag
💬 Add Comment
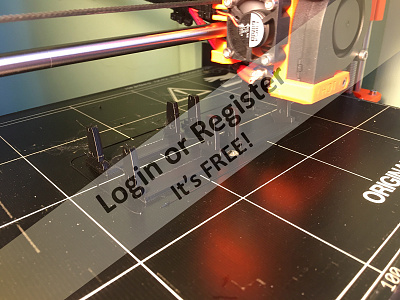
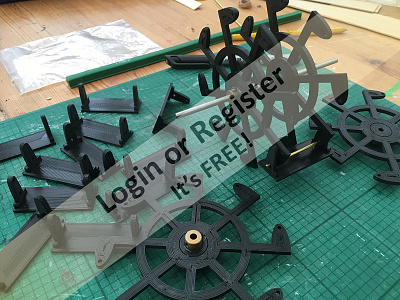
I decided to build the paddles on my 3D printer, working off the plan rather than building in brass as this should be much quicker... should be! Feeling confident I designed ver 1 & printed it out... and scratched my head a lot to see how this was going to fit together.
So ver 2 was much better and almost looked like it would work. Ver 3... same etc. Ver 4 👍 This would assemble looking like paddles. I decided against feathering paddles having talked to a few paddle steamer builders - it seemed more complicated, used slightly more battery power and in 1:36 scale would make little difference to performance. Having built one now I would probably make a few changes but it looks and performs ok. The assembled paddle is attached to a 4mm stainless steel drive shaft with brass bushes. I have recently added some pins to ensure they don't come loose on the lake.🤓
So ver 2 was much better and almost looked like it would work. Ver 3... same etc. Ver 4 👍 This would assemble looking like paddles. I decided against feathering paddles having talked to a few paddle steamer builders - it seemed more complicated, used slightly more battery power and in 1:36 scale would make little difference to performance. Having built one now I would probably make a few changes but it looks and performs ok. The assembled paddle is attached to a 4mm stainless steel drive shaft with brass bushes. I have recently added some pins to ensure they don't come loose on the lake.🤓
▲
⟩⟩
ianed57
gazza131420
Rookysailor
doghouse
marky
📝 PS Iona - Steering
5 years ago by 🇬🇧 Harvey Kitten ( Chief Petty Officer 1st Class)
Chief Petty Officer 1st Class)✧ 7 Views · 5 Likes
Flag
💬 Add Comment
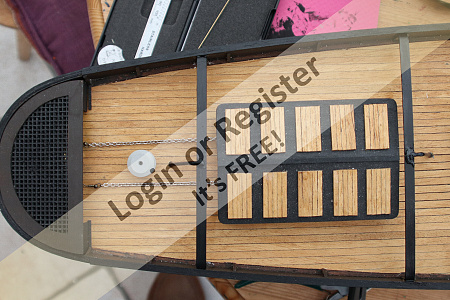
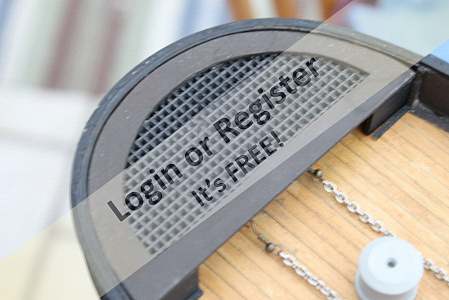
Fairly standard stuff, the steering. Rudder is made from brass and held to the stainless shaft with glue / pins. There's a chain drive from the servo to the tiller arm, both sides. Servo is accessed from the stern hatch lifting off, and the rear grid (3D printed) also lifts off. Despite having individual drive to each paddle, the rudder is quite useful for steering, although with paddles driven in opposite directions, Iona will turn on the spot. Nice🤓
▲
⟩⟩
ianed57
gazza131420
jugge
Joe727
doghouse
📝 PS Iona - misc fittings
5 years ago by 🇬🇧 Harvey Kitten ( Chief Petty Officer 1st Class)
Chief Petty Officer 1st Class)✧ 7 Views · 5 Likes · 2 Comments
Flag
💬 Add Comment
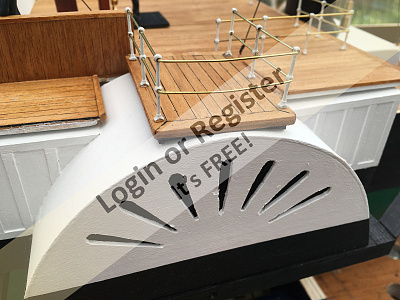
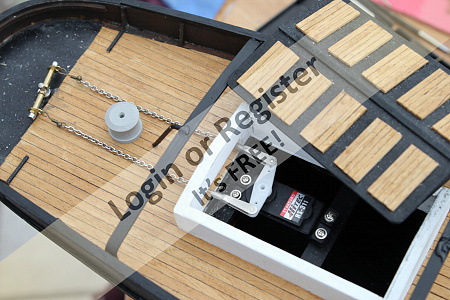
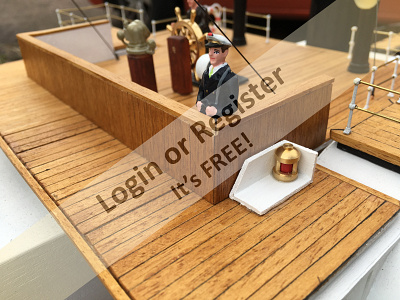
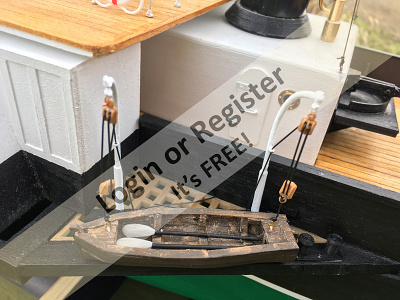
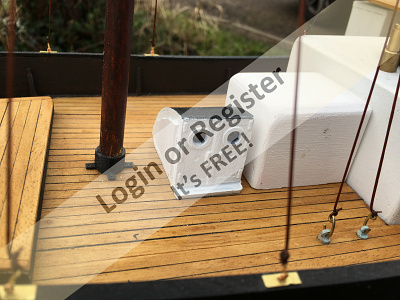
A bit of a miscellany here - the funnel fittings or mounts at the top are 3D printed and the 'rope' is some sort of elastic string used in jewellery making. This... 1) keeps it straight which is difficult with regular string or wire, 2) doesn't get damaged when you catch it with a stray arm, tool, etc. Brass steam fittings turned on my lathe.
The forward hatch was built in case extra ballast was needed, but has had a beneficial side effect. No ballast was needed and the hatch is filled with foam, so I can wedge in a mini tripod and mount a camera up front. Only briefly tested but looks promising
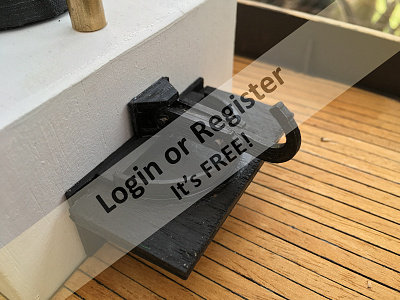
The windlass is a kit from mobile marine models. Easy to construct and looks the part. Tow hook 3D printed.
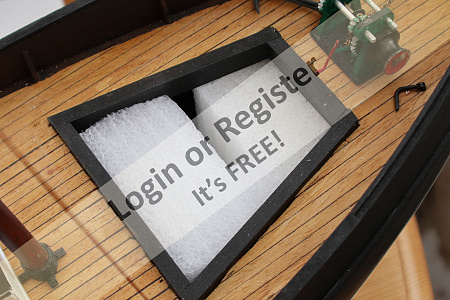
The forward hatch was built in case extra ballast was needed, but has had a beneficial side effect. No ballast was needed and the hatch is filled with foam, so I can wedge in a mini tripod and mount a camera up front. Only briefly tested but looks promising
The windlass is a kit from mobile marine models. Easy to construct and looks the part. Tow hook 3D printed.
▲
⟩⟩
ianed57
gazza131420
doghouse
Joe727
Donnieboy
|
💬 PS Iona - misc fittings
5 years ago by 🇬🇧 Harvey Kitten (
Chief Petty Officer 1st Class)✧ 4 Views · 2 Likes
Flag
Thanks for the compliments! it's been a good project, just adding the final touches a couple of days ago. One bonus about paddle steamers is they don't usually take on water as the paddle shafts are above the water line👍
▲
⟩⟩
ianed57
gazza131420
|
|
💬 PS Iona - misc fittings
5 years ago by 🇺🇸 Joe727 (
 Commander) Commander)✧ 5 Views · 3 Likes
Flag
I like the detailed photos, looks good, I have been looking for some witches so thanks for the info. Overall I enjoyed seeing the build as it is something very different from what I normally do. Congratulations on a nice build. Cheers, Joe
▲
⟩⟩
ianed57
gazza131420
Harvey Kitten
|
📝 PS Iona - on the water
5 years ago by 🇬🇧 Harvey Kitten ( Chief Petty Officer 1st Class)
Chief Petty Officer 1st Class)✧ 11 Views · 8 Likes
Flag
💬 Add Comment
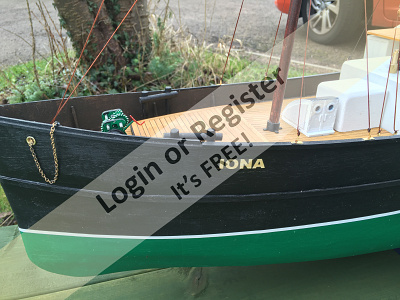
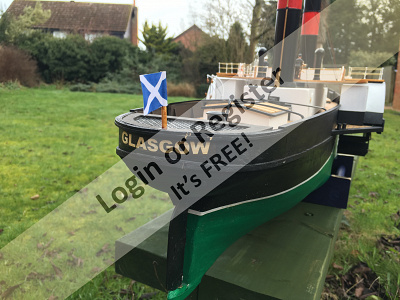
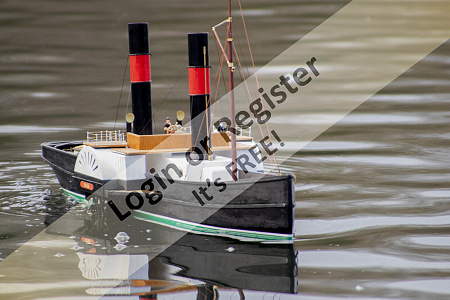
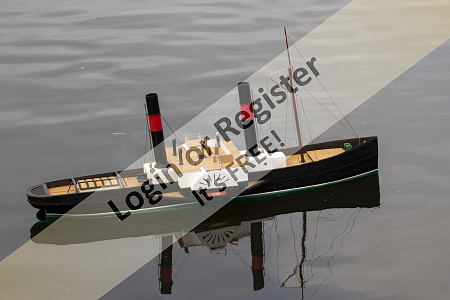
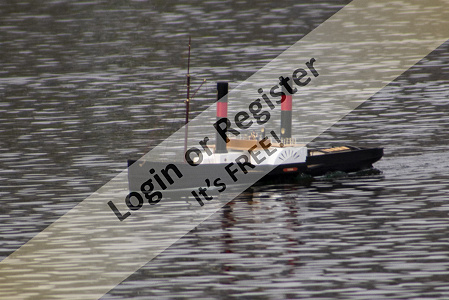
So how does it sail? very slowly! Iona is prone to the wind and will slip sideways on a windy day and also keel over on very windy days so one paddle comes out of the water. On a calm day it is a very manoeuvrable craft and looks good. I have a few refinements to add to the boat so it gets finished and looks like a working tug.
▲
⟩⟩
ianed57
twizzle
Joe727
doghouse
mturpin013
Ronald
figtree7nts
Donnieboy


Login To
Remove Ads
Remove Ads