Join Us On Social Media!

|

|

|
Download The App!
Login To
Remove Ads
Remove Ads
Login To
Remove Ads
Remove Ads
Model Boats Website
Italeri Vosper 72’6” MTB 77
9 Posts · 2 Followers · 33 Photos · 33 Likes
Began 4 years ago by
 Canada
Follow This Thread
Not currently following
> Click to follow
> Click to follow
Latest Post 4 years ago by
| Oldest posts shown first (Show Newest First) | (Print Booklet) |
📝 Italeri Vosper 72’6” MTB 77
4 years ago by 🇨🇦 Ronald ( Admiral)
Admiral)✧ 19 Views · 9 Likes
Flag
💬 Add Comment
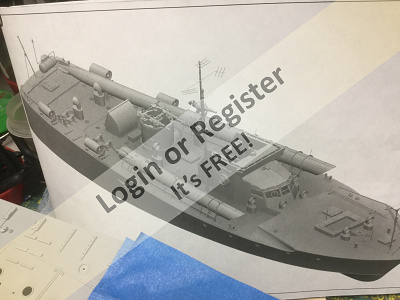
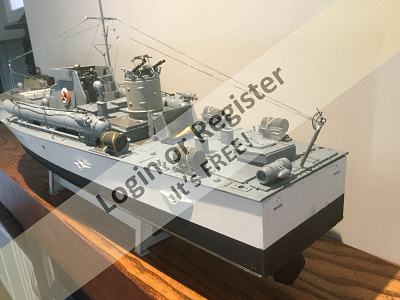
Donnieboy gave me this kits several years ago to build with the grandsons. But, the boys are not able to come over to help grandpa. Plus, they really are not interested!
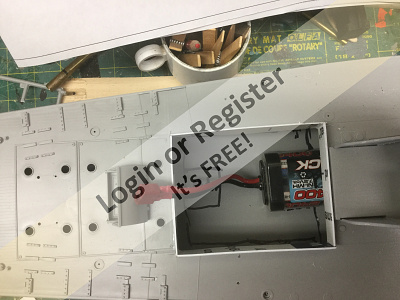
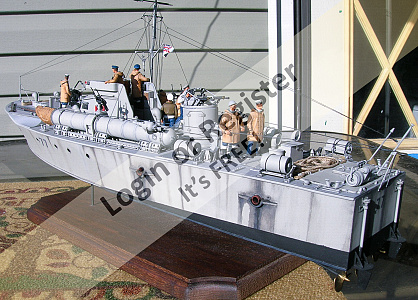
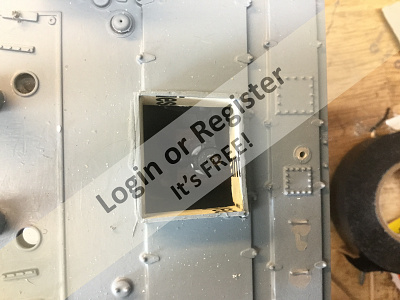
Plan to make the conversion to a single brushed motor using an NiHM. Looking over the deck there needed to be a hatch opening with the least disturbance to the design. I chose the area as seen in the photos. Built a coaming, and a hatch cover which once the torpedoes are in place is hidden. I do not believe the raised deck will be very obvious.
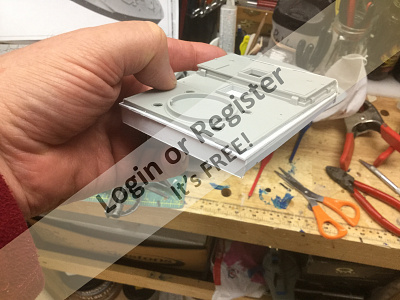
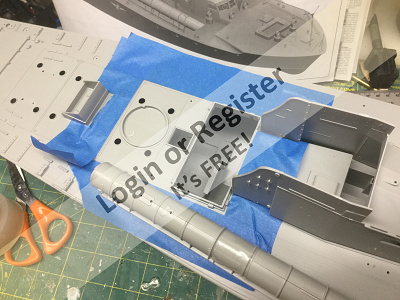
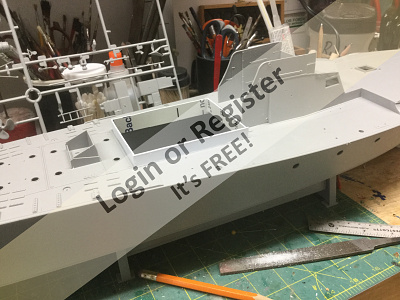
Plan to make the conversion to a single brushed motor using an NiHM. Looking over the deck there needed to be a hatch opening with the least disturbance to the design. I chose the area as seen in the photos. Built a coaming, and a hatch cover which once the torpedoes are in place is hidden. I do not believe the raised deck will be very obvious.
▲
⟩⟩
Dibdawg
MouldBuilder
Modellrune
Newby7
RonH
marky
Skydive130
Martin555
Puddle-pirate
Login To
Remove Ads
Remove Ads
📝 Vosper MTB 77’
4 years ago by 🇨🇦 Ronald ( Admiral)
Admiral)✧ 13 Views · 3 Likes
Flag
💬 Add Comment
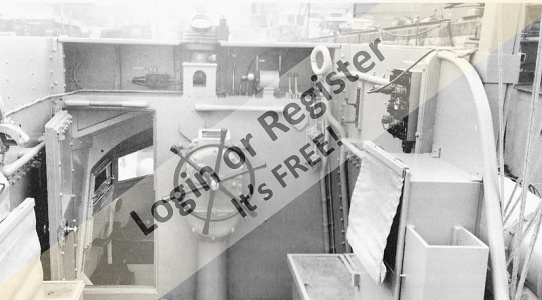
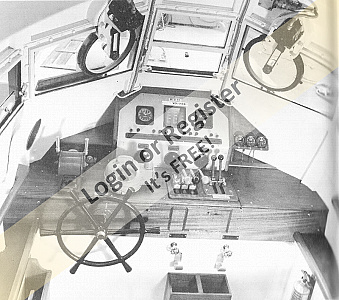
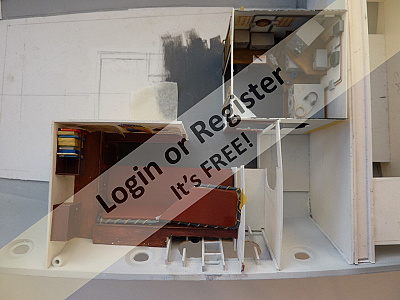
Found interior pictures of wheelhouse and helm. They really have helped. Also added coaming so the wheelhouse is removable.
▲
⟩⟩
Martin555
RNinMunich
jbkiwi
📝 Vosper interior of helm
4 years ago by 🇨🇦 Ronald ( Admiral)
Admiral)✧ 16 Views · 6 Likes · 9 Comments
Flag
💬 Add Comment
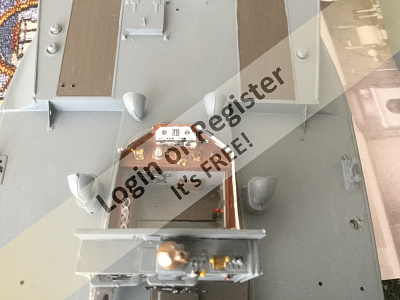
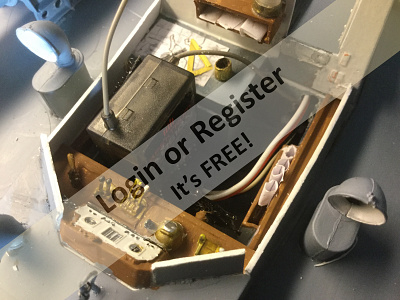
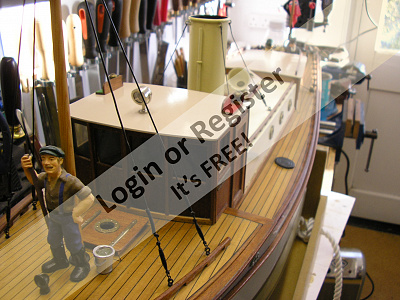
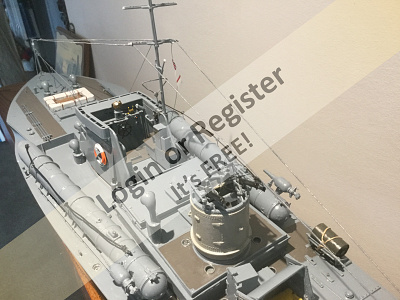
Added some imaginary items to the helm. Coffee mug, map n compass, wall cabinet, maps in the side compartment, additional gauges, and a picture of the yacht back home.
Research noted that the floor had rubber mats in the wheelhouse and external helm. Also rubber was on the top of the cabinets as these were seats as well used for standing up on.
The copper wire will be painted, it leads from the radio to the antenna. The speaking tube will also be painted once glue has dried.
▲
⟩⟩
MouldBuilder
Colin H
Graham93
Martin555
RNinMunich
jbkiwi
|
💬 Re: Vosper interior of helm
4 years ago by 🇬🇧 Martin555 (
 Fleet Admiral) Fleet Admiral)✧ 10 Views · 0 Likes
Flag
Hi Ron,
Unfortunately i no longer have the models and did not take any photos. I did do a little piece on modifying plastic figures on the site. (Forum Topic, modified figures.) Martin555. ▲
⟩⟩
No likes yet
This member will receive 1 point for every like received |
|
Login To
Remove Ads 💬 Re: Vosper interior of helm
4 years ago by 🇨🇦 Ronald (
Admiral)✧ 11 Views · 1 Like
Flag
Could you send me some ideas? Show me what you have done?
▲
⟩⟩
Martin555
|
|
💬 Re: Vosper interior of helm
4 years ago by 🇬🇧 Martin555 (
Fleet Admiral)✧ 10 Views · 1 Like
Flag
Hi Ron,
I have altered clothing on some figures using layers of toilet tissue and glue. Martin555. ▲
⟩⟩
Ronald
|
|
💬 Re: Vosper interior of helm
4 years ago by 🇨🇦 Ronald (
Admiral)✧ 11 Views · 1 Like
Flag
Italeri only includes 7 in their crew kit, and none in a helm position, or sitting, only one in foul weather gear. The boat has a crew of 10.
The ptboat crew kit has 10 figures. But all with steel helmets. Same price too. The photos are from another persons work. He bought several kits to get the crew. How does one make foul weather gear on their figures? Ron 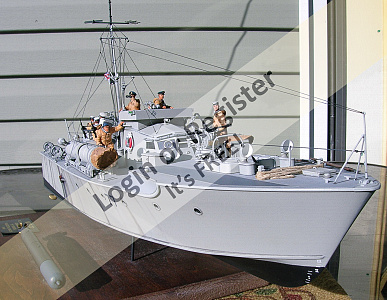
▲
⟩⟩
Martin555
|
|
💬 Re: Vosper interior of helm
4 years ago by 🇩🇪 RNinMunich (
Fleet Admiral)✧ 11 Views · 1 Like
Flag
Hi Ron,
Leeds Model Shop still have two crew sets😊 ▲
⟩⟩
Martin555
|


|
💬 Re: Vosper interior of helm
4 years ago by 🇨🇦 Ronald (
Admiral)✧ 11 Views · 1 Like
Flag
No I do not have the crew, I hope they are still available or ones similar.
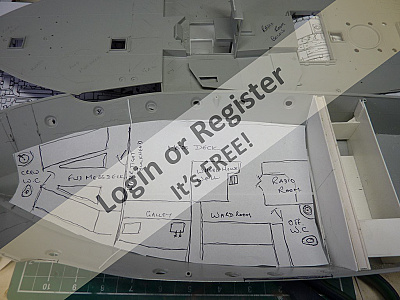
I also found a drawing which identifies the various items in the helm and wheelhouse. On the starboard side near the radio, is a fold down seat mounted on the wall. I plan to add that too. If you are familiar with these boats, would you tell me where the officers quarters are? Also, how they would respond quickly to the helm from their quarters? Those hatch covers look rather small for going in and out of when wearing bulky foul weather clothing. ▲
⟩⟩
Martin555
|
|
💬 Re: Vosper interior of helm
4 years ago by 🇬🇧 Martin555 (
Fleet Admiral)✧ 10 Views · 1 Like
Flag
Looking good Ron.
The extra little details make all the difference. Well done. Martin555. ▲
⟩⟩
Ronald
|
|
💬 Re: Vosper interior of helm
4 years ago by 🇩🇪 RNinMunich (
Fleet Admiral)✧ 11 Views · 1 Like
Flag
Excellent stuff Ron.👍
You've caught the atmosphere well there. Do you have the Italeri crew as well to bring her to life? Cheers, Doug 😎 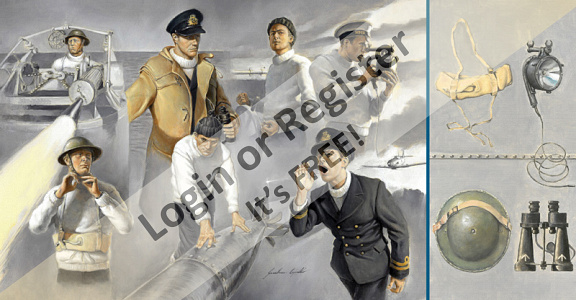
▲
⟩⟩
Martin555
|

|
💬 Re: Vosper interior of helm
4 years ago by 🇳🇿 jbkiwi (
Fleet Admiral)✧ 11 Views · 2 Likes
Flag
Nice job!
▲
⟩⟩
Martin555
Ronald
|
📝 Wheelhouse and Helm Arrangements
4 years ago by 🇨🇦 Ronald ( Admiral)
Admiral)✧ 11 Views · 1 Like
Flag
💬 Add Comment

▲
⟩⟩
Martin555
📝 Interior is Revealed
4 years ago by 🇨🇦 Ronald ( Admiral)
Admiral)✧ 12 Views · 2 Likes · 2 Comments
Flag
💬 Add Comment
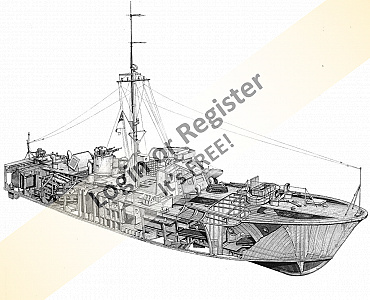
I am enjoying the work of Longshanks as found on the Britmodeller.com website. He is using the Italeri 1/35 Vosper 72' 6" MTB to create the interior of the boat beginning with the Wardroom & Radio shack located below the Helm.
Osprey Publishing
British Motor Torpedo Boat 1939–45
New Vanguard 74
Author: Angus Konstam
Illustrator: Tony Bryan
Short code: NVG 74
Publication Date: 20 Jun 2003
ISBN: 9781841765006
Format: Paperback
Number of Pages: 48
The cover is an Illustration of the MTB
When I asked in an earlier post about how men came up on deck from down below? This illustration reveals the answer.
The kit is wrong! Beside the ladder which drops down into the helm, there is a work table. That table surface is too long. It is half the length as it should be because there is another ladder leading below to the Officer's ward room and to the radio room.
You can view this by seeing this link, and following all six pages, just keep scrolling along till the end. Absolutely Amazing!

▲
⟩⟩
MouldBuilder
Martin555
|
💬 Re: Interior is Revealed
4 years ago by 🇨🇦 Ronald (
Admiral)✧ 10 Views · 0 Likes
Flag
His entries stop after page 6, not sure if he finished it?
▲
⟩⟩
No likes yet
This member will receive 1 point for every like received |
|
💬 Re: Interior is Revealed
4 years ago by 🇬🇧 Martin555 (
Fleet Admiral)✧ 10 Views · 0 Likes
Flag
Hi Ron,
As you say "Absolutely Amazing!" Longshanks is doing a really fantastic job. Martin555. ▲
⟩⟩
No likes yet
This member will receive 1 point for every like received |
📝 RC gear installed
4 years ago by 🇨🇦 Ronald ( Admiral)
Admiral)✧ 15 Views · 5 Likes
Flag
💬 Add Comment
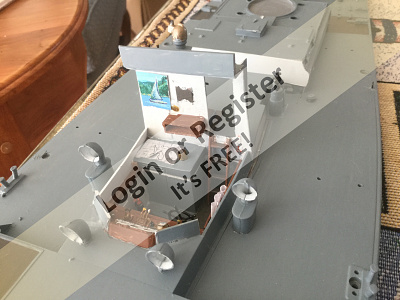
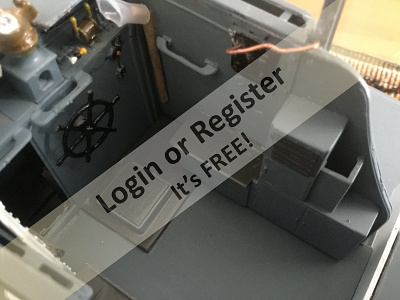
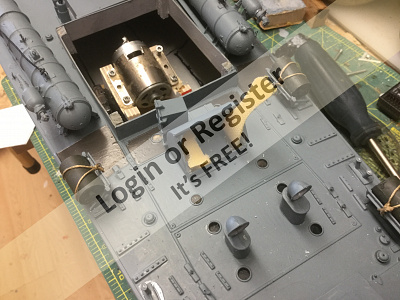
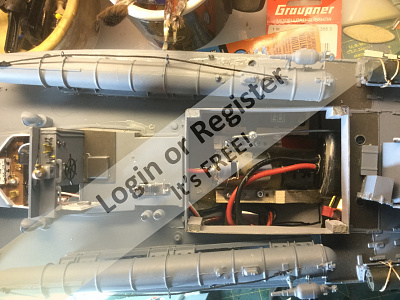
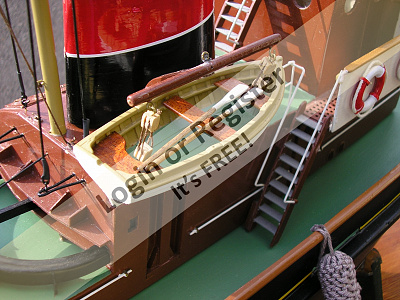
After consultation with donnieboy the placement of the receiver was to keep it away from the motor so it was placed in the helm. It may stay as seen in the photos or mounted to the roof with Velcro. Don Sutton, Metro Marine Model Club, Toronto, is a valued friend who assists me with many aspects of my builds. He is a generous man with his knowledge and stock of supplies.
A switch was added to the floor of the wheelhouse and to keep from snapping off the mast, an aluminum tube was glued to the side of the wheelhouse allowing the mast and rigging be removed in transportation, or working around the boat. Inserting the battery under the deck is easy and by adding a Velcro strip, hidden inside the large vent, securing the battery.
A small magnet secures the aft hatch above the rudder post.
▲
⟩⟩
Inkoust
Donnieboy
MouldBuilder
Martin555
RNinMunich
📝 Rigging and aerials?
4 years ago by 🇨🇦 Ronald ( Admiral)
Admiral)✧ 11 Views · 2 Likes · 10 Comments
Flag
💬 Add Comment
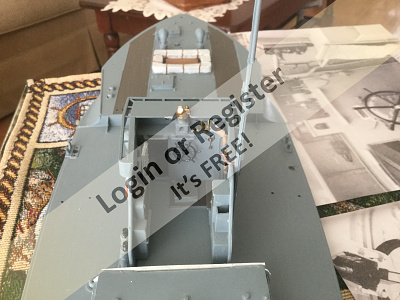
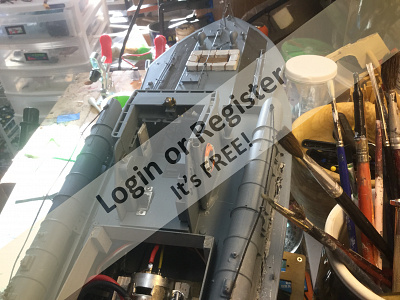
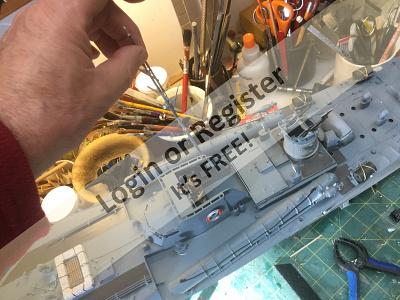
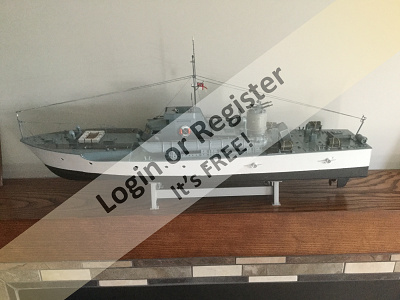
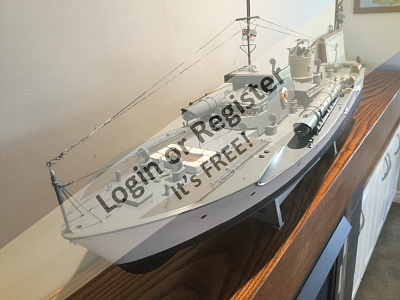
What do most of you do to keep from damaging your rigging and radio aerials during transportation and when working around the model?
Tonight, I remembered some stretchy “thread”, it is white, but it comes in black too. However, fabric stores are closed for now, so the white will do the job for now. Made up wire hooks too, then with the stretchy material, the radio aerials would maintain their tension, but allow me to easily remove them and the mast when transporting and servicing the model.

Tonight, I remembered some stretchy “thread”, it is white, but it comes in black too. However, fabric stores are closed for now, so the white will do the job for now. Made up wire hooks too, then with the stretchy material, the radio aerials would maintain their tension, but allow me to easily remove them and the mast when transporting and servicing the model.
▲
⟩⟩
AlessandroSPQR
Martin555
|
💬 Re: Rigging and aerials?
4 years ago by 🇬🇧 ianed57 (
 Sub-Lieutenant) Sub-Lieutenant)✧ 11 Views · 1 Like
Flag
Hi Ron, obtaining crew figures is always a bit of a problem. At 1:16, garden railway figures are reasonably close. We used to have a company doing resin figures, George Turner, but those are hard to get now. There is a German firm called Bruder who do some 1:16 farm figures and I have a couple to work up with Milliput. I have made Milliput figures on a wire armature but they tend to frighten the children!🙂
▲
⟩⟩
Martin555
|
|
Login To
Remove Ads 💬 Re: Rigging and aerials?
4 years ago by 🇬🇧 ianed57 (
Sub-Lieutenant)✧ 11 Views · 1 Like
Flag
Actually Pete, this isn't shirring elastic. I have used that in the past and it tends to go all floppy after a while and it is much thinner. It may suit Ron's purpose as his model seems to be a much smaller scale. This is jewellery elastic, is solid and I have it in sizes of .5mm and 1mm diameters.
▲
⟩⟩
Martin555
|
|
💬 Re: Rigging and aerials?
4 years ago by 🇬🇧 Rookysailor (
 Commodore) Commodore)✧ 11 Views · 1 Like
Flag
The 'Stretchy thread' you mention Ron, is called
Shirring Elastic, I've heard it called many other things like, shearing👎 you will certainly get it from haberdasheries or craft shops, when once again they open. It comes in a few colours, black,white brown, grey, mainly useful colours for us modelers.😊 Cheers, Pete ▲
⟩⟩
Martin555
|
|
💬 Re: Rigging and aerials?
4 years ago by 🇨🇦 Ronald (
Admiral)✧ 11 Views · 1 Like
Flag
Did you carve your crew? Look nice!
▲
⟩⟩
Martin555
|
|
💬 Re: Rigging and aerials?
4 years ago by 🇬🇧 ianed57 (
Sub-Lieutenant)✧ 12 Views · 2 Likes
Flag
Hi Ron,
I added a better photo of the rigging on Veleta. It is a compromise but I started using it for that very reason, catching it with a sleeve and wiping out the masts at the pondside. I try and make my rigging so that it all comes off with the superstructure to save fiddly unhooking with cold wet fingers but it can't always be achieved. I hope you find a solution that suits your purpose. As you say, I think brass masts and flagstaffs help. On Minnow I want to try and put a brass rebar in the wooden flagstaff- not sure how yet! Probably sandwich the brass in between two slices of mahogany and turn the wood. Ian PS added one of Dunlin's rigging too. 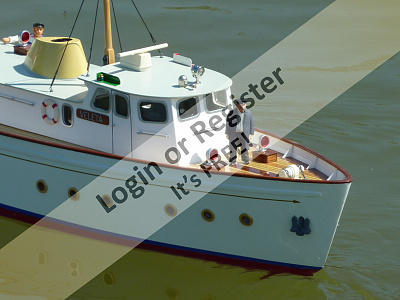
▲
⟩⟩
Inkoust
Martin555
|
|
💬 Re: Rigging and aerials?
4 years ago by 🇨🇦 Ronald (
Admiral)✧ 11 Views · 1 Like
Flag
I may change the white for black or try painting it? You are right at a distance it looks nice.
My biggest concern is when handling or reaching to get something, is the possibility of catching a wire and snapping the plastic mast. I may do that up in brass too, but for now, best to just make it removable along with the wires. ▲
⟩⟩
Martin555
|
|
💬 Re: Rigging and aerials?
4 years ago by 🇬🇧 ianed57 (
Sub-Lieutenant)✧ 11 Views · 2 Likes
Flag
Yes, that's right. I'd forgotten is was on that boat too. I have just received some 0.45mm stainless steel rope to do the standing rigging on my steam yacht. I have been experimenting with making a loop and sticking with cyano and then covering with heat shrink which you can shrink in this case, of course. It saves having an ugly, out of scale crimp in the wire. Again received courtesy of ebay. I suppose all this depends on what sacle you are working to - I tend to use fairly large scales- 1:32 up to 1:16.
PS Both Dunlin and Veleta in my boat harbour have black elastic rigging, it looks OK from a distance. ▲
⟩⟩
Martin555
Ronald
|
|
💬 Re: Rigging and aerials?
4 years ago by 🇨🇦 Ronald (
Admiral)✧ 11 Views · 1 Like
Flag
Ron here...I plan to replace the bow plastic post with brass as was done to the aft post.
▲
⟩⟩
Martin555
|
|
💬 Re: Rigging and aerials?
4 years ago by 🇨🇦 Ronald (
Admiral)✧ 11 Views · 1 Like
Flag
Is the boat you were referring to in your comment? Do I see black shrink here?
▲
⟩⟩
Martin555
|
|
💬 Re: Rigging and aerials?
4 years ago by 🇬🇧 ianed57 (
Sub-Lieutenant)✧ 11 Views · 2 Likes
Flag
Hi Ron,
I have used black jewellery elastic in the past. It comes in various diameters and can be bought on ebay. It isn't terribly realistic but can be bent over and stuck with cyano and does ping back if inadvertantly touched. I have also covered the end loop with heatshrink, but you can't heat it! It seems to be quite durable, I have had some on one model for over twenty years. Ian ▲
⟩⟩
Ronald
Martin555
|
📝 Do Not Trust the porthole material in the kit.
4 years ago by 🇨🇦 Ronald ( Admiral)
Admiral)✧ 11 Views · 2 Likes
Flag
💬 Add Comment
The kit came with funny windows that were self sticking which were for the port holes along both sides of the hull. I did not trust the self stick so added C.A. which I figured was good.
After some spray paint got on a window, I was rubbing it to remove the paint. POP out came the port hole window! I checked the others and they also popped out with just a slight bit of pressure.
Glad this happened on the workbench and not out on the water!
In my resources, I keep clear packaging materials which work well for clear parts. Cut into strips, these were glued and clamped to the inside of the hull using C.A.: Watch those fumes!! I opened the window and turned on my exhaust fan, then went out closing the door behind me.
▲
⟩⟩
AlessandroSPQR
Martin555
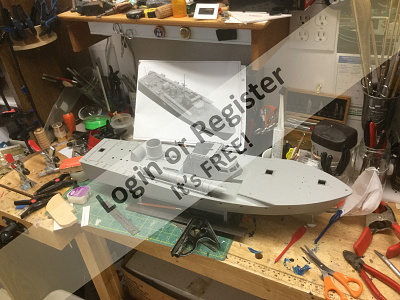
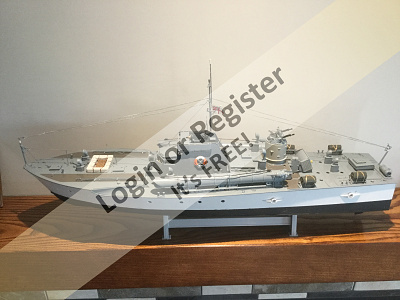
📝 Ready to be water tested
4 years ago by 🇨🇦 Ronald ( Admiral)
Admiral)✧ 11 Views · 3 Likes
Flag
💬 Add Comment
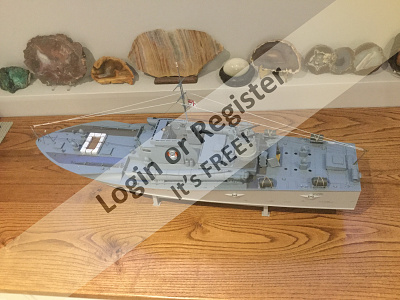
Bathtub is too small to properly give this a water test. Once our pond is open for use, it will be water tested.
▲
⟩⟩
AlessandroSPQR
Trident73
Martin555


Login To
Remove Ads
Remove Ads