Join Us On Social Media!

|

|

|
Download The App!
Login To
Remove Ads
Remove Ads
Login To
Remove Ads
Remove Ads
Model Boats Website
Planking the side panels
1 Post · 1 Follower · 7 Photos · 6 Likes
Began 3 years ago by
 United Kingdom
Follow This Thread
Not currently following
> Click to follow
> Click to follow
Latest Post 3 years ago by
| Oldest posts shown first (Show Newest First) | (Print Booklet) |
📝 Planking the side panels
3 years ago by 🇬🇧 mturpin013 ( Admiral)
Admiral)✧ 58 Views · 6 Likes · 4 Comments
Flag
💬 Add Comment
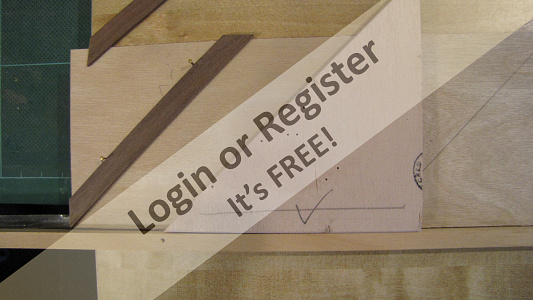
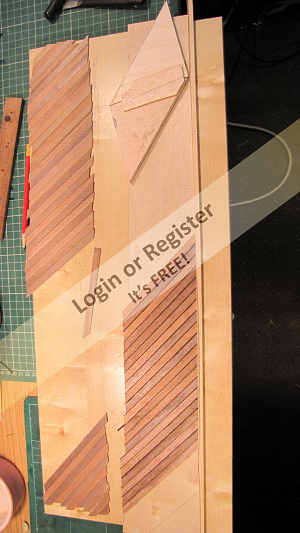
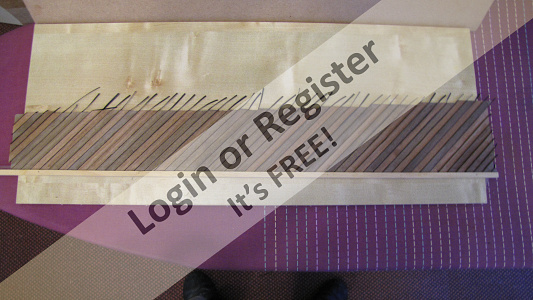
On the real boat the side panels are actually the inside faces of the planked hull and are angled at about 45 degrees, so to try and simulate this I decided to plank some side panels to fit down the sides of the lower deck, Once again I used some 0.8 mm ply as a backing. The backing sheets were cut to the shape of the box side which is tapered towards the stern, next I cut lengths of plank at random to mix the different shades and the ends are cut to 45 degrees so they can be set against the bottom edge when gluing, these are then laid on the backing sheet in position ready for gluing.
The backing ply is stuck to the building matt (which in turn is stuck to the building board) with double sided tape, this will stop the sheet warping when the glue is drying, it also allows me to fasten a piece of wood along the bottom edge to push each plank against and also to rest the angled “ply pusher” (see picture) against it to ensure each plank is at 45 degrees and is pushed up against the corking.
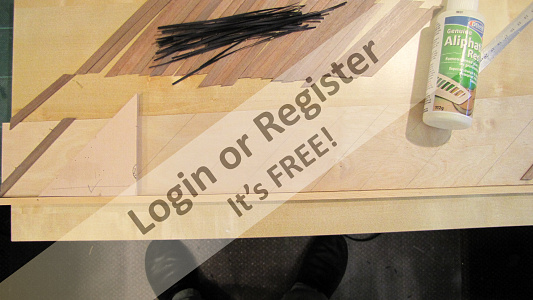
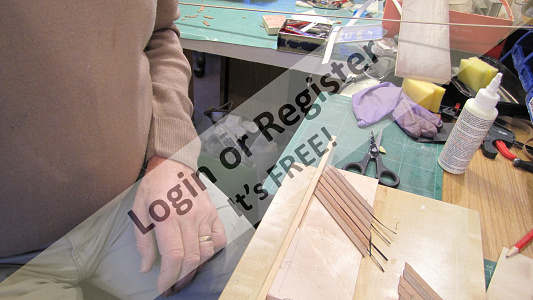
I work from a full length plank first to give a firm piece to push subsequent planks against, I will work from this plank to the right and then finish planks to the left. The process is quite repetitive – spread an area with glue just in front of the last plank then lay a strip of black card against that last plank making sure its covered in glue, then take the next plank and lay in the glue and using the angled “ply pusher” push the plank securely home, then remove any excess glue and repeat the process. This whole process takes about an hour to place all the planks in place, the side piece is then left to fully dry and the second side is prepared ready to glue.
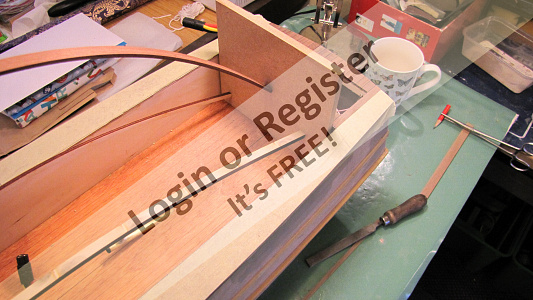
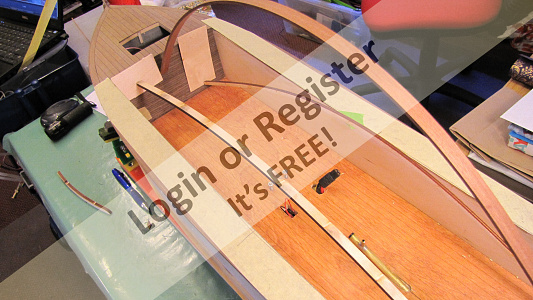
Since the sides are planked with walnut timber its only right that the end sections are treated in the same manner to give a consistent look. For this I had already purchased some walnut veneer which I used on the motor housing. Pieces where cut to size for each end then the surfaces were coated with aliphatic glue and the veneer pushed against each end and pressed home using “ply springs” (bendy ply sticks)against a flat board. Once the ends are set I can then cut out the various apertures that were previously cut out for the wires, pipe ducts and fuse holders, these are carefully cut using taper cutters and small files.
There is a video clip showing my process, please forgive the background music and heavy breathing, it sounds like I'm on my last legs, it must be a very sensitive microphone on the camera😁
The backing ply is stuck to the building matt (which in turn is stuck to the building board) with double sided tape, this will stop the sheet warping when the glue is drying, it also allows me to fasten a piece of wood along the bottom edge to push each plank against and also to rest the angled “ply pusher” (see picture) against it to ensure each plank is at 45 degrees and is pushed up against the corking.
I work from a full length plank first to give a firm piece to push subsequent planks against, I will work from this plank to the right and then finish planks to the left. The process is quite repetitive – spread an area with glue just in front of the last plank then lay a strip of black card against that last plank making sure its covered in glue, then take the next plank and lay in the glue and using the angled “ply pusher” push the plank securely home, then remove any excess glue and repeat the process. This whole process takes about an hour to place all the planks in place, the side piece is then left to fully dry and the second side is prepared ready to glue.
Since the sides are planked with walnut timber its only right that the end sections are treated in the same manner to give a consistent look. For this I had already purchased some walnut veneer which I used on the motor housing. Pieces where cut to size for each end then the surfaces were coated with aliphatic glue and the veneer pushed against each end and pressed home using “ply springs” (bendy ply sticks)against a flat board. Once the ends are set I can then cut out the various apertures that were previously cut out for the wires, pipe ducts and fuse holders, these are carefully cut using taper cutters and small files.
There is a video clip showing my process, please forgive the background music and heavy breathing, it sounds like I'm on my last legs, it must be a very sensitive microphone on the camera😁
▲
⟩⟩
stevedownunder
jacko
robbob
Graham93
Martin555
Ianh
|
💬 Re: Planking the side panels
3 years ago by 🇬🇧 mturpin013 (
Admiral)✧ 26 Views · 2 Likes
Flag
Hi Rob its amazing what you give away in a simple post, The main reason for this post was to show a quicker method of planking rather than waiting for each plank to dry before putting on the next.
▲
⟩⟩
stevedownunder
Martin555
|
|
Login To
Remove Ads 💬 Re: Planking the side panels
3 years ago by 🇬🇧 mturpin013 (
Admiral)✧ 26 Views · 2 Likes
Flag
Hi Stephen Its a Cannon sure shot its really useful as it has a digital screen that can rotate upside down and backwards
▲
⟩⟩
stevedownunder
Martin555
|
|
💬 Re: Planking the side panels
3 years ago by 🇦🇺 stevedownunder (
 Captain) Captain)✧ 31 Views · 1 Like
Flag
Great work Mike,
Lovely little video, Rob got in before me about Darth Vader. 🤣 What is the camera you are using? Cheers, Stephen. ▲
⟩⟩
Martin555
|
|
💬 Re: Planking the side panels
3 years ago by 🇬🇧 robbob (
Admiral)✧ 40 Views · 2 Likes
Flag
Hi Mike.
Great methodical work. I like the 'ply spring' idea for pressing the panels in place 👍 Nice video too.....I didn't know that Darth Vader was your alter ego 🤣 Rob. ▲
⟩⟩
stevedownunder
Martin555
|


Login To
Remove Ads
Remove Ads