Join Us On Social Media!

|

|

|
Download The App!
Login To
Remove Ads
Remove Ads
Login To
Remove Ads
Remove Ads
Model Boats Website
Morston - H A Kits (small version)
11 Posts · 12 Followers · 43 Photos · 75 Likes
Began 3 years ago by
 United Kingdom
Follow This Thread
Not currently following
> Click to follow
> Click to follow
Latest Post 3 years ago by
| Oldest posts shown first (Show Newest First) | (Print Booklet) |
📝 Morston - H A Kits (small version)
3 years ago by 🇬🇧 Seanympth ( Chief Petty Officer 2nd Class)
Chief Petty Officer 2nd Class)✧ 162 Views · 13 Likes · 4 Comments
Flag
💬 Add Comment
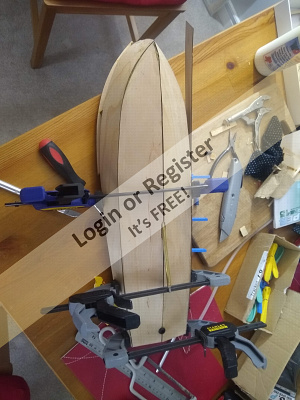
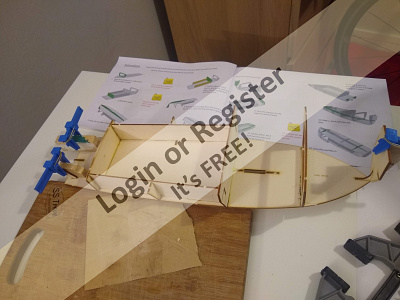
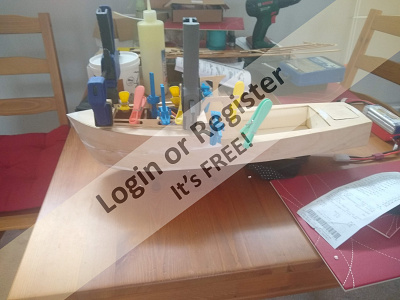
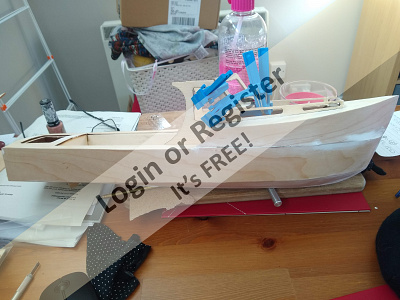
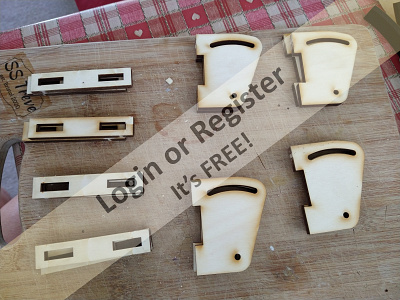
First, big thanks to Geoff, aka Mistyopoc, without his build blog to inspire/instruct me and his very helpful messages I would have made some basic mistakes.
I have not built a model for over 50 years and I do not think that my skill level has improved since I was 14. However this kit has been a pleasure, it is well cut on what to me feels like quality wood, the instructions are clear and well written.
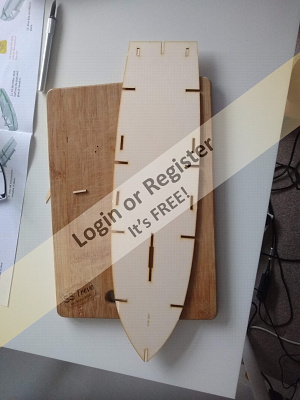
I have been building it slowly and have just glued the bottom and side skins to the frame, I struggled with this and whilst it is not the best job I think it will look OK after I have sanded it.
The only small criticism of Kit is that you have to figure out the motor mounting, battery holder etc yourself, but thanks to Geoff's blog and pictures all good.
I have not built a model for over 50 years and I do not think that my skill level has improved since I was 14. However this kit has been a pleasure, it is well cut on what to me feels like quality wood, the instructions are clear and well written.
I have been building it slowly and have just glued the bottom and side skins to the frame, I struggled with this and whilst it is not the best job I think it will look OK after I have sanded it.
The only small criticism of Kit is that you have to figure out the motor mounting, battery holder etc yourself, but thanks to Geoff's blog and pictures all good.
▲
⟩⟩
mturpin013
JOHN
mistyoptic
Madwelshman
shamrok
jacko
TonyAsh
RNinMunich
Colin H
MouldBuilder
Ianh
Peejay
Martin555
|
💬 Re: Morston - H A Kits (small version)
3 years ago by 🇬🇧 zooma (
 Sub-Lieutenant) Sub-Lieutenant)✧ 159 Views · 2 Likes
Flag
That is a nice looking build - good effort!👍
▲
⟩⟩
Seanympth
Martin555
|
|
Login To
Remove Ads 💬 Re: Morston - H A Kits (small version)
3 years ago by 🇬🇧 Colin H (
 Fleet Admiral) Fleet Admiral)✧ 162 Views · 3 Likes
Flag
Great start shipmate, it looks a very good starter /return to the hobby model.
Keep it up and thanks for sharing, Colin. ▲
⟩⟩
mistyoptic
Martin555
Seanympth
|
|
💬 Re: Morston - H A Kits (small version)
3 years ago by 🇨🇦 Newby7 (
Fleet Admiral)✧ 163 Views · 3 Likes
Flag
Good job for 50 years between builds.Keep up the good work.
Rick ▲
⟩⟩
mistyoptic
Martin555
Seanympth
|
|
💬 Re: Morston - H A Kits (small version)
3 years ago by 🇬🇧 Martin555 (
Fleet Admiral)✧ 160 Views · 2 Likes
Flag
Hi Seanympth.
A great start. Keep up the good work. Martin555. ▲
⟩⟩
mistyoptic
Seanympth
|
Login To
Remove Ads
Remove Ads
📝 Morston update
3 years ago by 🇬🇧 Seanympth ( Chief Petty Officer 2nd Class)
Chief Petty Officer 2nd Class)✧ 162 Views · 6 Likes · 2 Comments
Flag
💬 Add Comment
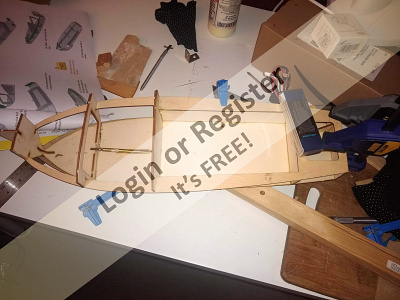
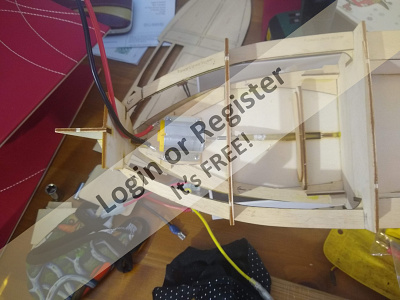
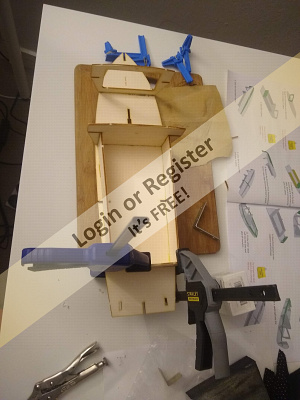
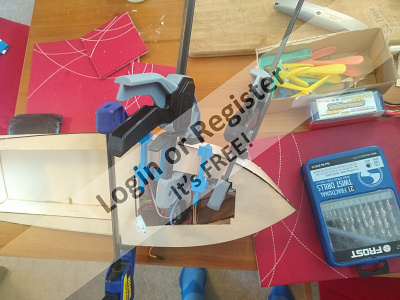
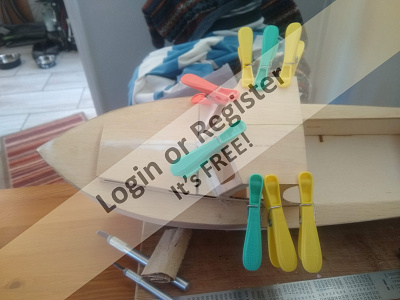
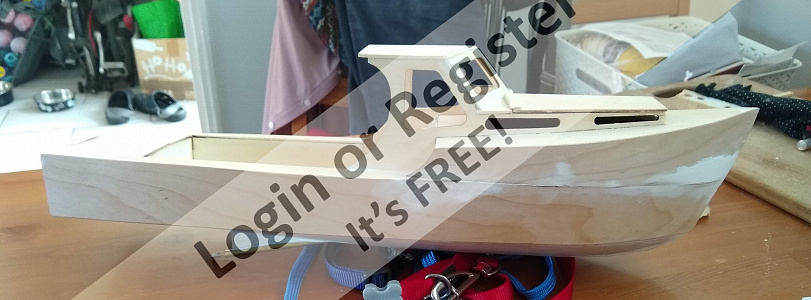
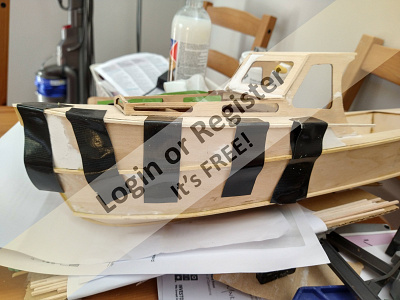
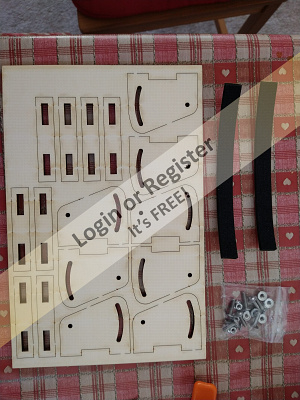
Well after a struggle I finished glueing the sides and have started the cabin. Once again thanks Geoff for the tip to drill a small screw to hold the bits that cannot be clamped, I would never have thought it would work but it did.
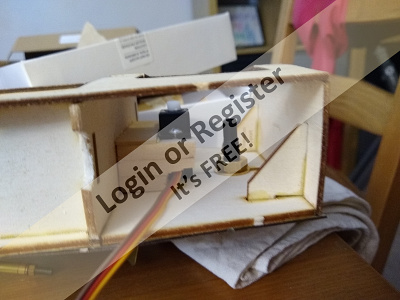
I filled and sanded the hull before starting the cabin, thank goodness for pegs, clamps etc. One point, as this is the small kit of Morston, the space under the rear hatch is tight for the rudder and servo, there is only 5mm from the top of the servo arm to the bottom of the hatch, once again Geoff came to my help with piano wire to join the servo and rudder, I am using a micro servo as the regular was too tall.
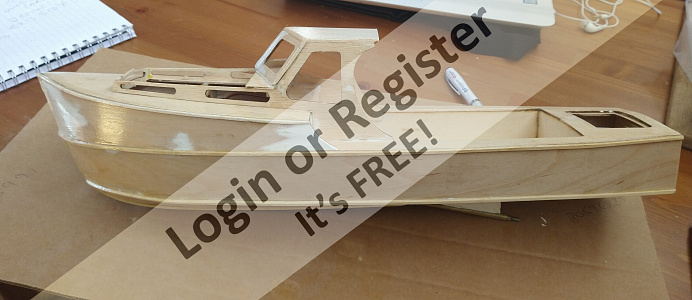
This has been a great kit to build, the timber, cutting of the parts has made it a pleasure to build, any mistakes are mine for not reading the instructions but thanks to Geoff I have been able to correct them.
I would have no hesitation in recommending a kit from HA Kits based on this one. It also has very pleasing lines to my eye as a bonus.
Geoff will probably be messaged as he said the cabin roof was the hard part! Any way that's the next task
I filled and sanded the hull before starting the cabin, thank goodness for pegs, clamps etc. One point, as this is the small kit of Morston, the space under the rear hatch is tight for the rudder and servo, there is only 5mm from the top of the servo arm to the bottom of the hatch, once again Geoff came to my help with piano wire to join the servo and rudder, I am using a micro servo as the regular was too tall.
This has been a great kit to build, the timber, cutting of the parts has made it a pleasure to build, any mistakes are mine for not reading the instructions but thanks to Geoff I have been able to correct them.
I would have no hesitation in recommending a kit from HA Kits based on this one. It also has very pleasing lines to my eye as a bonus.
Geoff will probably be messaged as he said the cabin roof was the hard part! Any way that's the next task
▲
⟩⟩
mturpin013
MouldBuilder
mistyoptic
Rookysailor
Colin H
Martin555
|
💬 Re: Morston update
3 years ago by 🇬🇧 mistyoptic (
 Midshipman) Midshipman)✧ 161 Views · 2 Likes
Flag
Well Done Treve for showing your work to date and thanks for sharing my affection for this design. It is a lovely kit to build and I endorse your recommendation of this company. Keep up the good work and thanks for sharing.
Geoff ▲
⟩⟩
Martin555
Seanympth
|
|
💬 Re: Morston update
3 years ago by 🇨🇦 Newby7 (
Fleet Admiral)✧ 163 Views · 3 Likes
Flag
The boat is coming nicely. Your comments on recommending this kit and seller will help others if looking for something to build.
Rick ▲
⟩⟩
mistyoptic
Seanympth
Martin555
|
📝 Morston - H A Kits (small version) Cabin fun
3 years ago by 🇬🇧 Seanympth ( Chief Petty Officer 2nd Class)
Chief Petty Officer 2nd Class)✧ 153 Views · 3 Likes · 2 Comments
Flag
💬 Add Comment
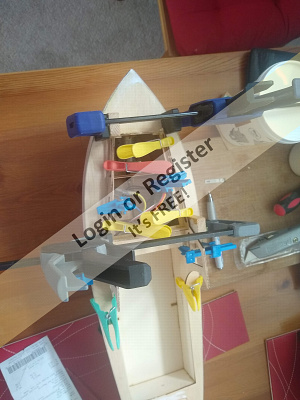
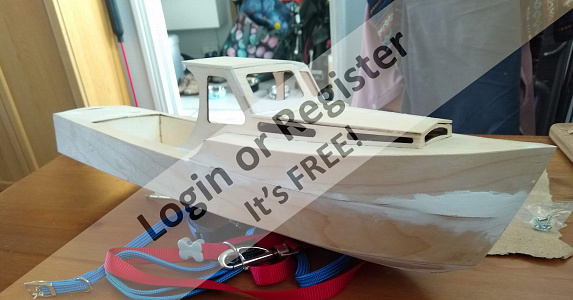
Well the last three weeks have flown by with little work on the slipway, Geoff was right the cabin roof and cockpit are a challenge, I have muddled through and whilst the result is not perfect I am hoping a bit of filler will help me out.
I struggled to figure out how to fit the roof to the cabin as despite my effort the cabin was not square but in the end, it seems to fit, can anyone suggest fitting a catch to keep it on when it is finally afloat? The front windscreen is another challenge to shape the edges for a neet fit but what is life without a challenge.
Just the Cabin roof to fit and its on to painting, I am thinking of a couple of shades of blue for the hull at the moment. I am planning to leave the roof off until I have finished painting the cockpit.
▲
⟩⟩
Martin555
Colin H
mistyoptic
|
💬 Re: Morston - H A Kits (small version) Cabin fun
3 years ago by 🇬🇧 Scamp (
 Petty Officer 1st Class) Petty Officer 1st Class)✧ 130 Views · 1 Like
Flag
I have used very small magnets or velcro to hold hatch lockers in place on my RAF fire tender.
▲
⟩⟩
Martin555
|
|
💬 Re: Morston - H A Kits (small version) Cabin fun
3 years ago by 🇬🇧 mistyoptic (
Midshipman)✧ 151 Views · 2 Likes
Flag
Treve, I think you will probably find that the hatch will sit comfortably in place during sailing, unless you reach considerable speed!
Keep up the good work. Geoff ▲
⟩⟩
Martin555
Seanympth
|
📝 Window and roof
3 years ago by 🇬🇧 Seanympth ( Chief Petty Officer 2nd Class)
Chief Petty Officer 2nd Class)✧ 151 Views · 5 Likes · 1 Comment
Flag
💬 Add Comment
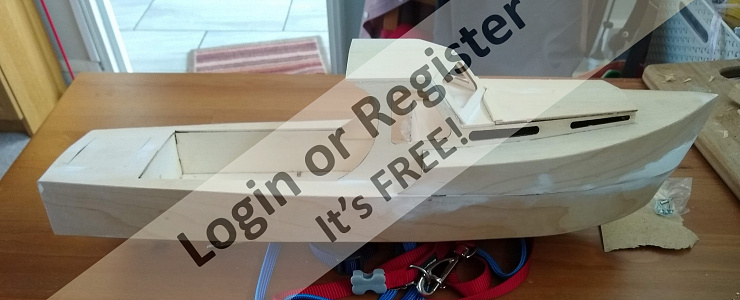
This has been challenging but satisfying thank goodness for modern fillers and fine sandpaper.
I am pleased to say that the roof is now drying and the front windows in place, final filling and sanding and then the first undercoat to go on, Geoff's outstanding model has inspired me to try for some cabin furniture and an attempt at a crab pot but I'll see how it goes.
I am pleased to say that the roof is now drying and the front windows in place, final filling and sanding and then the first undercoat to go on, Geoff's outstanding model has inspired me to try for some cabin furniture and an attempt at a crab pot but I'll see how it goes.
▲
⟩⟩
Martin555
Colin H
mturpin013
Rookysailor
mistyoptic
|
💬 Re: Window and roof
3 years ago by 🇬🇧 mistyoptic (
Midshipman)✧ 149 Views · 1 Like
Flag
Coming along nicely Treve, keep at it.
Geoff ▲
⟩⟩
Martin555
|
📝 Ready for painting
3 years ago by 🇬🇧 Seanympth ( Chief Petty Officer 2nd Class)
Chief Petty Officer 2nd Class)✧ 146 Views · 10 Likes · 6 Comments
Flag
💬 Add Comment
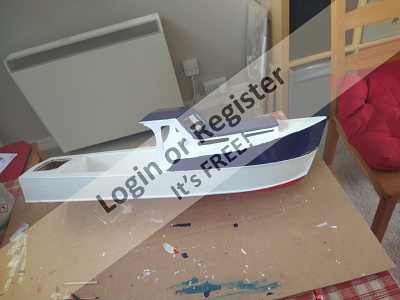
Well, sandpaper and filler, done the wood is smooth and I can now start the undercoating.
I have had enormous pleasure in building my first boat in 52 years.
Its not perfect, it has many little faults these are my mistakes but I am very pleased with it.
I think that the painting will take a while and having seen Geoffs photo's he has inspired me to be more creative than I would have been.
Thank you everyone for your kind comments and support
▲
⟩⟩
Martin555
Colin H
mturpin013
jbkiwi
RNinMunich
Rookysailor
mistyoptic
MouldBuilder
Ronald
JOHN
|
💬 Re: Ready for painting
3 years ago by 🇬🇧 Seanympth (
Chief Petty Officer 2nd Class)✧ 125 Views · 1 Like
Flag
Many thanks for your kind comments, it has been a pleasure to build this kit, it has challenged me and thanks to this website and Geoff I am pleased with the result and looking forward to painting her and finally sail her soon.
▲
⟩⟩
Martin555
|
|
Login To
Remove Ads 💬 Re: Ready for painting
3 years ago by 🇬🇧 mturpin013 (
 Admiral) Admiral)✧ 126 Views · 2 Likes
Flag
That's a great piece of work after 52 years, however there are skills you never forget. I look forward to the next build
▲
⟩⟩
Martin555
Seanympth
|
|
💬 Re: Ready for painting
3 years ago by 🇬🇧 Seanympth (
Chief Petty Officer 2nd Class)✧ 141 Views · 3 Likes
Flag
Many thanks for your advice, I would have gone straight to undercoat. Thank you for taking the time. Best wishes Treve
▲
⟩⟩
Martin555
mistyoptic
RNinMunich
|
|
💬 Re: Ready for painting
3 years ago by 🇩🇪 RNinMunich (
Fleet Admiral)✧ 144 Views · 4 Likes
Flag
I agree with Ron 👍
At least seal and strengthen the wood with a couple of coats of EzeKote water based resin. First coat diluted with ca 15% water to soak in. Then two coats neat. You'll then have a strong water tight hull and a good base for painting 😀 "Don't spoil the ship for a ha'p'orth of resin!" Cheers, Doug 😎 Agopolies if instructing your Mum's Mum to extract yokes from eggs! 😉 ▲
⟩⟩
Martin555
Ronald
Seanympth
MouldBuilder
|
|
💬 Re: Ready for painting
3 years ago by 🇨🇦 Ronald (
Admiral)✧ 145 Views · 4 Likes
Flag
Hang on before painting. Will you be applying a fiberglass layer ? that should be done before painting.
▲
⟩⟩
Martin555
Seanympth
MouldBuilder
RNinMunich
|
|
💬 Re: Ready for painting
3 years ago by 🇨🇦 Newby7 (
Fleet Admiral)✧ 144 Views · 2 Likes
Flag
52 Years that's a long time between builds.Good to hear you had fun with the build
Paint away and have fun doing it. How creative can you be. LOL Rick ▲
⟩⟩
Martin555
Seanympth
|
📝 I had forgotten the rubbing strips
3 years ago by 🇬🇧 Seanympth ( Chief Petty Officer 2nd Class)
Chief Petty Officer 2nd Class)✧ 123 Views · 5 Likes · 4 Comments
Flag
💬 Add Comment
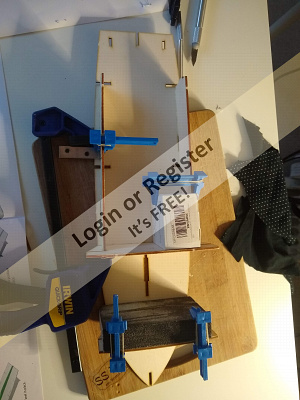
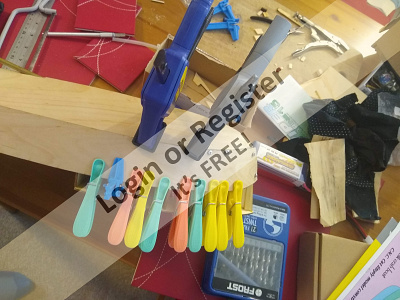
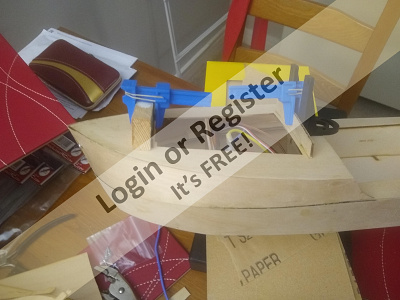
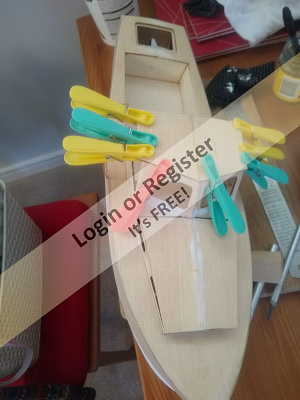
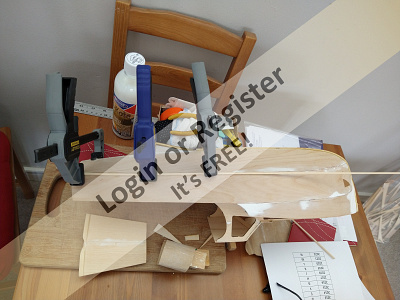
Well it pays to read the instructions! Thankfully I had taken the advice to spend a bit more time on preparation and its amazing when you look closely that the surface is not as good as you thought it was. Then I realised that I had not put the rubbing strips on so once more the fun with clamps and tape. I love these cheap clamps from Toolstation but still could do with another pair of hands.
I have the Eze Kote resin so as soon as the strips are on and the joins smooth it will be time for the paint brush
I have the Eze Kote resin so as soon as the strips are on and the joins smooth it will be time for the paint brush
▲
⟩⟩
Martin555
RNinMunich
Colin H
mistyoptic
Ianh
|
💬 Re: I had forgotten the rubbing strips
3 years ago by 🇬🇧 mturpin013 (
Admiral)✧ 119 Views · 3 Likes
Flag
At least its allowed you to re-asses the hull for for any defects before painting and its easier to sand when the rubbing strakes aren't on
▲
⟩⟩
Martin555
RNinMunich
Seanympth
|
|
Login To
Remove Ads 💬 Re: I had forgotten the rubbing strips
3 years ago by 🇬🇧 mistyoptic (
Midshipman)✧ 121 Views · 2 Likes
Flag
Good luck with the finishing Treve, but don't hurry it. REgards
Geoff ▲
⟩⟩
Martin555
Seanympth
|
|
💬 Re: I had forgotten the rubbing strips
3 years ago by 🇳🇿 jbkiwi (
Fleet Admiral)✧ 120 Views · 2 Likes
Flag
Re - There's always something that trips you up😊
Depends if they are non trip chines or not Ian, 😁😂 JB ▲
⟩⟩
Martin555
Seanympth
|
|
💬 Re: I had forgotten the rubbing strips
3 years ago by 🇿🇦 Ianh (
 Commander) Commander)✧ 129 Views · 2 Likes
Flag
There's always something that trips you up😊😊
▲
⟩⟩
Martin555
Seanympth
|
📝 And I thought this would be a quick easy part!
3 years ago by 🇬🇧 Seanympth ( Chief Petty Officer 2nd Class)
Chief Petty Officer 2nd Class)✧ 117 Views · 5 Likes · 1 Comment
Flag
💬 Add Comment
Well as I am sure everyone knows it's not easy to fit the chines or rubbing strips as I called them, just not enough hands, thank goodness for Gorilla tape, maybe this week to start on the Eze Kote. But its fun, thank you all for your support. I am going to need more gentil sanding to remove a bit os spare glue

▲
⟩⟩
Martin555
Ianh
mturpin013
mistyoptic
Colin H
|
💬 Re: And I thought this would be a quick easy part!
3 years ago by 🇬🇧 Colin H (
Fleet Admiral)✧ 116 Views · 3 Likes
Flag
Good afternoon seanymph,
I always put on the strakes, spray rails and rubbing strips after the Ezekote and fibreglass, that way any external damage is restricted to the areas meant for the purpose. Cheers Colin. ▲
⟩⟩
Martin555
RNinMunich
JOHN
|
📝 What a big difference Eze Kote has made
3 years ago by 🇬🇧 Seanympth ( Chief Petty Officer 2nd Class)
Chief Petty Officer 2nd Class)✧ 113 Views · 6 Likes · 12 Comments
Flag
💬 Add Comment
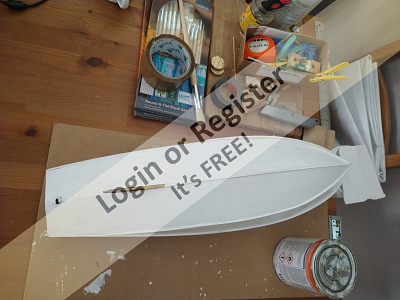
Just wanted to say that work on the slipway has been a little delayed recently but she now has 3 coats of Eze Kote on and the surface is much better.
Thank you for your advice, now a sand and undercoat.
Thank you for your advice, now a sand and undercoat.
▲
⟩⟩
Martin555
Colin H
mturpin013
mistyoptic
RNinMunich
billmcl61
|
💬 Re: What a big difference Eze Kote has made
3 years ago by 🇩🇪 RNinMunich (
Fleet Admiral)✧ 73 Views · 1 Like
Flag
Fy mhleser Will, gobeithio y bydd yn helpu. (I think!😉)
Cheers, Doug 😎 ▲
⟩⟩
Seanympth
|
|
Login To
Remove Ads 💬 Re: What a big difference Eze Kote has made
3 years ago by 🇬🇧 Madwelshman (
Midshipman)✧ 77 Views · 2 Likes
Flag
Thanks Doug, all this advice is very helpful for an amateur and newbie to working with wood like I am.
Will ▲
⟩⟩
Martin555
RNinMunich
|
|
💬 Re: What a big difference Eze Kote has made
3 years ago by 🇬🇧 Madwelshman (
Midshipman)✧ 77 Views · 1 Like
Flag
Thank you for the advice, much appreciated.
Will ▲
⟩⟩
Martin555
|
|
💬 Re: What a big difference Eze Kote has made
3 years ago by 🇩🇪 RNinMunich (
Fleet Admiral)✧ 74 Views · 3 Likes
Flag
"... and it needs to be done in an open space as the smell from the resin is not pleasant."
That's rather the point with EzeKote jb, It's a water based resin, needs no hardener, and has no evil gas emissions or pong at all 😀 You can also use it as a sanding sealer (and balsa strengthener😀) by adding 10-15% water. Finish with 2 or 3 coats of neat resin, sanding with 320 / 400 / 600 W&D between coats and you end up with a sound strong hull ready for priming and top coating. I only use tissue on the inside of the hull, esp to strengthen parts gone thin due to shaping / sanding. More usually on a restoration job. Cheers, Doug 😎 ▲
⟩⟩
Martin555
Madwelshman
Seanympth
|
|
💬 Re: What a big difference Eze Kote has made
3 years ago by 🇬🇧 jelley_baby (
 Chief Petty Officer 1st Class) Chief Petty Officer 1st Class)✧ 104 Views · 7 Likes
Flag
Hi, I used to use Sanding Sealer, to finish before painting, and I assume that Eze Kote is a similar product. With smaller hulls using fibreglass and tissue is probably unnecessary but if I were reselling a Sea Commander I think that I would use Fibreglass resin and a light tissue, as with a little finishing the hull will have a good strength and finish, when I restored my Sea Commander I did just that and the hull now feels solid. I will add however that the first time you do it is the worst, and it needs to be done in an open space as the smell from the resin is not pleasant.
Hope these comments help. ▲
⟩⟩
Martin555
billmcl61
NigelTailyour
mistyoptic
Madwelshman
Seanympth
Colin H
|
|
💬 Re: What a big difference Eze Kote has made
3 years ago by 🇮🇪 billmcl61 (
 Warrant Officer) Warrant Officer)✧ 108 Views · 3 Likes
Flag
Hi Treve,
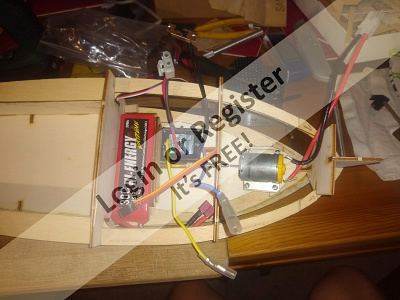
Many thanks for the photos, they'll be a huge help. Sure is compact in there, good solution for placing the battery though. Bill ▲
⟩⟩
Martin555
Seanympth
mistyoptic
|
|
💬 Re: What a big difference Eze Kote has made
3 years ago by 🇮🇪 billmcl61 (
Warrant Officer)✧ 107 Views · 3 Likes
Flag
Hi Geoff,
They look perfect thanks Bill ▲
⟩⟩
Martin555
Seanympth
mistyoptic
|
|
💬 Re: What a big difference Eze Kote has made
3 years ago by 🇬🇧 Madwelshman (
Midshipman)✧ 109 Views · 2 Likes
Flag
Excuse my ignorance here 🤔, but will the Eze Kote act as a sealer on the wood, so you won't need to glass cloth the hull afterwards?
I haven't done anything with wooden hulled model boats until recently and as all of my need work of some sort, I wondered if this is an alternative to glass cloth to seal the wood/hull? Thanks Will ▲
⟩⟩
Martin555
Seanympth
|
|
💬 Re: What a big difference Eze Kote has made
3 years ago by 🇬🇧 Seanympth (
Chief Petty Officer 2nd Class)✧ 111 Views · 2 Likes
Flag
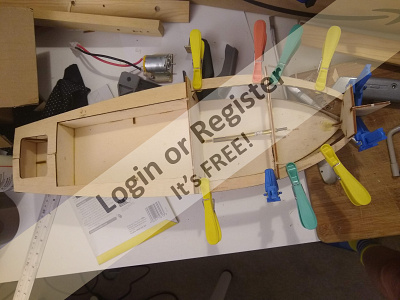
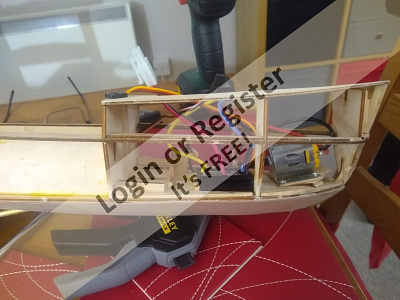
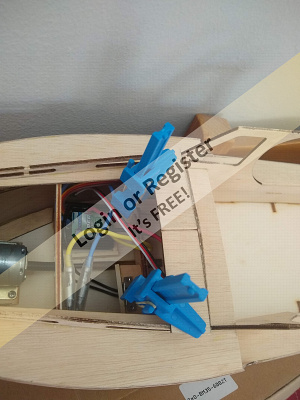
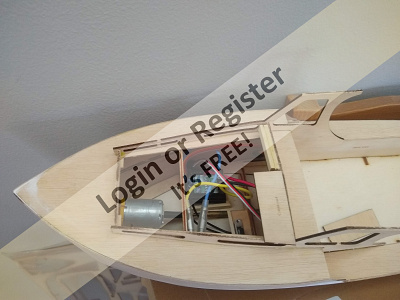
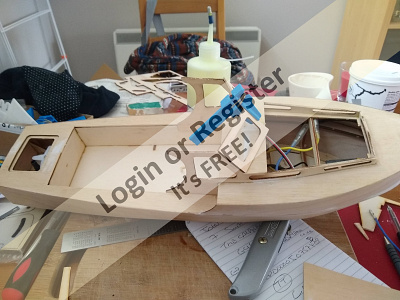
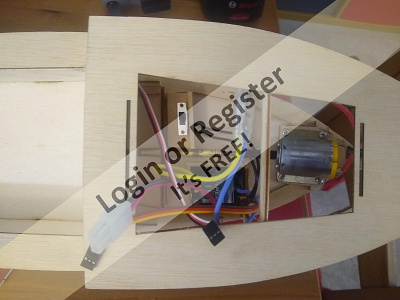
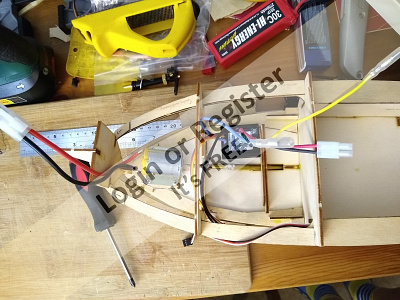
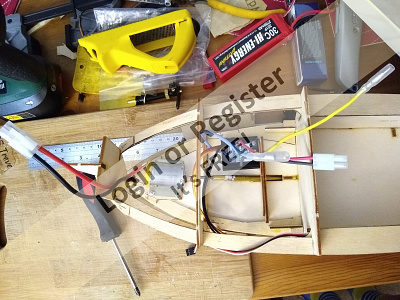
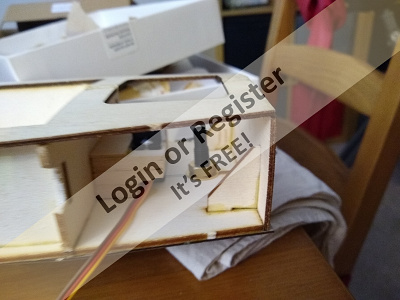
Hi Bill, the space is tight on this smaller model, the only place for the battery was the floor against the bulkhead I made a tray from scrap to hold it and the switch for the speed controller as you can see space becomes tight when the decking and sides are on.
It took me a while to figure out how to mount everything and the members were very helpful as I thought that the speed controller needed a clip. As the clearance is tight for the rudder I had to use a micro servo as the normal one is too tall. Once again a big thank you to Geoff for his advice. I have attached the photos that show the layout I used, there is no space or access under the cockpit floor. I hope this is helpful, any questions please ask. Thanks Treve 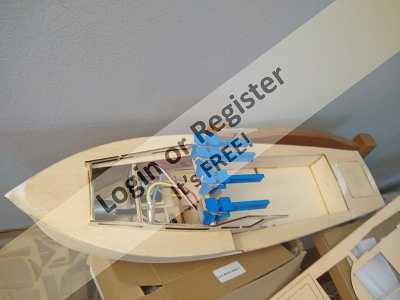
▲
⟩⟩
Martin555
mistyoptic
|
|
💬 Re: What a big difference Eze Kote has made
3 years ago by 🇬🇧 mistyoptic (
Midshipman)✧ 109 Views · 2 Likes
Flag
Hi Bill Have a look at Overlander 5 cell Nimh 1600, super little pack. size is given on site so you can check for fit Best Wishes,
Geoff ▲
⟩⟩
Martin555
Seanympth
|

|
💬 Re: What a big difference Eze Kote has made
3 years ago by 🇬🇧 mistyoptic (
Midshipman)✧ 109 Views · 2 Likes
Flag
Looking good Treve,
Regards Geoff ▲
⟩⟩
Martin555
Seanympth
|
|
💬 Re: What a big difference Eze Kote has made
3 years ago by 🇮🇪 billmcl61 (
Warrant Officer)✧ 107 Views · 2 Likes
Flag
Hi Treve,
Its looking good, the eze-kote certainly makes a difference. I'm just waiting on my stuff to arrive so that I can get started, I'll be getting the same size of boat as you. Just one question, where are you putting the batteries, it doesn't look like there's much room below decks, I'm thinking of 4 cell Ni-cad flat packs, which should (hopefully) sit under the main rear cabin. Bill ▲
⟩⟩
Martin555
Seanympth
|
📝 2 coats of undercoating completed
3 years ago by 🇬🇧 Seanympth ( Chief Petty Officer 2nd Class)
Chief Petty Officer 2nd Class)✧ 83 Views · 6 Likes · 2 Comments
Flag
💬 Add Comment
Now for the fun bit! It all takes longer but I am looking forward to hopefully launching her soon.
▲
⟩⟩
Colin H
Martin555
billmcl61
RNinMunich
mturpin013
mistyoptic
|
💬 Re: 2 coats of undercoating completed
3 years ago by 🇬🇧 Martin555 (
Fleet Admiral)✧ 63 Views · 0 Likes
Flag
For your first model boat after a 52 year rest i think you Are doing a wonderful job.
I bet it started brining back memories. I can't wait to see her in her final colours. Keep up the good work. Martin555. ▲
⟩⟩
No likes yet
This member will receive 1 point for every like received |
|
💬 Re: 2 coats of undercoating completed
3 years ago by 🇬🇧 mistyoptic (
Midshipman)✧ 75 Views · 3 Likes
Flag
Looking good Treve, Well worth the effort you have put in, looking forward to seeing the top coat.
Geoff. ▲
⟩⟩
Martin555
billmcl61
Seanympth
|
📝 I am finding the painting very slow
3 years ago by 🇬🇧 Seanympth ( Chief Petty Officer 2nd Class)
Chief Petty Officer 2nd Class)✧ 62 Views · 8 Likes · 5 Comments
Flag
💬 Add Comment
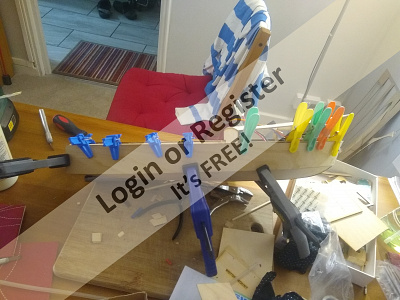
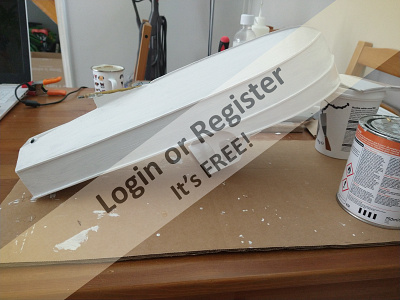
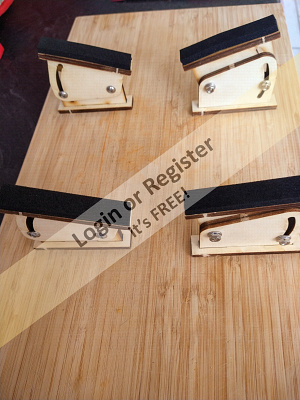
Its probably because I am finding it fiddly but that's the nature of the game.
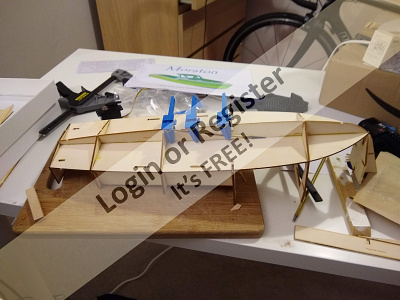
Its a bit rough and still a few more coats not so happy with the colour's I was hoping for a 'Cornish' fishing boat blue but we will see how it ends up.
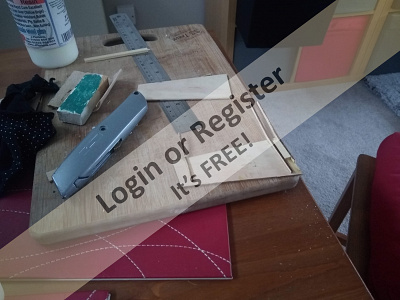
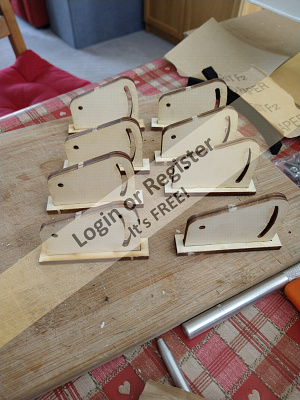
Just assembled the HAK kit stand, its simple, cheap and does the job perfectly. I will glue it on to an Ikea chopping board when they open.
Its a bit rough and still a few more coats not so happy with the colour's I was hoping for a 'Cornish' fishing boat blue but we will see how it ends up.
Just assembled the HAK kit stand, its simple, cheap and does the job perfectly. I will glue it on to an Ikea chopping board when they open.
▲
⟩⟩
BOATSHED
mistyoptic
Fred
billmcl61
jbkiwi
Colin H
Rookysailor
Martin555
|
💬 Re: I am finding the painting very slow
3 years ago by 🇬🇧 Martin555 (
Fleet Admiral)✧ 49 Views · 1 Like
Flag
Hi Zooma,
If you thin the paint a little and rub down in between coats you should get a better Finnish. Thinning the paint will make it runnier but you get a lot less brush marks. Martin555. ▲
⟩⟩
BOATSHED
|
|
Login To
Remove Ads 💬 Re: I am finding the painting very slow
3 years ago by 🇬🇧 zooma (
Sub-Lieutenant)✧ 50 Views · 3 Likes
Flag
I also find painting any of my powerboats to be the slowest part - and for me at least - the worst part!
Cutting the parts from plan and assembling the boat is what I enjoy doing the most, but painting (the bit that shows off the model the best) is not something I enjoy as I am finding it hard to get a really nice brushed finish. ▲
⟩⟩
BOATSHED
Seanympth
Martin555
|
|
💬 Re: I am finding the painting very slow
3 years ago by 🇮🇪 billmcl61 (
Warrant Officer)✧ 55 Views · 3 Likes
Flag
Hi Treve,
I like the colour, and the stand is a great idea. I've had a minor mishap with mine, but this is giving me the urge to restart again. Bill ▲
⟩⟩
BOATSHED
Seanympth
Martin555
|
|
💬 Re: I am finding the painting very slow
3 years ago by 🇬🇧 Seanympth (
Chief Petty Officer 2nd Class)✧ 61 Views · 1 Like
Flag
Many thanks Martin, Best wishes Treve
▲
⟩⟩
Martin555
|
|
💬 Re: I am finding the painting very slow
3 years ago by 🇬🇧 Martin555 (
Fleet Admiral)✧ 59 Views · 1 Like
Flag
I think the colour looks good Treve.
Martin555. ▲
⟩⟩
Seanympth
|


Login To
Remove Ads
Remove Ads