Join Us On Social Media!

|

|

|
Download The App!
Login To
Remove Ads
Remove Ads
Login To
Remove Ads
Remove Ads
Model Boats Website
OcCre Ulises
12 Posts · 8 Followers · 99 Photos · 73 Likes
Began 3 years ago by
 United Kingdom
Follow This Thread
Not currently following
> Click to follow
> Click to follow
Latest Post 9 months ago by
| Oldest posts shown first (Show Newest First) | (Print Booklet) |
📝 OcCre Ulises
3 years ago by 🇬🇧 StuartE ( Chief Petty Officer 1st Class)
Chief Petty Officer 1st Class)✧ 114 Views · 6 Likes · 3 Comments
Flag
💬 Add Comment
After 2 years of being banned from the dining room table, I decided to indulge again in challenging myself to build another boat. I have recently demolished our small shed in the garden and have replaced with a much bigger one which means I now have a man cave and work space.
This OcCre Ulises boat kit is going to challenge my skills further as its a 1/30th scale of an Ocean Tug boat that is almost all planking....hull, deck, cabins etc.
All advice greatly received!!
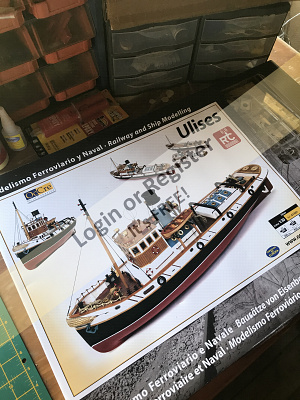
This OcCre Ulises boat kit is going to challenge my skills further as its a 1/30th scale of an Ocean Tug boat that is almost all planking....hull, deck, cabins etc.
All advice greatly received!!
▲
⟩⟩
ChrisG
SimpleSailor
Ronald
MouldBuilder
Colin H
Martin555
|
💬 Re: OcCre Ulises
2 years ago by 🇬🇧 StuartE (
Chief Petty Officer 1st Class)✧ 21 Views · 0 Likes
Flag
Hi SimpleSailor, have you started your build yet?
▲
⟩⟩
No likes yet
This member will receive 1 point for every like received |
|
Login To
Remove Ads 💬 Re: OcCre Ulises
3 years ago by 🇬🇧 SimpleSailor (
Chief Petty Officer 1st Class)✧ 109 Views · 2 Likes
Flag
Ha. I have the same kit. I will keep an eye on your progress as I have not started mine yet..
▲
⟩⟩
StuartE
Martin555
|
|
💬 Re: OcCre Ulises
3 years ago by 🇬🇧 Martin555 (
 Fleet Admiral) Fleet Admiral)✧ 109 Views · 1 Like
Flag
Hi Stuart,
I think you will enjoy making this Tug. Looking at the boats in your Harbour i don't think you will require much help, But if you do then just shout and i am sure the members here will give all the help you need. Good luck with the build I will be following. Congratulations on your promotion to Chief Petty Officer 2nd Class. Martin555. ▲
⟩⟩
StuartE
|
Login To
Remove Ads
Remove Ads
📝 Impressive Kit!
3 years ago by 🇬🇧 StuartE ( Chief Petty Officer 1st Class)
Chief Petty Officer 1st Class)✧ 118 Views · 1 Like · 1 Comment
Flag
💬 Add Comment
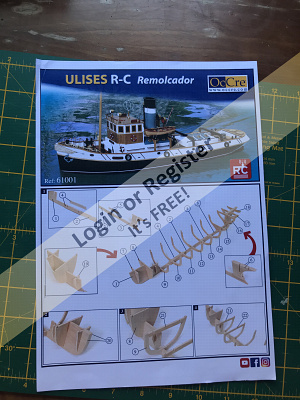
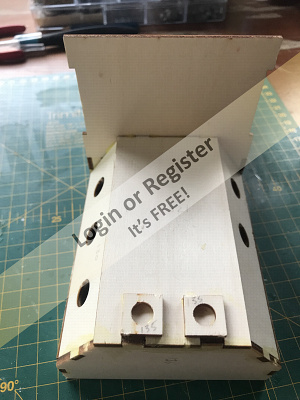
After opening the Box and eager to start on the build, the first thing to note is that the kit is really nicely packed. It has a great instruction booklet, plans, parts lists and an itemised sheet of parts on the laser cut wood. All the numerous metal parts are neatly stored in solid compartmentalised plastic boxes, which can be re-used for storage boxes after the build. For a novice, makes starting this build easy. 👍😁
▲
⟩⟩
Martin555
|
💬 Re: Impressive Kit!
3 years ago by 🇨🇦 Newby7 (
Fleet Admiral)✧ 109 Views · 2 Likes
Flag
Stuart The kit looks good .The best advice I would give take your time read the instructions a few times and take your time .Enjoy the build.
Rick ▲
⟩⟩
Martin555
StuartE
|
📝 Build now started
3 years ago by 🇬🇧 StuartE ( Chief Petty Officer 1st Class)
Chief Petty Officer 1st Class)✧ 122 Views · 6 Likes · 1 Comment
Flag
💬 Add Comment
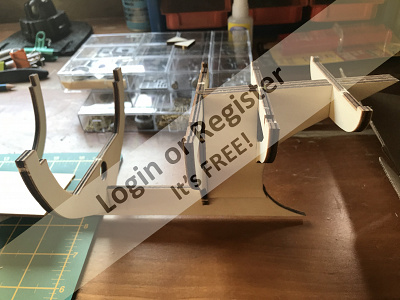
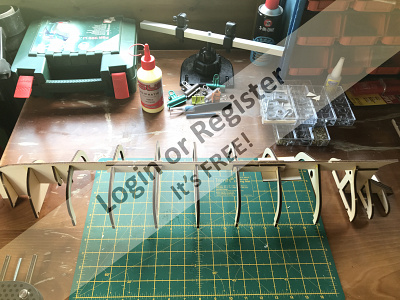
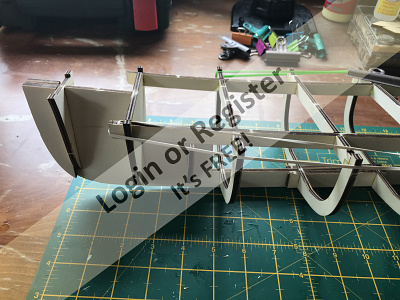
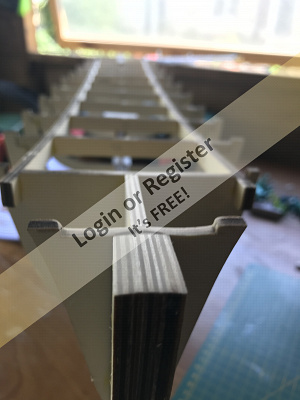
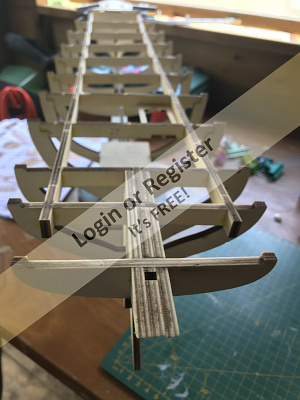
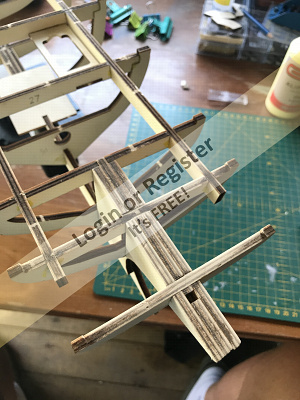
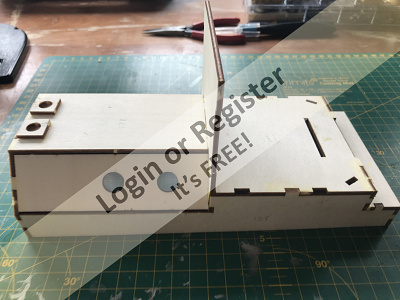
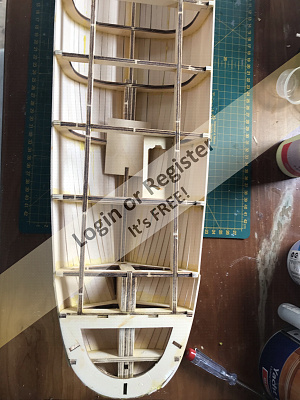
The build has now started from the new shed/workshop and the keel and hull ribs have gone together nicely thanks to the easy to follow instructions and the accurately, laser cut pieces. The Keel is in three parts with two sets of strengthening/connecting ply pieces, Bow, stern and midships. No adjustments or any other cuts required.....nice!! Now onto the rib strengthening and deck supports, plus extra stern and bow strengthening to securely attach planking. This should only take a day, so next update later.
▲
⟩⟩
Scratchbuilder
MouldBuilder
alan44
Martin555
SimpleSailor
Colin H
|
💬 Re: Build now started
3 years ago by 🇬🇧 Martin555 (
Fleet Admiral)✧ 115 Views · 0 Likes
Flag
So the fun has now begun Stuart.
I am looking forward to you next update. Martin555. ▲
⟩⟩
No likes yet
This member will receive 1 point for every like received |
📝 Hull skeleton completed
3 years ago by 🇬🇧 StuartE ( Chief Petty Officer 1st Class)
Chief Petty Officer 1st Class)✧ 122 Views · 8 Likes
Flag
💬 Add Comment
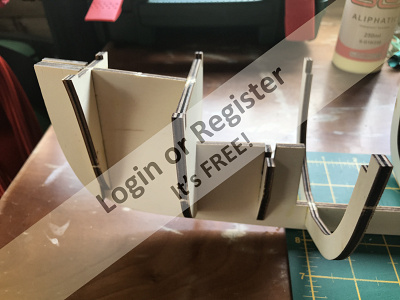
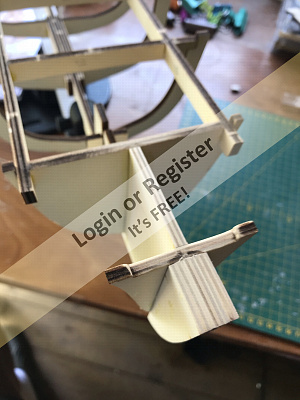
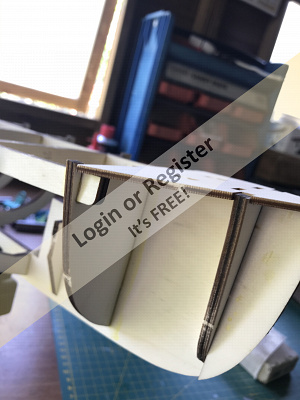
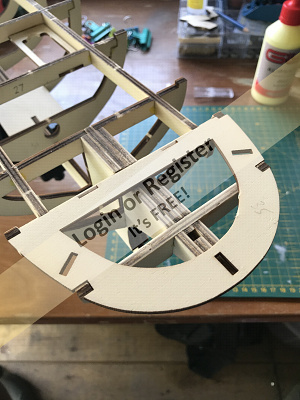
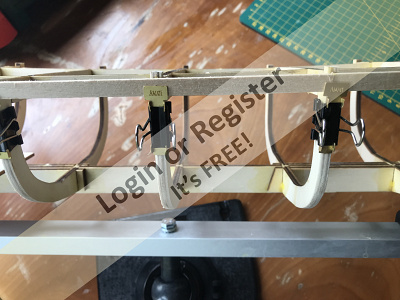
So, rib strengthening bars fitted and all tied together with decking supports. This part of the build also included fitting the rudder servo housing and it was a good job I had the servo already, and tried to fit it while not connected to the skeleton. Some slight modifications were necessary to the cutout to make the servo fit, which would have been difficult once fitted into the build. Bow and stern decking base to fit next with more strengthening to attach planking for the hull. I'm also making good use of the keel clamp I recently bought from Amati.......what a great device this is. 😀👍
▲
⟩⟩
mturpin013
Scratchbuilder
MouldBuilder
jbkiwi
SimpleSailor
alan44
Martin555
Colin H
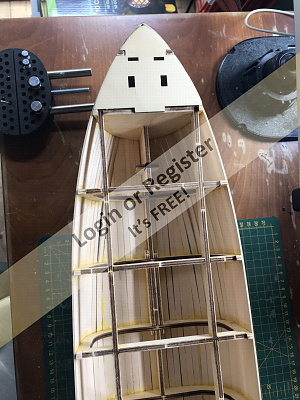
📝 Ready for Hull shaping
3 years ago by 🇬🇧 StuartE ( Chief Petty Officer 1st Class)
Chief Petty Officer 1st Class)✧ 116 Views · 8 Likes · 3 Comments
Flag
💬 Add Comment
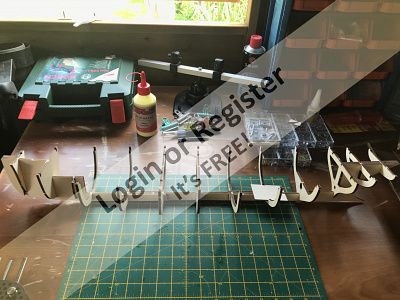
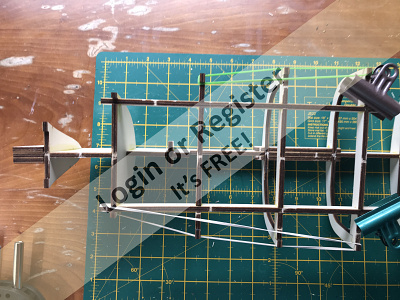
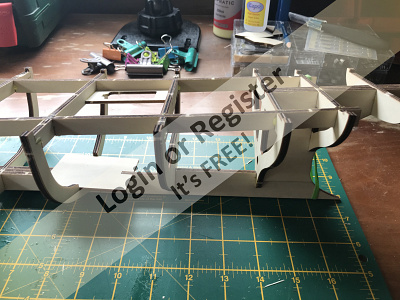
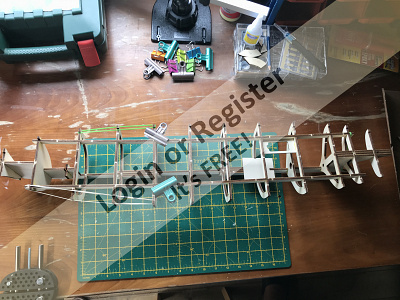
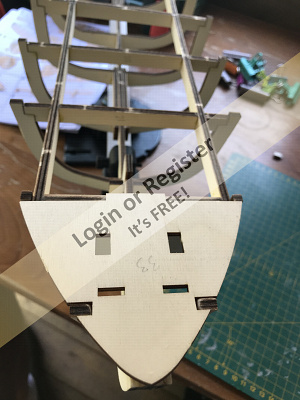
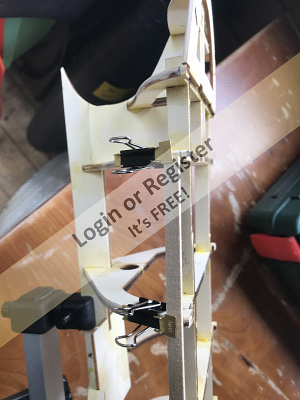
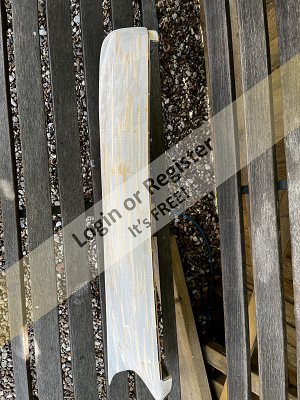
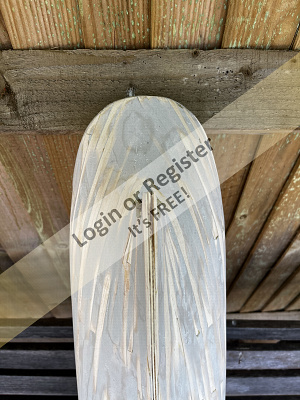
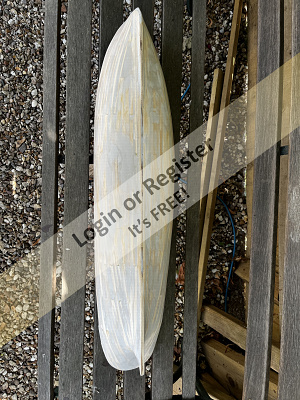
So this week hull strengthening has been added and bow and stern deck bases, but a bit of sanding required to get the bases to sit flat on the skeleton. The next stage it to shape the Hull before starting to add planking. I'm a bit hesitant to start this with a file or plane and it looks a bit time consuming to do by hand with sandpaper, so I'm charging the small electric Bosch sander I have to help with this bit ....... a little at a time!
The Skeleton does appear a bit "twisted" but am sure this is either an optical illusion or will sort itself out with the planking.
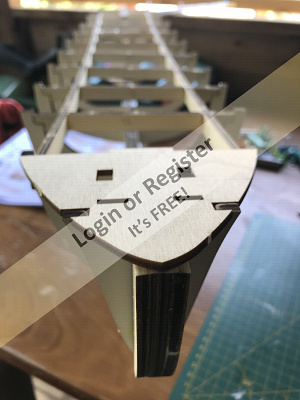
The Skeleton does appear a bit "twisted" but am sure this is either an optical illusion or will sort itself out with the planking.
▲
⟩⟩
ChrisG
mturpin013
jbkiwi
Scratchbuilder
SimpleSailor
MouldBuilder
Martin555
Colin H
|
💬 Re: Ready for Hull shaping
3 years ago by 🇬🇧 SimpleSailor (
Chief Petty Officer 1st Class)✧ 109 Views · 0 Likes
Flag
Hi Stuart. Any up dates on the boat build?
▲
⟩⟩
No likes yet
This member will receive 1 point for every like received |
|
Login To
Remove Ads 💬 Re: Ready for Hull shaping
3 years ago by 🇬🇧 StuartE (
Chief Petty Officer 1st Class)✧ 115 Views · 1 Like
Flag
Thanks for the advice Newby7.👍
▲
⟩⟩
Martin555
|
|
💬 Re: Ready for Hull shaping
3 years ago by 🇨🇦 Newby7 (
Fleet Admiral)✧ 107 Views · 2 Likes
Flag
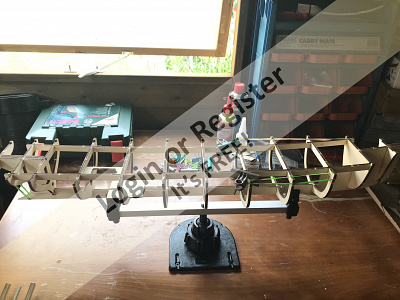
Hi Stuart will you put the frame on a building board to make sure every thing is strait before you plank the hull.If not a board can you clamp it to a flat surface to do a few planks on both sides thous helping to insure a strait hull.
Rick ▲
⟩⟩
MouldBuilder
Martin555
|
📝 Sorry for no updates
3 years ago by 🇬🇧 StuartE ( Chief Petty Officer 1st Class)
Chief Petty Officer 1st Class)✧ 110 Views · 5 Likes
Flag
💬 Add Comment
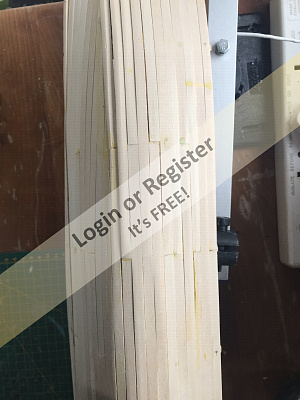
Unfortunately I haven't been able to progress much on the build for a few weeks, but I picked it up again last weekend by starting the hull planking and beginning the superstructure. Not much progress but have been told the you should only do small areas of planking at a time and keep it balanced by doing one side of the hull then the other to keep its shape. I'll have more time in the coming weeks.
The planking clamps are a great alternative to pinning... I starting pinning but every time the small brass pins bent while trying to hammer them into the Ply hull formers. I didnt want to hammer to hard as the hull skeleton is quite fragile. Any advice here please as I'll need to nail planks to the bow and stern.

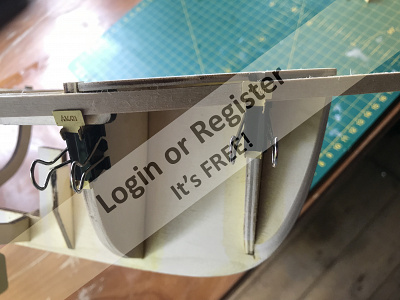
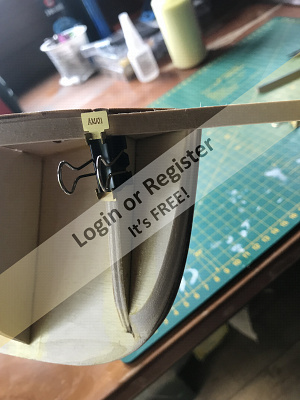
The planking clamps are a great alternative to pinning... I starting pinning but every time the small brass pins bent while trying to hammer them into the Ply hull formers. I didnt want to hammer to hard as the hull skeleton is quite fragile. Any advice here please as I'll need to nail planks to the bow and stern.
▲
⟩⟩
Martin555
jbkiwi
mturpin013
SimpleSailor
Colin H
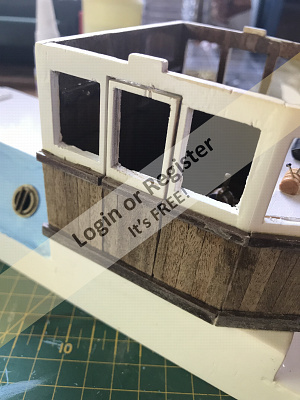
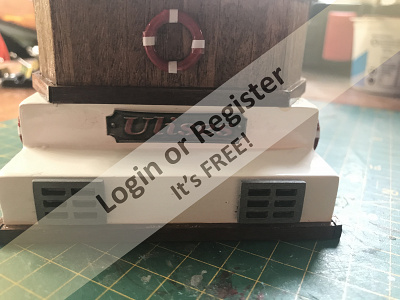
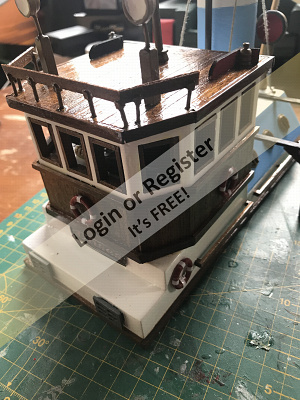
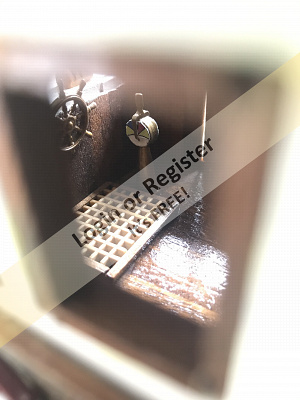
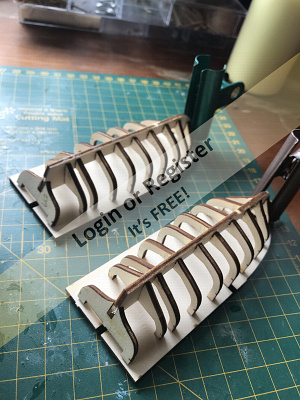
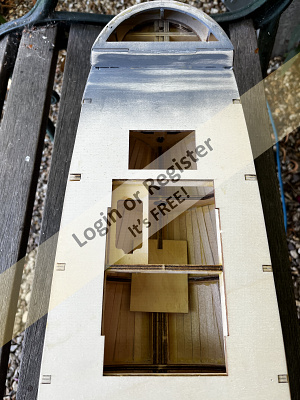
📝 Superstructure progress..
3 years ago by 🇬🇧 StuartE ( Chief Petty Officer 1st Class)
Chief Petty Officer 1st Class)✧ 96 Views · 9 Likes · 4 Comments
Flag
💬 Add Comment
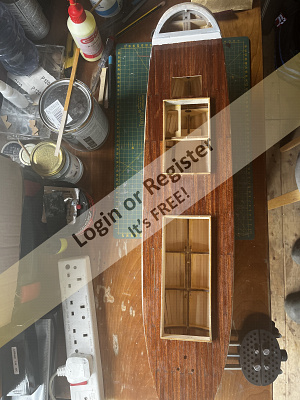
I am really losing my patience with planking as cannot seem to get planks to line up with each layer going around complex curves at bow and stern, and planks dont seem to be too flexible for this and broken a few, so decided to leave alone for now and concentrate on the superstructure.
This is coming along quite nicely.... the engine cover is almost complete and am pleased with the main control room and the teak planking so far. A long way to go yet, but taking my time!😊
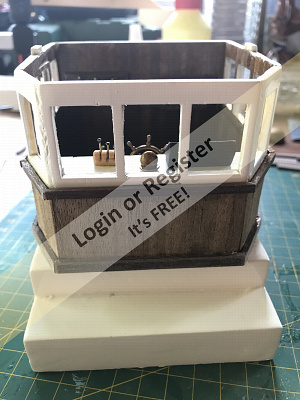
This is coming along quite nicely.... the engine cover is almost complete and am pleased with the main control room and the teak planking so far. A long way to go yet, but taking my time!😊
▲
⟩⟩
flaxbybuck
ChrisG
MouldBuilder
RNinMunich
Mike Stoney
redpmg
SimpleSailor
Colin H
jbkiwi
|
💬 Re: Superstructure progress..
3 years ago by 🇬🇧 Martin555 (
Fleet Admiral)✧ 86 Views · 1 Like
Flag
Hi StuartE,
Have you thought i using a plank bending tool like this. 
▲
⟩⟩
SimpleSailor
|


|
Login To
Remove Ads 💬 Re: Superstructure progress..
3 years ago by 🇬🇧 Nerys (
Fleet Admiral)✧ 84 Views · 2 Likes
Flag
When building real wooden boats, after the garboards were fitted, one then planked up one plank at a time on alternate sides, usually starboard side first, then port. With minor adjustments the first plank would be a pattern for it's opposite number. The next plank would be laid up against it's predecessor in order to ascertain it's shape. Every plank on each side would be different from the one it followed. Distortion of the hull would take place if the one plank at a time rule was not followed.
Cheers, Nerys ▲
⟩⟩
RNinMunich
Martin555
|
|
💬 Re: Superstructure progress..
3 years ago by 🇿🇦 redpmg (
 Commodore) Commodore)✧ 92 Views · 4 Likes
Flag
One method I used on reluctant planks Stuart was to soak them in hot water for a few minutes - then dry off with a paper towel - pin them in place & leave them to dry out (one each side) . Give them a couple of hours to dry before attempting to glue. Longer if using anything other than white (PVA) waterproof glue. Learnt the hard way epoxy & cyano don't like damp wood.......
You are making a great job of this boat. ▲
⟩⟩
Martin555
jbkiwi
SimpleSailor
Colin H
|
|
💬 Re: Superstructure progress..
3 years ago by 🇬🇧 SimpleSailor (
Chief Petty Officer 1st Class)✧ 99 Views · 4 Likes
Flag
Looks great makes me want to get on with mine. Not sure if this will help but when I had to bend planks on my yacht deck I used an old steam iron on full steam to soften them and it worked well.
▲
⟩⟩
RNinMunich
Martin555
Colin H
jbkiwi
|
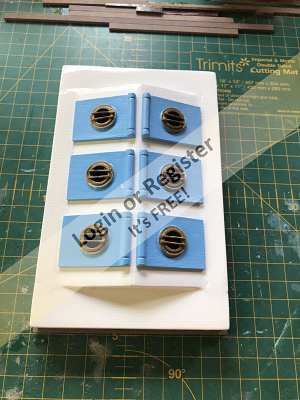
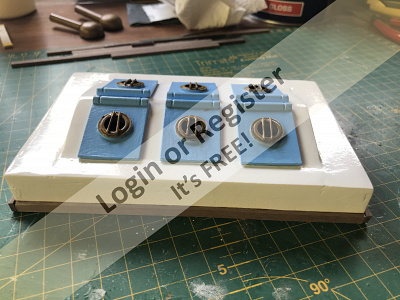
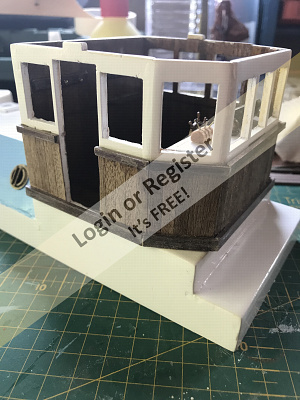
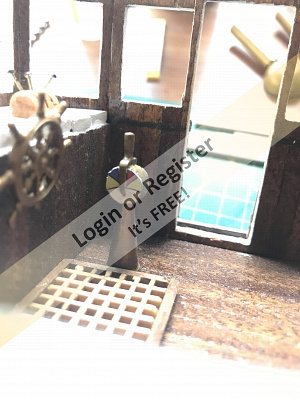
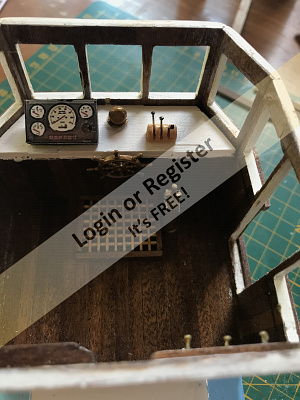
📝 Almost complete Superstructure
3 years ago by 🇬🇧 StuartE ( Chief Petty Officer 1st Class)
Chief Petty Officer 1st Class)✧ 85 Views · 9 Likes · 3 Comments
Flag
💬 Add Comment
Again...sorry for the delayed update on this build....time seems to go so quickly that I have no time for myself!
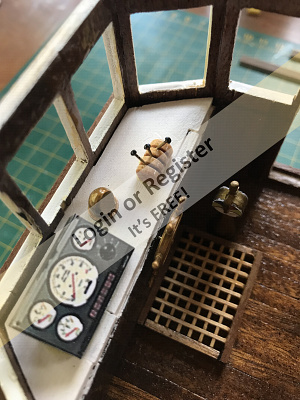
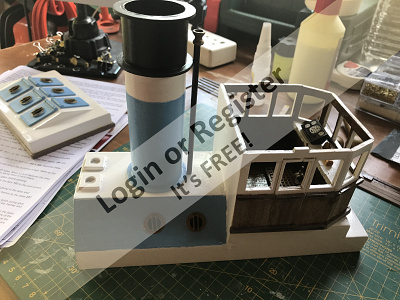
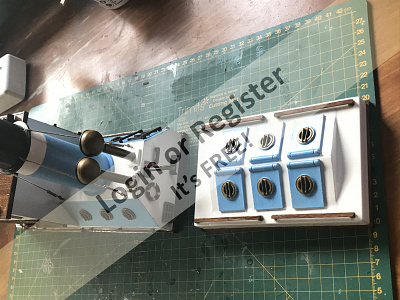
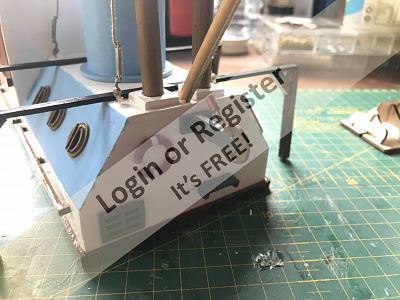
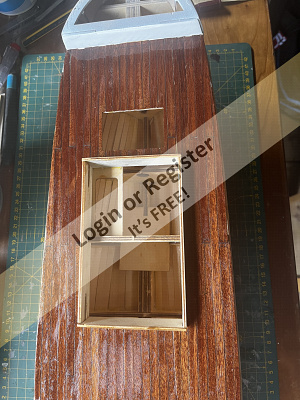
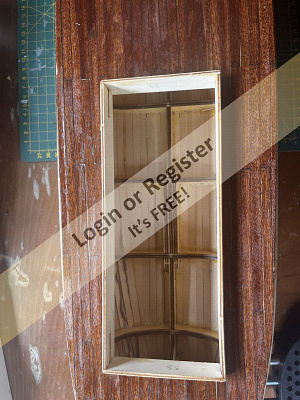
Anyway, much progress has now been made on the superstructure and all is complete bar adding the 2 lifeboats which I'm now starting to build. These sit on top of the support brackets you see in the pictures, either side of the funnel.
I'm getting better at detailing and painting now, but still room for improvement, and some "touch up" required in places. Everything is small and fiddly and even with small tweezers my big fingers get in the way and cant seem to get things straight and perfect fitting. Once the lifeboats are built them its back to the main hull planking, but not really looking forward to that. Thanks for all the advise thought, I'll try a couple and see if it improves the flexibility of the willow planks.
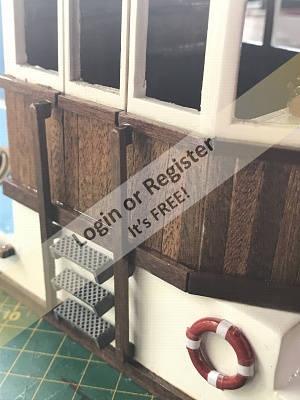
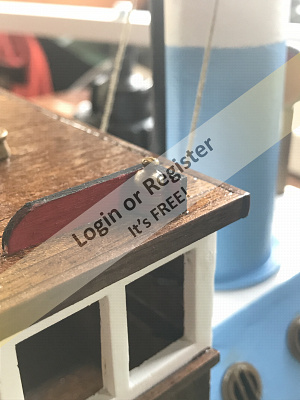
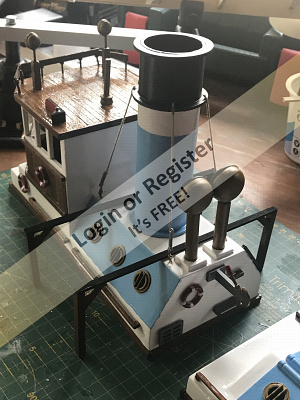
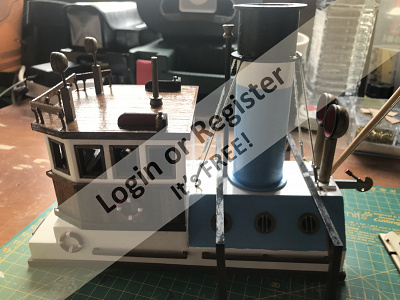
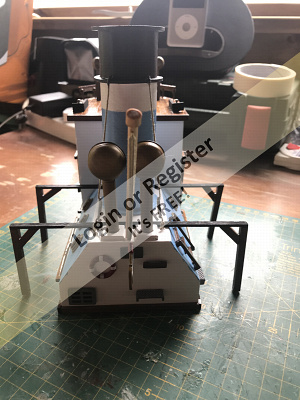
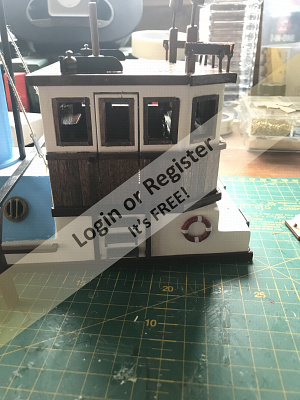
▲
⟩⟩
flaxbybuck
ChrisG
Dumaspittman
Newby7
MouldBuilder
Martin555
RNinMunich
jbkiwi
Colin H
|
💬 Re: Almost complete Superstructure
3 years ago by 🇬🇧 SimpleSailor (
Chief Petty Officer 1st Class)✧ 89 Views · 1 Like
Flag
Looks very good.👍
▲
⟩⟩
Martin555
|
|
Login To
Remove Ads 💬 Re: Almost complete Superstructure
3 years ago by 🇨🇦 Newby7 (
Fleet Admiral)✧ 79 Views · 0 Likes
Flag
Better on detailing I'd say that you have done a great job Stuart
Rick ▲
⟩⟩
No likes yet
This member will receive 1 point for every like received |
|
💬 Re: Almost complete Superstructure
3 years ago by 🇬🇧 Martin555 (
Fleet Admiral)✧ 83 Views · 0 Likes
Flag
Really great work Stuart,
Keep it coming. Martin555. ▲
⟩⟩
No likes yet
This member will receive 1 point for every like received |
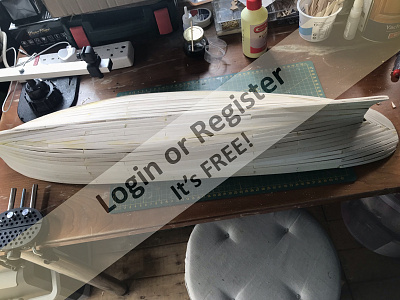
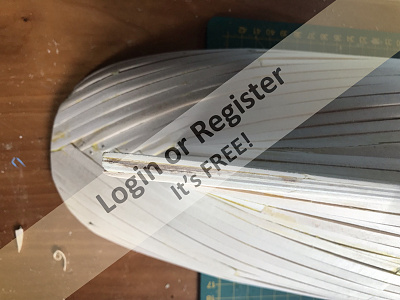
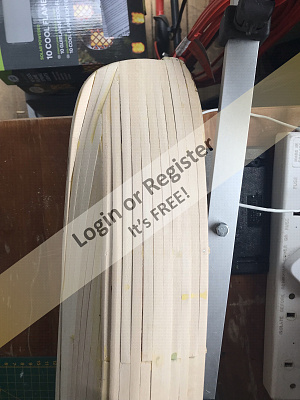
📝 At last…. Planking the hull is finished
2 years ago by 🇬🇧 StuartE ( Chief Petty Officer 1st Class)
Chief Petty Officer 1st Class)✧ 67 Views · 4 Likes
Flag
💬 Add Comment
After months of deliberations on planking and delaying and delaying I finally finished planking the hull and then filling and sanding 😊 . It’s not pretty, but once fibreglasses and painted it will look like the pictures on the box(hopefully).
It took many weeks of effort to actually get the first few rows of planks, but once I got going and mastered the pinning, I managed to do 2 rows a week! 👍

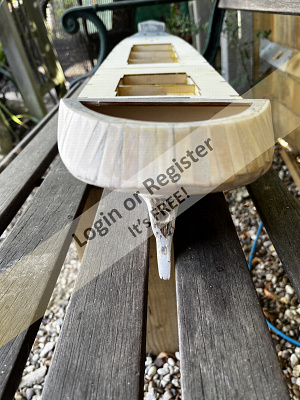
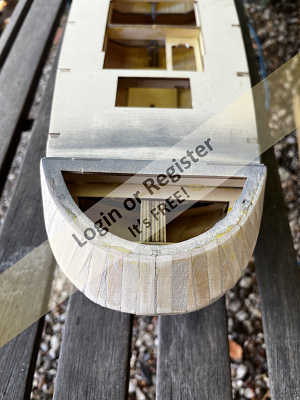


It took many weeks of effort to actually get the first few rows of planks, but once I got going and mastered the pinning, I managed to do 2 rows a week! 👍
▲
⟩⟩
ChrisG
Dumaspittman
Colin H
jbkiwi
📝 Decking on….,
2 years ago by 🇬🇧 StuartE ( Chief Petty Officer 1st Class)
Chief Petty Officer 1st Class)✧ 53 Views · 6 Likes
Flag
💬 Add Comment
Decking has now been applied and first coat of yacht varnish added. The next coat will go on in 8 hrs and then a light rub down and wash with white spirit before the final coat. Next it’s adding the bulwark’s and then hull finishing, sealing and painting. 😎

▲
⟩⟩
flaxbybuck
ChrisG
Peejay
Dumaspittman
Graham93
Colin H


Login To
Remove Ads
Remove Ads