Join Us On Social Media!

|

|

|
Download The App!
Login To
Remove Ads
Remove Ads
Login To
Remove Ads
Remove Ads
Model Boats Website
1/200 scale HMS Hood
10 Posts · 5 Followers · 27 Photos · 65 Likes
Began 3 years ago by
 United Kingdom
Follow This Thread
Not currently following
> Click to follow
> Click to follow
Latest Post 3 years ago by
| Oldest posts shown first (Show Newest First) | (Print Booklet) |
📝 1/200 scale HMS Hood
3 years ago by 🇬🇧 Brucep ( Petty Officer 1st Class)
Petty Officer 1st Class)✧ 95 Views · 5 Likes · 4 Comments
Flag
💬 Add Comment
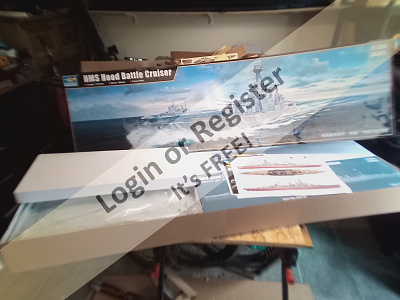
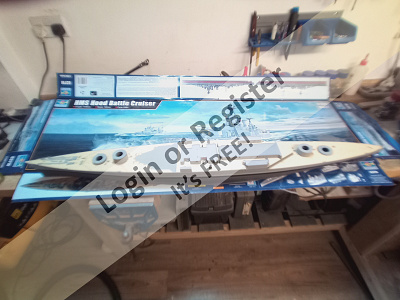
Decided the next project will be the trumpeter HMS Hood with the Mk1 full upgrade kit. It will have all 4 props powered. I bought the whole package with the deans marine 4 motor kit off eBay about 2 years ago. The gentleman was rationalising his rc models and decided he was never going to build this one.
▲
⟩⟩
Colin H
Martin555
Yoda
RNinMunich
Scratchbuilder
|
💬 Re: 1/200 scale HMS Hood
3 years ago by 🇬🇧 Robertcooper (
 Chief Petty Officer 1st Class) Chief Petty Officer 1st Class)✧ 90 Views · 1 Like
Flag
Your build is looking very good.
▲
⟩⟩
Martin555
|
|
Login To
Remove Ads 💬 Re: 1/200 scale HMS Hood
3 years ago by 🇬🇧 Martin555 (
 Fleet Admiral) Fleet Admiral)✧ 89 Views · 1 Like
Flag
Hi Bruce,
Like the other guys have said. I will be following too. Martin555. ▲
⟩⟩
Brucep
|
|
💬 Re: 1/200 scale HMS Hood
3 years ago by 🇬🇧 Scratchbuilder (
 Vice Admiral) Vice Admiral)✧ 94 Views · 2 Likes
Flag
Hi Bruce.
Good project,be good to follow this one throughout. Regards Bill. ▲
⟩⟩
Martin555
Brucep
|
|
💬 Re: 1/200 scale HMS Hood
3 years ago by 🇨🇦 Newby7 (
Fleet Admiral)✧ 89 Views · 2 Likes
Flag
Bruce looks to be a big project ahead. Look foreword to viewing your build.
Rick ▲
⟩⟩
Martin555
Brucep
|
Login To
Remove Ads
Remove Ads
📝 Prop shafts and rudder
3 years ago by 🇬🇧 Brucep ( Petty Officer 1st Class)
Petty Officer 1st Class)✧ 93 Views · 6 Likes · 4 Comments
Flag
💬 Add Comment
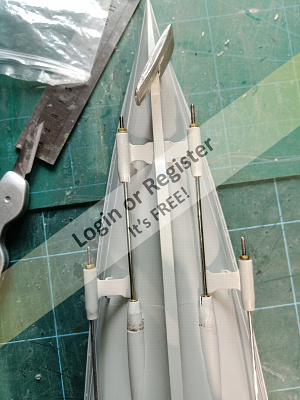
All the A frames have now been drilled to accept some brass tube which will act as bearings, and the caps where the prop shafts leave the hull were drilled to accept the prop shaft sleeves. This left very little plastic around the holes, so once glued to the hull, filler was required to fill the little splits. The prop shaft sleeves were then glued in place with 2 part rapid epoxy, which hopefully has made a watertight seal around each.
A hole has been drilled through the hull for the rudder, and a brass sleeve glued in, again with epoxy. To hold the glue in place around the brass sleeve, a little dam was built of 2 part epoxy putty. This allowed a nice depth of glue around the rudder sleeve to give it strength.

A hole has been drilled through the hull for the rudder, and a brass sleeve glued in, again with epoxy. To hold the glue in place around the brass sleeve, a little dam was built of 2 part epoxy putty. This allowed a nice depth of glue around the rudder sleeve to give it strength.
▲
⟩⟩
RNinMunich
Yoda
jbkiwi
Scratchbuilder
Colin H
Martin555
|
💬 Re: Prop shafts and rudder
3 years ago by 🇨🇦 Newby7 (
Fleet Admiral)✧ 88 Views · 2 Likes
Flag
Well done Bruce .
Rick ▲
⟩⟩
Brucep
Martin555
|
|
Login To
Remove Ads 💬 Re: Prop shafts and rudder
3 years ago by 🇬🇧 Scratchbuilder (
Vice Admiral)✧ 93 Views · 1 Like
Flag
Keep it coming Bruce.
Good start.Regards Bill. ▲
⟩⟩
Martin555
|
|
💬 Re: Prop shafts and rudder
3 years ago by 🇬🇧 Robertcooper (
Chief Petty Officer 1st Class)✧ 90 Views · 3 Likes
Flag
I will follow this build. Can’t wait till it is finished.
▲
⟩⟩
LOBOLONDON
Scratchbuilder
Martin555
|
|
💬 Re: Prop shafts and rudder
3 years ago by 🇬🇧 Martin555 (
Fleet Admiral)✧ 88 Views · 0 Likes
Flag
You have made a great start Bruce.
Keep it up. Martin555. ▲
⟩⟩
No likes yet
This member will receive 1 point for every like received |
📝 Sealing the prop shafts
3 years ago by 🇬🇧 Brucep ( Petty Officer 1st Class)
Petty Officer 1st Class)✧ 91 Views · 6 Likes
Flag
💬 Add Comment
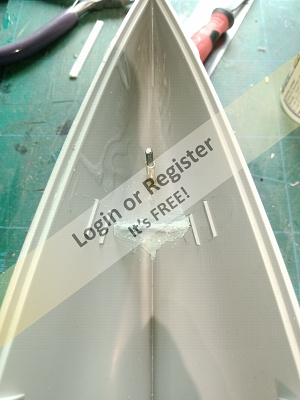
The prop shafts are only an m2 thread and about 10 inches long which allows them to flex a bit much for my liking. They were fastened in with 2 part epoxy, but there wasn’t a lot of plastic in that area so I was concerned about them flexing loose after a while.
Too get round this and ensure that there was going to be no leakage I’ve built a dam from epoxy putty around the shafts then filled the area over the shafts with epoxy resin. It took about 120ml to just cover all the shafts. This has taken 24 hours to cure, but flexing definitely won’t be an issue now.
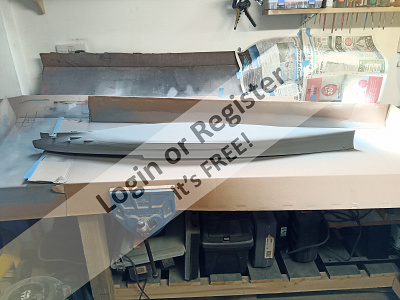
The hull has had some spruce marks cleaned off and smoothed over with plastic putty, before having a wash in soapy water to remove any release agent. After drying for a couple of hours, it has now had its coat of plastic primer. Unfortunately the hull is too long to fit in my spaying cabinet, so cardboard and newspaper over my bench had to suffice.
A couple of superstructure parts have had their doors and grills removed whilst waiting for the hull to dry, and photo etched brass replacement fitted. These look much better than the moulded plastic.

Too get round this and ensure that there was going to be no leakage I’ve built a dam from epoxy putty around the shafts then filled the area over the shafts with epoxy resin. It took about 120ml to just cover all the shafts. This has taken 24 hours to cure, but flexing definitely won’t be an issue now.
The hull has had some spruce marks cleaned off and smoothed over with plastic putty, before having a wash in soapy water to remove any release agent. After drying for a couple of hours, it has now had its coat of plastic primer. Unfortunately the hull is too long to fit in my spaying cabinet, so cardboard and newspaper over my bench had to suffice.
A couple of superstructure parts have had their doors and grills removed whilst waiting for the hull to dry, and photo etched brass replacement fitted. These look much better than the moulded plastic.
▲
⟩⟩
MouldBuilder
RNinMunich
Yoda
jbkiwi
Martin555
Colin H
📝 Back half of the focsle deck
3 years ago by 🇬🇧 Brucep ( Petty Officer 1st Class)
Petty Officer 1st Class)✧ 87 Views · 5 Likes · 3 Comments
Flag
💬 Add Comment
The hull is getting painted at the moment so I decidedly that the deck which goes under the splinter deck could be started. Unlike the Pontus photo etch which gets you to completely remove lockers, the mk1 design kit only requires the tops to be cleaned, and then the new photo etched hatch/locker doors to be glued on.
The first part of the wood deck has been attached, which should have extended onto the front section of the focsle deck, but that bit of the wood deck was removed. The front half of the focsle deck will be glued to the hull, while the rear 2 thirds of decking will be removable. The missing wooden deck part doesn’t show as it’s actually under the splinter deck.
To see the detail on the rear half of the focsle deck such as the hose reels, doors, vents etc it will be necessary to peer under the splinter deck, and may well require a torch to see the detail. Never mind, at least I know it’s there!
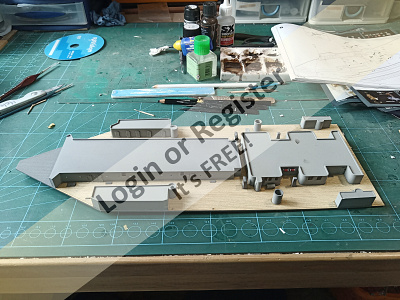
▲
⟩⟩
Yoda
RNinMunich
Martin555
Colin H
T33CNO
|
💬 Re: Back half of the focsle deck
3 years ago by 🇨🇦 Newby7 (
Fleet Admiral)✧ 82 Views · 2 Likes
Flag
I envy your work Bruce not only would my eyes not be good on this scale I don't think my fingers would be much better. LOL
Rick ▲
⟩⟩
Brucep
Martin555
|
|
Login To
Remove Ads 💬 Re: Back half of the focsle deck
3 years ago by 🇬🇧 Brucep (
Petty Officer 1st Class)✧ 87 Views · 1 Like
Flag
Some of the parts are that small that I’m having to use a magnifying glass to see which way up they go.
▲
⟩⟩
Yoda
|
|
💬 Re: Back half of the focsle deck
3 years ago by 🇬🇧 Martin555 (
Fleet Admiral)✧ 82 Views · 3 Likes
Flag
Hi Bruce,
I would imagine that this boat is absolute full with lots of fiddly bits that the carpet monster is dying to get hold of LOL!! Martin555. ▲
⟩⟩
jbkiwi
Yoda
RNinMunich
|
📝 Deck in place
3 years ago by 🇬🇧 Brucep ( Petty Officer 1st Class)
Petty Officer 1st Class)✧ 85 Views · 6 Likes · 3 Comments
Flag
💬 Add Comment
The hull is now painted, which is a big step forward.
The anchor holes have had pieces of styrene tubing glued to the inside of the hull, and then 2 part epoxy resin wrapped around them. This should stop any water ingress, and will look good painted black on the inside, and the anchor shaft will slide up inside them. The tops were blocked off with a bit more styrene, and sealed with 2 part epoxy.
This allowed the front half of the focsle deck to be glued in place, and the wood decking affixed the length of the ship. There is no obvious point where the deck can be cut to allow access to the inside of the hull, so the rear half of the focsle deck, and the quarter deck will be connected together with the shelter deck ( not the splinter deck that I called it last time). This overlaps, so will make a nice joint and it will be reinforced on the inside to stiffen it up. This removable decking will be about a meter long, so will definitely need to get reinforced.
The shelter deck actually overlaps the front focsle deck by about 5 inches, and the bridge superstructure is on this overhanging part, but at least it will hide the joint between the fixed and removable deck.
▲
⟩⟩
Scratchbuilder
mturpin013
Martin555
Colin H
Yoda
Robertcooper
|
💬 Re: Deck in place
3 years ago by 🇬🇧 Brucep (
Petty Officer 1st Class)✧ 85 Views · 2 Likes
Flag
I prime with the appropriate primer, then I use humbrol acrylic spray cans for large areas, as it's cheaper than the tamiya spray cans. For smaller areas I use tamiya paint in the air brush.
All paint work gets at least 2 coats of lacquer to finish. It's important to test your paints, as not all makes are compatible. Primer I get from a local shop either plastic primer or etch primer for brass. These are large spray cans for automotive repairs, and work out much cheaper. Hope this helps. ▲
⟩⟩
Yoda
Martin555
|
|
Login To
Remove Ads 💬 Re: Deck in place
3 years ago by 🇨🇦 Newby7 (
Fleet Admiral)✧ 80 Views · 2 Likes
Flag
Coming along nicely Bruce.
Rick ▲
⟩⟩
Martin555
Brucep
|
|
💬 Re: Deck in place
3 years ago by 🇬🇧 Robertcooper (
Chief Petty Officer 1st Class)✧ 79 Views · 1 Like
Flag
Hi Brucep
I am building my little boat it is the first time as I am a novice. Could you please tell me what paint you use it will be well appreciated to know want paint I have to get for mine. Thanks Robert 👍 ▲
⟩⟩
Martin555
|
📝 Decisions decisions
3 years ago by 🇬🇧 Brucep ( Petty Officer 1st Class)
Petty Officer 1st Class)✧ 80 Views · 6 Likes
Flag
💬 Add Comment
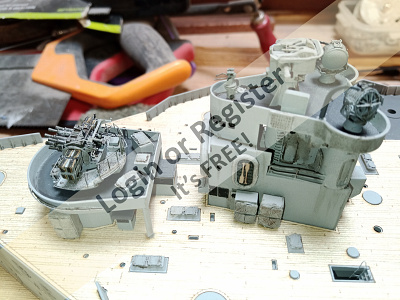
The shelter deck still isn’t glued down, but part of the bridge superstructure has been attached. Yet again half the detail has been completely hidden by the next layer.
As well as building this, I’ve been busy making dozens of little lockers, winches and ladders, and the wife kindly made 3 of the gun directors which were small and very fiddly. After some discussion I’ve decided that some of the very small photo etch won’t be used because there won’t be enough glue to hold them in place with the vibrations from the motors.
T.he motors that came with the kit from deans marine are too powerful, so I’ve ordered 4 geared motors that will be much better. These unfortunately aren’t a standard mount size, so I’ll have to manufacture some metal motor mounts.
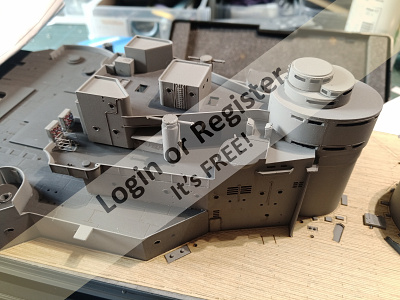
▲
⟩⟩
ShaunI
Scratchbuilder
Colin H
mturpin013
Martin555
Yoda
📝 Propulsion
3 years ago by 🇬🇧 Brucep ( Petty Officer 1st Class)
Petty Officer 1st Class)✧ 77 Views · 9 Likes · 4 Comments
Flag
💬 Add Comment
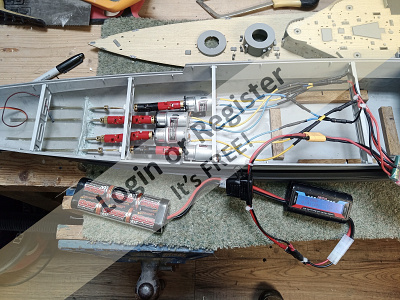
The motors that came in the deans marine kit were 28mm diameter, and looking at a YouTube clip, appeared much too high revving for the boat. In the YouTube clip it was nearly on the plane, so I decided new motors were required. Looking on mfa como site, I found some motors 22mm diameter and just under half the revs that the motors I had for the boat produced. I purchased 4 of these, then the fun started!
Mfa combo didn’t have any mounts for these motors so I had to fabricate my own. I had some 380 motor mounts but these had a 10mm hole in the centre, so a 14mm drill was ordered from eBay. The mounts were drilled on my myford lathe, then the screw mounting holes were widened with a small file. So far so good.
When these newly mounted motors were positioned in the boat it came apparent that the prop shafts came through too low to get a straight run to the motors, so I had to use double universal couplings to keep them as straight as possible. It also came apparent that 4 motors wouldn’t fit alongside each other, so the rear 2 had to be mounted behind the middle motors. That would have been much worse if I had used the original motors which were 6mm wider.
This left me another problem. The outside propshafts flexed far to much, so a little pillar was made with some brass tubing passing through to act as a bearing. The supporting column was filled with 2 part epoxy to secure it and that appears to have made everything rigid.
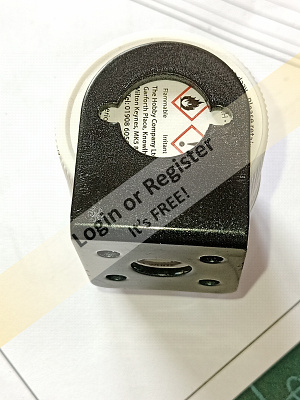
▲
⟩⟩
ShaunI
gunboat driver
Seanympth
jbkiwi
Scratchbuilder
Newby7
Martin555
Colin H
Yoda
|
💬 Re: Propulsion
3 years ago by 🇬🇧 Scratchbuilder (
Vice Admiral)✧ 74 Views · 2 Likes
Flag
Bruce.
This is coming along now and you are certainly packing a lot into a small space. Regards Bill ▲
⟩⟩
Brucep
Martin555
|
|
Login To
Remove Ads 💬 Re: Propulsion
3 years ago by 🇨🇦 Newby7 (
Fleet Admiral)✧ 73 Views · 2 Likes
Flag
Motors look good Bruce well done.
Rick ▲
⟩⟩
Brucep
Martin555
|
|
💬 Re: Propulsion
3 years ago by 🇬🇧 Brucep (
Petty Officer 1st Class)✧ 77 Views · 4 Likes
Flag
They were tagged in with super glue for testing, then 2 part epoxy to fasten them in securely.if there had been room for wood underneath them, then I would have screwed them down, which is my preferred method.
▲
⟩⟩
jbkiwi
Scratchbuilder
Yoda
Martin555
|
|
💬 Re: Propulsion
3 years ago by 🇬🇧 Martin555 (
Fleet Admiral)✧ 72 Views · 1 Like
Flag
Hi Bruce,
How have/will you attach the motor mounts to the hull ? Martin555. ▲
⟩⟩
Brucep
|
📝 First water test and more superstructure
3 years ago by 🇬🇧 Brucep ( Petty Officer 1st Class)
Petty Officer 1st Class)✧ 72 Views · 9 Likes · 7 Comments
Flag
💬 Add Comment
Last Thursday I wandered down to the local boat club to test the motor installation. I was still waiting for the actual receiver so find an old radio and transmitter for testing purposes. Unfortunately this system just wouldn’t work fully with the esc. Although forward and reverse worked fine, getting the props on one side to spin forward, whilst the props on the other side spin backwards to help with the turn just wouldn’t work.
The rudder throw also wasn’t enough, so some extra long micro servo arms were ordered from eBay to give me more rudder movement. What with the boat still too high in the water, it wasn’t a very good first run out. Hopefully this week, with the rudder throw sorted, a new receiver and a bit more ballast, it will work a bit better.
This week some of the superstructure parts that have been getting assembled we’re finally glued to the boat, but I’ve run out of grey paint now so bits will have to stay under coated until Wednesday when the new paint arrives.
▲
⟩⟩
ShaunI
gunboat driver
Colin H
Scratchbuilder
jbkiwi
Yoda
Robertcooper
Martin555
Newby7
|
💬 Re: First water test and more superstructure
3 years ago by 🇬🇧 Brucep (
Petty Officer 1st Class)✧ 62 Views · 2 Likes
Flag
Paint brush, cotton buds, wet finger and dry brush.
Oh, and one secret ingredient....a wife who is very artistic! ▲
⟩⟩
Martin555
Colin H
|
|
Login To
Remove Ads 💬 Re: First water test and more superstructure
3 years ago by 🇬🇧 Scratchbuilder (
Vice Admiral)✧ 66 Views · 2 Likes
Flag
Hi Bruce.
Really neat job. I really like your weathering.How have you applied that ? I normally use a small sponge about the size of a pencil head. Regards Bill. ▲
⟩⟩
Martin555
Brucep
|
|
💬 Re: First water test and more superstructure
3 years ago by 🇬🇧 Scratchbuilder (
Vice Admiral)✧ 69 Views · 2 Likes
Flag
Bruce.
Really coming along nicely. Keep it coming. Regards Bill. ▲
⟩⟩
Martin555
Brucep
|
|
💬 Re: First water test and more superstructure
3 years ago by 🇳🇿 jbkiwi (
Fleet Admiral)✧ 67 Views · 2 Likes
Flag
Progressing very nicely👍
JB ▲
⟩⟩
Martin555
Brucep
|
|
💬 Re: First water test and more superstructure
3 years ago by 🇬🇧 Robertcooper (
Chief Petty Officer 1st Class)✧ 67 Views · 3 Likes
Flag
Hi Bruce
This is looking very nice keep it up. Robert 👍 ▲
⟩⟩
Scratchbuilder
Martin555
Brucep
|
|
💬 Re: First water test and more superstructure
3 years ago by 🇬🇧 Martin555 (
Fleet Admiral)✧ 70 Views · 2 Likes
Flag
Looking good Bruce.
Martin555. ▲
⟩⟩
Scratchbuilder
Brucep
|
|
💬 Re: First water test and more superstructure
3 years ago by 🇨🇦 Newby7 (
Fleet Admiral)✧ 69 Views · 3 Likes
Flag
Looks great .
Rick ▲
⟩⟩
ShaunI
Martin555
Brucep
|
📝 Second water test and more assembly
3 years ago by 🇬🇧 Brucep ( Petty Officer 1st Class)
Petty Officer 1st Class)✧ 52 Views · 6 Likes · 3 Comments
Flag
💬 Add Comment
With more superstructure fastened to the decks I took the model back to the boating lake for another checkout. The hull was listing to starboard and stern heavy, but about 4 oz of lead in the bow and another 4oz on the port side, she should sit perfect on the water.
The longer servo arms arrived but were too flexible so the current rudder throw will have to do. This didn’t seem to bad after all, and the arrival of the new receiver meant that the twin esc started working fine. I can now spin 2 props forward whilst the props on the other side of the model spin backwards. This really improves manoeuvring so I’m happy with all that now.
I received more grey paint, so many parts that had been assembled could now be painted, and some elastic rigging cord arrived, so assembly has really started these last few days. I have to say that it is starting to look really good and maybe another weeks work will see it completed. That will please the wife as she wants to start the Deans marine HMS Bulldog but the Hood is taking up all the working area.
I’ve attached a short video on how it is looking, and hopefully will get a video of it completed and sailing very soon.
▲
⟩⟩
MouldBuilder
Rookysailor
Colin H
jbkiwi
Newby7
Yoda
|
💬 Re: Second water test and more assembly
3 years ago by 🇳🇿 jbkiwi (
Fleet Admiral)✧ 46 Views · 1 Like
Flag
Excellent job Bruce, obviously lots of patience required👍
JB ▲
⟩⟩
Brucep
|
|
Login To
Remove Ads 💬 Re: Second water test and more assembly
3 years ago by 🇬🇧 Nerys (
Fleet Admiral)✧ 50 Views · 2 Likes
Flag
Just seen your download of HMS Hood. One word, MAGNIFICENT.
Nerys ▲
⟩⟩
Ronald
Brucep
|
|
💬 Re: Second water test and more assembly
3 years ago by 🇨🇦 Newby7 (
Fleet Admiral)✧ 49 Views · 1 Like
Flag
Wow Bruce just a wonderful boat well done.
Rick ▲
⟩⟩
Brucep
|
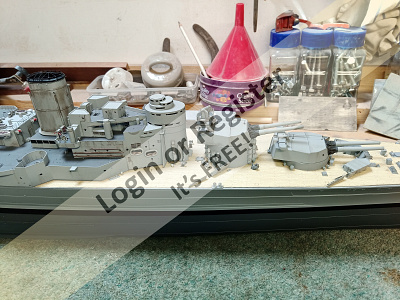
📝 a few close up pictures
3 years ago by 🇬🇧 Brucep ( Petty Officer 1st Class)
Petty Officer 1st Class)✧ 46 Views · 7 Likes
Flag
💬 Add Comment
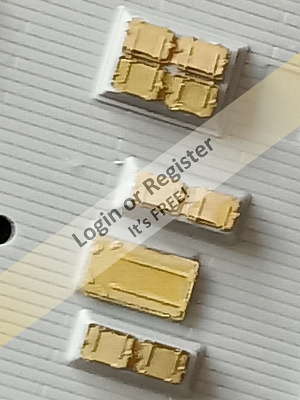
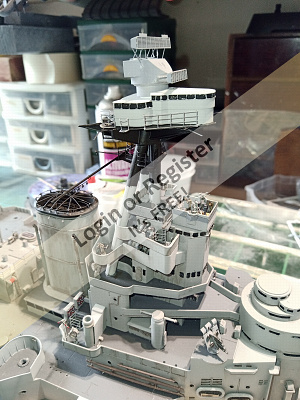
I don't know why i thought getting up so close was a good idea, as all I see are errors!
Anyhow, here are some images, one of which is against a 2p coin for scale


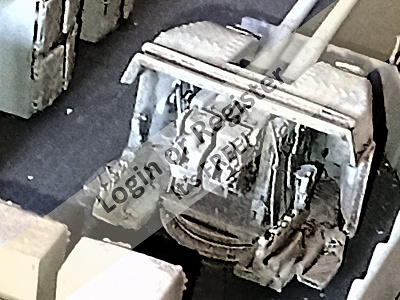
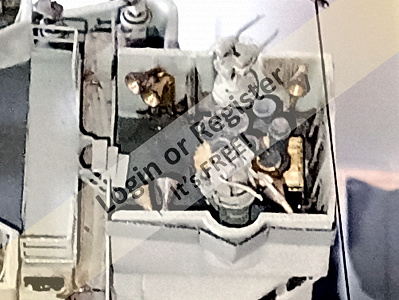
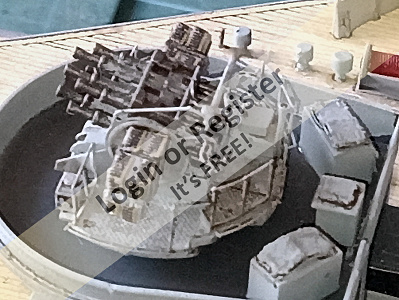
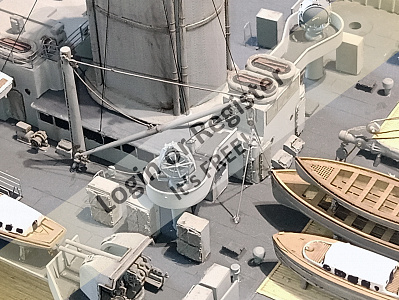
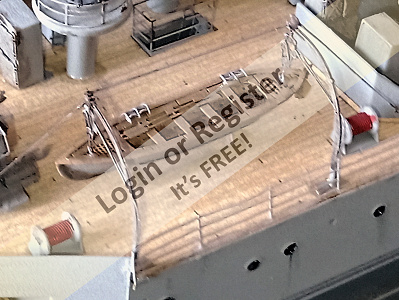
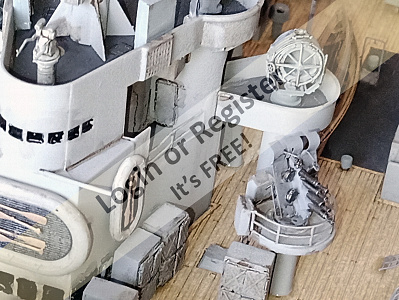
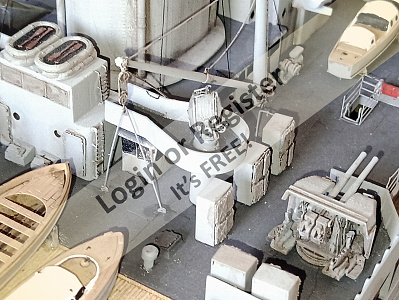
Anyhow, here are some images, one of which is against a 2p coin for scale
▲
⟩⟩
ShaunI
MouldBuilder
gunboat driver
Mallory
Yoda
Commodore-H
Colin H


Login To
Remove Ads
Remove Ads