Join Us On Social Media!

|

|

|
Download The App!
Login To
Remove Ads
Remove Ads
Login To
Remove Ads
Remove Ads
Model Boats Website
 Liked 20th Scale ELCO 80ft PT boat part 31 4 years ago
 Liked HARTLEY FLARELINE, NEW PROJECT 4 years ago
 Liked Fitting the side skins. 4 years ago
 Liked Parts 4 years ago
 Liked Re: Planking 4 years ago
 Liked It’s the little things ....! 4 years ago
 Liked Waterslide graphics for the cabin, and the value of paint tests ! 4 years ago


Australia
Recent Posts
📝 Mental Health & Wellbeing Volunteers
3 years ago by 🇦🇺 ChrisB ( Petty Officer 1st Class)
Petty Officer 1st Class)✧ 55 Views · 3 Likes
Flag
📝 Reply
Here in sleepy South Australia, we in Adelaide dodged a Covid crisis last month, a mini lockdown and restrictions which are now mostly eased. Most of the country was nearly open across borders and families, some of whom haven’t been home for months or longer were just starting to reconnect with loved ones. Particularly tough year for Victorians here, and those with WA families due to hard border restrictions.
Things were looking good nationally but unfortunately our NSW folks have a quite the challenge now on their hands with a cluster at their northern beaches region. Looks like most of that state, and Sydney residents are going to be locked in again from the rest of Aus, and restricted or locked down for the festive season.
Quarantine continues to be our challenge, Adelaide had a UK strain in November get out from a worker at a quarantine hotel, now NSW has a US strain from an Air crew being taken to quarantine getting out via the bus driver I believe.
It’s a long road ahead, and by comparison to many others Australia has done well, at times been led well, and we have for the most part been blessed to be somewhat isolated. It would be fair to say we’ve also been lucky at times.
Mostly our leaders have worked well, and I think they have done their best in the craziest of years. Unfortunately people have lost loved ones, lost businesses and livelihoods and in honour we’re having a quiet and low key Xmas focussed simply family and gratitude for our lot in life.
The vaccine I believe may start rolling out to high risks workers and other high risk people in March/April, I just hope that it safely works to give everyone some hope at normality(whatever that is).
Wherever you are this Xmas, stay safe and well.
Stay safe.
Chris
▲
⟩⟩
RNinMunich
jbkiwi
Ianh
Login To
Remove Ads
Remove Ads
💬 Re: Sea Commander build.
3 years ago by 🇦🇺 ChrisB ( Petty Officer 1st Class)
Petty Officer 1st Class)✧ 12 Views · 3 Likes
Flag
💬 Add Comment
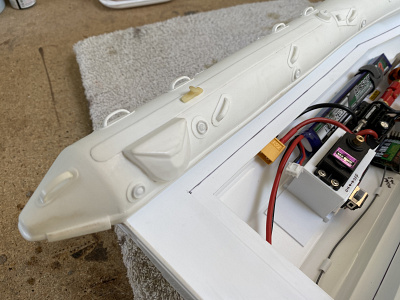
Sorry Will, forgot to share the other pieces I use. I’m a simple bloke, so I use a common set up on my boats which are all brushed currently. ESC - RTR type - waterproof 60amp forward 30amp reverse. (Not recommending brands but I use Hobbywing WP-1060 as I can generally get them locally and I’ve found them reliable). Usual standard servo arrangement for the tiller, and typically for me a 3 channel Tx/ Rx set up. As I have lights on a couple of boats like this it gives me a convenient 6v power supply to the leds(3-6v).
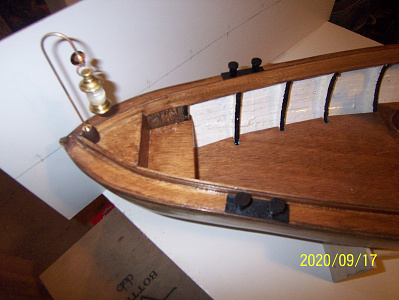
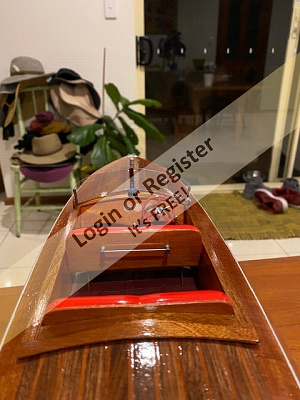
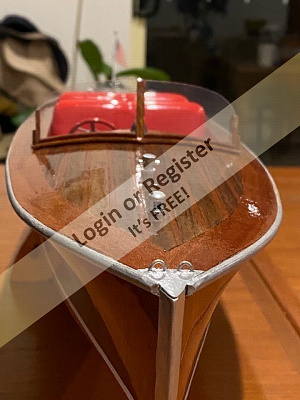
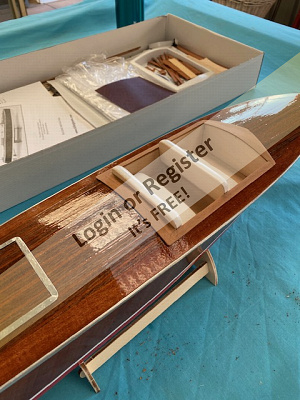
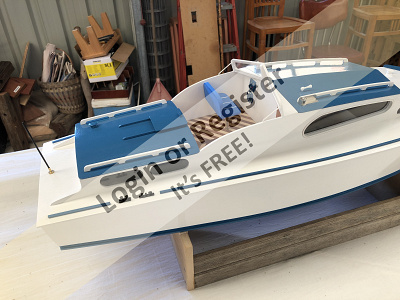
Couple of updated pics, including her Welsh name “waves of the sea”. On a DNA test recently I found I have 20% Welsh origins, so I thought I’d honour that, and I think it kind of fits her Sea Commander kit name.
All the best with the refurbishment, look forward to seeing some pictures in the future.
Cheers
Chris
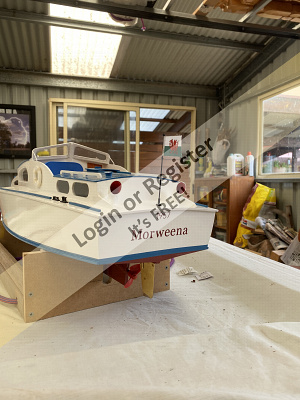
▲
⟩⟩
Martin555
Madwelshman
jbkiwi
💬 Re: Sea Commander build.
3 years ago by 🇦🇺 ChrisB ( Petty Officer 1st Class)
Petty Officer 1st Class)✧ 11 Views · 2 Likes
Flag
💬 Add Comment
Hi there, congratulations on winning a sea commander. Awesome!!!
Mine runs a brushed 750 size motor from caldercraft. Purchased and installed a similar spec motor for my brothers wave master a few months back as the caldercraft motors were hard to come by here in Aus(Not promoting caldercraft, it came in the kit). The non branded runs really well also. Picture attached if this helps.
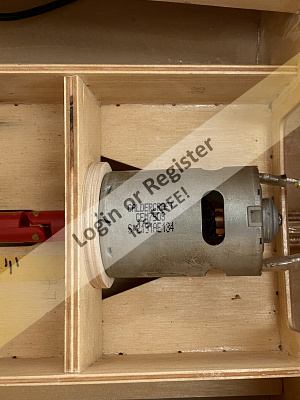
Mine runs a brushed 750 size motor from caldercraft. Purchased and installed a similar spec motor for my brothers wave master a few months back as the caldercraft motors were hard to come by here in Aus(Not promoting caldercraft, it came in the kit). The non branded runs really well also. Picture attached if this helps.
▲
⟩⟩
Madwelshman
Martin555
💬 Re: Update 9 - Phantom build - completion.
4 years ago by 🇦🇺 ChrisB ( Petty Officer 1st Class)
Petty Officer 1st Class)✧ 15 Views · 1 Like
Flag
💬 Add Comment
Thank you Martin, sincerely appreciate your kind words.
Cheers
Chris
Cheers
Chris
▲
⟩⟩
Martin555
💬 Re: Update 9 - Phantom build - completion.
4 years ago by 🇦🇺 ChrisB ( Petty Officer 1st Class)
Petty Officer 1st Class)✧ 16 Views · 2 Likes
Flag
💬 Add Comment
Thank you sir. Appreciate your advice along the way.
▲
⟩⟩
Martin555
RNinMunich
📝 Update 9 - Phantom build - completion.
4 years ago by 🇦🇺 ChrisB ( Petty Officer 1st Class)
Petty Officer 1st Class)✧ 24 Views · 11 Likes · 7 Comments
Flag
💬 Add Comment
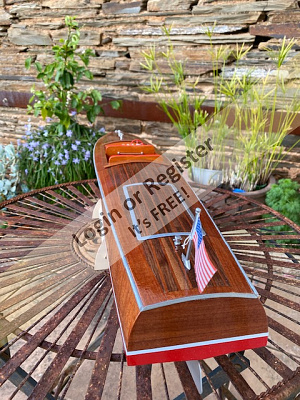
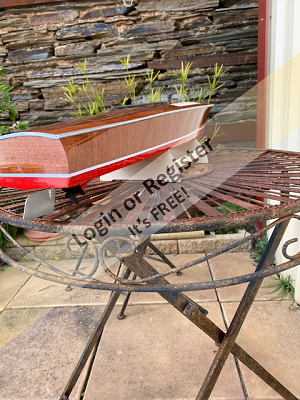
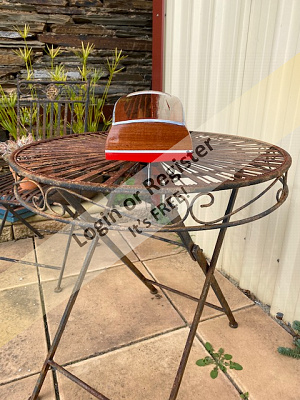
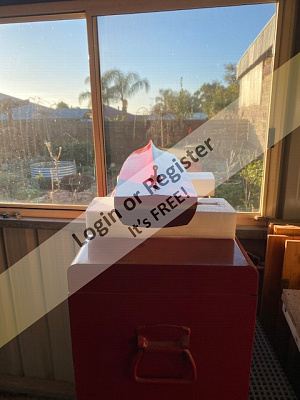
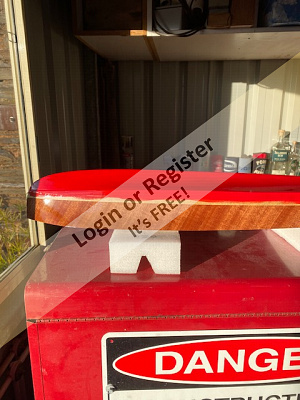
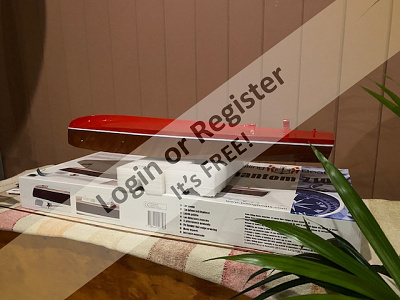
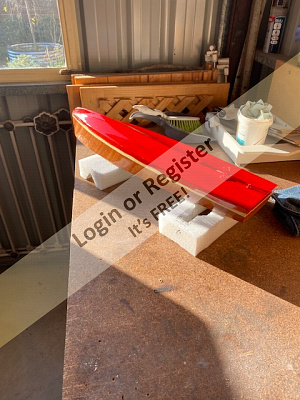
Hi all, final blog update for the "Phantom".
I'm sure I'll tinker with things once I get her on the water finally, I'm still waiting on 4 deck cleats which were never on the plans, however I think she needs them. If they continue to be problematic to procure locally I'll make my own from aluminum stock in the shed(albeit a fiddly job).
I will post a video when I get her out for her maiden voyage.
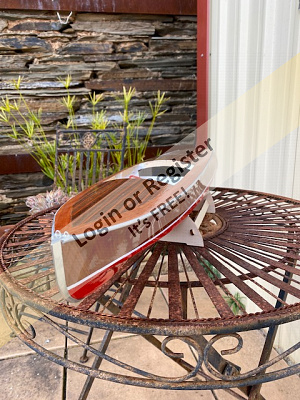
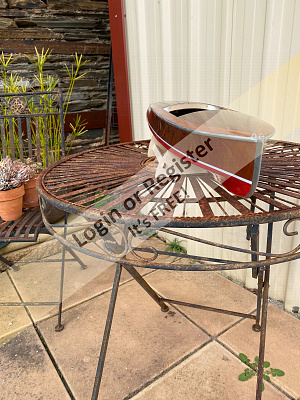
As for her - she's called "Saoirse" - pronounced "Seer-sha". According to the boss (who hails from County Clare) she wanted to name our daughter this as she always liked the name. As an Irish girls name it has the meaning of "Freedom", a popular Irish name apparently in the 1920's era, or "Liberty" depending on which dictionary you look up. Final photos attached.
Thanks to all who have commented, liked and provided encouragement and guidance during this build. It is sincerely appreciated, thank you.
Stay safe and well, and keep on building folks.
Cheers,
Chris


I'm sure I'll tinker with things once I get her on the water finally, I'm still waiting on 4 deck cleats which were never on the plans, however I think she needs them. If they continue to be problematic to procure locally I'll make my own from aluminum stock in the shed(albeit a fiddly job).
I will post a video when I get her out for her maiden voyage.
As for her - she's called "Saoirse" - pronounced "Seer-sha". According to the boss (who hails from County Clare) she wanted to name our daughter this as she always liked the name. As an Irish girls name it has the meaning of "Freedom", a popular Irish name apparently in the 1920's era, or "Liberty" depending on which dictionary you look up. Final photos attached.
Thanks to all who have commented, liked and provided encouragement and guidance during this build. It is sincerely appreciated, thank you.
Stay safe and well, and keep on building folks.
Cheers,
Chris
▲
⟩⟩
Dibdawg
Commodore-H
Ianh
Puddle-pirate
stevedownunder
marky
MouldBuilder
Jimbo1
Martin555
jbkiwi
RNinMunich
💬 Re: Parts
4 years ago by 🇦🇺 ChrisB ( Petty Officer 1st Class)
Petty Officer 1st Class)✧ 23 Views · 1 Like
Flag
💬 Add Comment
Great work sir, coming along really nicely.
Chris
Chris
▲
⟩⟩
Martin555
📝 SEA COMANDER RE-FURB.
4 years ago by 🇦🇺 ChrisB ( Petty Officer 1st Class)
Petty Officer 1st Class)✧ 9 Views · 2 Likes
Flag
📝 Reply
Sorry to hear of your unfortunate incident Colin, hope your on the mend pal and back out on the water very soon.
Chris
Chris
▲
⟩⟩
Colin H
Martin555
📝 Update 8 - Phantom build
4 years ago by 🇦🇺 ChrisB ( Petty Officer 1st Class)
Petty Officer 1st Class)✧ 20 Views · 7 Likes · 3 Comments
Flag
💬 Add Comment
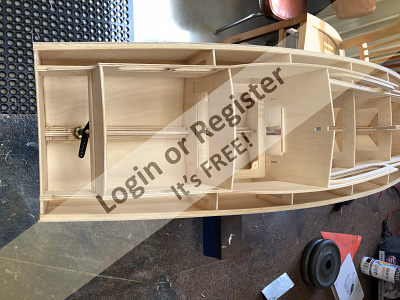
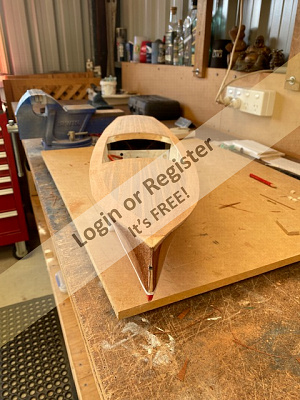
Hi all, hope all are keeping well. Its been a while since I've been able to make any progress, working away over the last few weeks and have had little time to get back in the shed as a result.
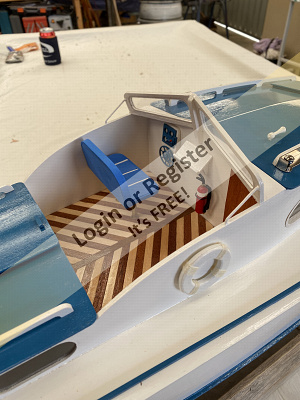
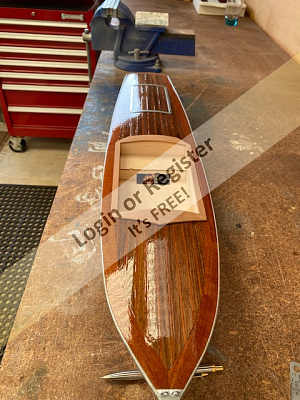
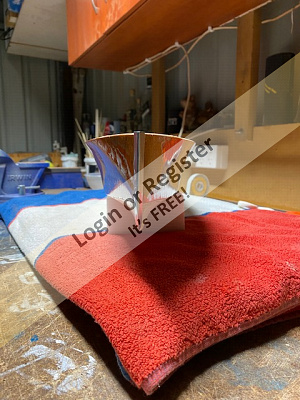
However some progress, particularly the cockpit and seating arrangements. Going through the kit fittings I opted to make my own cockpit surround, dash, steering wheel, including a throttle, a simple shifter for the floor, and my own bollards. The kit supplied bollards were undersized in my opinion, so I've used them (and the short brass rod supplied) as a handrail for the rear seat.
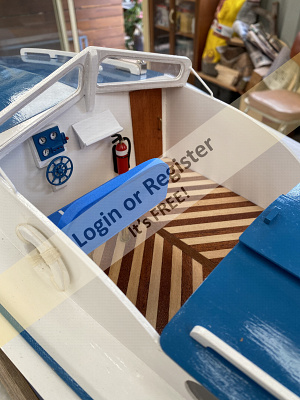
I'm pondering making up a false glove box cover for the left side of the dashboard - the wood has a light coloring showing through that I'm not altogether happy with and I was considering a glovebox anyhow so it might work out well. Maybe a few other details - one or two false lights under the gauges might also fill out the space without being overly complex.
The mast and flag are fitted, I had a spare US flag luckily as the kit supplied version is only colored on one side - it's transparent but looks rubbish to be honest so its in the toolbox and out of my sight for now. 🤔
This weekend I hope to fabricate a new window frame, again the kit plastic pieces are fairly lame so I'm going to replace these also - I can't decide whether to use a wooden frame or make one from brass angle and paint it chrome.
I need to also make up 2 air inlets which will sit in front of the hatch, then go back to touch ups particularly inside and under the hatch, and inside the hull at the cockpit opening.
Still haven't found a seal solution as yet that I'm happy with for the hatch or cockpit, it might be a case of taking a test cruise first and see how much of an issue this is in my case as I haven't used the plastic covers / surrounds from the kit. Hopefully I've got a better seal than I think....🤞
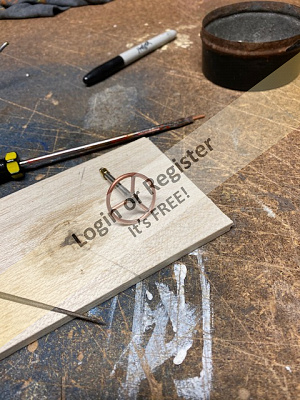
Last job-if all goes well-is to give her a name. I'm fortunate to have a label cutting machine at home to make my own decal- Just got to decide on a name.
I'll reveal that in the next post.
Stay safe and well everyone.
Cheers,
Chris


However some progress, particularly the cockpit and seating arrangements. Going through the kit fittings I opted to make my own cockpit surround, dash, steering wheel, including a throttle, a simple shifter for the floor, and my own bollards. The kit supplied bollards were undersized in my opinion, so I've used them (and the short brass rod supplied) as a handrail for the rear seat.
I'm pondering making up a false glove box cover for the left side of the dashboard - the wood has a light coloring showing through that I'm not altogether happy with and I was considering a glovebox anyhow so it might work out well. Maybe a few other details - one or two false lights under the gauges might also fill out the space without being overly complex.
The mast and flag are fitted, I had a spare US flag luckily as the kit supplied version is only colored on one side - it's transparent but looks rubbish to be honest so its in the toolbox and out of my sight for now. 🤔
This weekend I hope to fabricate a new window frame, again the kit plastic pieces are fairly lame so I'm going to replace these also - I can't decide whether to use a wooden frame or make one from brass angle and paint it chrome.
I need to also make up 2 air inlets which will sit in front of the hatch, then go back to touch ups particularly inside and under the hatch, and inside the hull at the cockpit opening.
Still haven't found a seal solution as yet that I'm happy with for the hatch or cockpit, it might be a case of taking a test cruise first and see how much of an issue this is in my case as I haven't used the plastic covers / surrounds from the kit. Hopefully I've got a better seal than I think....🤞
Last job-if all goes well-is to give her a name. I'm fortunate to have a label cutting machine at home to make my own decal- Just got to decide on a name.
I'll reveal that in the next post.
Stay safe and well everyone.
Cheers,
Chris
▲
⟩⟩
Ianh
MouldBuilder
Colin H
stevedownunder
mturpin013
jbkiwi
Martin555
💬 Re: Sea Commander build.
4 years ago by 🇦🇺 ChrisB ( Petty Officer 1st Class)
Petty Officer 1st Class)✧ 11 Views · 1 Like
Flag
💬 Add Comment
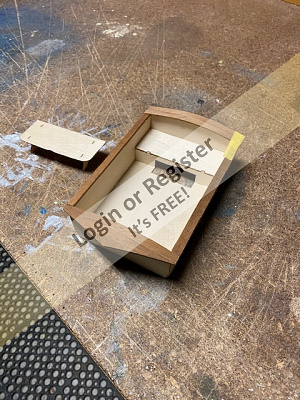
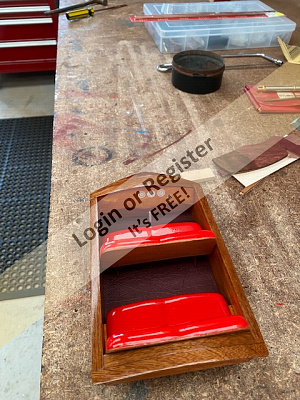
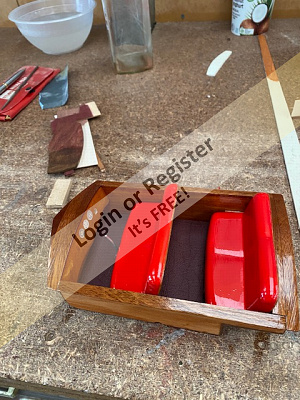
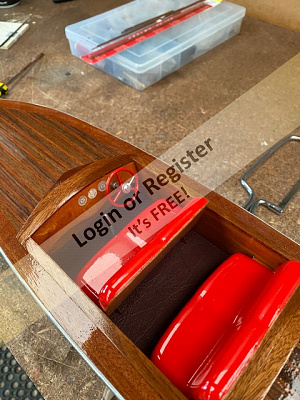
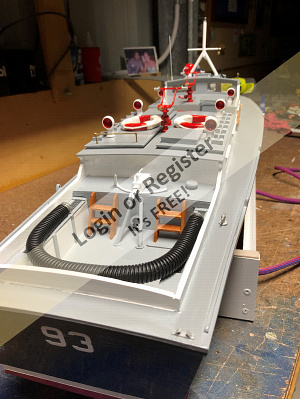
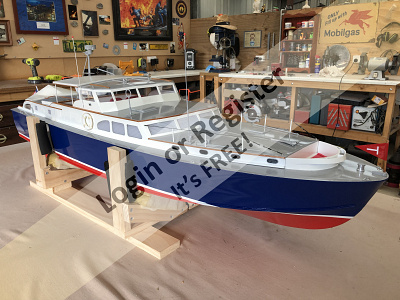
The extra pieces, hatches and vents, seat, doors etc, are add ons I decided to make and install. I felt she needed a few more details to bring her to life. The kit came with running LED lights which look great, so adding the extra pieces (without going overboard - no pun intended) I hoped would compliment her.
I’d like to make a map table / locker on the forward cockpit wall to sit over a scale fire extinguisher I’ve since added. Once I get back from work 😔 and complete the phantom build I might be able sneak some time to devote to finishing her.
Just don’t tell my missus! 😁
I’d like to make a map table / locker on the forward cockpit wall to sit over a scale fire extinguisher I’ve since added. Once I get back from work 😔 and complete the phantom build I might be able sneak some time to devote to finishing her.
Just don’t tell my missus! 😁
▲
⟩⟩
Martin555
📝 Sea Commander build.
4 years ago by 🇦🇺 ChrisB ( Petty Officer 1st Class)
Petty Officer 1st Class)✧ 10 Views · 6 Likes · 10 Comments
Flag
💬 Add Comment
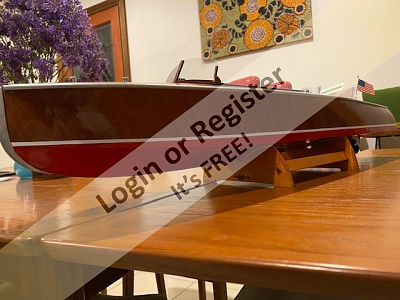
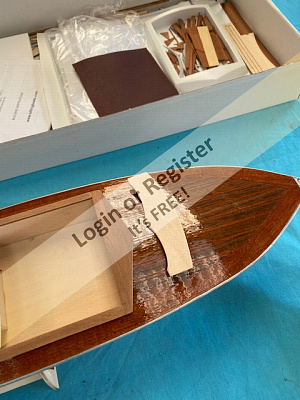
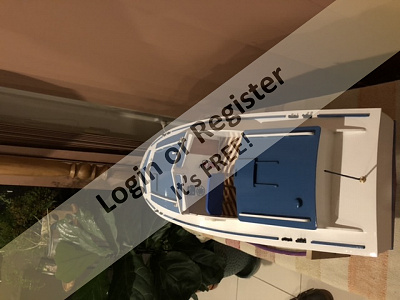
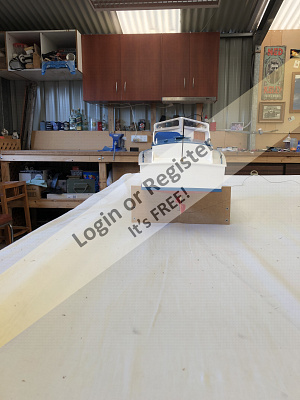
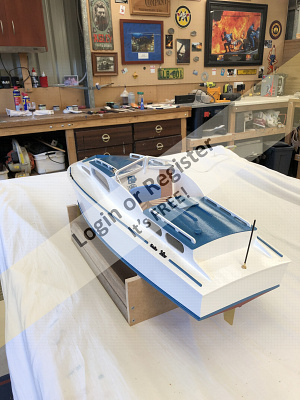
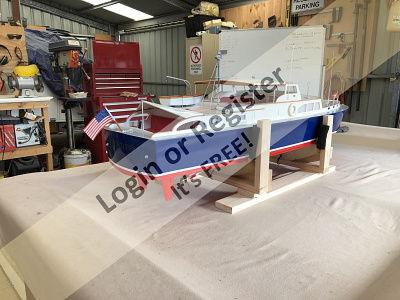
My Sea Commander kit build from a few years back. Runs very nicely and its quite a spritely model.
I am yet to decide on her name (names always puzzle me - I need to get a sense of this boat before deciding) and to add a few more details to her. The only issue found on first run was the rudder tube leaking at the tiller arm flange, purely as she stands up so high on the plane that a small burr on the tube was allowing water ingress as the transom dipped under full speed. Remedied with a file and some minor adjustments.
Will post a video when I get her back out on the pond, waiting for a few warmer days to come our way.
Cheers
Chris
▲
⟩⟩
Madwelshman
Martin555
ianed57
RNinMunich
Nerys
Colin H
Login To
Remove Ads
Remove Ads
💬 Re: Phantom build update 7
4 years ago by 🇦🇺 ChrisB ( Petty Officer 1st Class)
Petty Officer 1st Class)✧ 14 Views · 1 Like
Flag
💬 Add Comment
Thank you sir, really appreciate the feedback. Whilst the exposed timber is at times a curse of sorts, the reward is the boat is starting to resemble the beautiful crafts I've seen of that era. I hope to get the deck up to a similar level of finish and customize the cockpit to the same standard or better. Thanks again for your kind words, greatly appreciated.
Cheers,
Chris
Cheers,
Chris
▲
⟩⟩
Martin555
💬 Re: Phantom build update 7
4 years ago by 🇦🇺 ChrisB ( Petty Officer 1st Class)
Petty Officer 1st Class)✧ 14 Views · 1 Like
Flag
💬 Add Comment
Thanks Rick, I'm trying to overcome my impatience in finishing models. I tend to rush towards the end - I'm a slow learner but hope to make a good job of this one. All that wood (and my rookie errors) are on display in this one I'm afraid - but she is a rewarding and learning build. Most enjoyable.
Cheers,
Chris
Cheers,
Chris
▲
⟩⟩
Martin555
💬 Re: Phantom build update 7
4 years ago by 🇦🇺 ChrisB ( Petty Officer 1st Class)
Petty Officer 1st Class)✧ 14 Views · 1 Like
Flag
💬 Add Comment
Thanks for your kind words JB. Patience whilst watching the "varnish dry" has been testing! Think I've got a few more coats on the deck to go - its very close to how I'd like her to look but the weather (and work) aren't cooperating at the moment!!
Cheers,
Chris
Cheers,
Chris
▲
⟩⟩
Martin555
💬 Re: Aero Naut Jenny
4 years ago by 🇦🇺 ChrisB ( Petty Officer 1st Class)
Petty Officer 1st Class)✧ 13 Views · 2 Likes
Flag
💬 Add Comment
Lovely work sir, looks fantastic. Look forward to seeing pics of the next run.
Chris
Chris
▲
⟩⟩
Rogerdotcom
Martin555
📝 SEA COMANDER RE-FURB.
4 years ago by 🇦🇺 ChrisB ( Petty Officer 1st Class)
Petty Officer 1st Class)✧ 10 Views · 3 Likes
Flag
📝 Reply
Hi Peter,
Had a couple of further thoughts post my own battery woes previously. ESC setting? Battery conditioning?
Long story below - apologies!
Using my Huntsman as an example, 1/16 scale and very light weight - but she would stop only after 10-12 minutes run time. Its is a brushed set up, then using a Hobby-wing(?) WP1040 ESC and at the time a 12 turn 540 motor and 7.2 v NiMh batteries - nothing overly complex which suits my electronic IQ!
My first thought was too high speed motor drawing way to much juice - which I scaled back to a 35turn but still had short runs but scale speed at least.
I would run my multimeter across the battery post returning to shore and it would show a surface charge of >6.2v....I was a little confused. I tried several of my batteries and similar results...so I did a boat bench test to check the voltage and amp draw - amps were good around 1.1 - 1.3amp full noise, voltage as required by the ESC depending on throttle position. However, as the battery declined and it approached 6v - it was goodnight. No go.
Turns out the ESC I had purchased - RTR kind - had a fault or incorrect set point for the low voltage protection. Being RTR it wasn't adjustable. It was meant to be a 5v trip, recoverable down to 4.5v by letting the throttle return to neutral. But I was a dead duck each time.
I procured the same brand but a WP1060 RTR - same trip specs - recommended by the hobby shop here and now I use these on all my boats - never missed a beat (so far) and run times are 40+ mins or longer depending on pauses and idle time. Voltage runs down to 5v as intended - solved for my case.
I also tend to deliberately run for only for 15 minutes or so, then rest the boat which allows the battery to recover, motor to cool etc - but if its a family day with my nieces driving my boats around then its run till they nearly stop but they each get good run times regardless.
With the battery - and I'm not sure of your set up - but I run on NiMh and all get some warmth post running. Do you notice any battery heat?
I have had a new but "problematic" battery which took several days of bench running on a test motor, recharging once cool, and repeating the cycle to condition it (if that's the right word). Might be helpful if you suspect a battery issue to give this a try?
My limited experience is the more consistently they get used the better and longer they perform (I have had a 7.2v 1700mah NiMh for over 20 years now - still as strong as ever).
Sorry for the long story - hope my past woes might help you (if you haven't already ruled these out that is). Good luck.
Cheers,
Chris
PS - not recommending any brands - just sharing what has worked for me.
▲
⟩⟩
Ianh
Colin H
Martin555
📝 SEA COMANDER RE-FURB.
4 years ago by 🇦🇺 ChrisB ( Petty Officer 1st Class)
Petty Officer 1st Class)✧ 8 Views · 1 Like
Flag
📝 Reply
Hi Peter, I have a Sea Commander running a 750 can "caldercraft"motor included in my kit. Running 7.2v ranging from 3600-5000mah I have typically seen 45-55 minutes of run time - speed dependent as I have a bit of a heavy throttle finger with this boat!!
Apologies if my reply is a little late.
kind regards,
Chris
Apologies if my reply is a little late.
kind regards,
Chris
▲
⟩⟩
Colin H
💬 Re: RAF Class 100 HSL
4 years ago by 🇦🇺 ChrisB ( Petty Officer 1st Class)
Petty Officer 1st Class)✧ 13 Views · 1 Like
Flag
💬 Add Comment
Beautiful model. Great work sir, thanks for sharing.
Chris
Chris
▲
⟩⟩
Martin555
📝 Update 7 - Phantom build
4 years ago by 🇦🇺 ChrisB ( Petty Officer 1st Class)
Petty Officer 1st Class)✧ 24 Views · 11 Likes · 6 Comments
Flag
💬 Add Comment
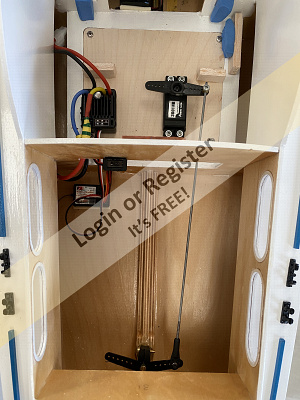
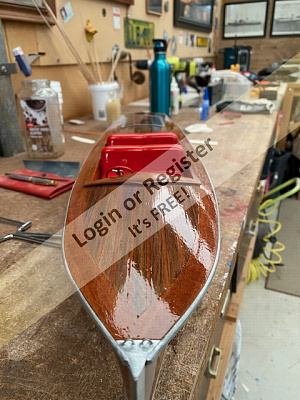
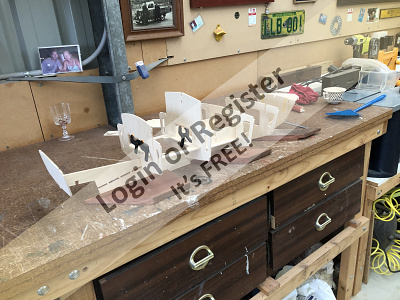
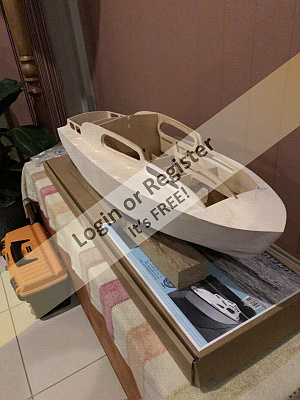
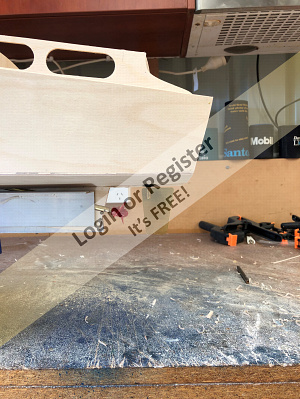
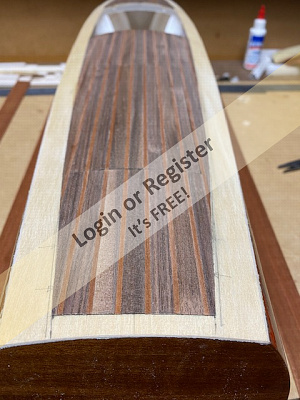
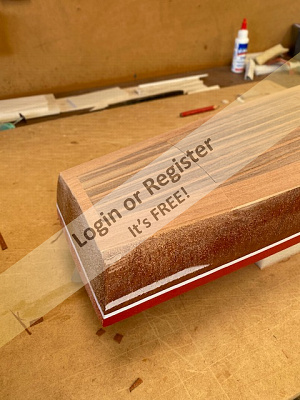
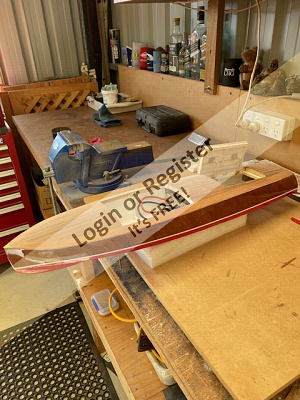
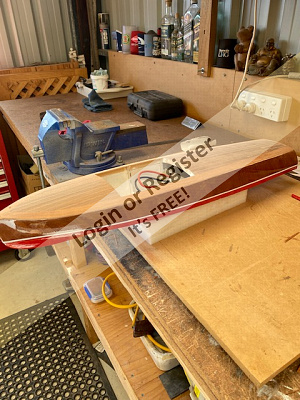
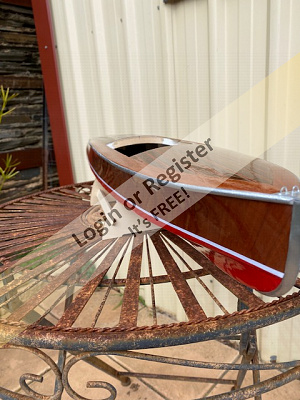
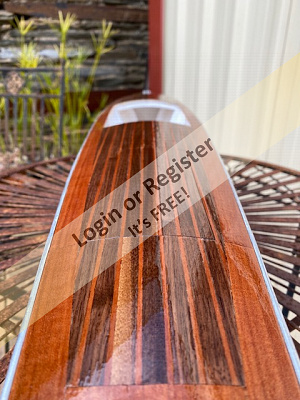
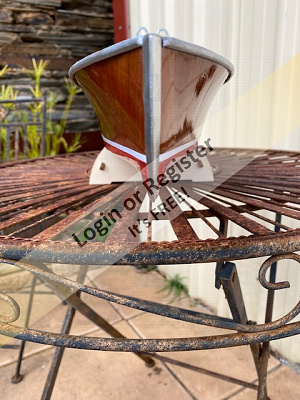
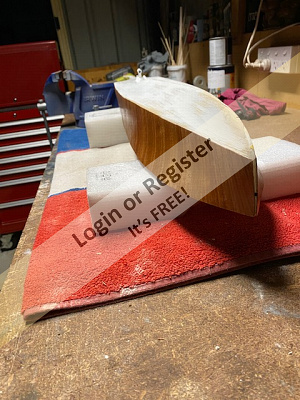
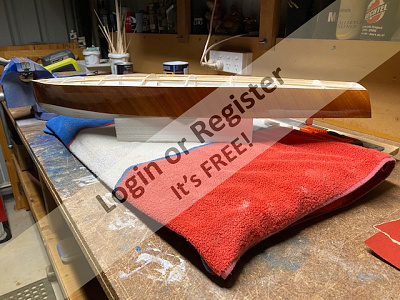
Hi all, some progress since my last update - running gear fitted and tested, false deck on and veneer over the top completed. I used the left over 0.7mm x 25mm hull veneer as an edge planking and found some 0.8 x 8mm strip mahogany to use for the insert pieces.
Fabricated some home made hinges and made a working hatch in the deck in lieu of the kit provided "plastic tarp" cover design for the engine bay. I've made a trim up from brass plate to sit over the gap between the hatch and the deck, painted chrome and just needs a rub down and second coat before fitting. Have to solve the sealing aspect of the hatch yet, a few blogs (on other sites) I'd read previously when researching the Phantom indicated this was an issue with the kits plastic deck pieces - whilst I'm not using these trims I recognize I'm still going to have some splash and ingress - I have some left over foam tape from my aircraft build years ago - hopefully this will be thin enough to fit around the hatch without impeding operation.
Rub rails painted and fitted, steep installed and a thin chrome (painted) strip at the transom to hide the false deck line installed.
Varnishing of the deck is nearly completed, one more sand and a final coat tomorrow and she's pretty well ready for final hull touch ups and fittings to be fabricated and installed - mast / bollards / cleats etc.
Next major task is to customize the cockpit replacing the plastic dash and surround piece provided in the kit. Making this up will be good fun and I hope rewarding - be nice to move on to something else other than the hull 😊
Apologies if my pictures are out of order - I can't quite seem to get that right!
Hope all are keeping safe and well.
Chris
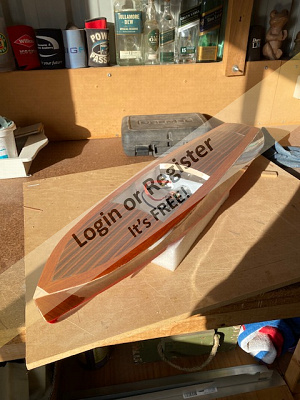
▲
⟩⟩
MouldBuilder
Colin H
stevedownunder
mturpin013
peterd
Rogerdotcom
RNinMunich
Puddle-pirate
jbkiwi
Graham93
Martin555
💬 Re: Crash Tender
4 years ago by 🇦🇺 ChrisB ( Petty Officer 1st Class)
Petty Officer 1st Class)✧ 40 Views · 0 Likes
Flag
💬 Add Comment
Stunning model sir, congratulations on an amazing build. Best of luck with the maiden voyage.
Chris.
Chris.
▲
⟩⟩
No likes yet
This member will receive 1 point
for every like received
This member will receive 1 point
for every like received
📝 Update 6 - Phantom build
4 years ago by 🇦🇺 ChrisB ( Petty Officer 1st Class)
Petty Officer 1st Class)✧ 21 Views · 8 Likes · 1 Comment
Flag
💬 Add Comment
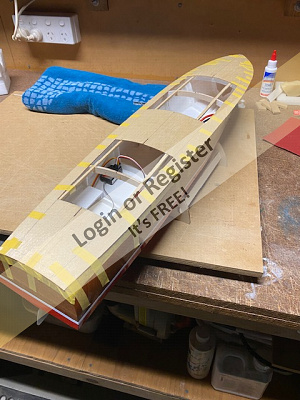
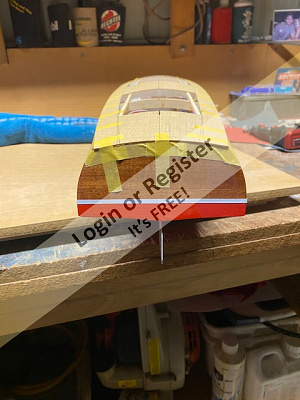
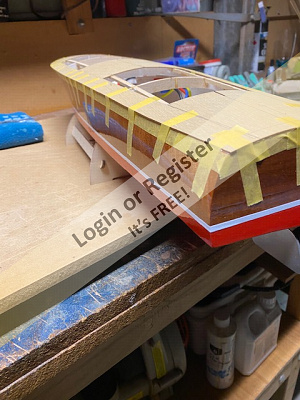
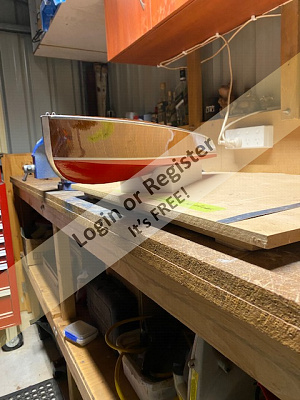
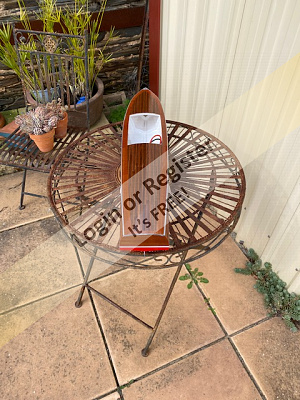
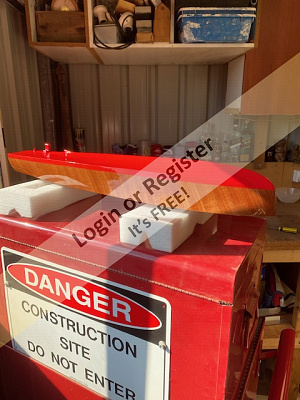
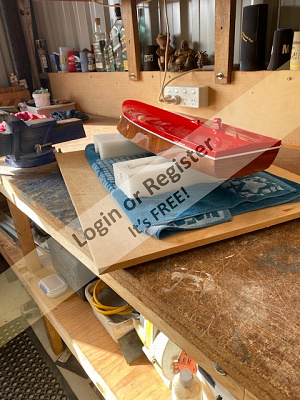
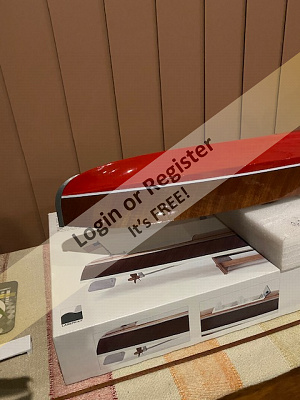
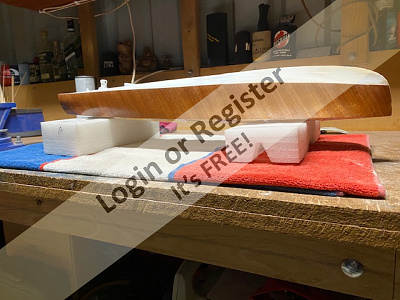
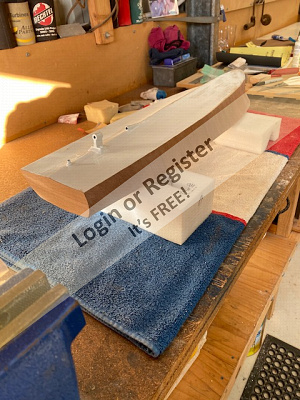
Hi all, finished varnishing and for the most part happy with the result. Getting enough coats on and sanding lightly in between has filled between the joins of each plank quite well and given a quite even surface finish. Despite what I thought was a thorough sanding before I started the first coat, it has been somewhat time consuming and I still have a couple of fix ups to do that refused to cooperate under the water line but after 8 further coats since my last update I had to call enough. I think it's turned out pretty even overall and I can't see or feel too much deviation along the sides. Phew!
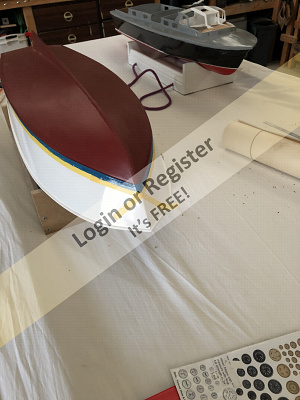
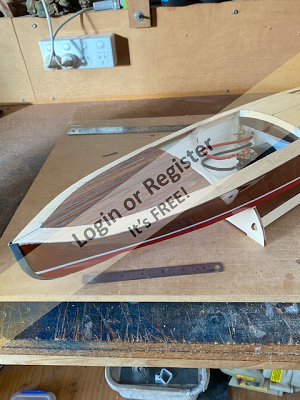
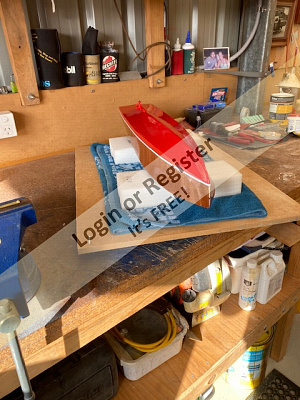
She now has 4 coats of enamel on the underside and today I added the water line striping. I'm glad I opted for the red, I think white was going to look a bit plain against the veneer.
So she's nearly ready for the running gear and a bench test which I hope I can get at this week, then progress with the deck install, planking, hatches and cockpit build. I have enough veneer to cover the deck, however I'm trying to source alternative mahogany and lighter color veneer decking planks (of the same thickness) to make sanding the top sides hopefully simpler and ultimately to have only one level across the deck. I think this will look much better and be consistent with other craft of the era.
Hope all are well,
Chris
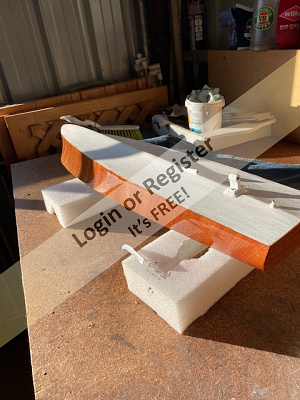
▲
⟩⟩
Colin H
stevedownunder
MouldBuilder
Puddle-pirate
Martin555
jbkiwi
Graham93
RNinMunich
Login To
Remove Ads
Remove Ads
💬 Re: Dauntless
4 years ago by 🇦🇺 ChrisB ( Petty Officer 1st Class)
Petty Officer 1st Class)✧ 12 Views · 2 Likes
Flag
💬 Add Comment
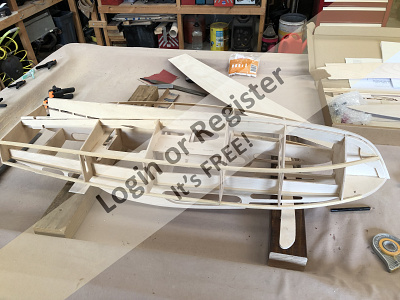
On reflection I think the Hull was probably the more challenging if only from the sanding perspective and the sheer number of parts. Being as she's over 1200mm in length, the combination of ply over frames plus plank on frames gives a lot of variance to sand out, fill, and then ultimately once you have that complete apply the fibreglass and resin and start sanding again.
Having a flat board that you can mark up for alignment and pinning the sheers down, a safe place to build her on (and to leave in place as you progress the frame then the skins) is important, as are 10mm brass pins and lots of clamps / weights etc. Please don't misunderstand me though, I only use pins to clamp or secure parts then I remove them (I'm not a fan of leaving them in due to unforeseen corrosion or swelling etc).
Dumas do not make scale plans which can be a pain - however I found these and their instructions whilst brief to be sufficient as a good guide. Be wary of their supplied fittings as they were undersize for the scale and like many kits not quite true to form. The running gear kit was a more cost effective option than individual parts such as bushes / couplings / props/ shafts and rudders. When I weighed up the cost of the 2" brass propellers alone (Aus $60 each) I chose to purchase the kit for around $160 I think.
I run 2 x Axial 45 turn brushed motors and 2 x 60amp waterproof ESC's, each running on their own 3600mah NiMh. Apart from a slight rpm variance at start up these seem to work well together and bench test each motor only draws around 1.3-1.4 amps at full revs.
I posted the video I have in my response to Ian's comment and I have to sort out a YT account and try that method as well.
Kind regards,
Chris
▲
⟩⟩
gunboat driver
Martin555
💬 Re: Dauntless
4 years ago by 🇦🇺 ChrisB ( Petty Officer 1st Class)
Petty Officer 1st Class)✧ 12 Views · 1 Like
Flag
💬 Add Comment
Hi Ian, yes it was the Dumas kit. I'll add the video today once I sort the YT account out. Per Doug's note I'll add the video I have again.
Cheers,
Chris.

Cheers,
Chris.
▲
⟩⟩
Martin555
💬 Re: RAF Firefloat refurbishment
4 years ago by 🇦🇺 ChrisB ( Petty Officer 1st Class)
Petty Officer 1st Class)✧ 12 Views · 1 Like
Flag
💬 Add Comment
Thank you Colin, I appreciate your kind words. A lot of personal attachment to her, and hopefully she’ll be around for many years to come and bring fond memories.
Cheers
Chris
Cheers
Chris
▲
⟩⟩
Martin555
💬 Re: RAF Firefloat refurbishment
4 years ago by 🇦🇺 ChrisB ( Petty Officer 1st Class)
Petty Officer 1st Class)✧ 13 Views · 2 Likes
Flag
💬 Add Comment
Thanks Doug, I had to learn a lot on the fly so to speak. Back then the internet was far from established as was my capability in using it 😂
Attached image of what I used to run, I had no idea of what to use so followed the model shop advice all those years ago. I now use it to test motors periodically, my brothers wavemaster in particular was a pain (burning through motors) so this seemed a good option to re-purpose it into a test bed of sorts. Servo obviously omitted.
Cheers
Chris
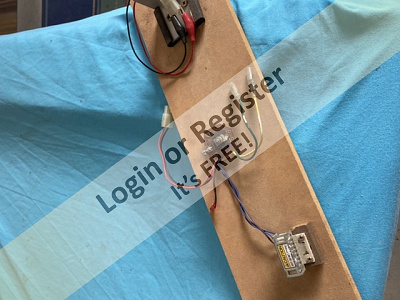
▲
⟩⟩
RNinMunich
Martin555
💬 Re: Phantom build update 5
4 years ago by 🇦🇺 ChrisB ( Petty Officer 1st Class)
Petty Officer 1st Class)✧ 15 Views · 2 Likes
Flag
💬 Add Comment
Thanks Doug.
The veneer wasn't too bad, your glue tip worked really well thank you again. Only had one rub through on sanding - which I nearly missed prior to varnish. This was a devil to cut and fit but it has blended in well and can't be seen.
The pre-veneer sanding was painstaking, and even then I know I could have done better. My skills are basic but I'm learning that with patience and practice it will pay off. I am enjoying this build though for sure.
Re- the deck - there are rubbing strakes which I'm hoping will bridge the divide as long as I can make the transom to the deck joint clean and seamless it should work. It's just very very tight - especially when all around the rest of the hull its got a bit of meat to sand off. We'll see how she goes sir.
Cheers
Chris
▲
⟩⟩
Colin H
RNinMunich
📝 RAF Firefloat refurbishment
4 years ago by 🇦🇺 ChrisB ( Petty Officer 1st Class)
Petty Officer 1st Class)✧ 12 Views · 8 Likes · 9 Comments
Flag
💬 Add Comment
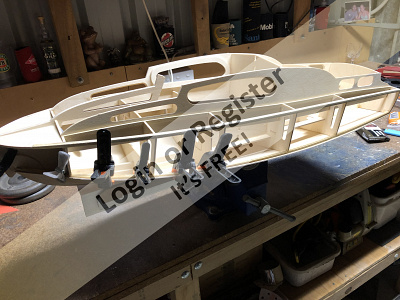
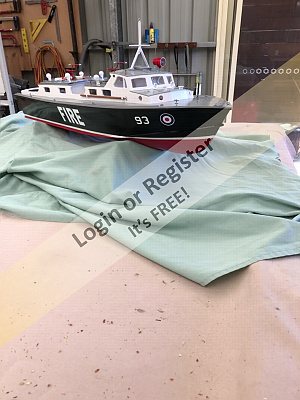
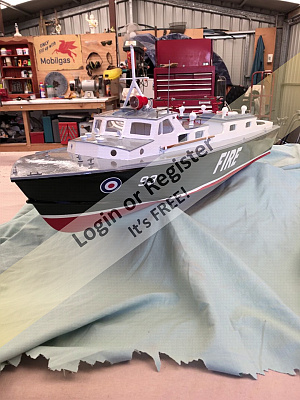
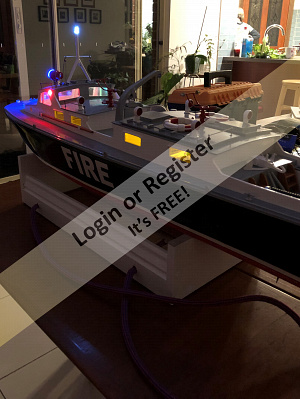
This was my first full scratch build - using the plans from my Dad some 23+ years ago she was built in my garden shed (which at the time was probably not much bigger than the average 4 seater dining table!).
At that time I deliberately kept the boat aesthetically different to his original kit built in the 1950's.
Not sure why, I think perhaps I didn't understand the history of the 2 vessels and my dad was a little vague other than he loved the speed he got from his with an ED racing diesel in it originally!!
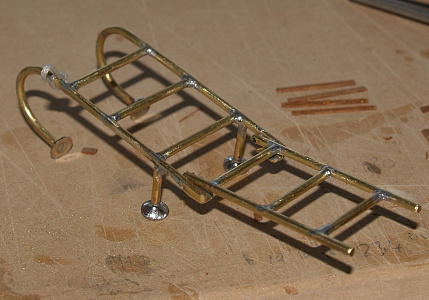
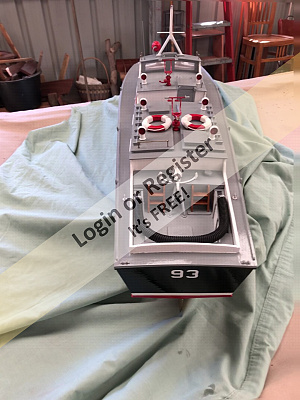
Anyhow, after his passing a few years ago I gave it a touch up but was never really happy with it. So I gave it a good refurb last year, replacing the deck, forward cabin roofs, installing the forward portholes, a new aft deck, and scratch building all the parts as best I could from the images I could obtain - tow hook, masts, davit etc etc. and adding an LED light kit to the mast, navigation and insides. I obtained a decal kit from the UK to finish her off, and numbered her #93. When I refurbished my Dads before xmas that became #94 (I understand this was delivered first so it seemed appropriate). Fire monitors from SLEC also obtained a few years back for both boats. Still running my original Johnson brushed motor, but upgraded the prop, shaft and stern tube to M4 and replaced the servo driven electro-mechanical speed controller for an ESC instead. Yet to get a video of her on the plane but she certainly scoots along.
Cheers,
Chris

At that time I deliberately kept the boat aesthetically different to his original kit built in the 1950's.
Not sure why, I think perhaps I didn't understand the history of the 2 vessels and my dad was a little vague other than he loved the speed he got from his with an ED racing diesel in it originally!!
Anyhow, after his passing a few years ago I gave it a touch up but was never really happy with it. So I gave it a good refurb last year, replacing the deck, forward cabin roofs, installing the forward portholes, a new aft deck, and scratch building all the parts as best I could from the images I could obtain - tow hook, masts, davit etc etc. and adding an LED light kit to the mast, navigation and insides. I obtained a decal kit from the UK to finish her off, and numbered her #93. When I refurbished my Dads before xmas that became #94 (I understand this was delivered first so it seemed appropriate). Fire monitors from SLEC also obtained a few years back for both boats. Still running my original Johnson brushed motor, but upgraded the prop, shaft and stern tube to M4 and replaced the servo driven electro-mechanical speed controller for an ESC instead. Yet to get a video of her on the plane but she certainly scoots along.
Cheers,
Chris
▲
⟩⟩
Elsrickle
ianed57
Martin555
Colin H
RNinMunich
robbob
marky
Graham93
📝 Update 5 - Phantom build
4 years ago by 🇦🇺 ChrisB ( Petty Officer 1st Class)
Petty Officer 1st Class)✧ 22 Views · 9 Likes · 3 Comments
Flag
💬 Add Comment
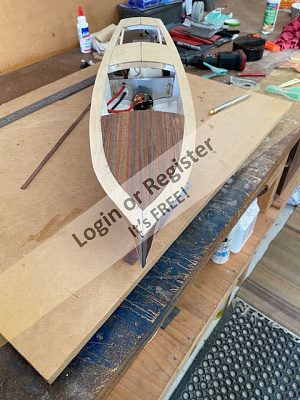
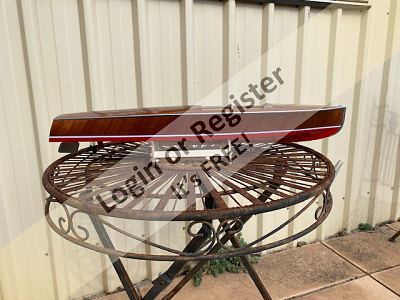
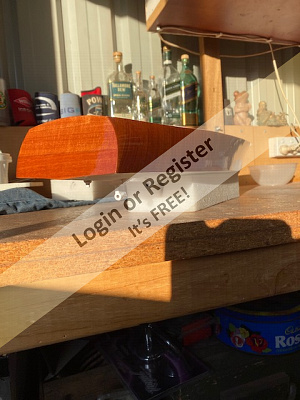
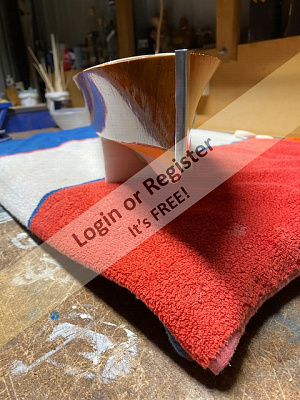
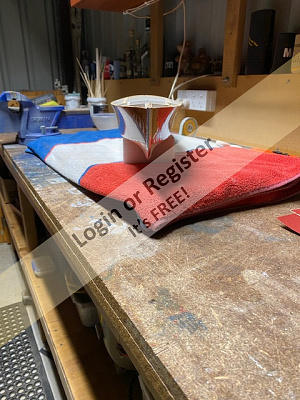
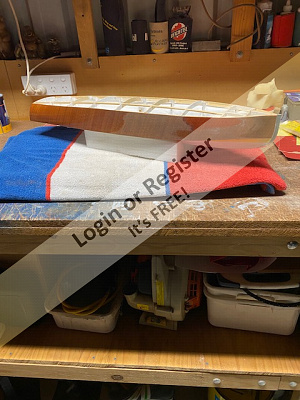
Hi all, has been a few days since I finally finished the veneer step and varnishing has now commenced - 2 coats down. In between I've been adjusting the steep to get a better fit with the veneer in place and forward planning the deck finish, specifically what to do with the exposed un-planked deck areas. I have enough left over veneer so I'm going use this over the deck rather than staining or painting the exposed areas. I'll lay it on an angled pattern same as the sides for consistency - its going to be a long process but I think worth it in the end.
The deck fitting is going to be a close call - the supplied 1mm deck is barely wide enough at the transom with the veneer now in place. I'll savor fitting this piece (got a feeling its gonna be a trip to the hobby shop to make a replacement ☹️).
Also carried on some further research into colours and I've decided on Symphony Red for the underside with a simple white waterline above. I also note many boats of this style and era have a spray rail (what I call it) that extends approximately 1/4 of the way along the sides from the transom forward. Not sure of the purpose of these - spray diffusion? Speed/ handling? Aesthetic? I think I'll be adding these anyhow.
I must say I've enjoyed the research into the era, there are some truly beautiful images of craft from this time to be found online and it is has been a joy to view them and to appreciate the craftsmanship. Its a hobby now as I watch the glue and varnish/paints dry with a cuppa 😊.
Next steps are to finish the marine varnishing, final sand the underside and painting, then let it rest for a few days to harden off with this cold weather. Then its running gear install and testing time.
Stay safe and healthy folks.
Chris
▲
⟩⟩
Colin H
stevedownunder
mturpin013
peterd
Puddle-pirate
MouldBuilder
jbkiwi
Martin555
RNinMunich
💬 Re: Dauntless
4 years ago by 🇦🇺 ChrisB ( Petty Officer 1st Class)
Petty Officer 1st Class)✧ 12 Views · 2 Likes
Flag
💬 Add Comment
Thanks JB,
I only have one video of her running early this year, I tried to upload it but I might need to post a youtube video? Any advice on loading a video media file would be appreciated 😊
Cheers
Chris
I only have one video of her running early this year, I tried to upload it but I might need to post a youtube video? Any advice on loading a video media file would be appreciated 😊
Cheers
Chris
▲
⟩⟩
gunboat driver
Martin555
📝 Dauntless
4 years ago by 🇦🇺 ChrisB ( Petty Officer 1st Class)
Petty Officer 1st Class)✧ 9 Views · 5 Likes · 11 Comments
Flag
💬 Add Comment
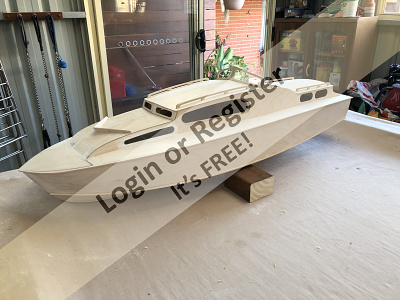
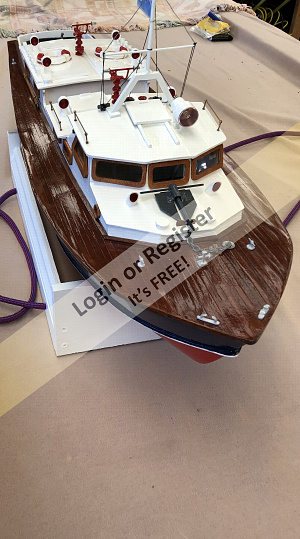
I built Dauntless back in 2019 taking nearly 5 months to complete. Loved the build, very challenging and rewarding. Based on the Rockerfellers daily commuter boat she is from the mid 1940's with quite some history. She survived as a private vessel I believe until around 2014. 60ft 1/16th scale.
Runs really nicely and is close to her scale speed.
Chris.
Runs really nicely and is close to her scale speed.
Chris.
▲
⟩⟩
gunboat driver
Martin555
RNinMunich
jbkiwi
Graham93
Login To
Remove Ads
Remove Ads