Join Us On Social Media!

|

|

|
Download The App!
Login To
Remove Ads
Remove Ads
Login To
Remove Ads
Remove Ads
Model Boats Website
Build Blogs
5 Posts
6 Followers
40 Likes
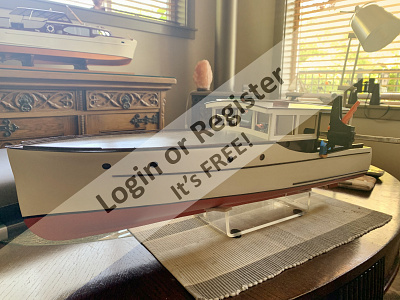
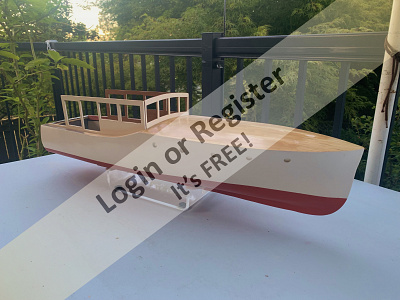
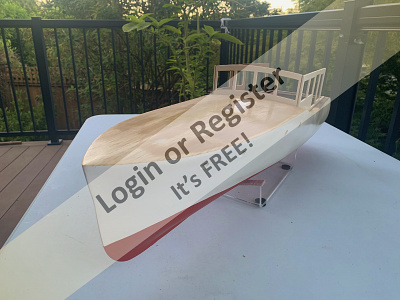
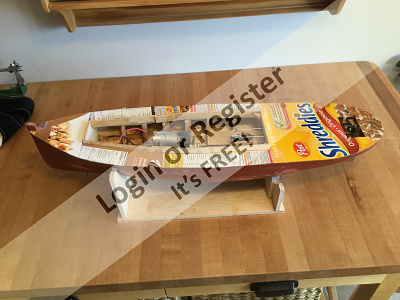
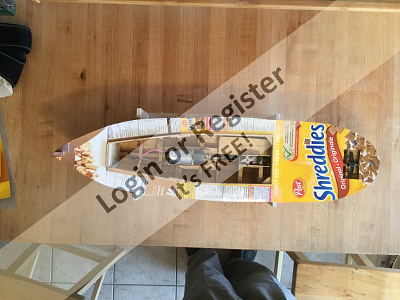
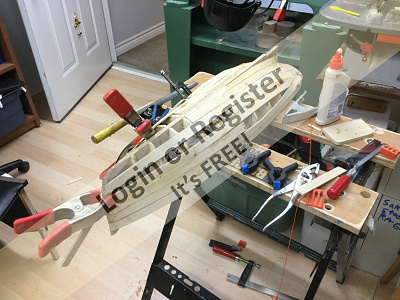
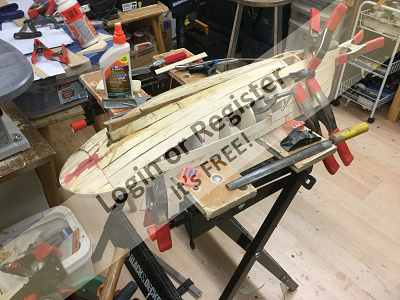
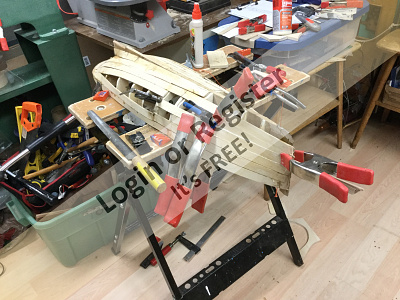
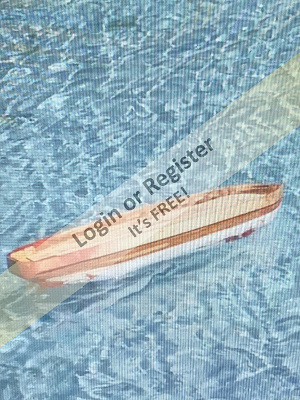
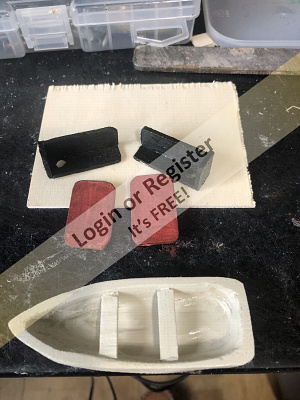
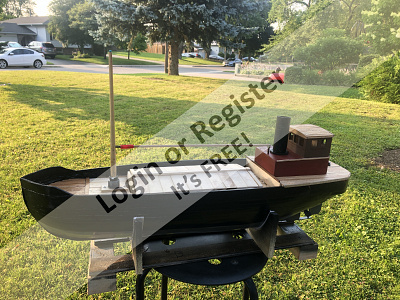
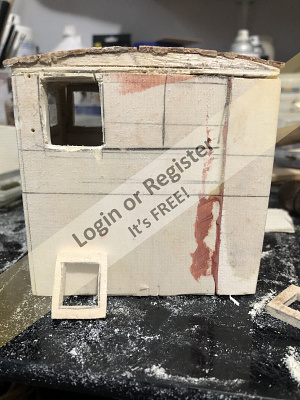
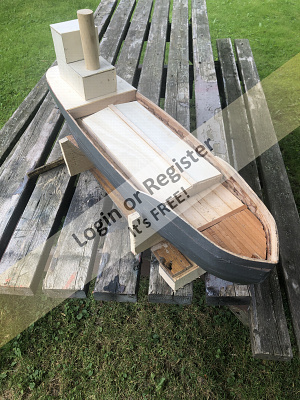
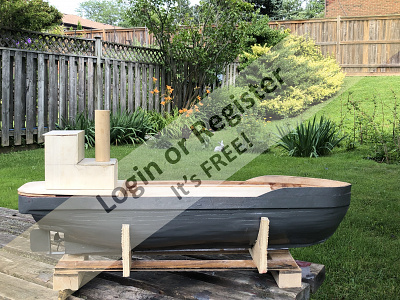
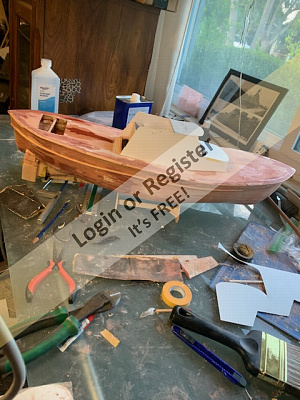
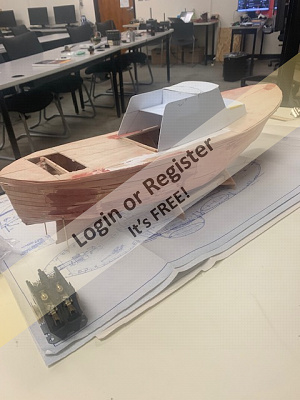
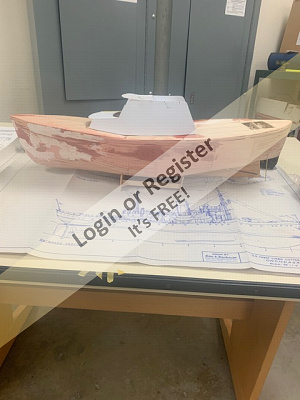
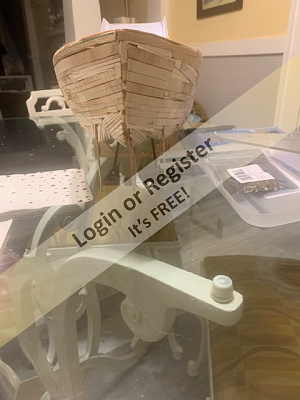
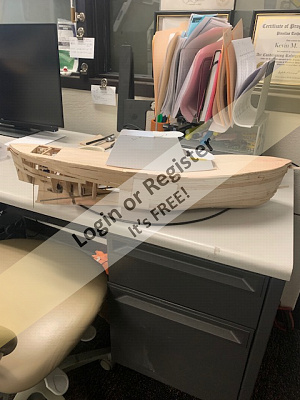
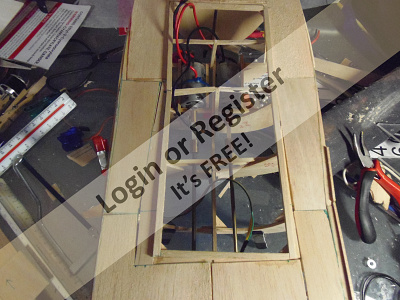
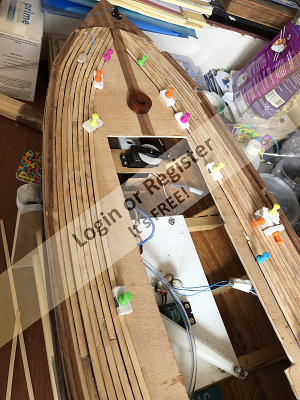
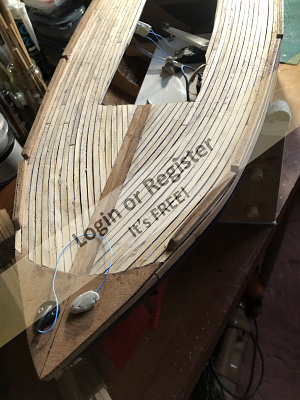
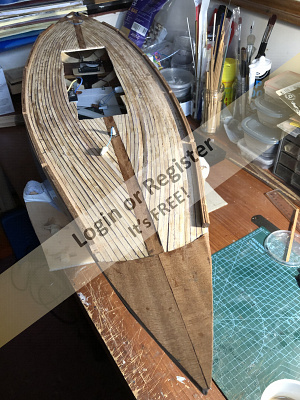
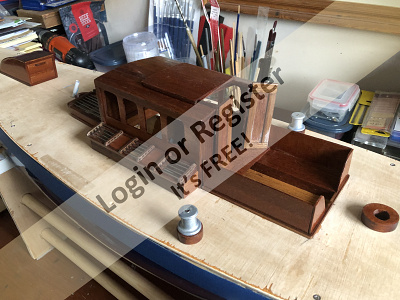
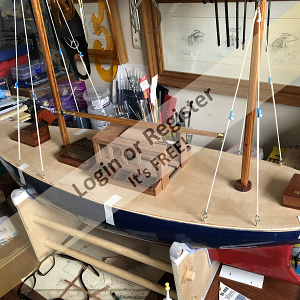
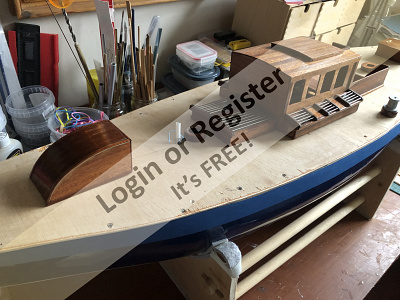
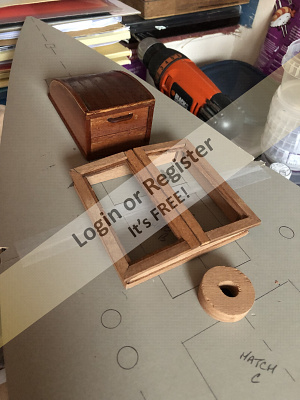
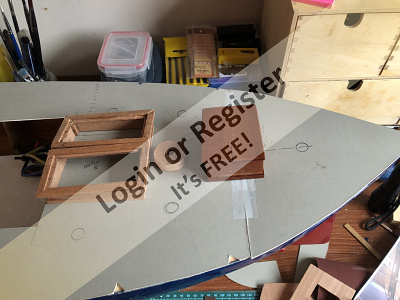
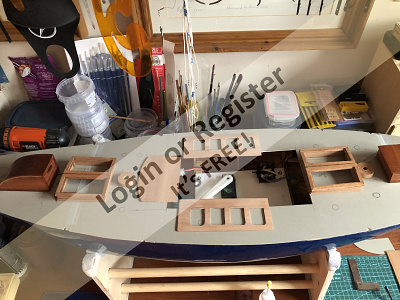
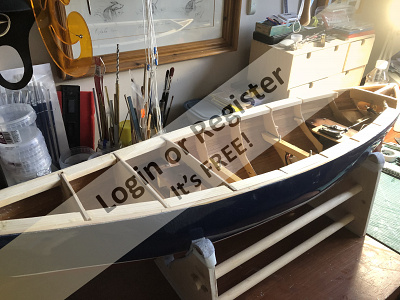
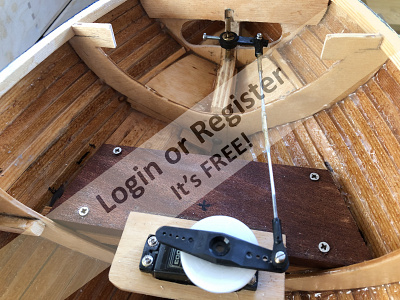
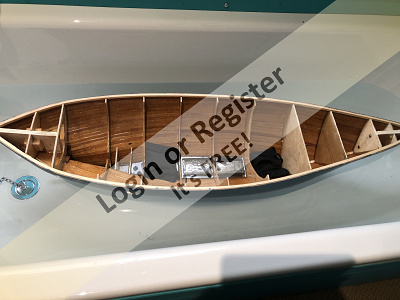
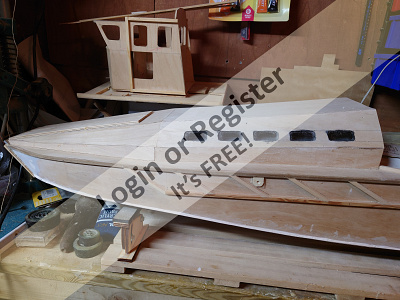
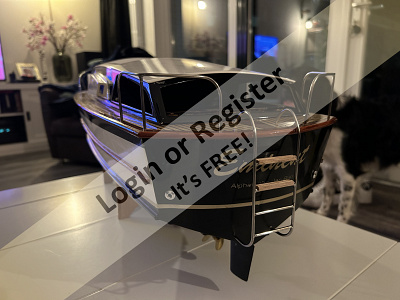
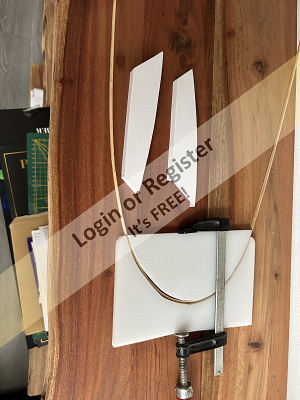
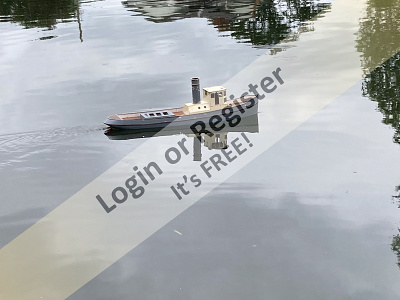
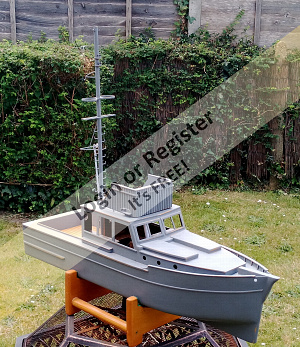
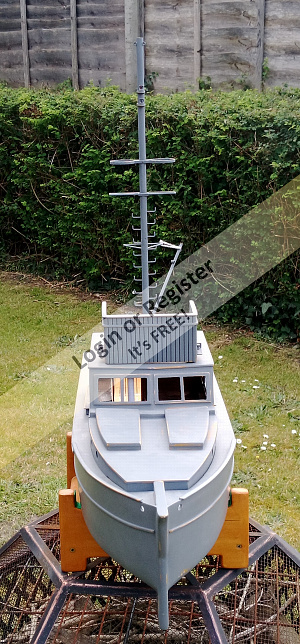
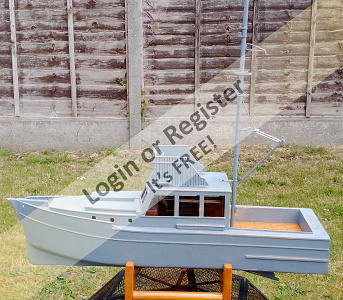
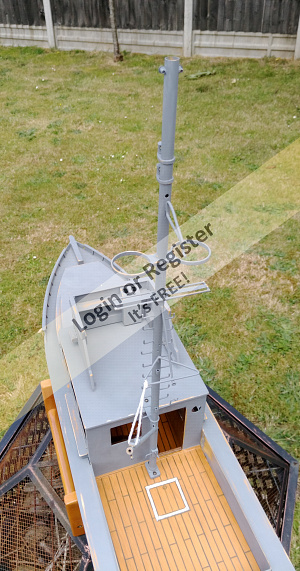
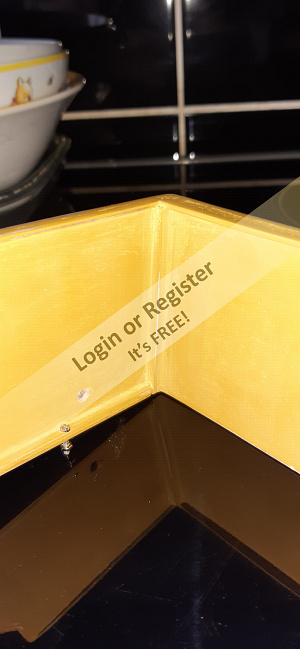
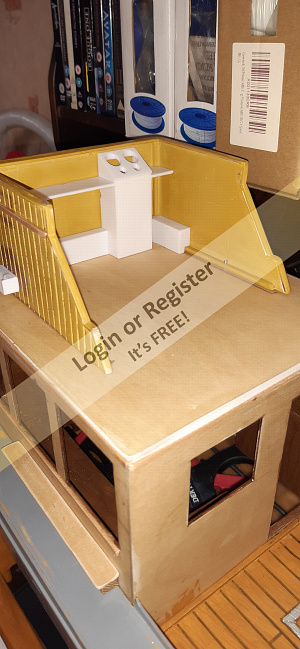
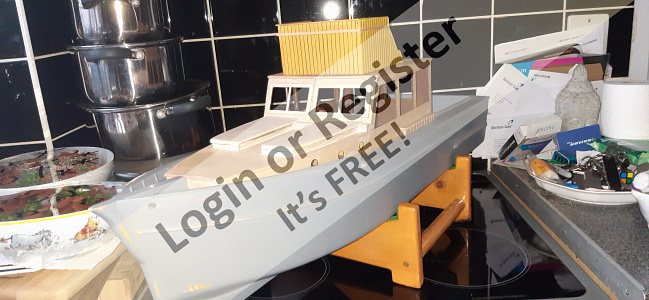
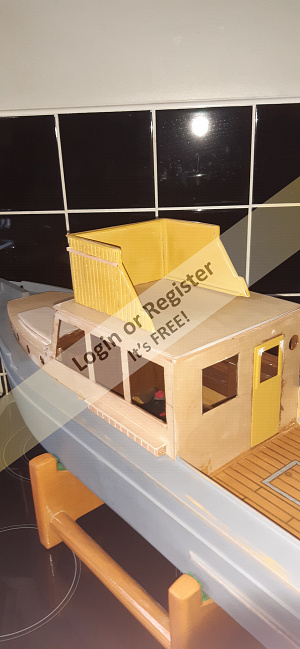
Turtle
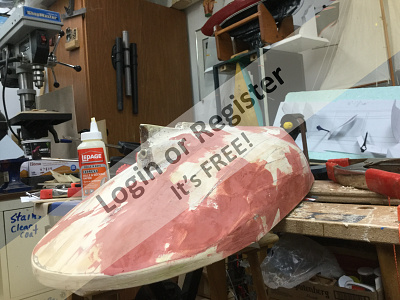
I have the honour and privilege to embark on a restoration of a model of a boat which belonged to a family I have known since I was knee high to a grasshopper.
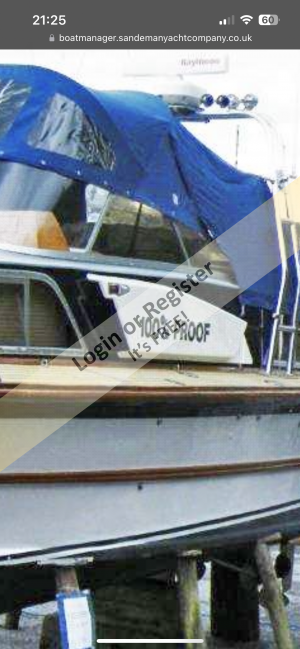
She is the "Turtle", which has a very storied past. When I knew her she was plying the waters of the Southern Lakes of the Yukon.
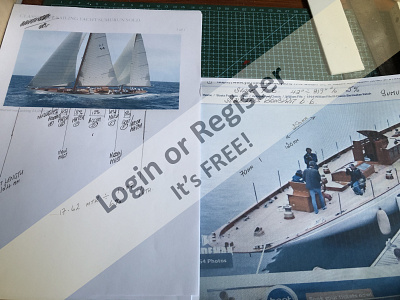
I believe she is a Lake Union Dreamboat designed by the Grandy Boat Co. in Seattle and built in 1929. I understand from her history that the "Turtle" may have actually been built with prison labour.
Her specs are as follows (if she is indeed a Grady Dreamboat).
LOA 38' 0"
Beam 11' 6"
Draft 3' 6"
Designer: Grandy Boat Co.
Gross Displacement: 12000 lbs.
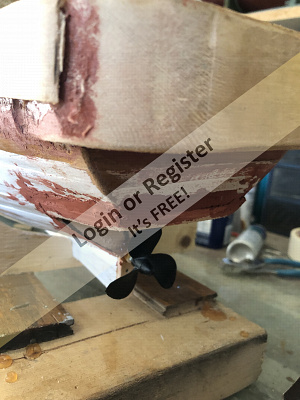
Number of Engines: 1 (model has twin screws)
Engine Model: Lehman
Fuel Type: Diesel
Year Built: 1929 ( "Adelante's" Information shows her as built 1912. I believe this is an error as Grandy started building Dreamboats in 1926)
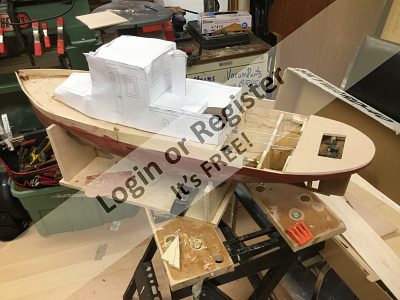
The model I believe was built from the "Dumas" model boat plans for the 40' "Vinyard" (very last photos), and the cabin modified to reflect the "Grandy" plans.
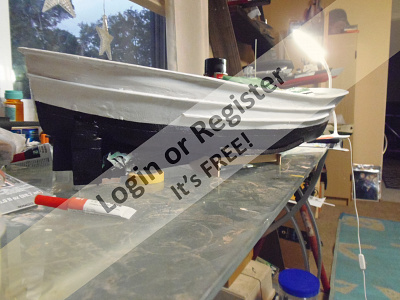
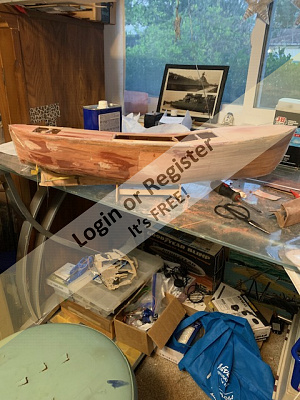
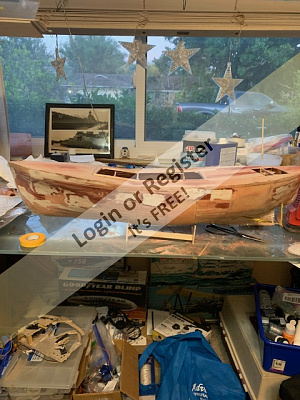
I have started with a photo of the "Turtle" on the Southern Lakes as I remember her. Then a photo of the only sister I know of her in Seattle, the "Nirvana".
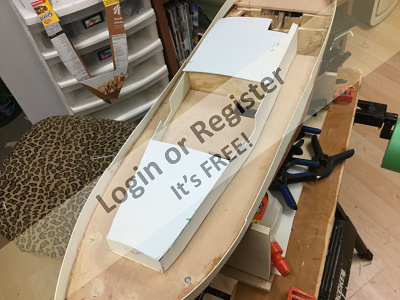
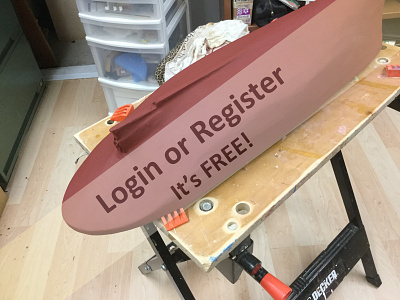
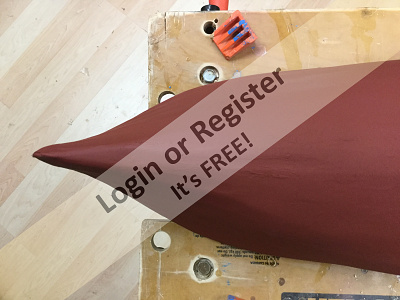
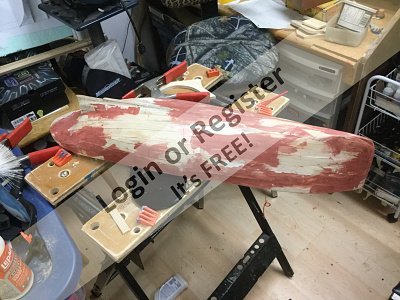
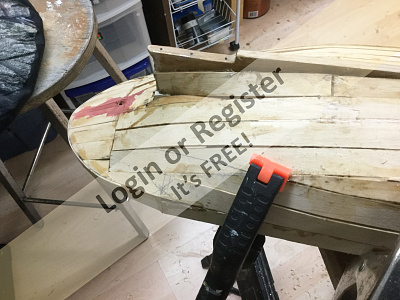
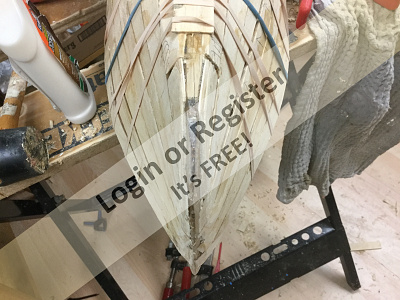
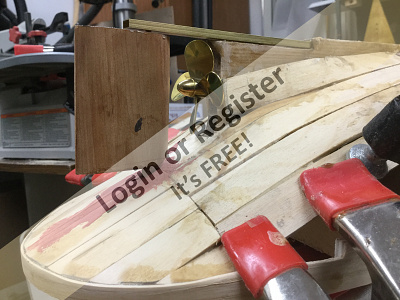
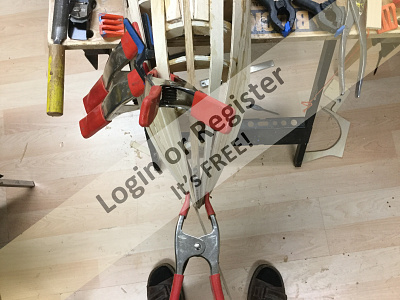
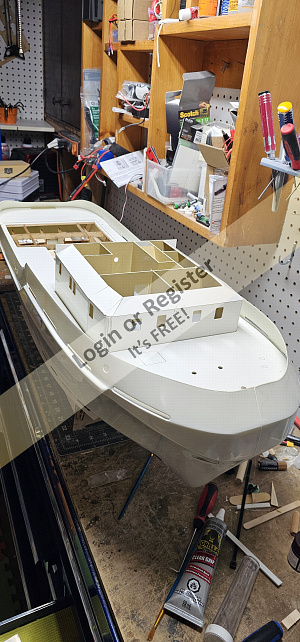
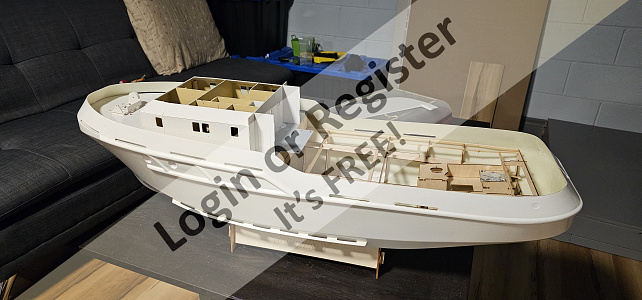
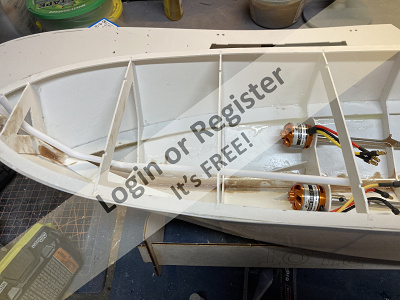
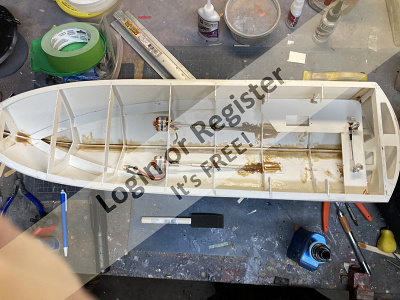
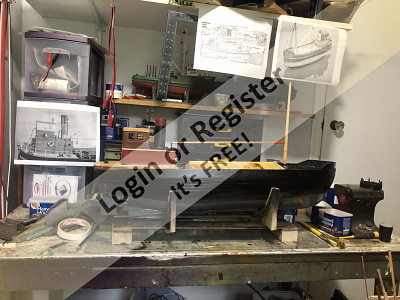
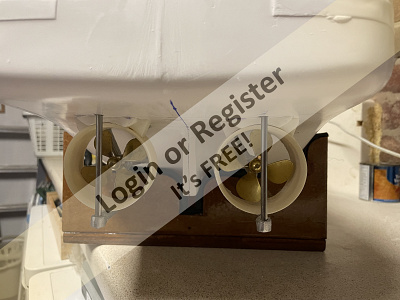
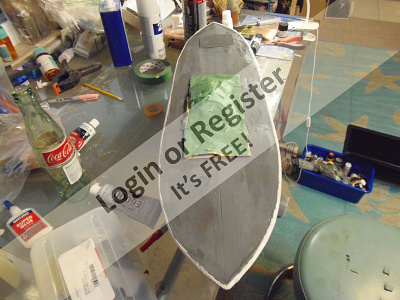
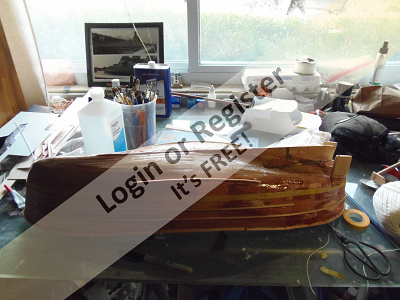
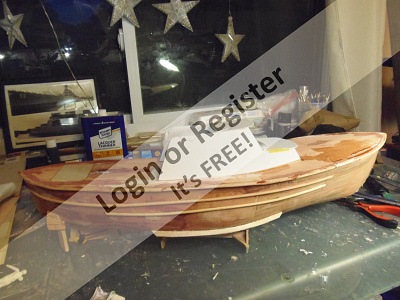
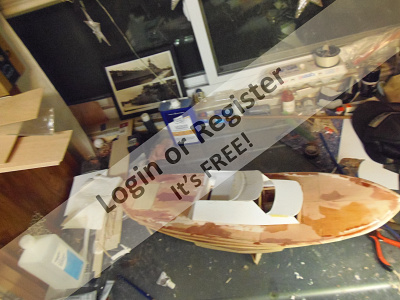
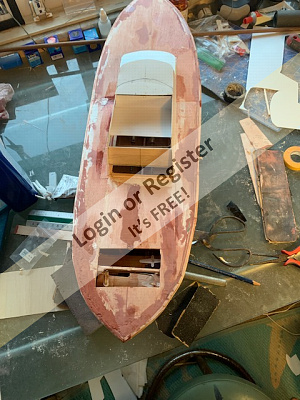
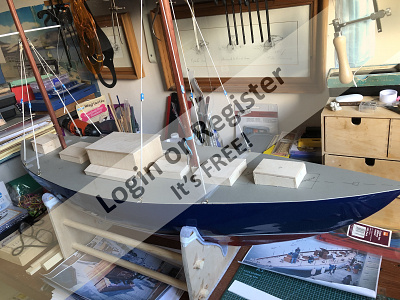
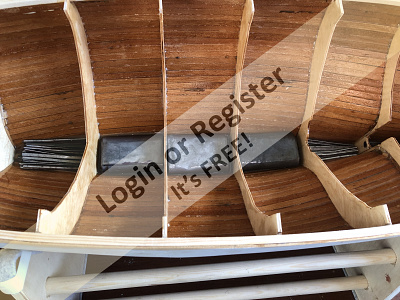
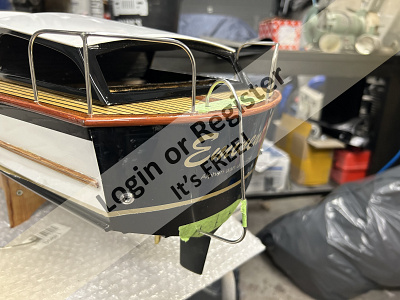
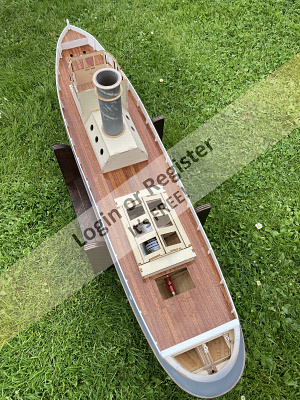
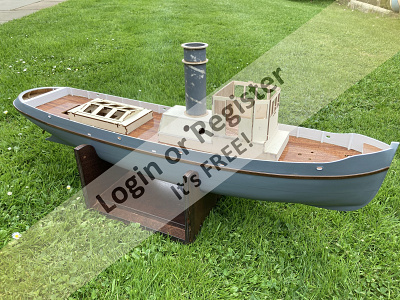
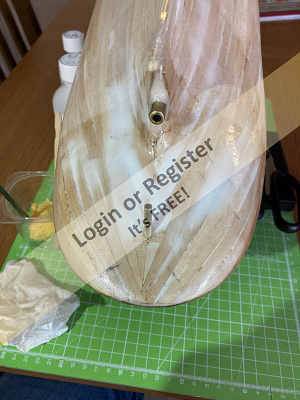
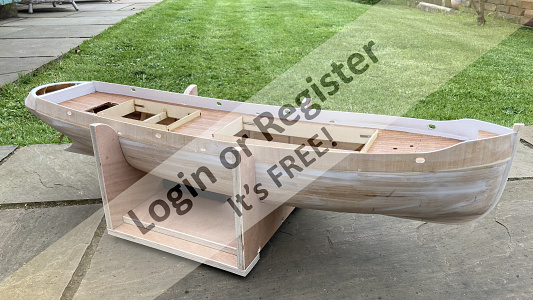
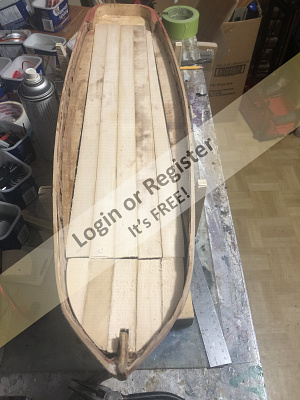
Following is a the photo of the model when she was stored in Edmonton earlier this year. Unfortunately as the following photos show, she floundered and was quite damaged.
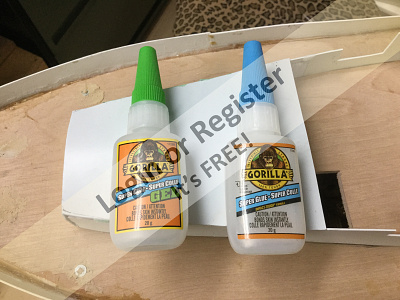
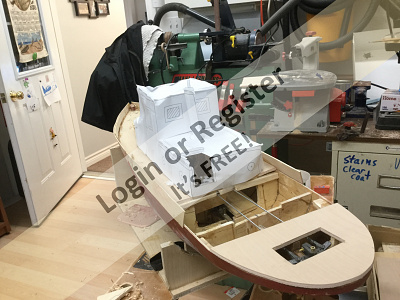
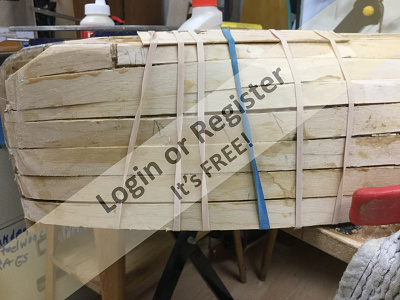
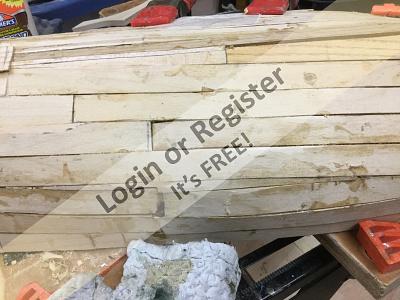
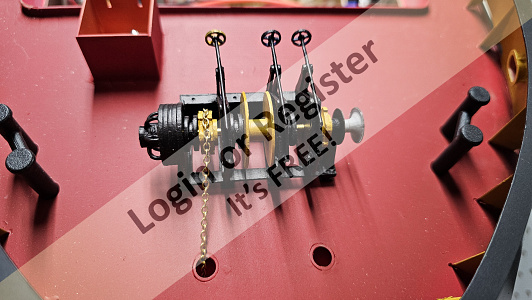
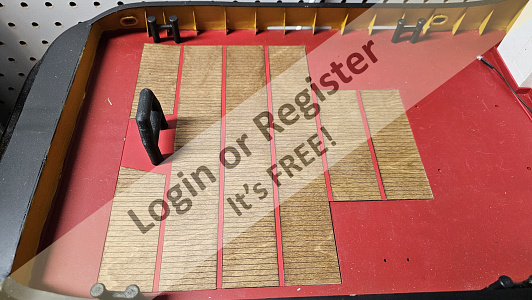
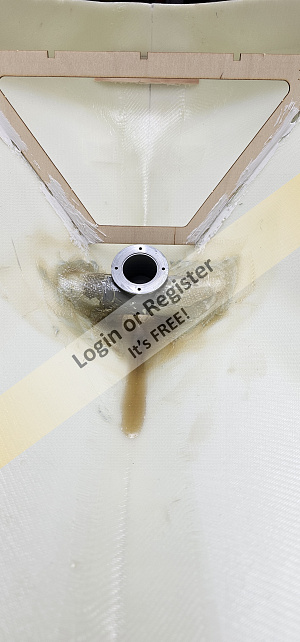
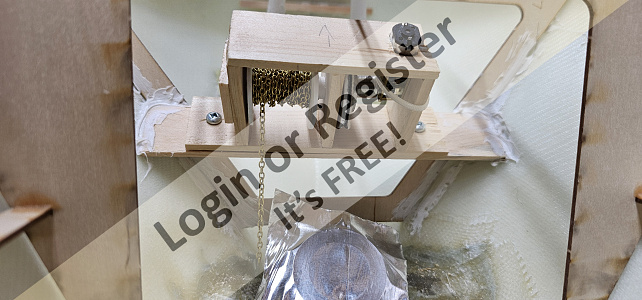
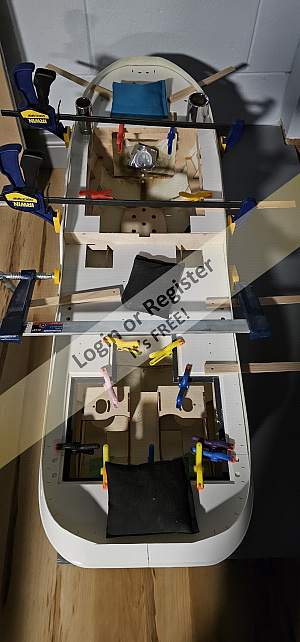
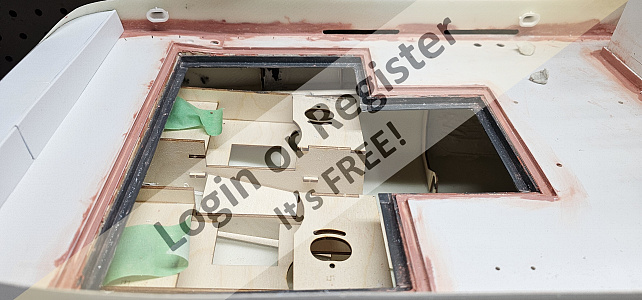
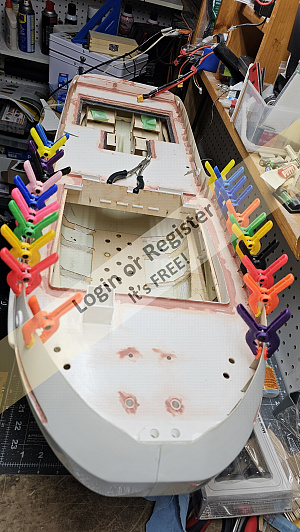
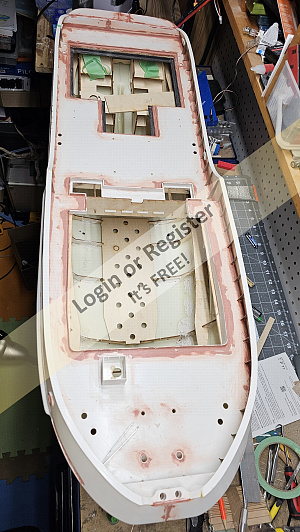
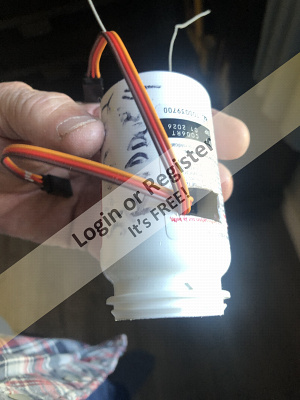
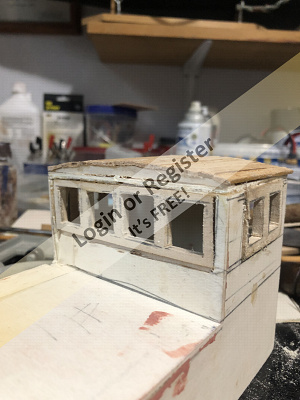
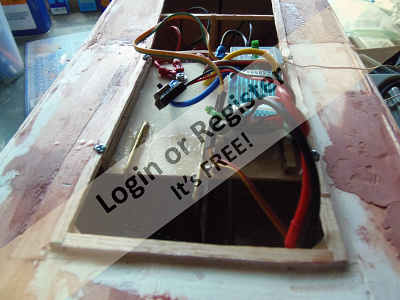
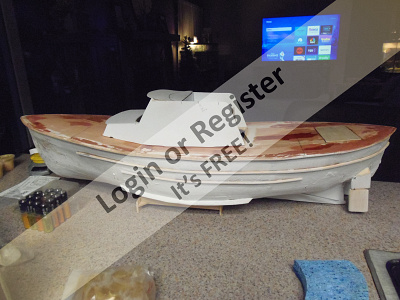
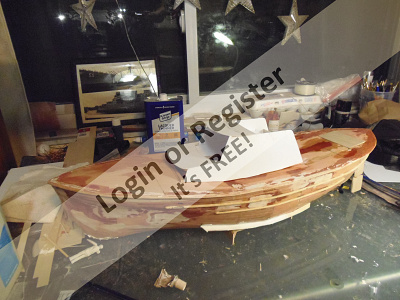
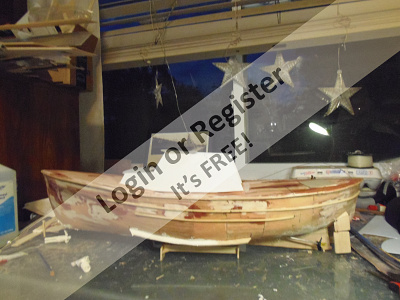
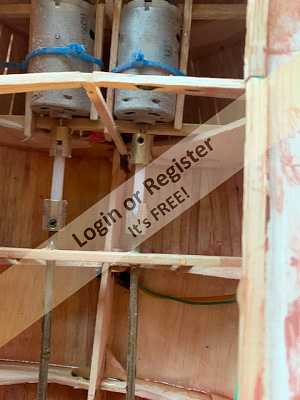
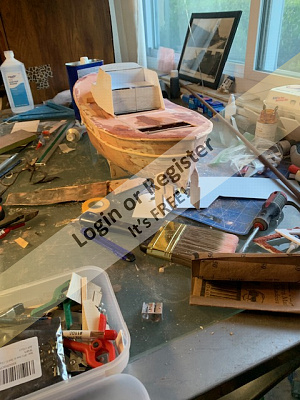
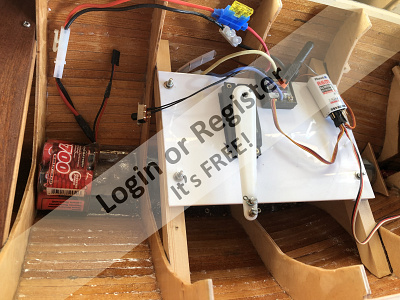
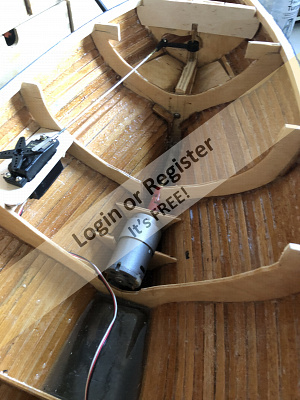
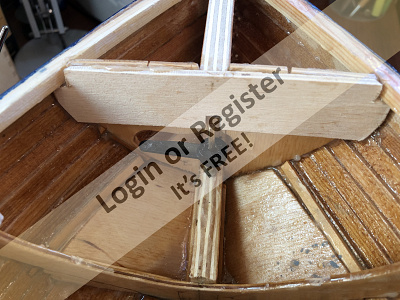
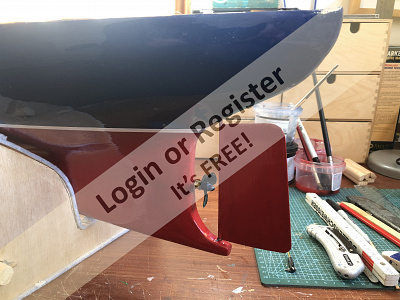
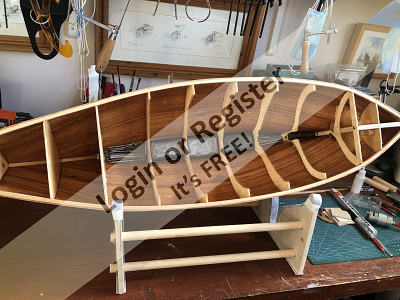
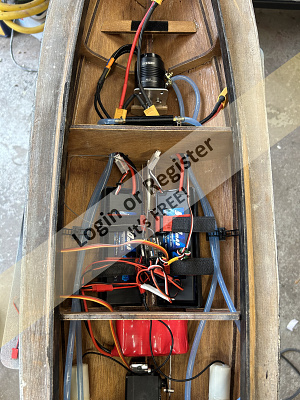
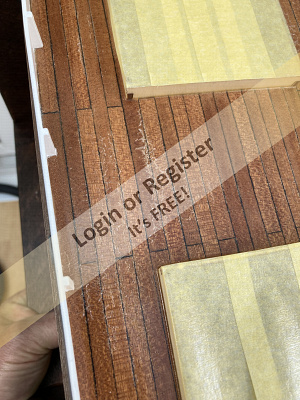
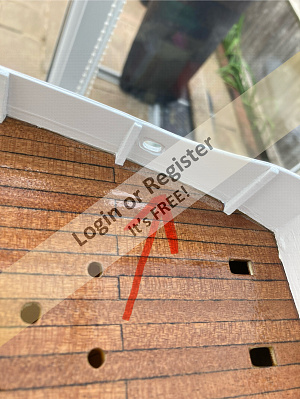
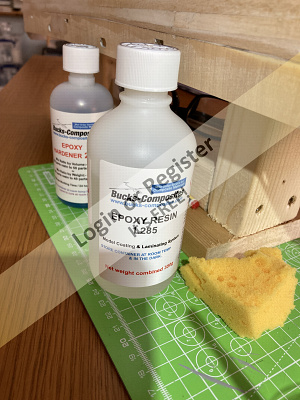
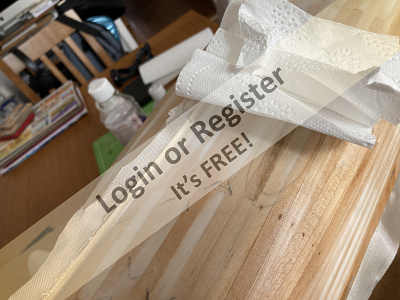
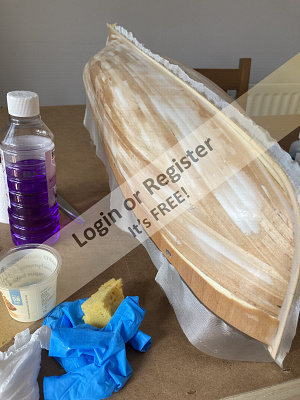
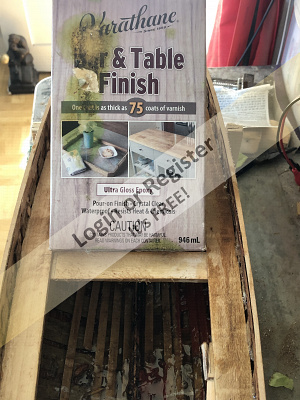
She arrived at my shipyard today, and I did a quick survey of her. Her wood is probably close to 50 years old now and quite delicate. She has the old mechanical speed control in her from "Dumas" as well as dated electronics. I have removed all I can so that I can start repairs and reinforce the hull. We will work our way up to superstructure and electrical later.
I would like to honour her builder and keep his work intact as much as possible. I do think I will need to redo the transom on her however. I will save the old one if that is the case.
The model is 28" LOA
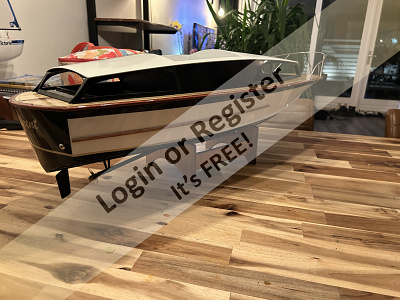
Stay tuned for more as we bring her back.
🇨🇦 Brightwork

11 minutes ago


13 Posts
7 Followers
82 Likes
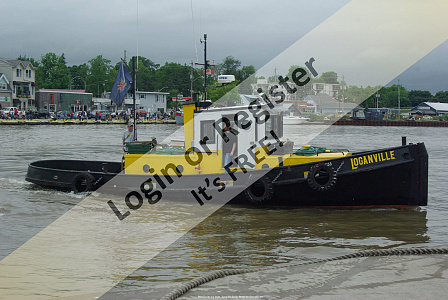
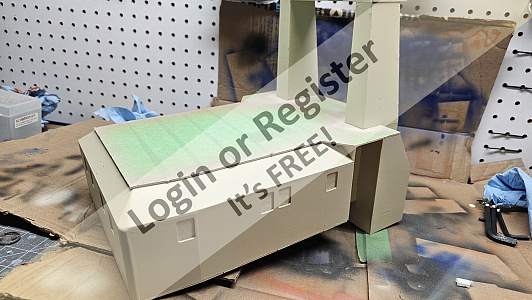
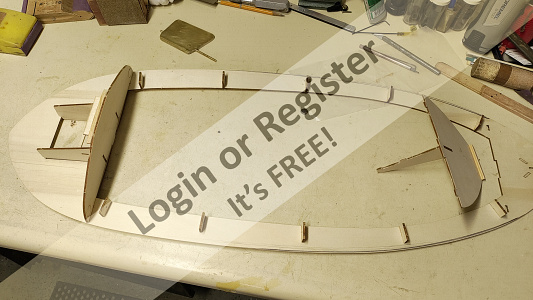
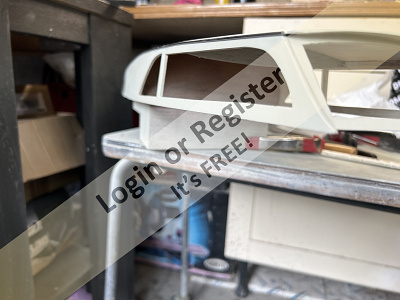
Miss Jenna located in Mahone Bay, N.S
Mike Kelly owns the Miss Jenna, a Russel Brothers Ville Class tugboat built for use by the RCN for duty on the East and West coasts of Canada. It has an approximate LOA of 40', beam 10' and interestingly virtually no keel. The drawings found, show a visible keel beginning about in the middle. A 4 1/2" width and about 1 3/4" depth, which becomes increasingly more moving aft.
http://www.russelbrothers.ca/xlisterville.html
Bill Froelich, Houston, Texas, built a fine 40" 1"=1' scale model seen here.
Bill and I have been in contact and have shared various ideas.
🇨🇦 Ronald

9 hours ago


29 Posts
23 Followers
289 Likes
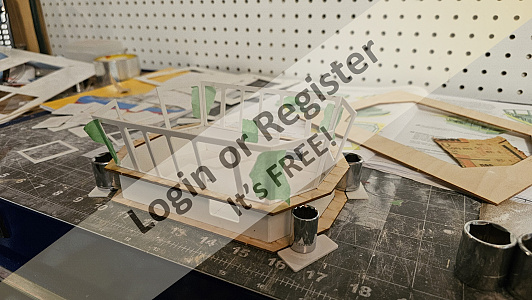
Modified Stiletto project
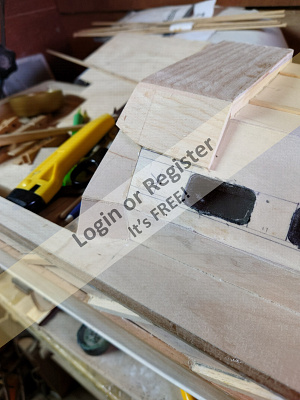
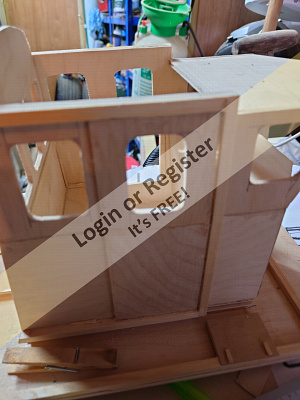
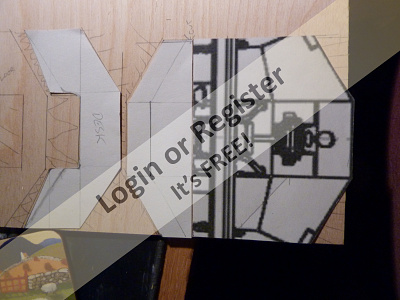
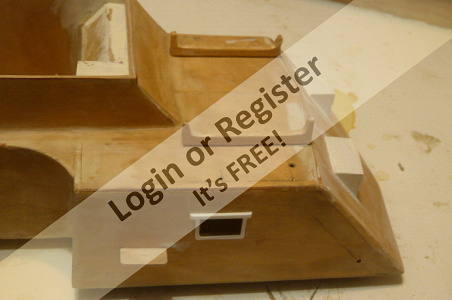
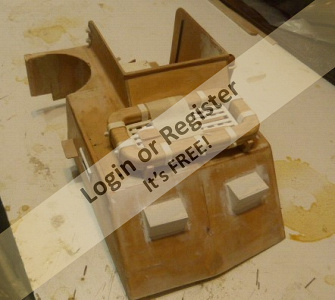
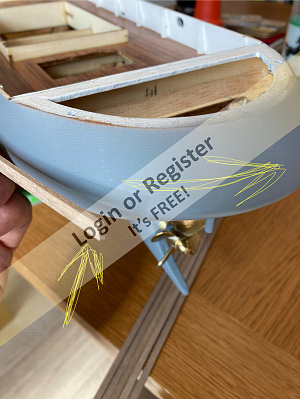
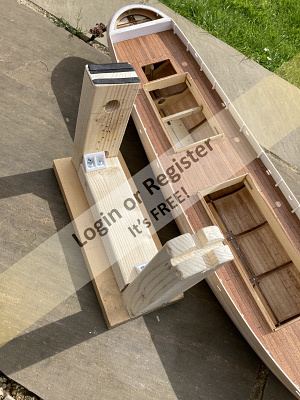
Making a bit of a start on my stretched Stiletto (more a Stilapier) at the moment, as it had been put aside while I had a play with a surface drive to fit to it, if I could get one working (see under surface drive experiment, in forum). I've shelved that idea till I can find a suitable universal for it, and have decided to use a modified cable drive instead (see under 'converting a cable drive to a standard drive', in forum) I wanted to settle on the drive type before starting fully, to make installation easier.
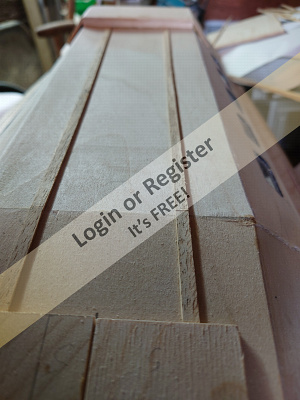
The Stiletto has been stretched to 38 1/2" by blowing the A4 sized drawings up to AO paper size. I've left out the usual internal locking structure so as to create more room and ease of access to the internals, instead, the whole cabin will lift off, rather than a few 'lids'. All the new positions have been worked out using top and bottom datum lines (pic 1). The deck camber has been changed but the deck sheer left in. A few other mods will be made as things progress.
I started by cutting out the keel, breast hook and new ply bulkheads, then cut the centers out of the bulkheads notched them for the stringers and reinforced them. I made a new universal building jig (under model framing jig, in forum) to hold everything in place, (right side up and upside down), and set everything up on it. Glued all the bulkheads bar the transom to the keel, (keel has shaft tube slot previously built in by cutting the keel on the appropriate angle, separating the 2 pieces by a shaft tube diam, trenching 2 side plates to suit the shaft tube angle and diam, and gluing/clamping them on using the building jig to hold them flat and straight.
I've made a cut-out for the motor in bulkhead 3, and bent the cable drive to suit. A motor mounting plate will be made later. Cable drive will have a V brace made to suit once the angle has been sorted for prop clearance etc.
Getting hard to find some modelling supplies (namely spruce strips for stringers and balsa) now so there might be some slow patches in the building.
🇳🇿 jbkiwi

10 hours ago


5 Posts
10 Followers
63 Likes
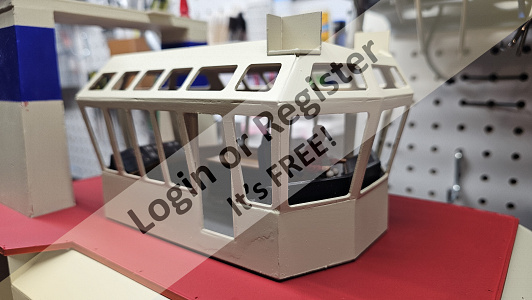
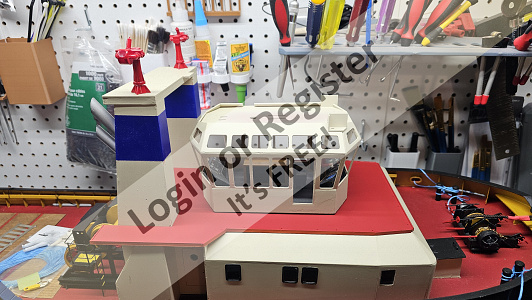
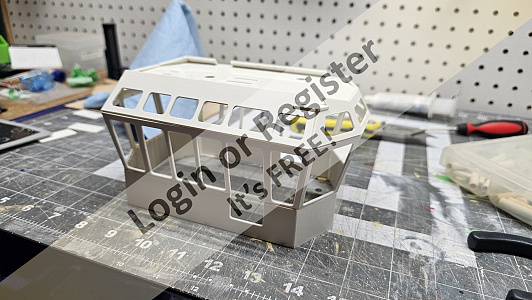
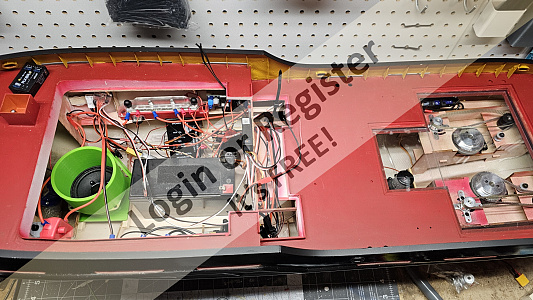
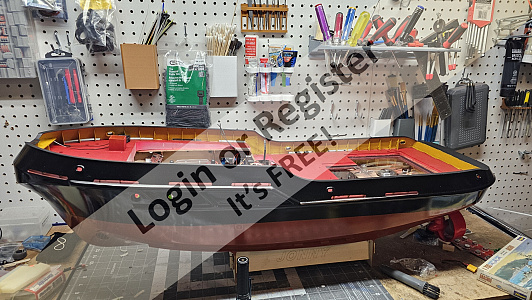
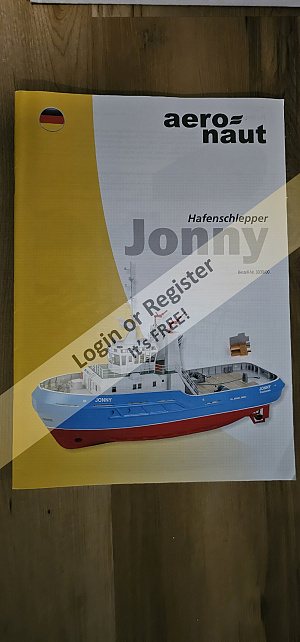
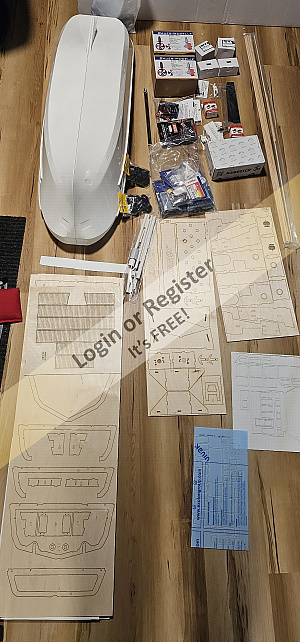
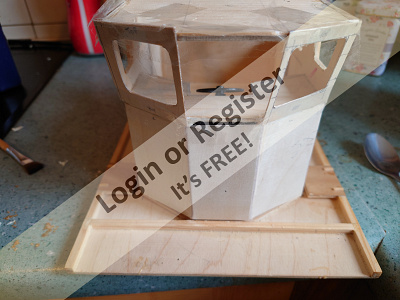
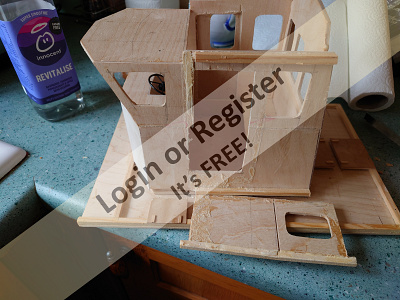
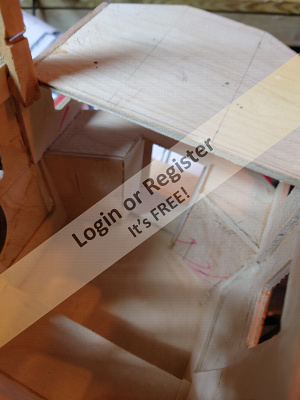
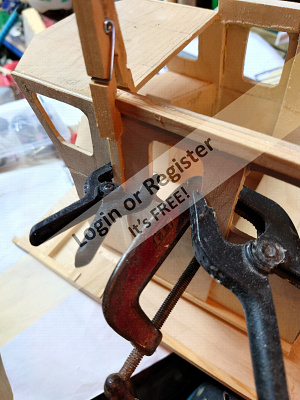
Aeronaut Jonny
Hi all, I started a new build during Christmas and I'm just about ready to start painting the haul so I figured its a good time to get the build log going.
I've had this kit for about a year now, purchased from Bauer in Germany along with with the recommended equipment including their Schottel Drive system. The plan is to have the two Schottel drives, a bow thruster, one working Anchor (possibly two in the future of off the same winch), a sound system, two working radars, working spot light with pivot in pitch and yaw, always on nav lights and interior lights, RC working main winch and manually operated bow and side winches, tow separate working fire monitors able to rotate individually, possibly a smoke generator and final an auto bilge system This comes to a total of 18 RC, unfortunately I only have 16 available so we will have to see what ends up in the ship.
So far I have the drives and bow thruster all fit and ready for assembly. I then built up the frame work and made the holes for the fire pumps and bilge. then had to build the lower deck house so I could fit the deck in the right place on the ship. Once the deck was dry fit I cut the scuppers then glued the deck down. I then set to work making the deck splash proof by installing and extending the kits coaming. I also add a drop floor under the aft hatch that I'm hoping will allow me to keep the water that gets on the deck from leaking down into the haul. Now I've got the Bulwark stanchions and handrails just about complete. I also started work on some of the deck items as I need the locations to work out some of the modifications I'm working through.
I hope to start painting the haul soon, I'm going to try brush painting this ship as I was able to find some nice paints at an Art supply store and I don't have much access to a place to spray paint in the winter. I do think I will spray on the primer first and hope it helps absorbed some of the brush marks.
🇨🇦 Westwind

11 hours ago


13 Posts
10 Followers
113 Likes
Billing Calypso
Picked this up at our first scale meet of the season early April, too much going on at the moment, but eventually managed to start this evening. The kit is over 20yrs old, was started and then put on "hold" by the previous owner. Hull is already assembled as was the observation chamber which was situated at the bow. As this "lends " itself to being lit internally, I have removed the brass observation windows plus the one on the bow and then attached some clear acetate on the back of them to make this forward area watertight. The observation chamber now glued in place, spraying to be carried out once this is dry and the "windows " can then be reinstated. Going to be a long job but looking forward to the build.
🇬🇧 Doogle

1 day ago


2 Posts
3 Followers
5 Likes
Yard Sale Find
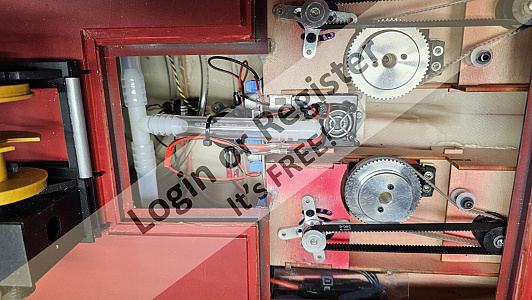
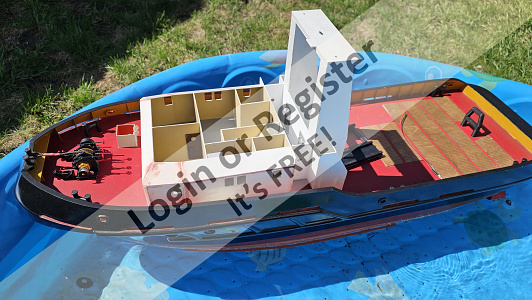
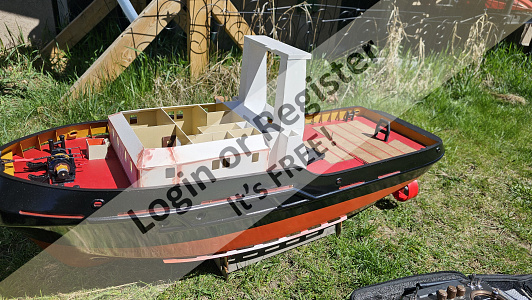
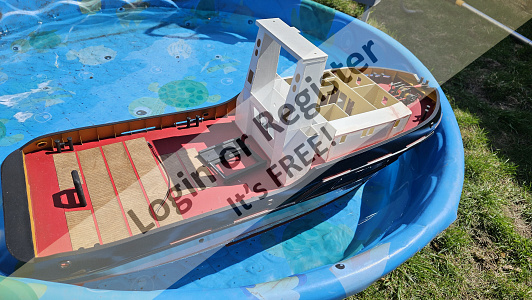
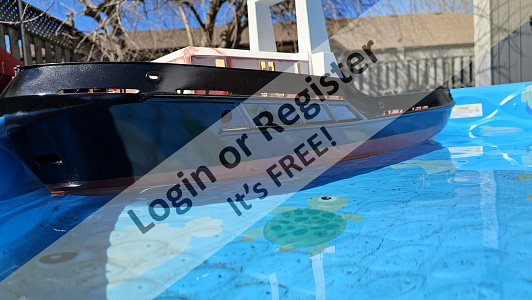
Because I can't figure out how to download a video on this web site I just pause the video & photographed the image of my Yard Sale Find It was such a lovely Canada Day morning went to the pool & ran the model checked for leaks, balanced model with a little lead test O/K I did have a tiny leak which I think will be fixed up with a little hull paint.
🇨🇦 GARTH

1 day ago
1 Post
6 Followers
15 Likes
Naxos Laser sheets
I am finally just getting going on the "short kit" of the Naxos fishing boat from China. I call it "short" because there are no instructions (posted somewhere on the web) and only a minimal amount of parts, but the fiberglass hull is beautiful. And the laser cut pilot house and deck parts (what there is of them) are really really sweet. However, a huge amount of kit-bashing is in the offing on this one!
As a side note, on a personal level. I am heading on a cross-country trip for a few weeks and it is always my habit to leave a project undone so I have something to look forward to when I get back. Call it habit or superstition...it's just me.
🇺🇸 jumpugly
2 days ago


5 Posts
4 Followers
56 Likes
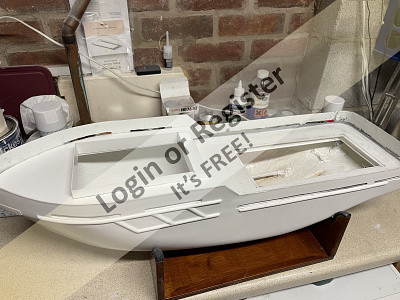
Aeronaut Pilot Boat
Hi y’all. So, the “Mystery” has maidened, and handled her sea trials with flying colors. My bench was busy the past couple of weeks with repair and minor restoration of our antique “Pom Pom” aluminum Christmas tree. We’ve had it since the 90s my wife found it at an antique store and brought it home. She still thought it was….errr…tacky, and that I was quite out of my mind, but once I had it up, trimmed, and the color wheel shining on it she changed her mind. It needed some sprucing up and minor repair to the branches, as the tape that holds the aluminum “leaves” was failing, so I used a little ca and almost as good as new!!
Anyhow…I’ve been looking at the Aeronaut Pilot boat for a few years, finally pulled the trigger a few months ago. It’s a fairly well thought out kit. It’s a traditional built up hull, but all the frames, keels, etc are laser cut abs. It comes with that, hardware, metal etched parts, it’s nice. I was off today, so I started the hull.
The kit comes with a precut cardboard jig for the hull, the frames have tabs and the jig is marked as to what frame goes where. Frame number 5 is also the motor mounts. The slots that are pre cut are a little too wide for a speed 400 or 28mm outrunner, but there were punch outs for the correct spacing, so I drilled those and marked them. You add the keel first, then the deck and chine stringers. The main “fun” was sheeting the hull with the precut abs sides and bottoms. The hardest part was getting the bow seam right. I tried to do it as the instructions stated, using tape to hol everything in place, but I finally had to do it by tacking the sides to the bow, bending and occasionally cursing till I got a good fit. The bottoms were just about as bad, but I got it done.The instructions do tell you to glue to the keel and stringers first, then the frames if they’re touching the sides, so I did that. There’s also use of copious amounts of Stabilit Express used to fill any gaps, etc. Thats next up. I plan to lay in some balsa for filler in places to sturdy up the hull, then I have to build the transom. Once that’s done I need to get a couple of 900 kv outrunners ordered, then I can start mounting the running gear. I plan to add lights, and this boat has provisions for a lot of lights. She’s going to take me a while to build…stay tuned!!
🇺🇸 Cashrc

4 days ago


8 Posts
10 Followers
55 Likes
Yard Sale Find
I have built to many tug boats & we have a member in our club that has a Clyde Puffer and he hardly ever runs it so I've decided to build one .The bottom isn't flat but no one will know that except me & anyone that reads this. I have a lot of finishing up on the model but that's always the fun part adding doors windows more planking etc. etc.
🇨🇦 GARTH
7 days ago


7 Posts
7 Followers
53 Likes
Al Khubar Harbour Tug
I have now started to build this Mountfleet (Model Slipway) Kit.
Firstly I decided to sort out the power system. 2 x RE540/1 geared motors (6:1). The propshafts supplied with the kit and the 4 blade brass props, also supplied.
🇬🇧 Rockbag

8 days ago


19 Posts
6 Followers
107 Likes
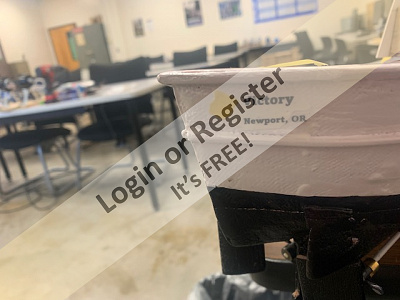
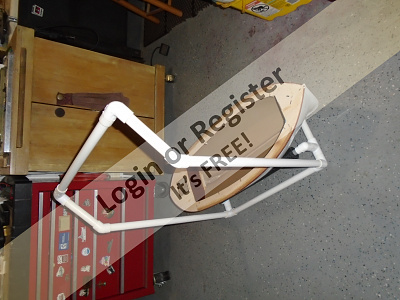
52' Motor Lifeboat Victory
One of my nine-year projects is coming to an end. I am sad to see it completed in some ways, overjoyed in others. Many projects have been begun and shelved over those nine years; some are in the trash now.
What is known is the 213' WMEC-168 Yocona is hit or miss whether my attempts to waterproof a static hull will be successful. So on hold or a side project.
The Gunboat Philadelphia is on-going at work between shifts.
PBY that doesn't Fly I will place on hold, pending possible actual flight. (That will put three aircraft inline to be completed.)
The battleship North Carolina....Big. Not so complex as physically large undertaking.
SO, begin at the beginning as I tell my students. I pondered purchasing the laser-cut kit from Canada, but it is just frames, deck, and pilothouse. Yes, it is 1" to one foot scale, and would match my 44' MLB perfectly, but $286 plus shipping? For me too much, I will build at 1/24th scale for now. Small enough to store, big enough to detail and outfit with running gear.
My 44 MLB, is a leaky, but I am installing an automatic bilge pump. I get so much joy out of running it, and I will have the tri-fecta of MLB's 36', 44', and 52'. The 213 should be complete around the time I finish, so four CG projects in a years time, plus the Philly is a quick build. So, it is a year, year and a half plan.
This will be a slow one.
Non Boat picture is project that is almost complete.
Kevin
🇺🇸 KevinH
9 days ago


29 Posts
26 Followers
356 Likes
CGINGA IV
I am pushing the boat out really early in fact in its embryonic stage for this build blog and I might regret it but hope not.
It has been my dream of some weeks that my preferred build for the future would be a great looking motor sailor and the one I settled on was Inga 1v and with encouragement from roycv who has in his harbour a splendid example set the ball rolling.
There does not seem to be much interest out there for this model mainly due to there being is no kits available, nor plans, nor plastic hulls being produced simply lots of pictures and of course some beautiful completed models.
First step and many thanks to tiggy_cat for sending me a set of plans for this model which arrived today. They are produced by Revell and are for the topsides which is great but leaves me with one of the challenges of my life that of drawing, stealing, borrowing whatever a plan of the hull shape. I fear that if I attempt to accurately draw the frames for the hull it might end sailing sideways.
Anyway as somebody once said `I have started so I will finish` interested then watch this space. Regards ChrisG
🇬🇧 ChrisG
9 days ago


1 Post
4 Followers
2 Likes
Thanks to those who responded about Dean’s Kit
You may recall James May asked about having someone build his Dean’s kit of the HMS BRONNINGTON for his dad? I responded with questions about the kit and after consulting others with experience building them, it’s not one I could do. It requires someone who knows how to use photo etched parts.
Another is James wanted to make an RC model, but this kit is only 18” in length and has a 3 3/8” beam which is very tight for a twin screw kit. Not for a novice, operator.
Sorry but better to check out a kit before buying and then afterwards seeing your dream is more difficult than first thought.
Ron
🇨🇦 Ronald
12 days ago

69 Posts
13 Followers
240 Likes
Watercat M12 (Jurmo Class) landing craft
Decided to have a go at building a Watercat M12 as I have recently brought a couple of 28mm jet drives, yet to arrive! and wanted a craft to fit them in.
The model will be semi- scale and I intend to modify the stern's deadrise to ensure both jet intakes keep in the water when turning a deep v stern may cause ventilation on turns.
upscaled the plans available to make a craft around 35.5in (90cm).
🇬🇧 CB90
14 days ago


1 Post
3 Followers
12 Likes
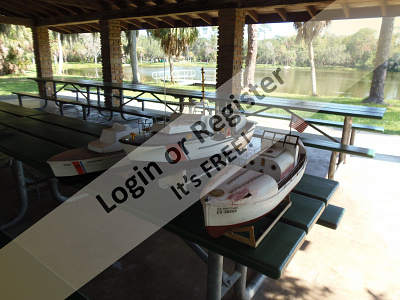
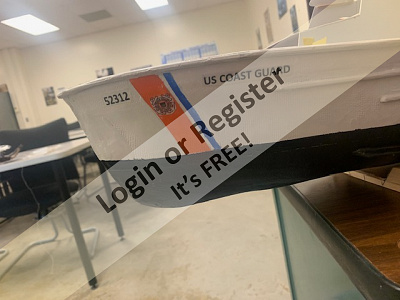
Us Coast Guard 47' MLB model slipway 1:16 scale
Here ar some photo's of my current Build.
Us Coast Guard 47' MLB model slipway 1:16 scale
Been working on it for about 6 months. about 36 inches long
🇺🇸 bruce1946

16 days ago


2 Posts
4 Followers
16 Likes
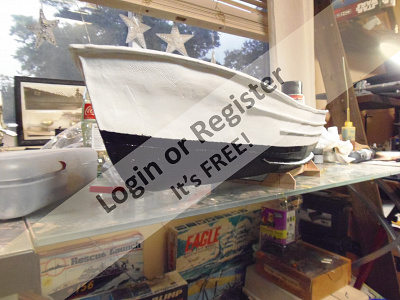
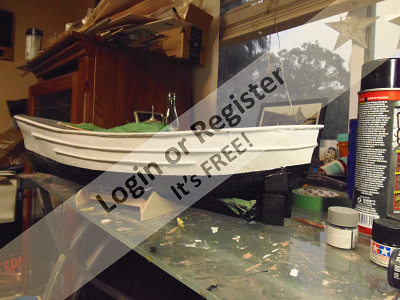
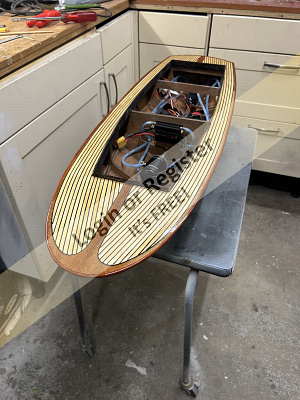
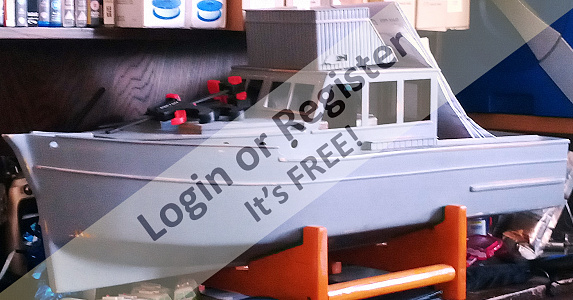
WHOPPER STOPPER a Terry Jason sport fisherman
A few photos of how this build came together. In New England we refer to this type as a downeast (Maine) sport fisher since it’s built on a lobster boat hull. A couple of photographs early in the process.
Hull is a 36” long fiberglass hull built by a young craftsman in Bristol, Maine. Everything else scratch built.
More later about when it was built; sort of the reason for this blog.
🇺🇸 Chum444

16 days ago

27 Posts
5 Followers
218 Likes
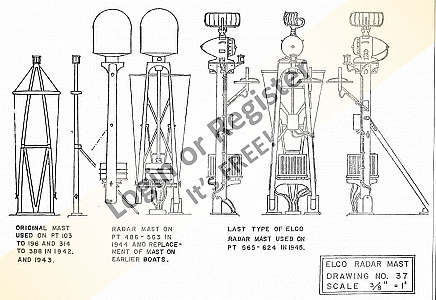
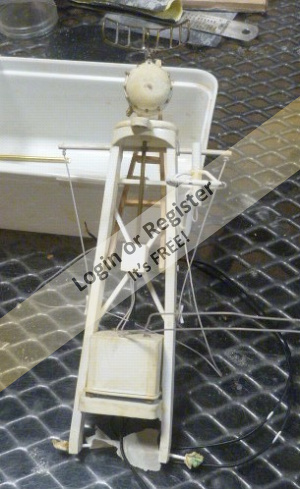
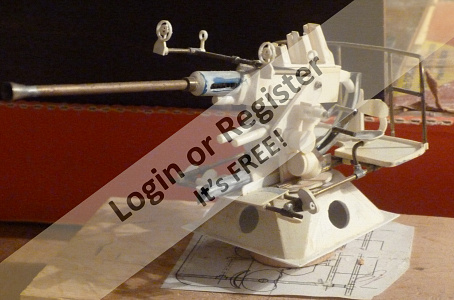
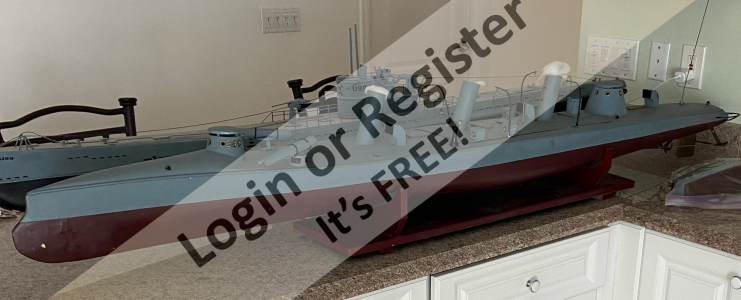
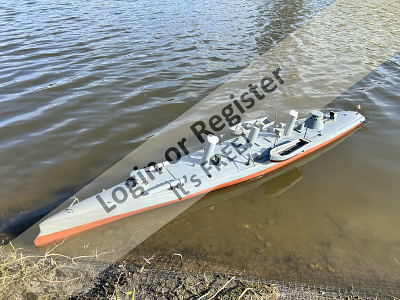
Late War Elco 80' PT Boat Model
This is a model I started many years ago back in the 80’s when disco was dying and I was a young engineering student still in college. I hope to get this model painted after too many years of sitting idle while I ponder and make some progress on other model builds.
I thought a build journal is a good idea, while I am forced to wait 15 months (Ontario Premier Doug Ford’s pathetic healthcare system) for cataract surgery (unless I pay big bucks to have it done in a private clinic), since I cannot do fine scale work effectively. A good political dig always cheers me up.
This will be a tough reflection to write about something that was started in the 1980’s. I wish I had kept better build documentation back then, but as soon as I am able, this model after 40 years (can't believe I was that young when this build started) is finally going to be painted so I can reflect on this build and continue to progress on a few others models (Perkasa, Mr Darby, Egrete, Type XXIII U-Boat...) I have been working building since then.
🇨🇦 gcladd
17 days ago


30 Posts
13 Followers
150 Likes
American torpedo boat Spanish American war
This is a new thread of my refurbishing of an old ship model that was built back in the 1980's or so.
Background:
I managed to get this model when a fellow boat modeler knew that I have multiple scale RC powered boats and would be the right person to give it to. This was during a sailboat regatta and I was videoing the races from my big fishing trawler using a GOPRO camera.
The story goes that this particular person had the boat built, wired and fitted professionally. It is a huge model spanning 76 inches in length and weighing 35 lbs fully loaded ( of which 21 lbs were lead acid batteries ; six of them ).
however, that person passed away years ago and after a while, his widow needed to clean up the house and was about to trash all the models into the dumpster. Fellow modelers were able to save two of his huge boats. One being the German U99 submarine that went to a collector in Texas and the second was this un named old ship. It languished for years in a garage. The person that saved it was not interested in powered RC boats, but kept it.
Apparently there was an email offering this model for sale back then, but I have no idea what came of it or when it was written, nor any details as to what it was.
So what is it?
next thread
Isaac
🇺🇸 Isaac
17 days ago


1 Post
1 Follower
9 Likes
Harro Koebke german lifeboat(SAR)
It is a kit manufactured in China and distributed by a German company.
I bought the unbilt kit second hand about 15 months ago
🇧🇪 hermank
17 days ago

1 Post
3 Followers
3 Likes
Question
Is this Nozzle mounted to the rudder? It doesn’t look to be surrounding the prop as other nozzles do.
🇨🇦 Ronald
19 days ago
3 Posts
5 Followers
22 Likes
Fun at the lake
Fun at the park. A big lake and nice day to run the boat at the Wellen Park in Florida. The owner of the bike and kayak shop took this video of my shrimp boat Capt CJ (it is a scale boat; the full boat was destroyed during hurricane Ian a couple of years ago).
here is the link. I don't know how to copy the video by itself.
https://www.facebook.com/reel/501543055774701
Isaac
🇺🇸 Isaac
19 days ago


4 Posts
4 Followers
32 Likes
Island Supporter "Borkum" (with some modifiactions)
Kit is by Krick and it will be steam powered. Scale is 1" to 1 foot. Only have a few hours into at this point.
🇺🇸 MartyV

19 days ago


11 Posts
13 Followers
121 Likes
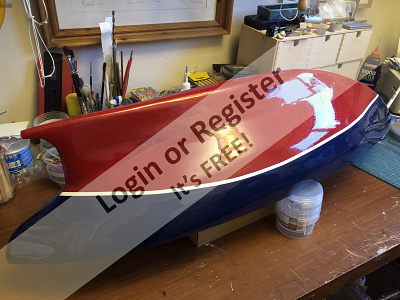
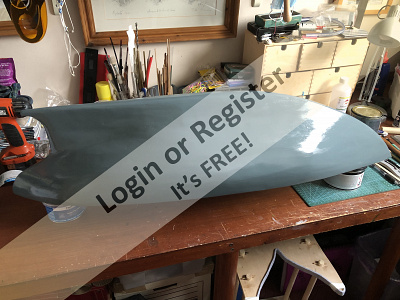
Now it’s a Huntsman
Painted the bow, really happy
🇳🇱 renew
22 days ago


1 Post
7 Followers
10 Likes
Brushless motor sync problems
Can anyone help me with this issue please.
Cabin cruiser 1m long; 4240 x 740 brushless motor; 5S lipo; 55mm prop.
Cruised happily for 15 mins, then made noise (not dissimilar to slipping coupling) and powered down to a stop. Would then only creep along. On inspection found all three fuse holders and 25A fuses had melted, but fuses not blown. The motor was not hot, nor was the ESC. Out of water seemed to operate OK. It was suggested that the prop might be too large, and caused the motor to go out of sync after a while.
So, what do you think might be happening ?
🇬🇧 flaxbybuck
22 days ago

2 Posts
3 Followers
26 Likes
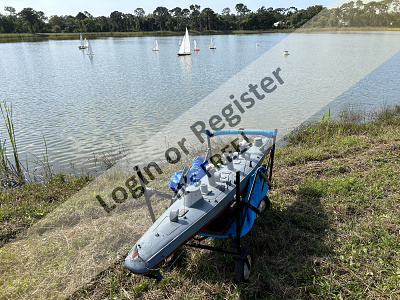
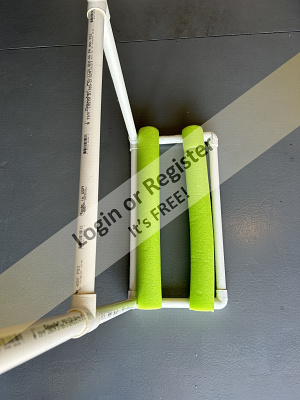
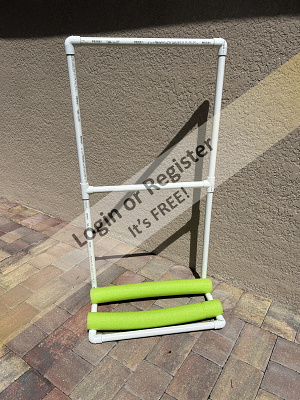
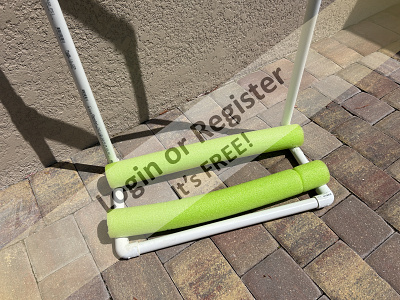
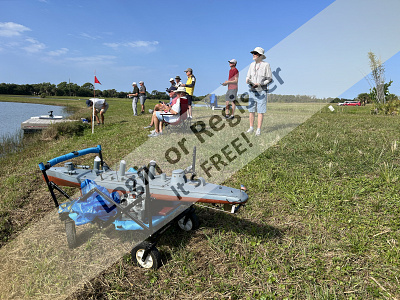
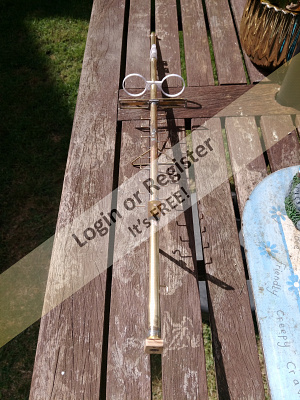
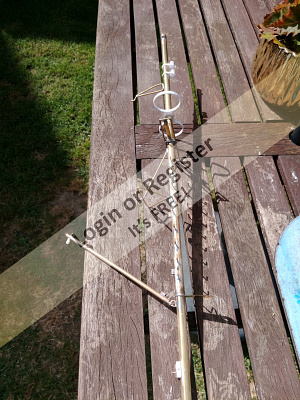
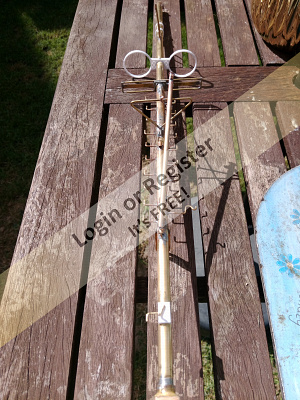
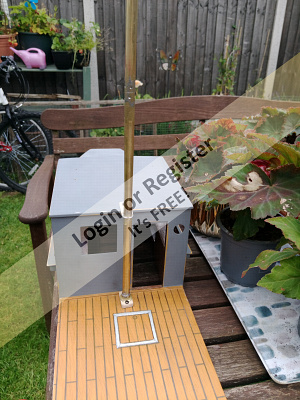
Jim's Model Boat Launcher / Retriever
Finally tired of using my launcher (PVC pipe and fittings) and had SSMBC member build me a special one. (He has made a bunch of his version.) I am taller than him and have some back issues so I got one about 5 inches taller.
The photo here shows it as I got it today at the meet. Need to prep and paint and add padding.
It is made using 1/2 and 3/4" EMT steel and can handle at least 80 pounds.
Lew
Florida , USA
🇺🇸 LewZ
25 days ago


18 Posts
19 Followers
193 Likes
Occre Ulises
Was given the Occre kit of the “Ulises” ocean going tug for Christmas. Started the build this weekend but I reckon it is going to be a bit of a drawn-out build for a while as I have a lot going on with work and other things. I will gradually add photos of my progress…
Re comment about kit suppliedpropshaft - I agree, I didn’t like the look of that one in the kit so I cut down an old one I had from something else, put the bearing back in with the addition of a touch of solder To make sure it stayed there and I added the oiler tube as well by soldering that on.
🇬🇧 Trident73
26 days ago


4 Posts
3 Followers
28 Likes
Yard Sale Find
It was a great day to sit out side & do a little cutting & gluing So I decided that my Galion will need a rounded stern if it's going to be a tug boat .Because Ernest Shackleton ship the Quest was found by the Royal Canadian Geographical Society and the wreck was 1,280 feet below the surface of the northwest Atlantic Ocean roughly 15 nautical miles off the coast of Labrador. It’s sitting on its keel, with its broken mast lying on the seafloor nearby. I thought that that could also be made into a R/C ship .Can't make up my mind .
🇨🇦 GARTH
26 days ago


24 Posts
10 Followers
164 Likes
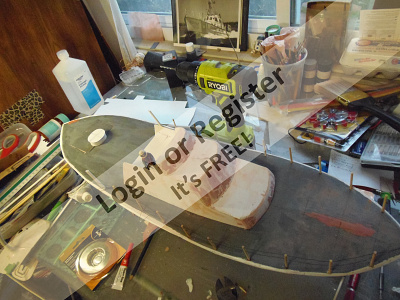
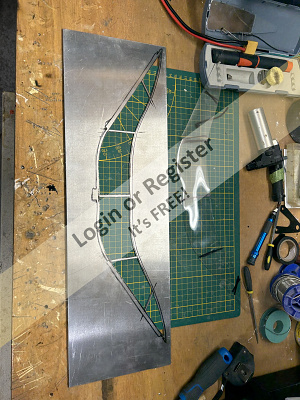
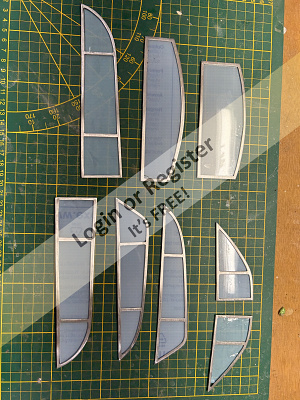
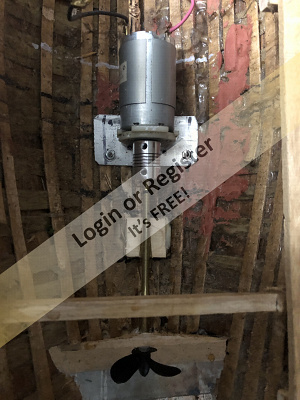
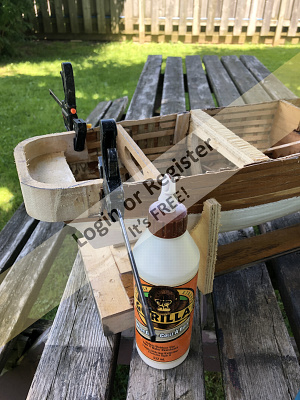
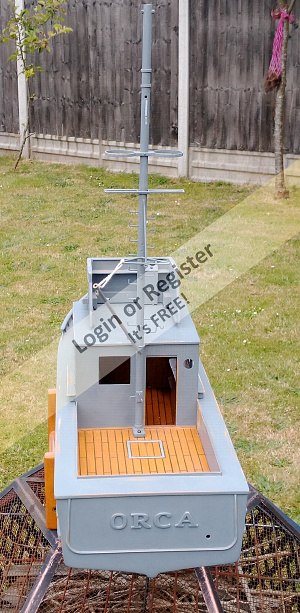
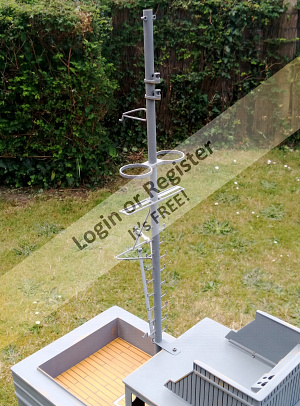
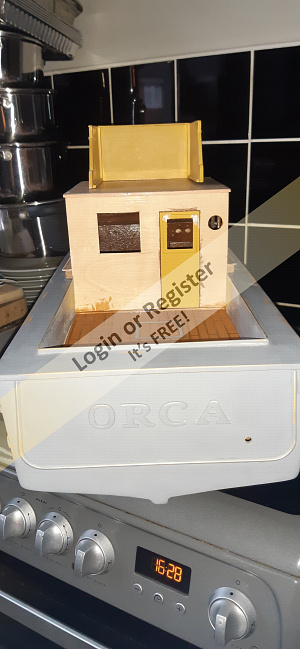
Another Orca Sarik Hobbies plans
OK so over the years i have built many Model Boats some restores all types POF glass fibre plastics etc but never from a plan only so here goes this is inspired by what i have seen on this site and wanted to have one myself and after finding out there is no kit for this boat i thought i would give it a go these plans are Sarik Hobbies version and believe it or not are set at Beginner ? well i must be a complete novice because the first week i was trying to work out the keel from the drawings as you can see below they come with no patterns so its tracing paper im afraid .as you can see from the plans im guessing this will be classed as Semi scale as the hull is not the same as the real one last picture shows the rubbing strip on the stern is actually the shape of the real one however lest see what it turns out like
🇬🇧 quattroo
26 days ago


38 Posts
39 Followers
369 Likes
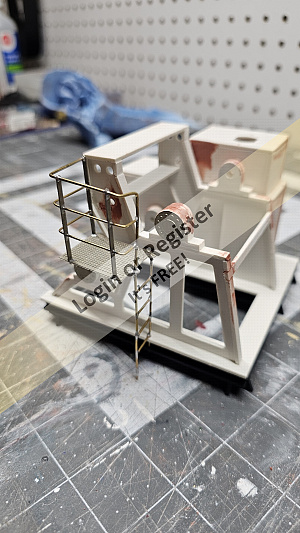
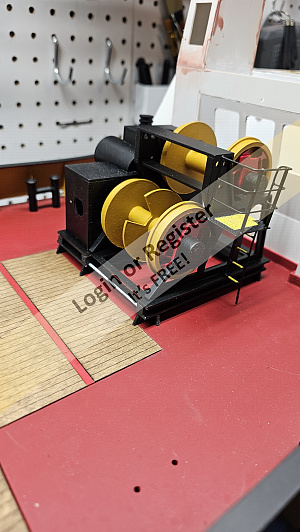
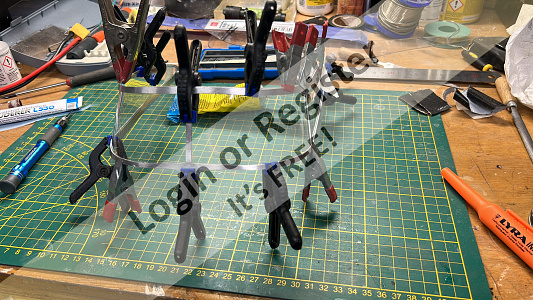
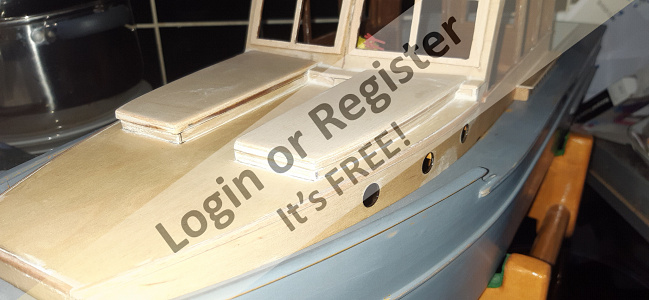
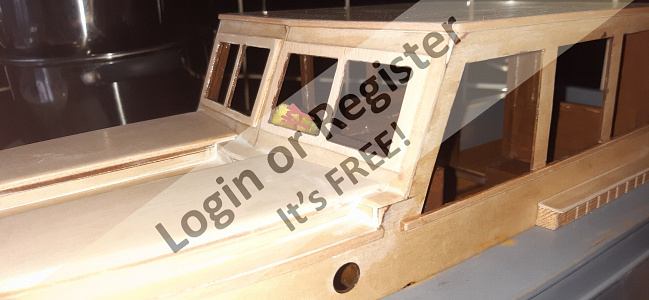
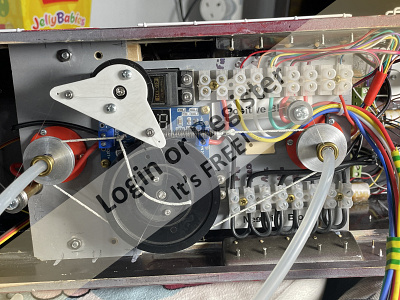
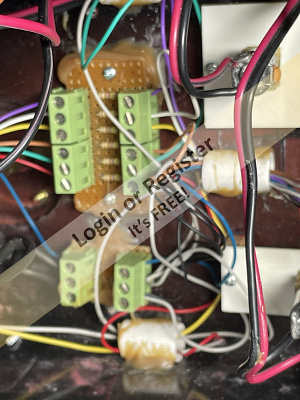
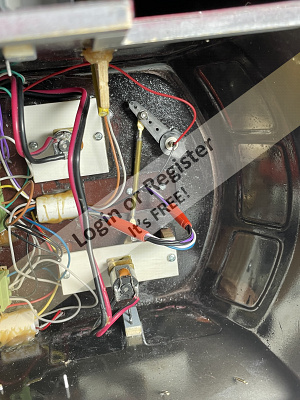
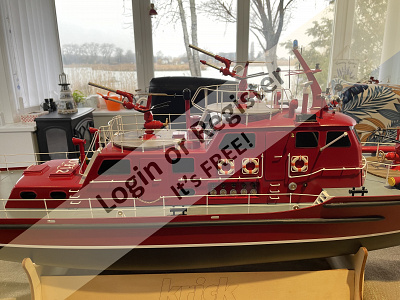
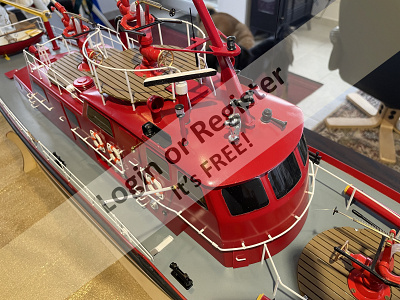
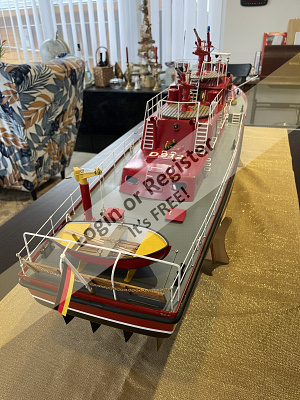
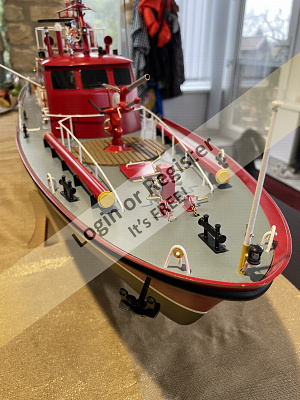
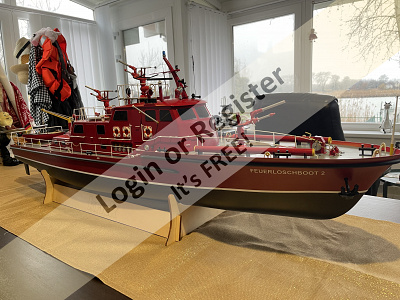
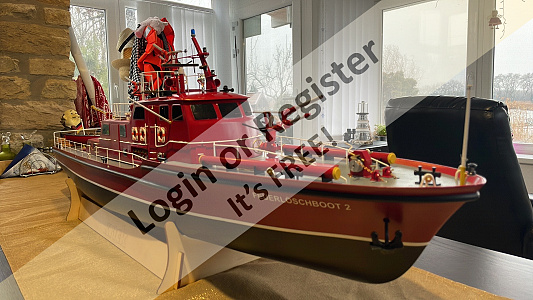
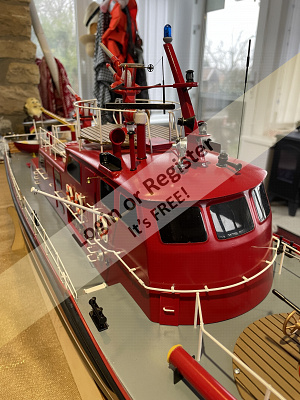
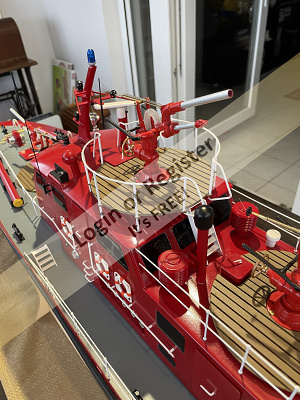
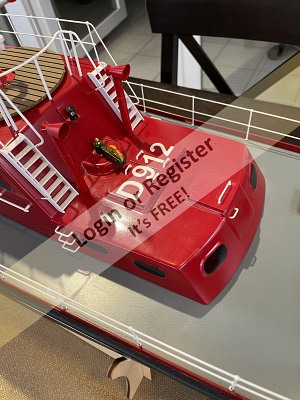
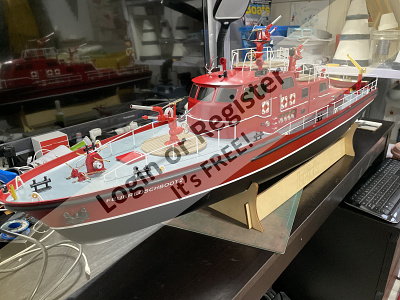
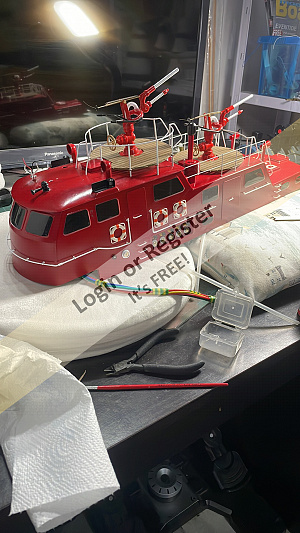
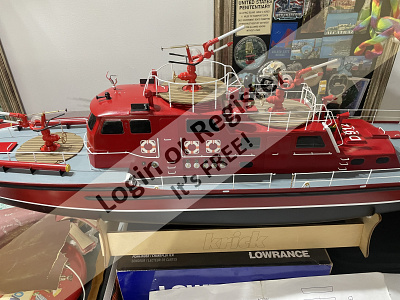
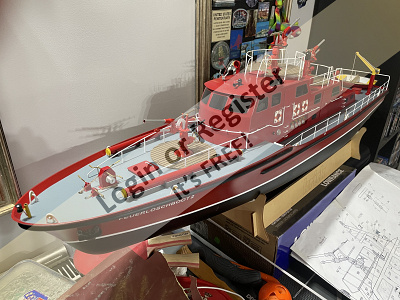
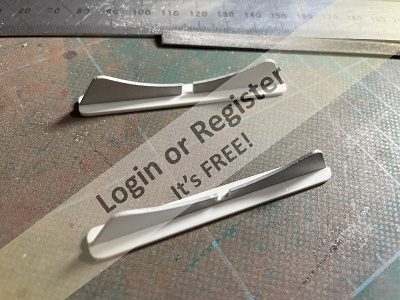
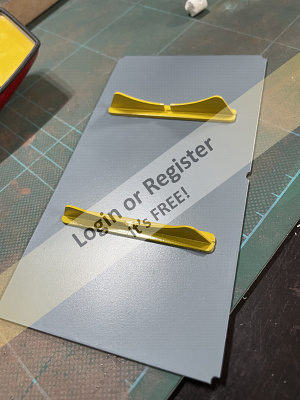
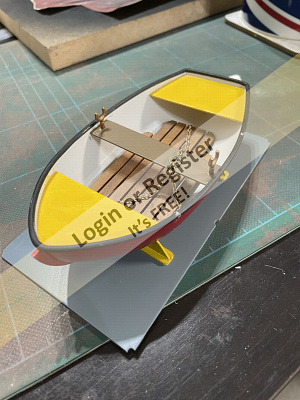
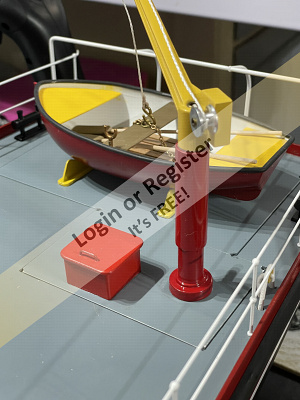
RoMarin/Krick Dusseldorf Fire Boat.
I have been looking forward to starting this build for some time. It looks like this will be an interesting model to build but mainly I look forward to setting up the 16 channels required to give full function to all of the special features.
The Dusseldorf is one of three identical boats built for use in the Ruhr area of Germany. The boats are equipped for disaster situations, (they must have known I was going to build it). They can be used for ship fires, oil leaks or as a port facility at risk of explosion.
The fire monitors, radar, boat crane, lighting and anchor winch will all be working if I can sort out the controls. The fire monitors are of particular interest because if I get things right, they will swivel, lift and lower and shoot water. We will see.
As stated in the instructions, I read most of them to see how things looked. I got bored at page six so forgot that bit. The next stage was to check the contents against the bill of materials. There must be 1000 pieces. I checked the large pieces and gave the rest a miss also. Not a good start I hear you cry. You will get used to it.
I proceeded to remove the stand parts and lightly sanded off the connection remains. I assembled it using super glue but I will strengthen the inner corners with Epoxy later. I stuck some draft excluder tape to all of the edges which contact the hull for safety.
Next stage was to trim off the excess material at deck level of the Hull. With 1.5mm thick ABS this is quite a job especially considering that the boat measures around 2.8 Metres all around. I used a Stanley knife to remove the bulk of the material followed by different sized files to trim to size. This process takes a lot of care so that not too much material is removed. The hull has a rather crude sort of line to work to but I think I will put more reliance on my eye and a two foot steel rule. I still have a little filing of the edges to do before I will be completely happy as this edge will be visible on the completed model.
According to the instructions my next stage is to fit the rudders, motors and prop shafts. A job for next week.
🇭🇺 MouldBuilder
28 days ago


11 Posts
9 Followers
56 Likes
29" Double Horse 7007 Flying Fish
Hi Shipmates,
The Polycarbonate Hull
the only part I will use.
The rest will be scraped
(Equipped with Twin 380 Motors Vector-push design for easy control
Radio Controller with antenna Wall Battery Charger 7.2v NiCD 1800 mAh NiCD Rechargeable battery Extra Pair of Propellers English Manual
Length: 32 Inches Battery Type: 7.2V 1800 mAh Transmitter: 3 Channel Motor Type: Twin 380 Charger: Supplied
Skill Level: Beginner / All Levels Speed: 20 - 25 mph+ Battery Requirements: Vehicle: 7.2V 1800 mAh NiCd Rechargeable Battery (Included) Transmitter
I have stripped out all hardware, filled holes in the transom and affixed polystyrene to the hatch / cabin to make it buoyant, so it will not sink if it falls in the water.
Regards
Roy
🇬🇧 CB90
30 days ago


Login To
Remove Ads
Remove Ads