Join Us On Social Media!

|

|

|
Download The App!
Login To
Remove Ads
Remove Ads
Login To
Remove Ads
Remove Ads
Model Boats Website
Kathryn - a Thames Bawley - 3
1 Post · 0 Followers · 4 Photos · 9 Likes
Began 5 months ago by
 United Kingdom
Follow This Thread
Not currently following
> Click to follow
> Click to follow
Latest Post 5 months ago by
| Most recent posts shown first (Show Oldest First) | (Print Booklet) |
📝 Kathryn - a Thames Bawley - 3
5 months ago by 🇬🇧 flaxbybuck ( Captain)
Captain)✧ 45 Views · 9 Likes
Flag
💬 Add Comment
After doing a bit of research into Thames Bawleys I discovered they were built in a number of different lengths, and this enabled me to adopt a scale of 1:16 for my boat. Once this was settled it allowed me to progress with the build.
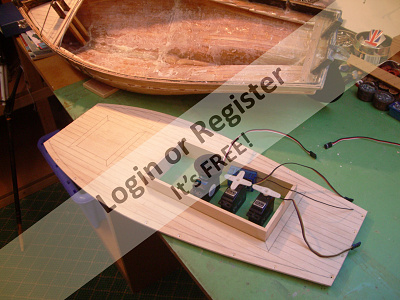
The original deck was in a terrible state, and totally unrepairable, so I removed it completely whilst retaining sections of it around the gunwales. The new deck would then sit on these sections. The bowsprit supports (the two vertical members) were left in situ, so I decided to have a join in the deck at this point, the small section forward being fixed in place, whilst the main deck piece was planned to be screwed down and removable. This was to allow access to the inside of the hull which would otherwise only be accessible through the hatch.
After making a card pattern for the deck and adjusting it for a close fit the new ply deck was cut out and the edges smoothed. Screw positions were marked on the ply, holes drilled and countersunk. The planking was then drawn on using a black pencil. A simplified (ie. rectangular) hatch was then cut out and coamings glued into place, with supporting battens on the underside of the deck.
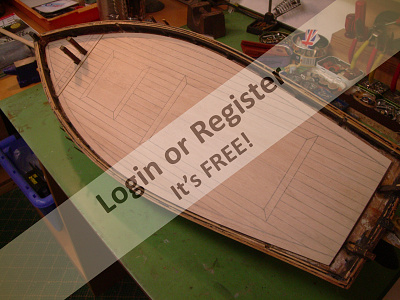
▲
⟩⟩
boatmam
EdW
Ray
hermank
luckyduck
Graham93
Peejay
Len1
AlessandroSPQR


Login To
Remove Ads
Remove Ads