Join Us On Social Media!

|

|

|
Download The App!
Login To
Remove Ads
Remove Ads
Login To
Remove Ads
Remove Ads
Model Boats Website
Kathryn - a Thames Bawley - 4
1 Post · 0 Followers · 12 Photos · 11 Likes
Began 5 months ago by
 United Kingdom
Follow This Thread
Not currently following
> Click to follow
> Click to follow
Latest Post 5 months ago by
| Most recent posts shown first (Show Oldest First) | (Print Booklet) |
📝 Kathryn - a Thames Bawley - 4
5 months ago by 🇬🇧 flaxbybuck ( Captain)
Captain)✧ 41 Views · 11 Likes
Flag
💬 Add Comment
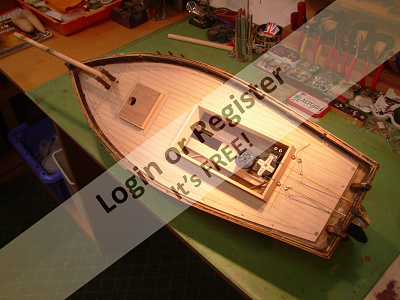
This section of pictures is slightly out of order because prior to this stage I spent some time designing the internal installations. These comprised the sheeting loop, the operating sail servo, the rudder servo and a battery box.
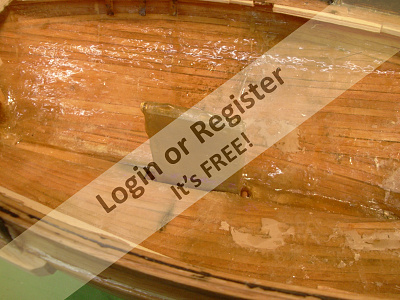
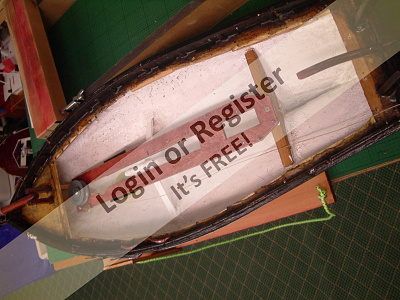
To start with the whole installation had to clear the keel box and struts. These can be seen in the last picture. In this picture the interior has also been treated with flow coat. Not only does this provide a waterproof coating but the light colour makes it much easier to see the interior when working on it , making adjustments or simply baling out.
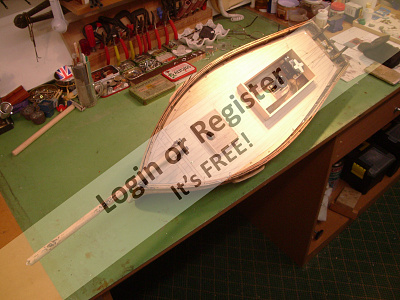
The first three pictures show work on the deck progressing with the main hatch, the forward hatch (which is fixed) and the hole for the mast. The foot of the mast is shaped with two flat sides so when it is in place in a socket created in resin in the bottom of the boat it is not able to turn.
The old lead keelson was removed, the vacant space filled with wood with a slot left into which a keel box is fitted. The box is made of sheet aluminium, superglued together and clad with fibreglass. (see photo). This was then secured in place with car body filler and fibreglass. Later the box was further strengthened with internal struts (see last photo). Externally the box projects to the same depth as the keel so when viewed from the side it cannot be seen.
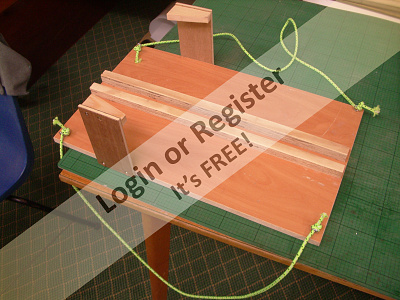
Where the original brass strip chain plates emerge on the boat sides I attached wooden blocks to more closely resemble the real construction. These blocks come in very useful to support the boat in place on the carrier/stand which was simply made from scrap.


To start with the whole installation had to clear the keel box and struts. These can be seen in the last picture. In this picture the interior has also been treated with flow coat. Not only does this provide a waterproof coating but the light colour makes it much easier to see the interior when working on it , making adjustments or simply baling out.
The first three pictures show work on the deck progressing with the main hatch, the forward hatch (which is fixed) and the hole for the mast. The foot of the mast is shaped with two flat sides so when it is in place in a socket created in resin in the bottom of the boat it is not able to turn.
The old lead keelson was removed, the vacant space filled with wood with a slot left into which a keel box is fitted. The box is made of sheet aluminium, superglued together and clad with fibreglass. (see photo). This was then secured in place with car body filler and fibreglass. Later the box was further strengthened with internal struts (see last photo). Externally the box projects to the same depth as the keel so when viewed from the side it cannot be seen.
Where the original brass strip chain plates emerge on the boat sides I attached wooden blocks to more closely resemble the real construction. These blocks come in very useful to support the boat in place on the carrier/stand which was simply made from scrap.
▲
⟩⟩
ZdenekB
Graham93
Len1
boatmam
Ray
Peejay
jumpugly
Ronald
AlessandroSPQR
AndyN
Wolle


Login To
Remove Ads
Remove Ads