Join Us On Social Media!

|

|

|
Download The App!
Login To
Remove Ads
Remove Ads
Login To
Remove Ads
Remove Ads
Model Boats Website
 Rear Admiral)

 Chief Petty Officer 1st Class)
 Fleet Admiral)
 Commander)

 Recruit)

 Vice Admiral)
 Lieutenant Commander)

 Liked Sunday at the pond 2 months ago


United Kingdom


Recent Posts
📝 Sunday at the pond
2 months ago by 🇬🇧 Rogal118 ( Captain)
Captain)✧ 30 Views · 1 Like
Flag
📝 Reply
Thanks for your interest, live in Hatfield, travel about 15 mile to the pond.cheers happy boating
▲
⟩⟩
hermank
Login To
Remove Ads
Remove Ads
📝 Sunday at the pond
2 months ago by 🇬🇧 Rogal118 ( Captain)
Captain)✧ 34 Views · 6 Likes
Flag
📝 Reply
Hi ColinJ2. “Balne moor model boat club”. We are 2 mile south of the M62 off Junction 34 south down A19, turn left onto Balne moor road for about another mile travelling east, under the main line railway bridge we are on the right at the side of the London to Edinburgh railway line. Post code DN14 0ER membership fee £50 per year access 7 days a week all year, guests welcome £5 day rate need to arrange with club secratery to meet and have gate opened, very secure and secluded pond, some Sundays catering put on to.
▲
⟩⟩
DWBrinkman
DuncanP
AlessandroSPQR
ColinJ2
hermank
Mike Stoney
📝 Sunday at the pond
2 months ago by 🇬🇧 Rogal118 ( Captain)
Captain)✧ 72 Views · 14 Likes
Flag
📝 Reply
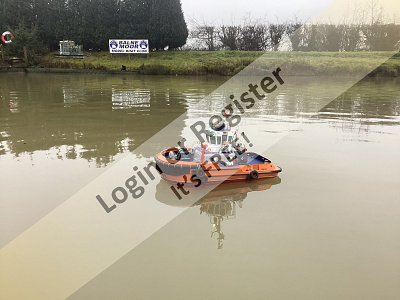
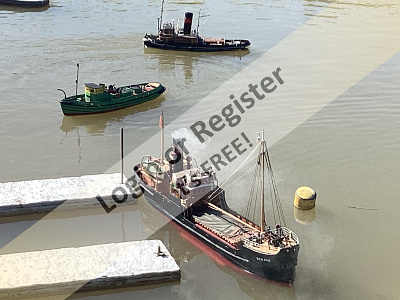
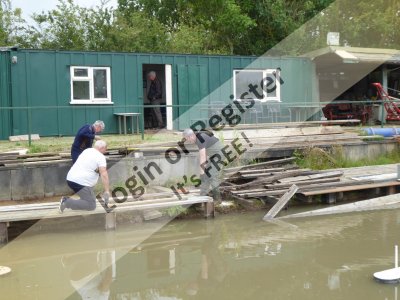
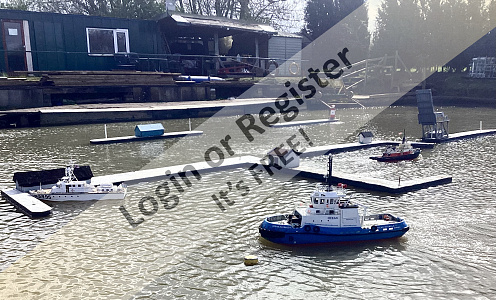
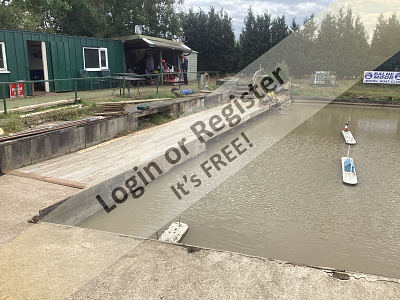
1st Sunday at the pond with bacon butties sold, lovely clear fresh day, water levels at normal after being flooded out. No docks or pontoons in place yet but plans are afoot for the next few weeks. Here are some shots of our day


▲
⟩⟩
AlessandroSPQR
pressonreguardless
VictorC
robbob
DuncanP
xtramaths
PhilH
ColinJ2
EdW
Steve P
hermank
premecekcz
Mike Stoney
Wolle
📝 4 vessels for sale
3 months ago by 🇬🇧 Rogal118 ( Captain)
Captain)✧ 31 Views · 0 Likes
Flag
📝 Reply
Hi mikec4. I have a member of my club who has shown an interest. We spoke on saturday and he is gettingback to me. I was asking £550 for her.if he declines do you want me to contact you again?.regards Rogal.
▲
⟩⟩
No likes yet
This member will receive 1 point
for every like received
This member will receive 1 point
for every like received
📝 4 vessels for sale
4 months ago by 🇬🇧 Rogal118 ( Captain)
Captain)✧ 55 Views · 3 Likes
Flag
📝 Reply
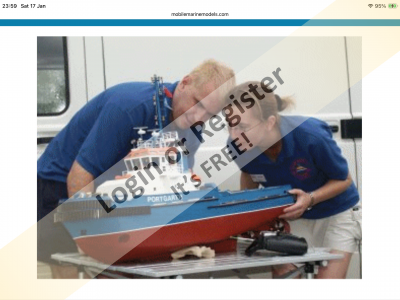
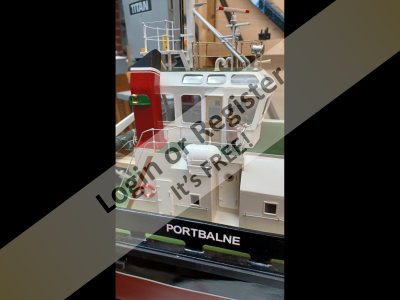
Good evening. The PortBalne was originally built from a kit yes. And I believe is still made, the manufacturers are mobilemarine models of Lincoln, England. Have a look at their web page it’s rather informative.
▲
⟩⟩
Mike Stoney
hermank
chugalone100
📝 4 vessels for sale
4 months ago by 🇬🇧 Rogal118 ( Captain)
Captain)✧ 57 Views · 4 Likes
Flag
📝 Reply
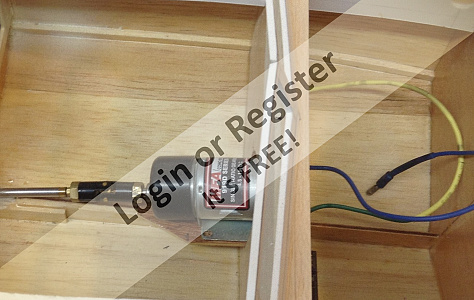
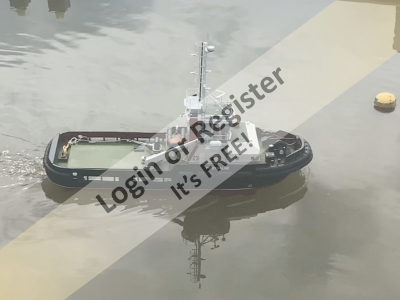
Portbalne steering tests

▲
⟩⟩
RNinMunich
hermank
Mike Stoney
chugalone100
📝 4 vessels for sale
4 months ago by 🇬🇧 Rogal118 ( Captain)
Captain)✧ 57 Views · 4 Likes
Flag
📝 Reply
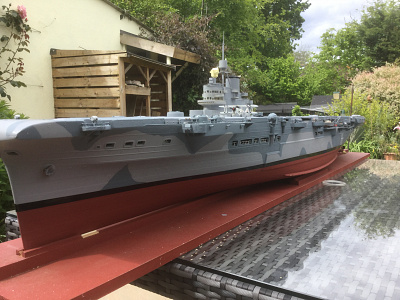
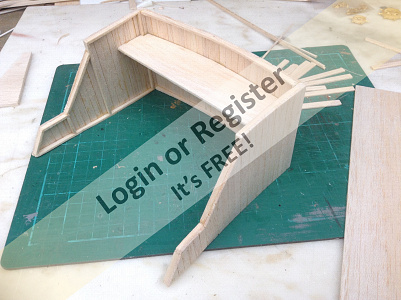
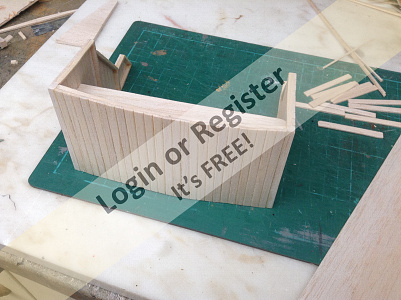
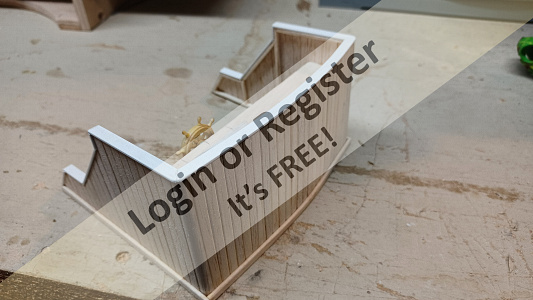
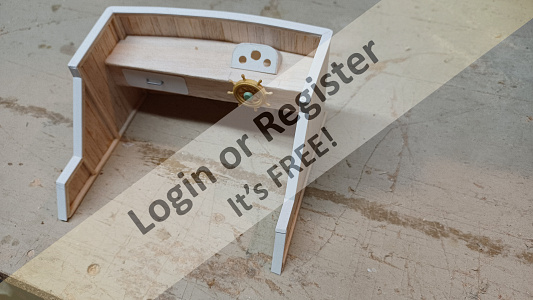
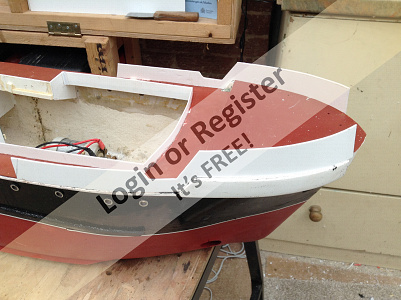
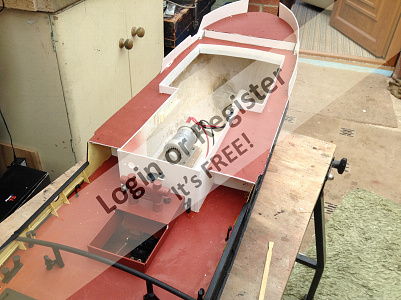
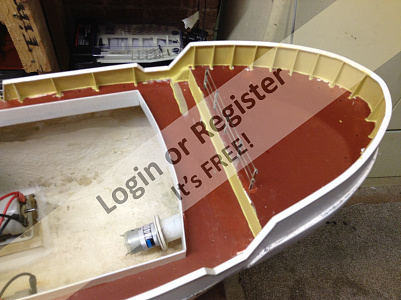
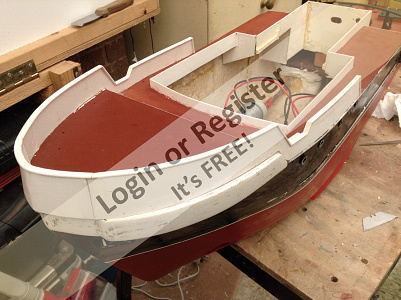
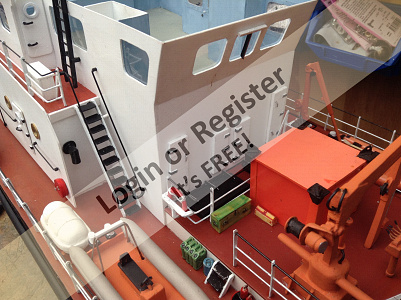
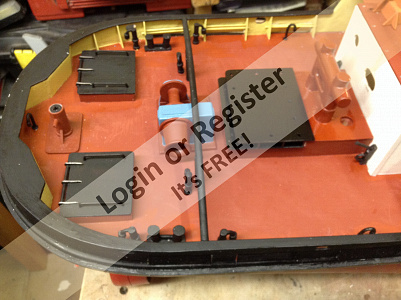
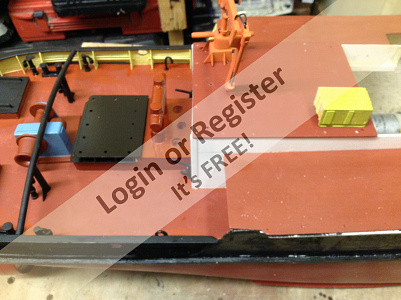
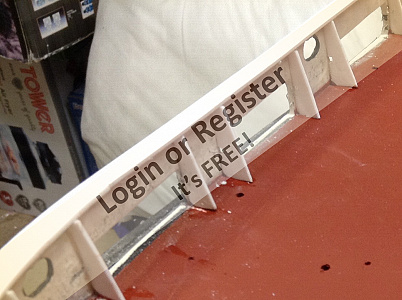
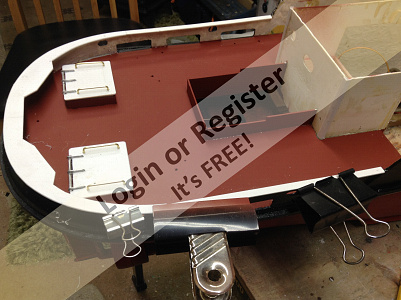
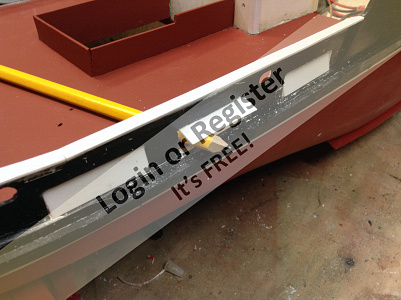
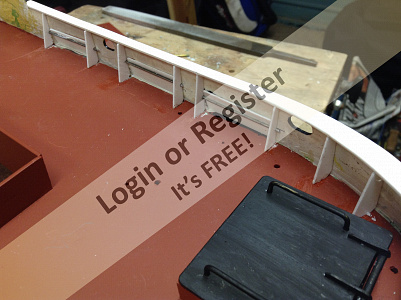
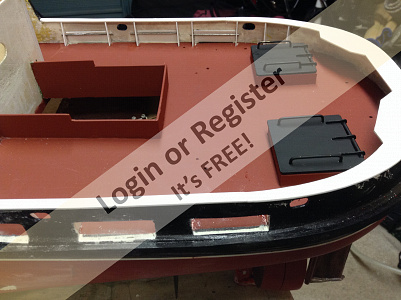
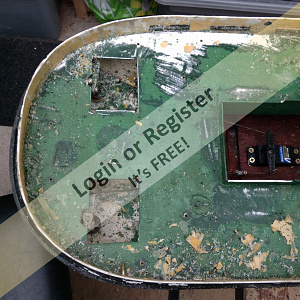
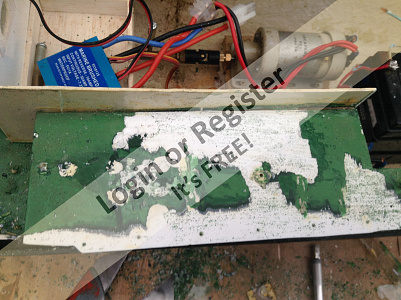
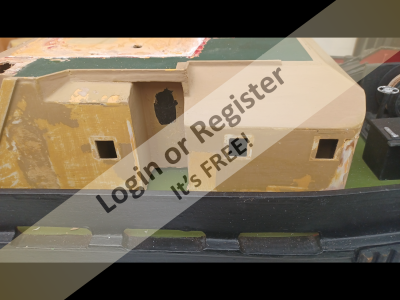
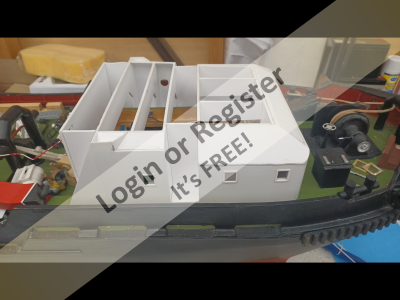
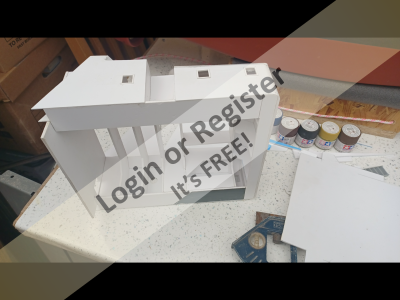
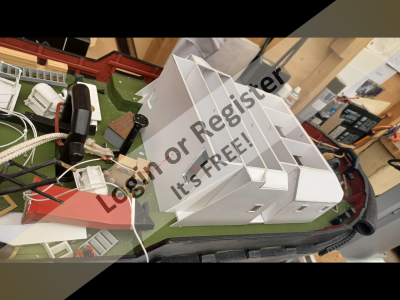
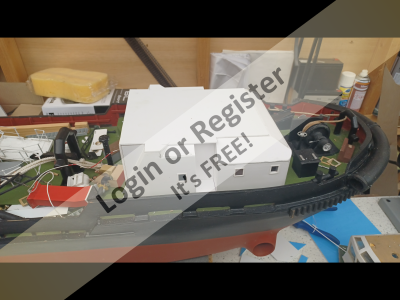
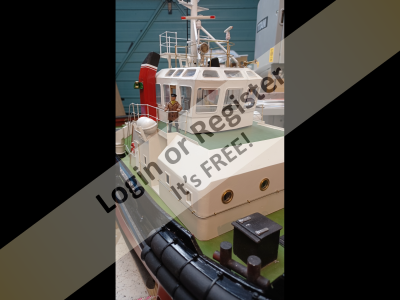
Good evening. Your right chugalone100 I don’t think I did a blog for the rebuild of the Portbalne. I have found some photos though, of the before and after regarding the supa structure and bridge, plus the test runs when complete.

▲
⟩⟩
Steves-s
RNinMunich
hermank
Mike Stoney
📝 4 vessels for sale
4 months ago by 🇬🇧 Rogal118 ( Captain)
Captain)✧ 54 Views · 4 Likes
Flag
📝 Reply
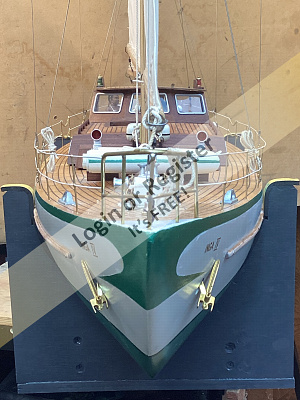
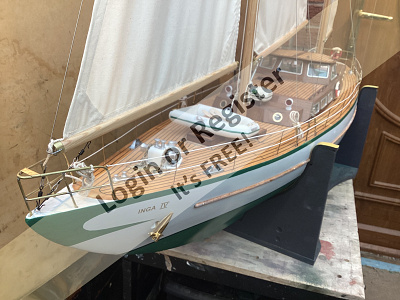
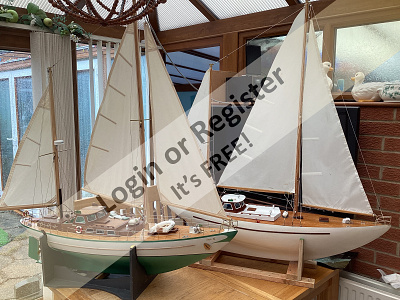
Good afternoon everyone. with a harbour of 12 boats and 2 in the stocks, I have them standing on my work desk, tool bench, 2 side tables even the top of my cool box, so I picked at great heart searching these 4 plus my Tyne lifeboat thats waiting to go to its new harbour already. As of this morning I’ve sold 3 of these 4, just the Olga4 to find a new home for, I’ve got her sister yacht Inga4 on the shelf.
▲
⟩⟩
premecekcz
hermank
chugalone100
Mike Stoney
📝 4 vessels for sale
4 months ago by 🇬🇧 Rogal118 ( Captain)
Captain)✧ 101 Views · 12 Likes
Flag
📝 Reply
I have decided to thin my harbour out, I need the room in my workshop to move on to new projects.PM me for further details or look in my harbour for the boats, there are lots of photos also in my blogs.
▲
⟩⟩
premecekcz
chugalone100
Mike Stoney
GaryLC
Madwelshman
Wolle
xtramaths
hermank
jumpugly
luckyduck
ColinJ2
EdW
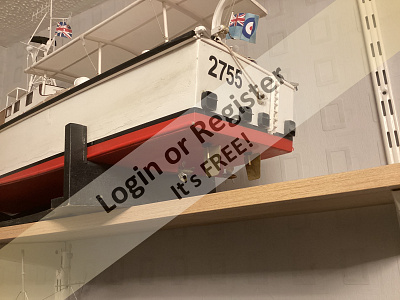
📝 RTTL2755 having a run out
5 months ago by 🇬🇧 Rogal118 ( Captain)
Captain)✧ 47 Views · 5 Likes
Flag
📝 Reply
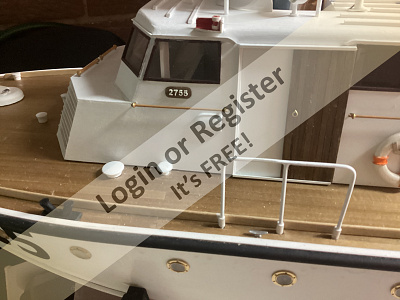
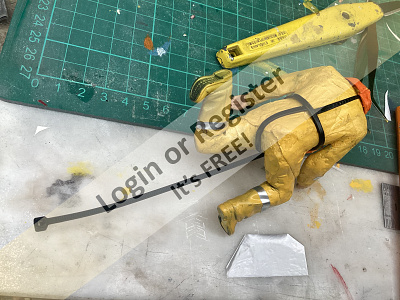
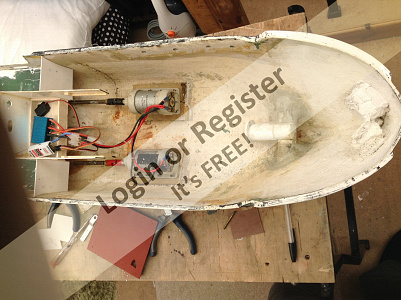
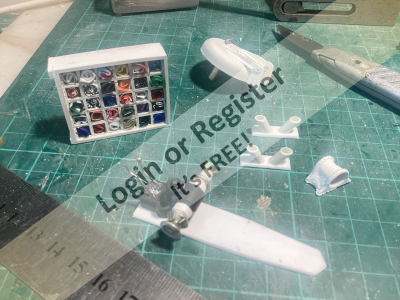
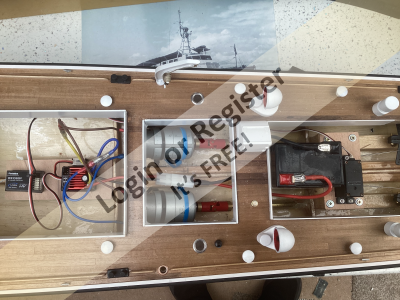
Good afternoon AlessandroSPQR the craft has twin opposite rotating 25mm props with 3 blades and has a total weight of 3.2 kg. See photo. One other point the hull is actually a hull I built for the Brave Borderer and put to one side in favour of a commercial glass fibre hull for the Brave. Then on receiving the plans for the 2755 I superimposed the pre made hull on the plans, the size and profile matched within 3mm in beam but was I recall to long by 125 mm at the stern.this was too near to pass up, so I just cut the stern down and fitted a new transom. I now had a pre made hull that needed a deck etc fitted. So using the Braves hull has probably helped with the planing. It is after all a proven pedigree design!.but the Brave is another discussion I’d like to have with you guys at a later date, I have power problems??.
▲
⟩⟩
GaryLC
RNinMunich
AlessandroSPQR
roycv
hermank
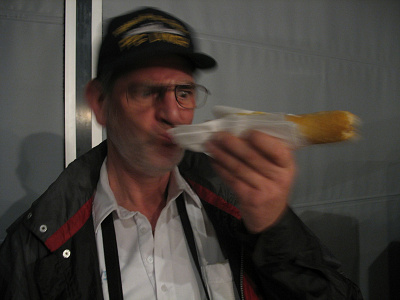
💬 Re: Look I’m aiming for
5 months ago by 🇬🇧 Rogal118 ( Captain)
Captain)✧ 38 Views · 4 Likes
Flag
💬 Add Comment
No I agree the gull doesn’t look right, it hasn’t got someone’s half a battered fish in its beak.😂
▲
⟩⟩
Ronald
RNinMunich
hermank
AlessandroSPQR
Login To
Remove Ads
Remove Ads
📝 RTTL2755 having a run out
5 months ago by 🇬🇧 Rogal118 ( Captain)
Captain)✧ 51 Views · 6 Likes
Flag
📝 Reply
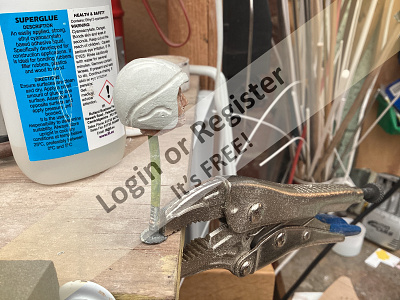
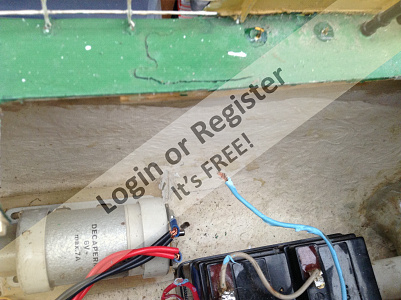
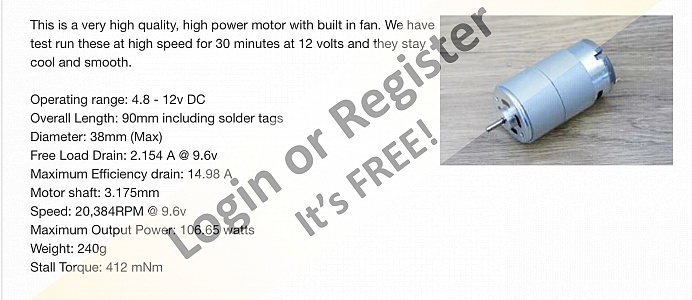
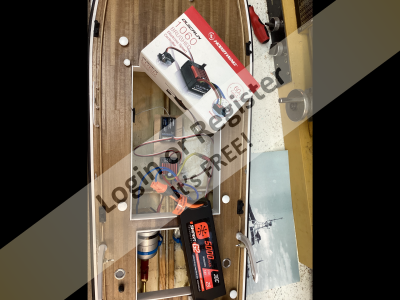
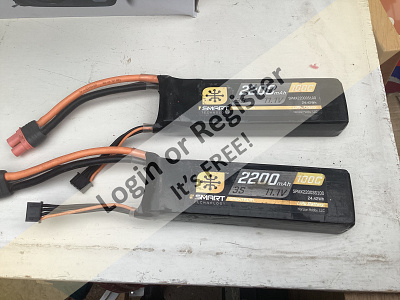
Good evening AlessandroSPQR the black battery was for test purposes only, while I waited for the spectrum 5000m/ah 7.4 v, lipo 2s to arrive. The motors I believe are as photo spec hope the info helps. I sometimes use my other battery, same make but 2200m/ah, 11.6 v,lipo 3.look forward to your thoughts.
▲
⟩⟩
GaryLC
cumbrae
RNinMunich
jumpugly
AlessandroSPQR
hermank
📝 RTTL2755 having a run out
5 months ago by 🇬🇧 Rogal118 ( Captain)
Captain)✧ 48 Views · 9 Likes
Flag
📝 Reply
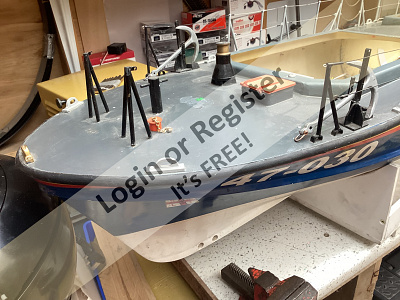
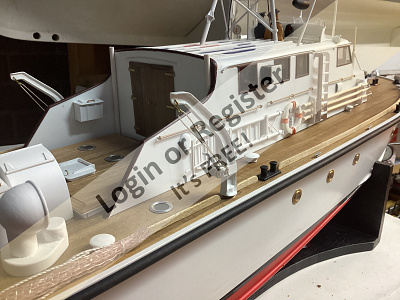
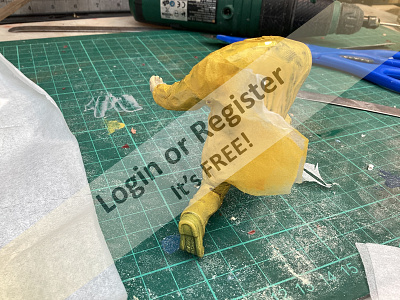
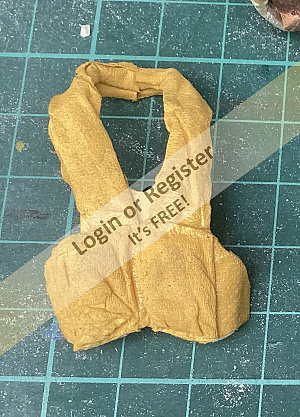
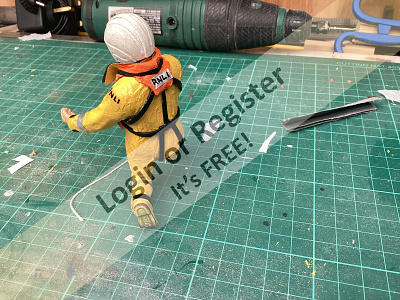
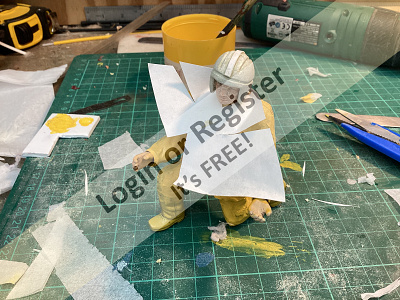
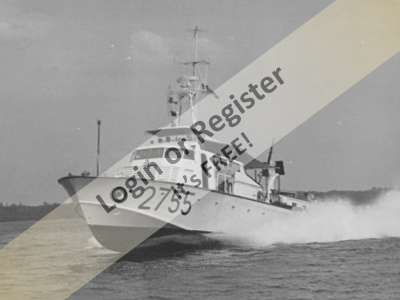
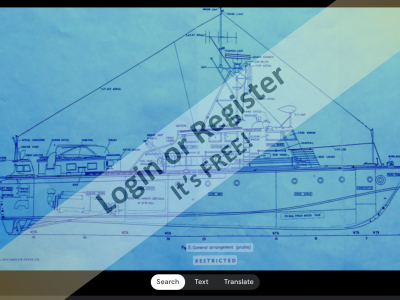
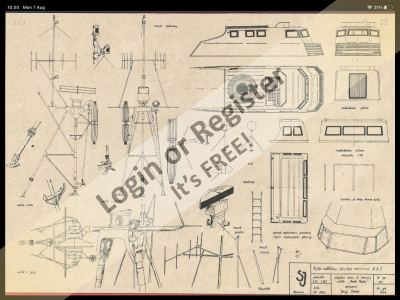
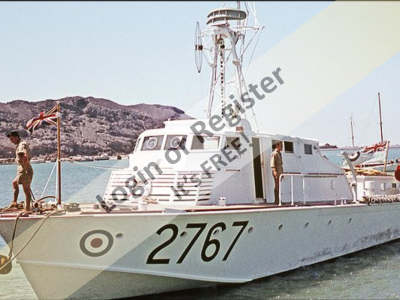
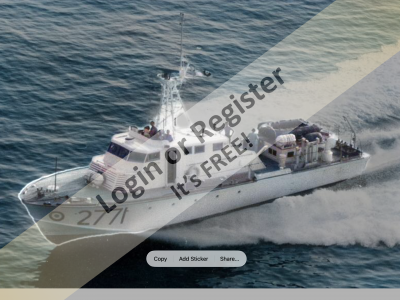
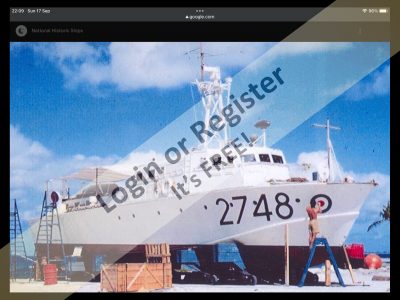
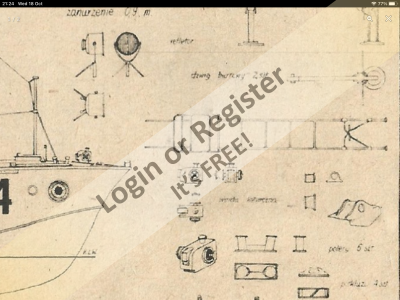
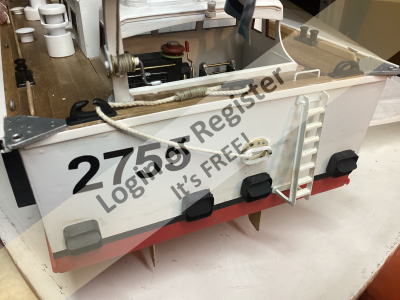
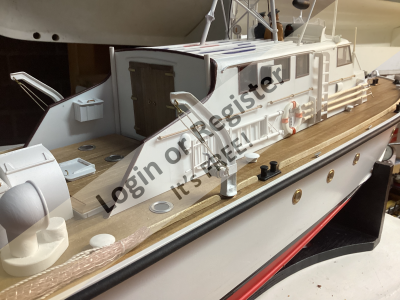
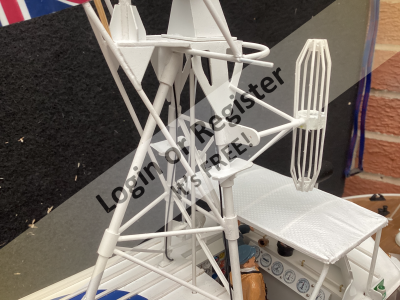
That’s a great point you have raised there Roland.yes the tarpaulin is to aid in shading, as can be seen in the first photo of the original, even at speed it is deployed. Also something I had not thought about, the research can be as important to share with fellow modellers. I use the photos to fine tune detailing, I do not strive for a pure scale model, I am not good enough for that, I go for my best interpretation. I do tend to beat myself up sometimes, and remake parts a couple of times when not happy. But as has been said many times on this forum,” it’s your model, your interpretation” so here are a few of the photos-drawings that inspired me during the build.

▲
⟩⟩
cumbrae
chugalone100
GaryLC
AlessandroSPQR
EdW
RodC
Ronald
jumpugly
hermank
📝 RTTL2755 having a run out
5 months ago by 🇬🇧 Rogal118 ( Captain)
Captain)✧ 48 Views · 9 Likes
Flag
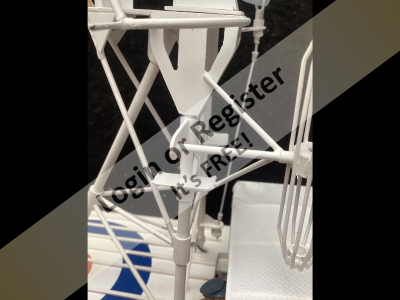
📝 Reply
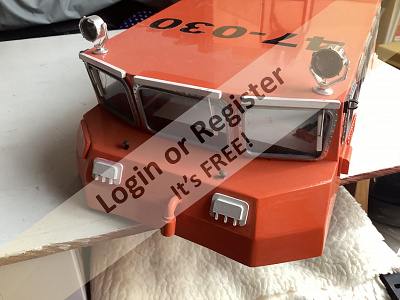
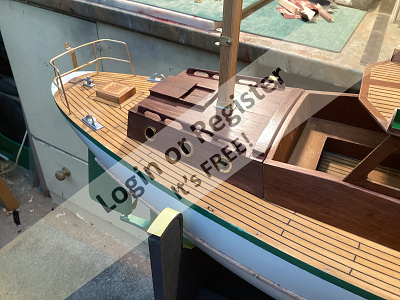
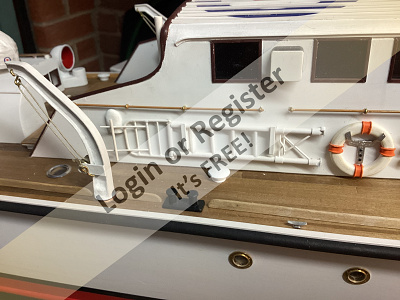
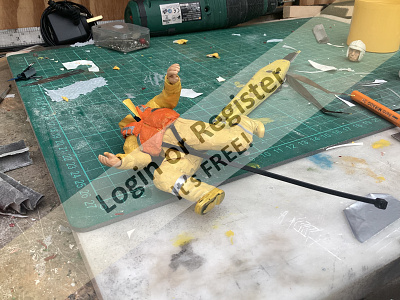
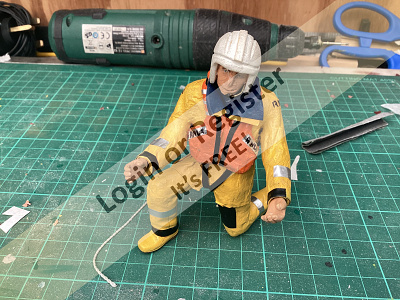
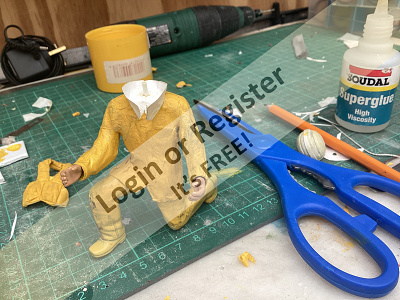
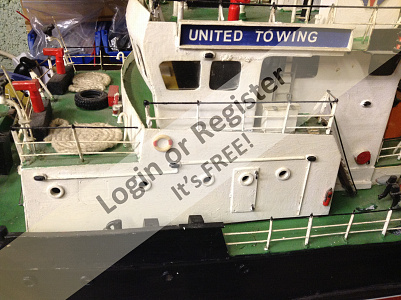
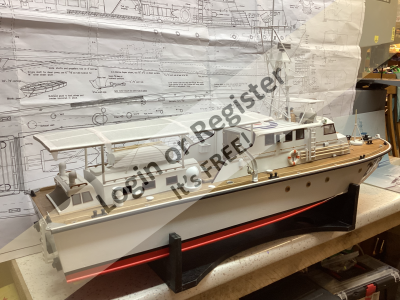
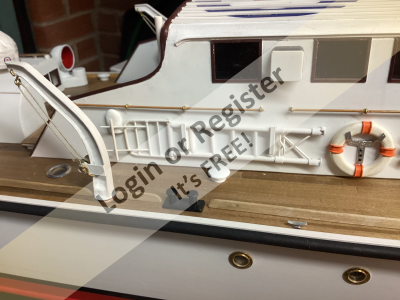
Thankyou everyone for your interest, it really makes it all worthwhile when you guys stop and take a look, especially when I see and aspire to the fantastic work that you all actually produce. He are some closer photos of the 2755, thanks once again.

▲
⟩⟩
cumbrae
GaryLC
AlessandroSPQR
EdW
RodC
Ronald
roycv
hermank
chugalone100
📝 RTTL2755 having a run out
5 months ago by 🇬🇧 Rogal118 ( Captain)
Captain)✧ 88 Views · 24 Likes
Flag
📝 Reply
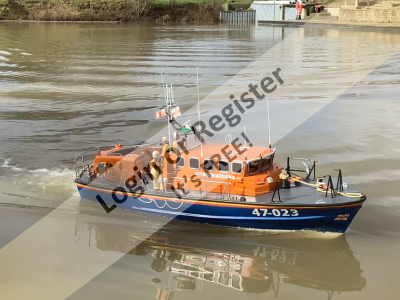
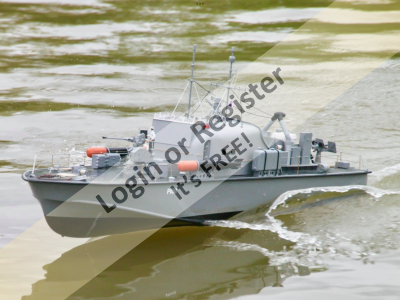
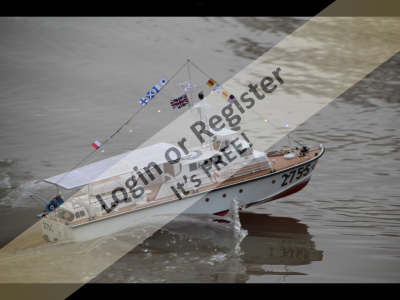
Fired up my Far Eastern version in white livery with sun shade canopy at the pond this week.heres a video of my powered run,
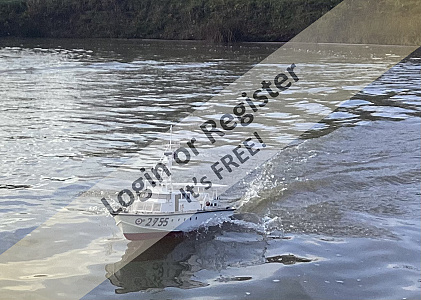

▲
⟩⟩
cumbrae
RodC
zooma
jumpugly
Rookysailor
GaryLC
SimpleSailor
Hsailer
Ray
RNinMunich
DWBrinkman
hermank
ColinJ2
EdW
xtramaths
chugalone100
premecekcz
IanL1
luckyduck
AlessandroSPQR
DuncanP
roycv
JOHN
Ronald
📝 Billings Boat Karoline #412
6 months ago by 🇬🇧 Rogal118 ( Captain)
Captain)✧ 59 Views · 3 Likes
Flag
📝 Reply
Hi Roycv, She hasn’t as such, a bit heath robinson really just a lump of lead screwed to the keel as a stop gap while tweaking to make her sailable. But worked that well it’s got left. Not pretty but you can’t see it while sailing. It’s 200 mm x 30 mm x 15mm. Never weighed it but can when home. I’m in Whitby at moment in tourer for a few days.
▲
⟩⟩
hermank
RodC
roycv
📝 Billings Boat Karoline #412
6 months ago by 🇬🇧 Rogal118 ( Captain)
Captain)✧ 59 Views · 3 Likes
Flag
📝 Reply
Hi Ronald this may help I found a copy on the web,

▲
⟩⟩
jumpugly
hermank
RodC
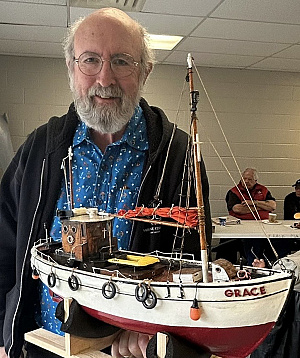
📝 Billings Boat Karoline #412
6 months ago by 🇬🇧 Rogal118 ( Captain)
Captain)✧ 59 Views · 5 Likes
Flag
📝 Reply
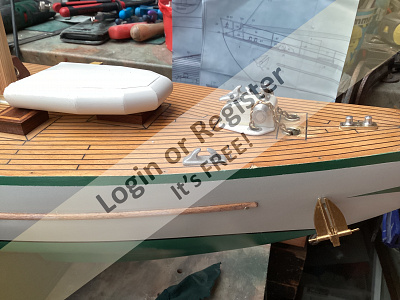
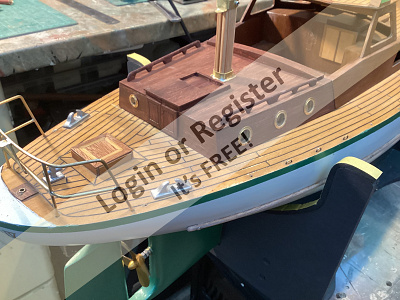
Here’s my Karoline


▲
⟩⟩
jumpugly
hermank
RNinMunich
Ronald
roycv
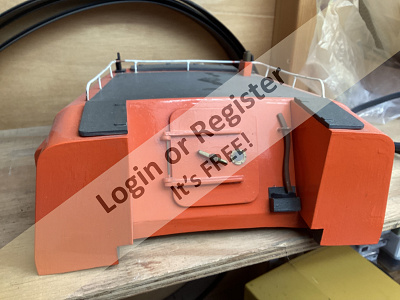
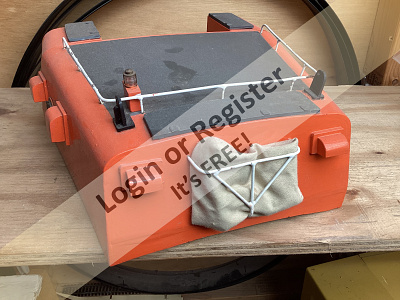
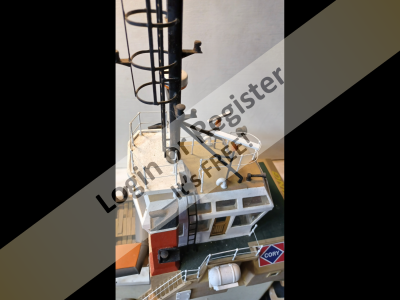
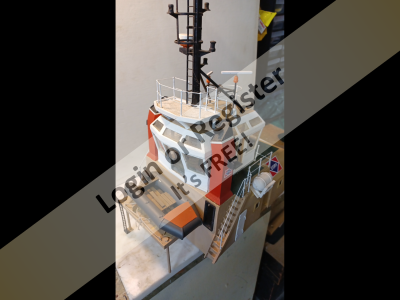
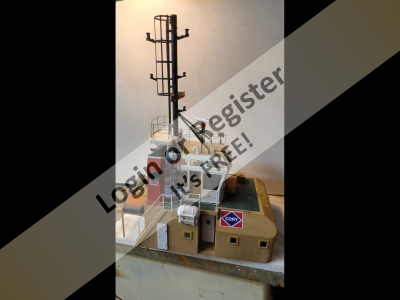
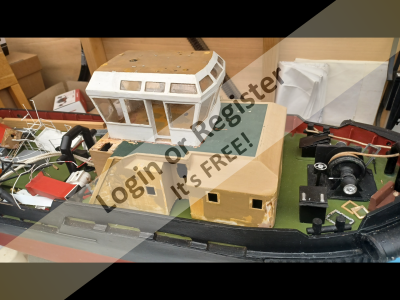
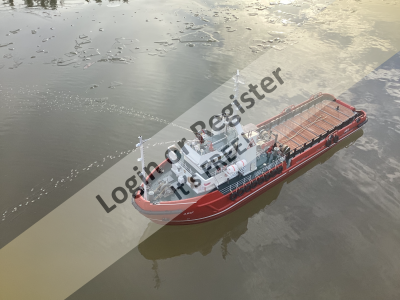
📝 Unknown hull and deck
6 months ago by 🇬🇧 Rogal118 ( Captain)
Captain)✧ 75 Views · 8 Likes
Flag
📝 Reply
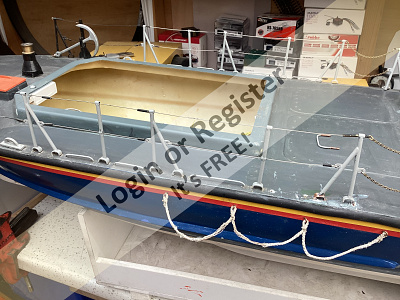
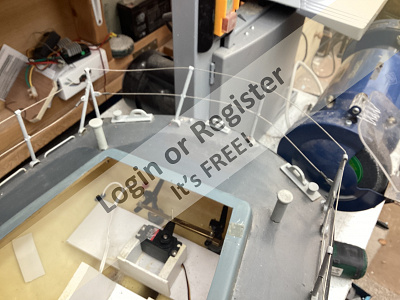
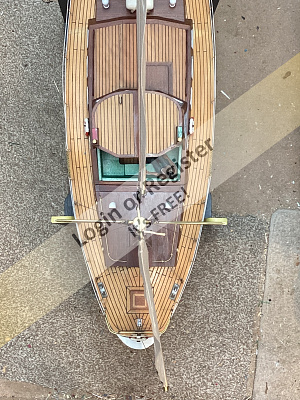
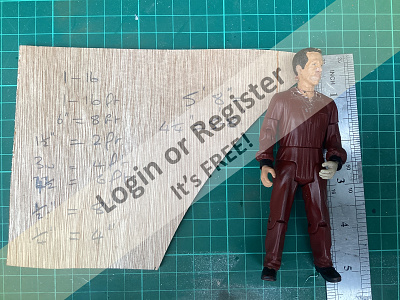
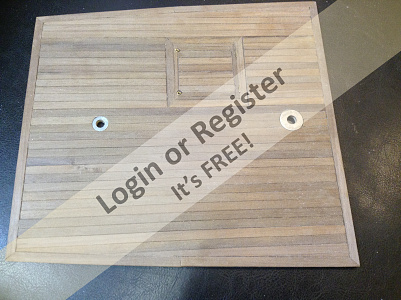
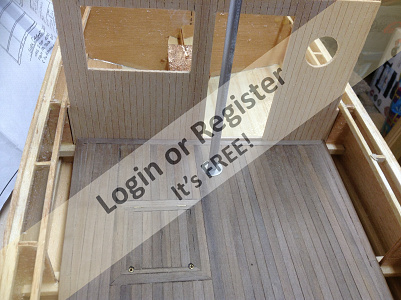
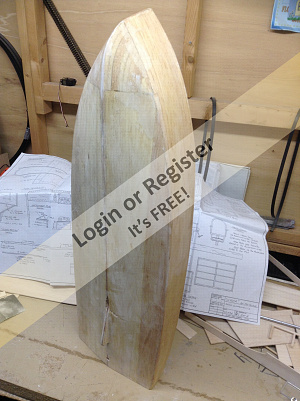
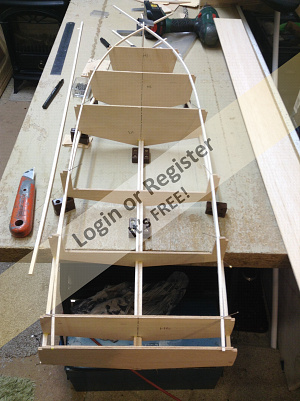
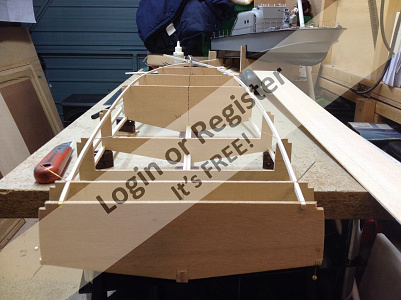
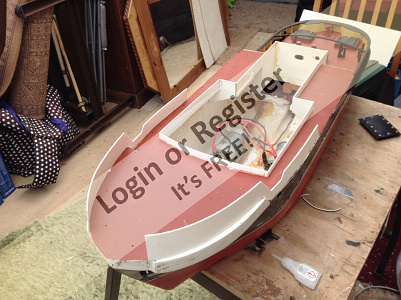
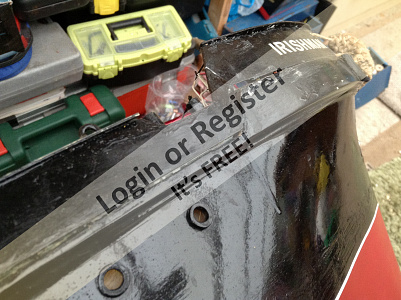
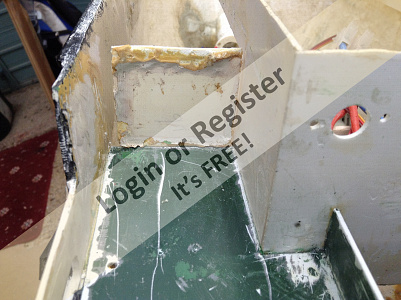
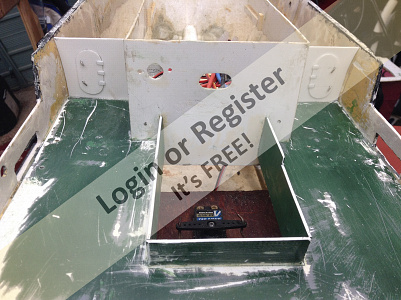
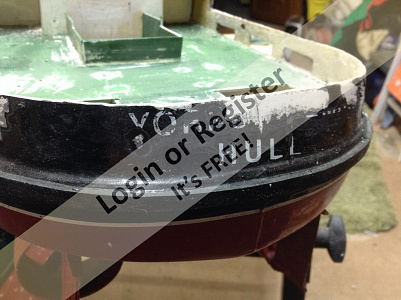
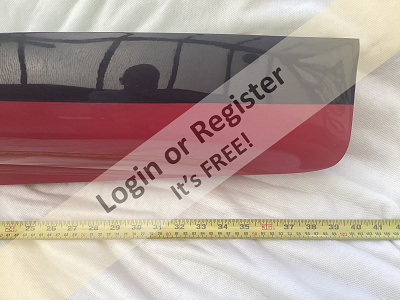
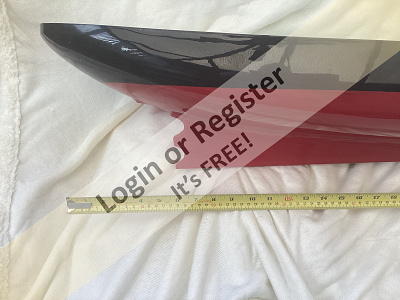
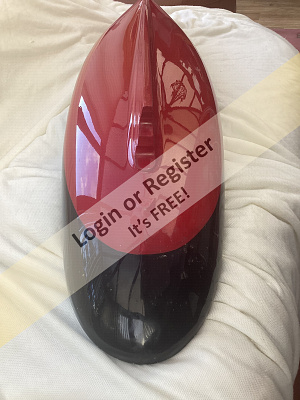
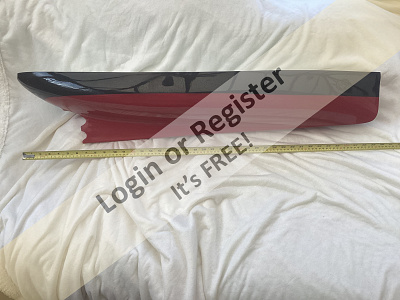
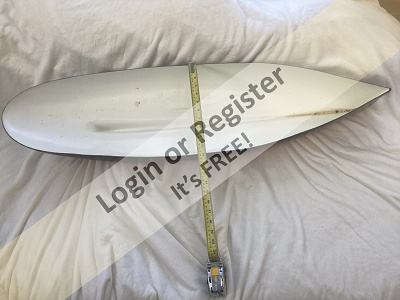
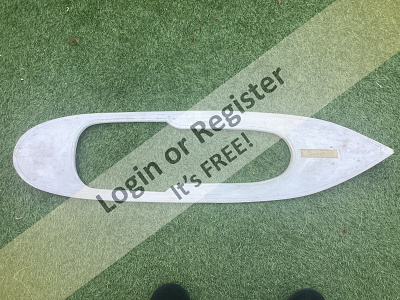
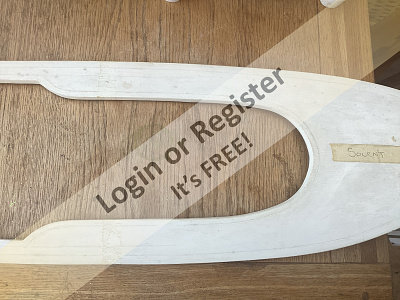
Good afternoon fellow modellers. Here I am asking if anyone of you can guide me in the right direction to research my latest purchase. I acquired this hull and deck at auction, it is 42 inches long(1066mm) long, with a beam of 11 inches (280 mm) it is moulded for single prop and rudder and has a beautiful finish as can be seen in the photos. The deck is glass fibre with an unusual access shape that may give a clue to the superstructure shape. There is a mark on the deck with the word “Solent” on. Also on the deck top, are scribed markings that seem to indicate the position of the bulwarks and structure.That is all the info I have, so can anyone shed any light on it for me so I can proceed further. It appealed to me as I thought I could use my imagination for the above deck, but now would like to know what it should really be. Hope you can help all suggestions considered. Thankyou
▲
⟩⟩
RobW1
Mike Stoney
hermank
SimonB2
Chum444
Frankiesays1953
ColinJ2
EdW
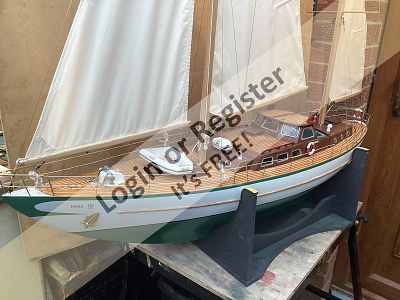
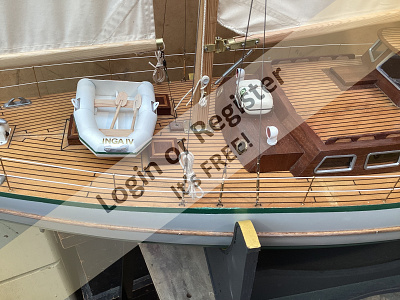
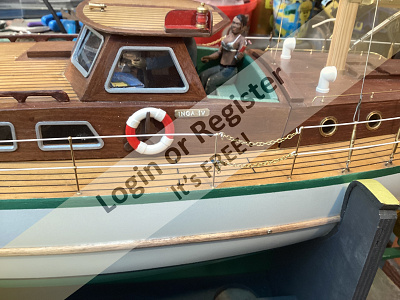
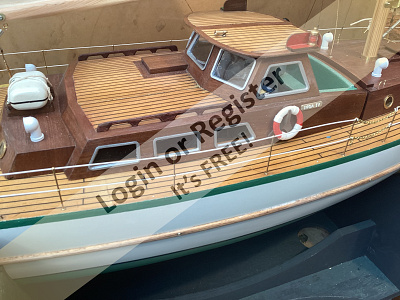
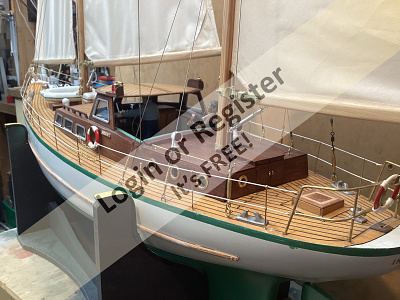
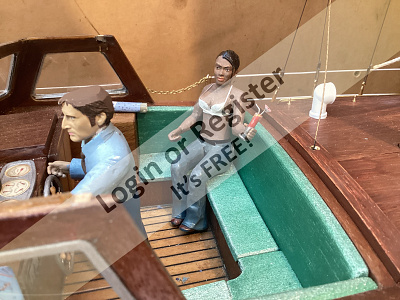
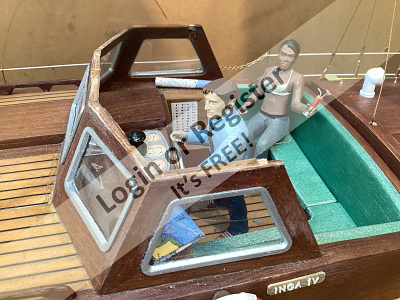
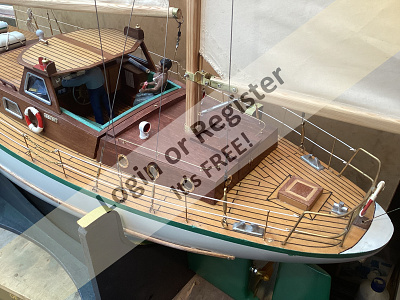
📝 Inga IV Plans?
7 months ago by 🇬🇧 Rogal118 ( Captain)
Captain)✧ 49 Views · 6 Likes
Flag
📝 Reply
Found your post just now, if you pm me with your email I can help with what you require. Dont send it by forum post, it’s better by pm, only I can see it. As I was in the same predicament with my first Inga. The guys on this site are tremendous with the help that they give so I just hope I can do the same. I now have two Inga’s but I call the second one “Olga”.
▲
⟩⟩
BarryS
USA Corsair
Ronald
Ace23
hermank
EdW
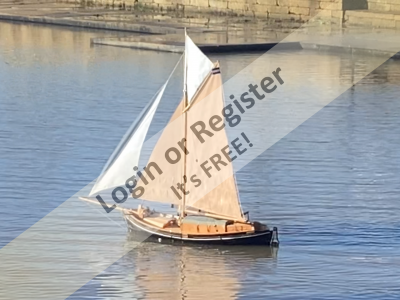
📝 Inga IV finally a good breeze.
1 year ago by 🇬🇧 Rogal118 ( Captain)
Captain)✧ 67 Views · 3 Likes
Flag
📝 Reply
Hi there HermanK. I may have had the pond to myself but other members were nearby. We’ve been tiding up after the floods, high winds and 70 mm ice. Thanks for your interest.
▲
⟩⟩
AlessandroSPQR
Peejay
hermank
Login To
Remove Ads
Remove Ads
📝 Karoline at last a gentle breeze.
1 year ago by 🇬🇧 Rogal118 ( Captain)
Captain)✧ 72 Views · 17 Likes
Flag
📝 Reply
Good evening fellow modellers, here is a video of Karoline sailing under wind power at last. Every time I’ve been to the pond since about September it has been either blowing a gale, becalmed or iced over. But at last all the elements have come together, and an enjoyable afternoon it was. Here’s a video.


▲
⟩⟩
peterd
AndyN
IanL1
Len1
luckyduck
BarryS
Commodore-H
jumpugly
RogerA1
roycv
JohnJ1
Ray
Peejay
Peter s
RNinMunich
AlessandroSPQR
hermank
📝 Inga IV finally a good breeze.
1 year ago by 🇬🇧 Rogal118 ( Captain)
Captain)✧ 68 Views · 15 Likes
Flag
📝 Reply
Good evening. Finally everything comes together. Sunny afternoon, no ice, gentle breeze and the pond all to myself. No pontoons to bump into, although I did manage to hit the oil rig legs and tangle some weeds at the pond side. What a pleasant afternoon, other members were jet washing the side walks. So just me and my boats, Karoline to follow on another post.


▲
⟩⟩
Ronald
AlessandroSPQR
AndyN
IanL1
Len1
flaxbybuck
luckyduck
JohnJ1
Ray
Peejay
jumpugly
RNinMunich
RodC
hermank
AustinG
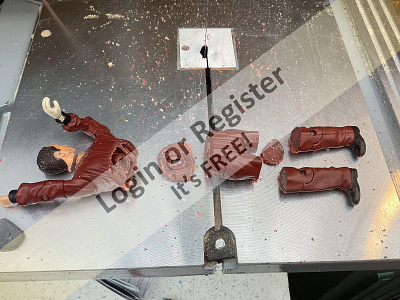
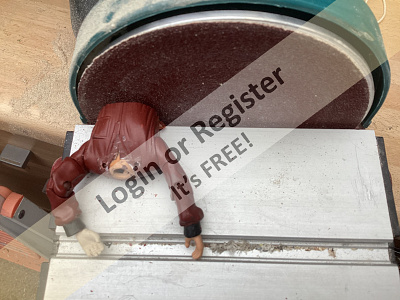
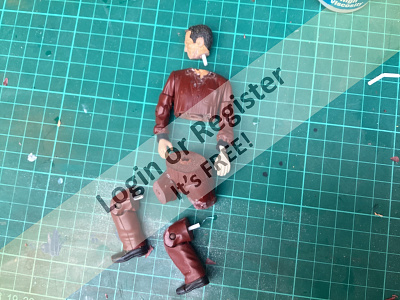
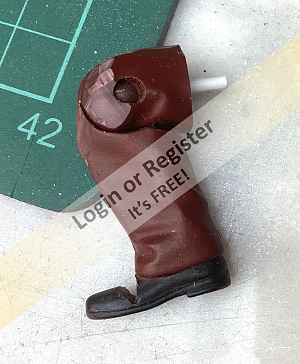
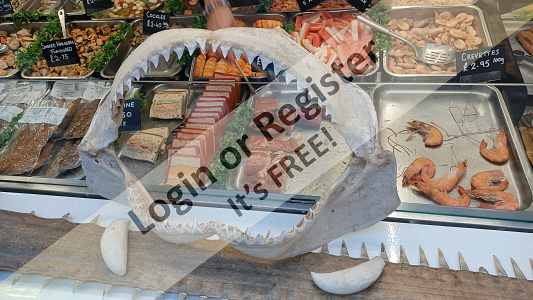
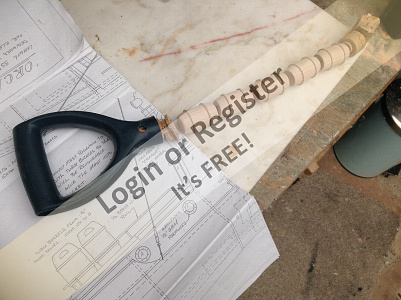
📝 Orca with a full crew looking for jaws. ( filmed in slo-mo)
1 year ago by 🇬🇧 Rogal118 ( Captain)
Captain)✧ 80 Views · 9 Likes
Flag
📝 Reply
Hi GaryLC, I’ve had some success with the shark I made from a block of insulation foam, with the outside fibreglassed. This I can tow with two piano wire rods. I found one rod was too unstable and the shark had a mind of its own. Two rods keep it quite rigid. 2.5 kg of lead was added for ballast to get the shark to sit right in the water. The Orca has a turning circle of around 2 mtr when solo, but with the shark attached it is terrible about 20 mtrs. After much pondering I’ve come to the conclusion that the shark needs a secondary rudder to help with steering. Imagine a 2mtr long model boat with small rudder in the centre of the hull, this is in effect what I have at the moment.


▲
⟩⟩
RoyBoycieB
Julio
RNinMunich
stevedownunder
hermank
Mike Stoney
Commodore-H
AlessandroSPQR
DWBrinkman
📝 Orca with a full crew looking for jaws. ( filmed in slo-mo)
1 year ago by 🇬🇧 Rogal118 ( Captain)
Captain)✧ 106 Views · 15 Likes
Flag
📝 Reply
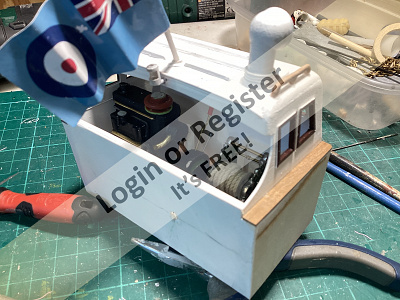
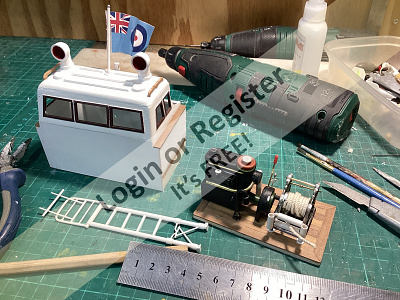
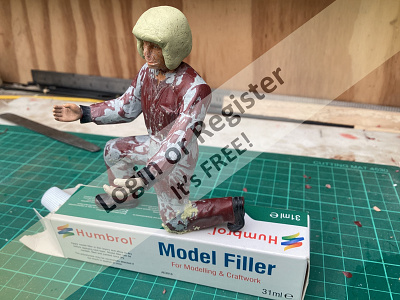
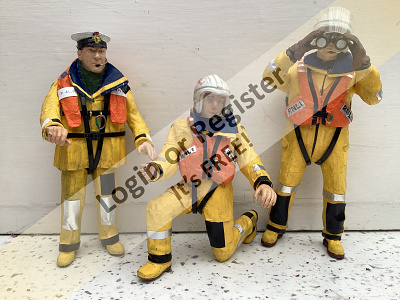
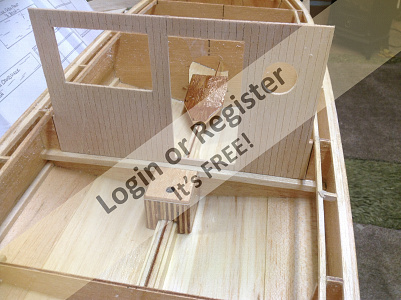
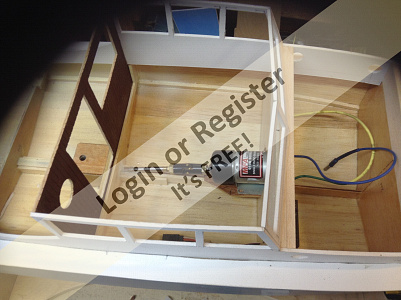
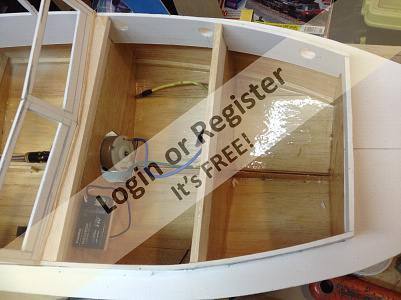
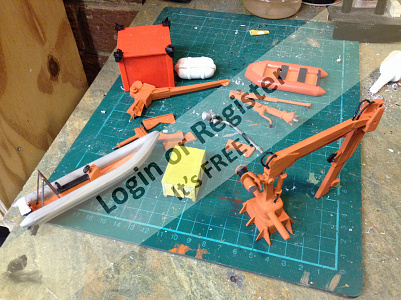
Thanks for your comments GaryLC. I ran and ran the movie many times to authenticate the finer details, some parts contradicted each other then I found that 3 boats were used and the continuity wasn’t always spot on. Well that’s my excuse for straying to my own version in places. Here are some more shots of the cabin internals, I really enjoyed this part of the build.


▲
⟩⟩
MartyV
Julio
peterd
stevedownunder
Mike Stoney
DWBrinkman
luckyduck
Fred
SimpleSailor
EdW
AlessandroSPQR
Ray
LeeA1
GaryLC
RNinMunich
📝 Orca with a full crew looking for jaws. ( filmed in slo-mo)
1 year ago by 🇬🇧 Rogal118 ( Captain)
Captain)✧ 104 Views · 22 Likes
Flag
📝 Reply
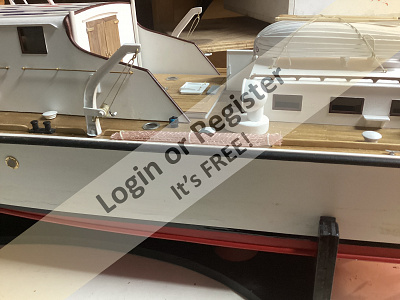
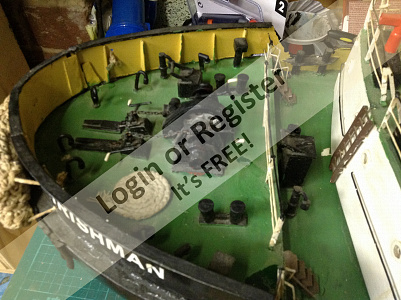
Today at the pond, after 4 weeks of flooding then freezing ice, at last I was able to get out and about. The pond was flat calm, no wind and weak winters sun. A pleasant afternoon in all. I took Orca after some minor repairs and enjoyed sailing her. Here are some latest photos and a video.


▲
⟩⟩
Julio
peterd
stevedownunder
Doogle
IanL1
ChrisF
bryanc
SimpleSailor
EdW
Ray
hermank
RodC
LeeA1
jumpugly
Razor1955
RNinMunich
DuncanP
Peejay
DWBrinkman
GaryLC
roycv
Mike Stoney
💬 Re: Karoline. Dutch fishing/potato boat
1 year ago by 🇬🇧 Rogal118 ( Captain)
Captain)✧ 39 Views · 3 Likes
Flag
💬 Add Comment
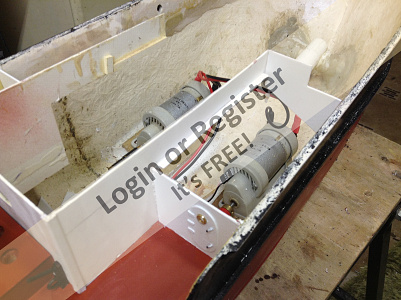
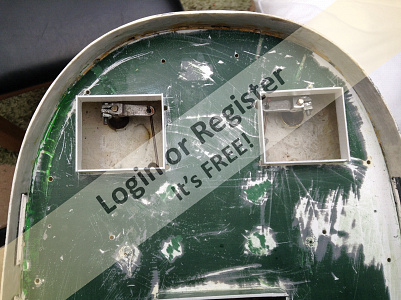
Good morning everyone. Re question by BarryS. Yes I believe the original builder added as an extra the small twin props. This I find is a great help when sailing on our small pond, about the size of 2 tennis courts,, the props are 25mm 2 blade and each have there own small brushed motor with belt drive. At first I could not get any drive forward even in the slightest of head wind, and did contemplate fitting 3 or 4 bladed props. But instead swapped over the pulleys from the motor to the prop shafts, hoping to improve the gearing ratio from approx 3-1 to 1-3 . This didn’t have any effect either. Then I had a thought maybe the props are not really turning efficiently and had a look at the rubber belt drives. These were small loops of rubber about 30 mm diameter with a cross section of around 1mm and were very stretchy. I had a box of assorted rubber seals bought from our local supermarkets middle isle, amongst was a 30mm diameter one with a cross section of 2mm and not as flexible. These fitted perfect and tightly onto the pulley grooves. Bench testing seemed to be satisfactory, so I couldn’t wait to go to the pond. At the pond the breeze was quite a stiff one as they say, so this would test the power train. Perfect, could not be better, at full power the speed was quite gentle and scale looking especially into the breeze. Once turned about the sails took over and the motors were not required. I had worried that she may have been to fast and unrealistic under power, and I always had the option of changing the gearing back to the original, but have not bothered. The stiff breeze showed up other problems. I have dealt with these though in other blogs. Thanks everyone for your interest, just waiting now for the 3inch ice covering of the pond to melt.

▲
⟩⟩
BarryS
AlessandroSPQR
Mike Stoney
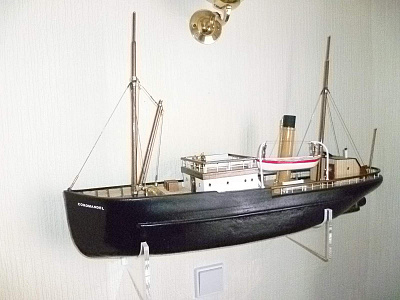
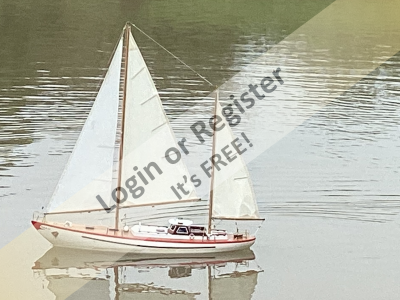
📝 Karoline. Dutch fishing/potato boat
1 year ago by 🇬🇧 Rogal118 ( Captain)
Captain)✧ 24 Views · 15 Likes · 8 Comments
Flag
💬 Add Comment
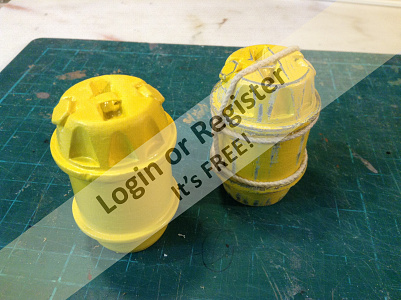
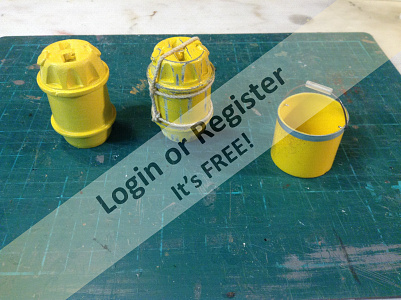
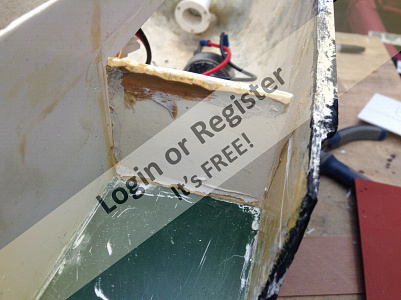
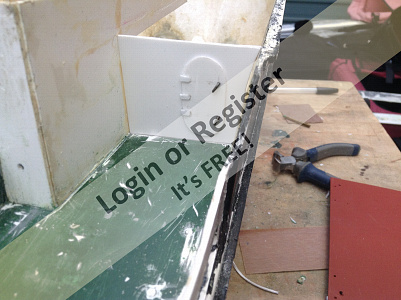
This beautiful sailing boat was left to our club, but was not taken by anyone to be finished off as it was nearly completed.She has a lovely made box for transportation, this was where she was when I acquired her. The hull was complete and the rigging and masts were all jumbled up. There was no instructions, but I soon unravelled the mixture.the sails were still in a flat sheet of plain cotton. I used these as a template to make new from left over cambric cotton. Once complete I staged a test sail which went very well, except the twin props would not power the vessel forward in even the slightest breeze. At first I thought the props were too small, but it turned out to be the belts slipping. I changed these for new and the problem was cured. A few other tweeks were needed and now I have a cracking sailing boat.


▲
⟩⟩
AndyB2
Chuck
Mike Stoney
Ray
johnf
xtramaths
Wolle
BarryS
RogerA1
AlessandroSPQR
EdW
luckyduck
roycv
RNinMunich
hermank
📝 My harbour, re Yorkshireman
1 year ago by 🇬🇧 Rogal118 ( Captain)
Captain)✧ 37 Views · 2 Likes
Flag
📝 Reply
Good evening Captain ChrisF, I will just have to live with this anomaly, weird technology does what it wants.
▲
⟩⟩
ChrisF
hermank
📝 My harbour, re Yorkshireman
1 year ago by 🇬🇧 Rogal118 ( Captain)
Captain)✧ 37 Views · 1 Like
Flag
📝 Reply
Good evening ChrisF, thanks for your interest, yes you are correct it is on my page, and I can see it when I open Model boats web page on my old iPad. But that is my query now I’m on my new iPad typing this reply to you . The Yorkshireman post in my harbour is not there!!!. Here’s the latest screen shot, note time and date in top left corner.

▲
⟩⟩
ChrisF
Login To
Remove Ads
Remove Ads