

HMS Medway Queen
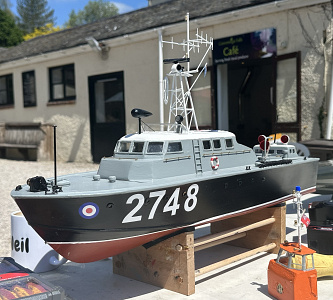
Following the build of my BYMS and the restoration of my Zambezi River Gunboat sternwheeler I was looking for a new build.
Obviously have been aware of the PS Medway Queen so the next project had to combine paddle wheels with minesweeping so HMS Medway Queen is now in build.
I bought a 3D printer in the summer and have had lots of fun printing various trimarans, an air boat and a pontoon boat along with a rock crawler, trailers and a range of model boat fittings. The plan is to scratch build the hull and print the paddle wheels and as many fittings as possible.
I bought a set of modellers plans from the Medway Queen Preservation Society a few months ago and found that some of the dimensions were getting to be unreadable as the plans have been copied many times, this was a major issue with the paddle wheel plans as I couldn't read the dimensions for the wheel diameter and eccentric diameter. After emailing the society to see if they had a better copy they mentioned they had all the original plans in their archive and I was welcome to inspect and photograph anything I needed.
We were on holiday in Kent in September so added to trip to the Medway Queen and had a great day on board and examining the plans, highly recommend a trip to see her - details at https://www.medwayqueen.co.uk/
Back home I decided that 1:48 would be an ideal scale, giving me a model that will 1.18m (3' 10.5") long and big enough to 3D print most of the fittings.
The plans do give enough detail when scaled to 1:48 so I produced a set of 20 body sections that were scaled and printed on orange card, transferred to 3.5mm ply and the full set of sections mounted to the build board.
Currently about half the hull is planked and as I've run out of timber I've used the time to sort the feathering paddle wheels. Had to make a decision to lose some historical accuracy as the Medway Queen has 7 floats on each paddle wheel whereas mine have 8. It's so much easier to work in segments of 45 degrees than the 51.4286 degrees required for authenticity. I'll make the paddle fascias removable so I can change to a 7 float version at a later date.
The paddle wheels have been tested on the bench and do feather when under load after a bit of tweaking to remove friction in the floats and eccentric rods and hub.
Just waiting for more timber to arrive this week so I'll finish the planking, fair the hull and cover with epoxy and cloth. Should keep me busy for a few months!
Obviously have been aware of the PS Medway Queen so the next project had to combine paddle wheels with minesweeping so HMS Medway Queen is now in build.
I bought a 3D printer in the summer and have had lots of fun printing various trimarans, an air boat and a pontoon boat along with a rock crawler, trailers and a range of model boat fittings. The plan is to scratch build the hull and print the paddle wheels and as many fittings as possible.
I bought a set of modellers plans from the Medway Queen Preservation Society a few months ago and found that some of the dimensions were getting to be unreadable as the plans have been copied many times, this was a major issue with the paddle wheel plans as I couldn't read the dimensions for the wheel diameter and eccentric diameter. After emailing the society to see if they had a better copy they mentioned they had all the original plans in their archive and I was welcome to inspect and photograph anything I needed.
We were on holiday in Kent in September so added to trip to the Medway Queen and had a great day on board and examining the plans, highly recommend a trip to see her - details at https://www.medwayqueen.co.uk/
Back home I decided that 1:48 would be an ideal scale, giving me a model that will 1.18m (3' 10.5") long and big enough to 3D print most of the fittings.
The plans do give enough detail when scaled to 1:48 so I produced a set of 20 body sections that were scaled and printed on orange card, transferred to 3.5mm ply and the full set of sections mounted to the build board.
Currently about half the hull is planked and as I've run out of timber I've used the time to sort the feathering paddle wheels. Had to make a decision to lose some historical accuracy as the Medway Queen has 7 floats on each paddle wheel whereas mine have 8. It's so much easier to work in segments of 45 degrees than the 51.4286 degrees required for authenticity. I'll make the paddle fascias removable so I can change to a 7 float version at a later date.
The paddle wheels have been tested on the bench and do feather when under load after a bit of tweaking to remove friction in the floats and eccentric rods and hub.
Just waiting for more timber to arrive this week so I'll finish the planking, fair the hull and cover with epoxy and cloth. Should keep me busy for a few months!