Join Us On Social Media!

|

|

|
Download The App!
Login To
Remove Ads
Remove Ads
Login To
Remove Ads
Remove Ads
Model Boats Website
Rescue Vessel - Springer Tug
22 Posts · 3 Followers · 118 Photos · 70 Likes
Began 5 years ago by
 United States
Follow This Thread
Not currently following
> Click to follow
> Click to follow
Latest Post 4 years ago by
| Oldest posts shown first (Show Newest First) | (Print Booklet) |
📝 Rescue Vessel - Springer Tug
5 years ago by 🇺🇸 Joe727 ( Commander)
Commander)✧ 3 Views · 1 Like
Flag
💬 Add Comment
Hello all,
Even though I am in the middle of several projects, including refitting two of my boats, I can't resist starting a new one. I am sure that I am not the only one with this affliction, I get bored quickly and jump from project to project. To keep them moving, I mostly work simultaneously.
So here goes, my first ever Build Blog, bear with me....
Picked the Springer Tug as it is very simple and it will just be used ss a backup recovery vessel. I intend to build it a zero cost from my parts box and scrap wood pile. I put together my extra props, driveshaft, gearbox, motor, esc and RX. May have to buy a SLA Battery to get descent run time.
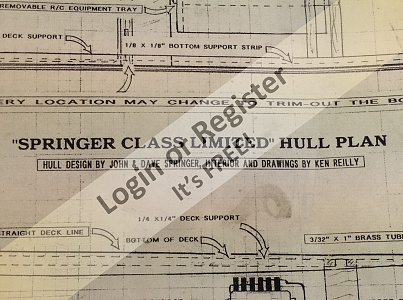
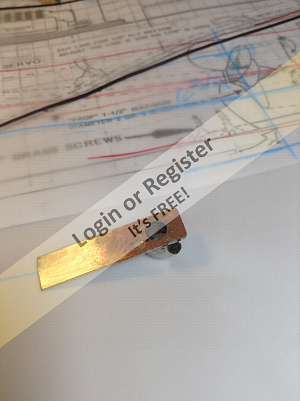
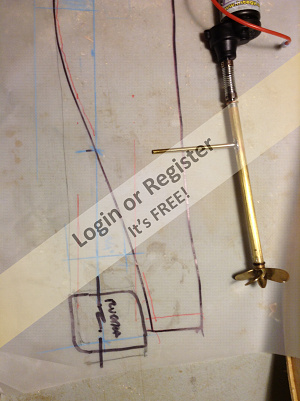
Started last evening by making a template based on the plan in photo, credit goes to hull designer, see photo.
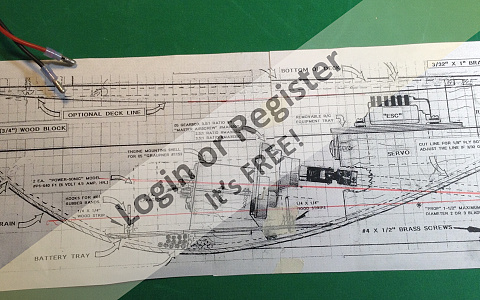
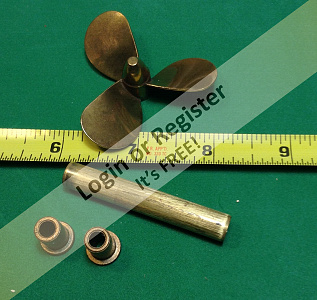
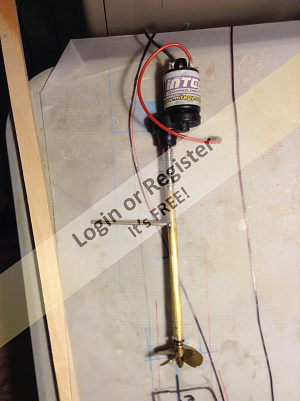
Then I determined my motor location and Drive Line Angle so I could design the stuffing tube. Constructed that the same night using a 3/16" SS steel drive shaft. Bronze bushings from local hardware store and brass tubing from my supplies. See photos...
Had the 500dc motor, Master Airscrew Gearbox, drive shaft, coupler and 2" brass prop. More to come.....
Joe


Even though I am in the middle of several projects, including refitting two of my boats, I can't resist starting a new one. I am sure that I am not the only one with this affliction, I get bored quickly and jump from project to project. To keep them moving, I mostly work simultaneously.
So here goes, my first ever Build Blog, bear with me....
Picked the Springer Tug as it is very simple and it will just be used ss a backup recovery vessel. I intend to build it a zero cost from my parts box and scrap wood pile. I put together my extra props, driveshaft, gearbox, motor, esc and RX. May have to buy a SLA Battery to get descent run time.
Started last evening by making a template based on the plan in photo, credit goes to hull designer, see photo.
Then I determined my motor location and Drive Line Angle so I could design the stuffing tube. Constructed that the same night using a 3/16" SS steel drive shaft. Bronze bushings from local hardware store and brass tubing from my supplies. See photos...
Had the 500dc motor, Master Airscrew Gearbox, drive shaft, coupler and 2" brass prop. More to come.....
Joe
▲
⟩⟩
Martin555
Login To
Remove Ads
Remove Ads
📝 Day Two Springer
5 years ago by 🇺🇸 Joe727 ( Commander)
Commander)✧ 5 Views · 3 Likes
Flag
💬 Add Comment
Springer build log for website
Hello all,
Even though I am in the middle of several projects, including refitting two of my boats, I can't resist starting a new one. I am sure that I am not the only one with this affliction, I get bored quickly and jump from project to project. To keep them moving, I mostly work simultaneously.
So here goes, my first ever Build Blog, bear with me....
Picked the Springer Tug as it is very simple and it will just be used ss a backup recovery vessel. I intend to build it a zero cost from my parts box and scrap wood pile. I put together my extra props, driveshaft, gearbox, motor, esc and RX. May have to buy a SLA Battery to get descent run time.
Started last evening by making a template based on the plan in photo, credit goes to hull designer, see photo.
Then I determined my motor location and Drive Line Angle so I could design the stuffing tube. Constructed that the same night using a 3/16" SS steel drive shaft. Bronze bushings from local hardware store and brass tubing from my supplies. See photos...
Had the 500dc motor, Master Airscrew Gearbox, drive shaft, coupler and 2" brass prop. More to come.....
Joe
Day 2
Hello,
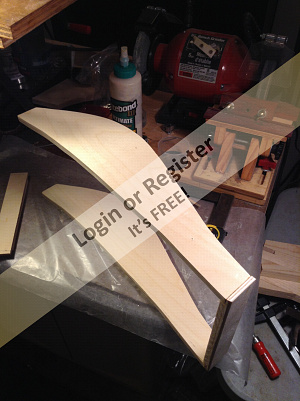
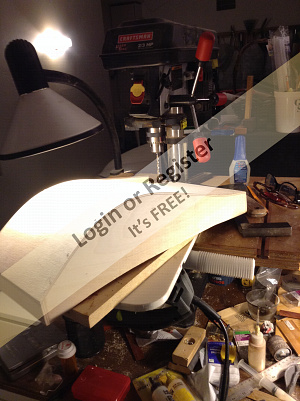
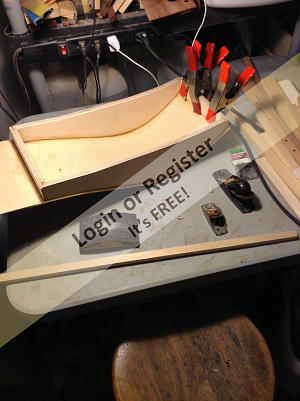
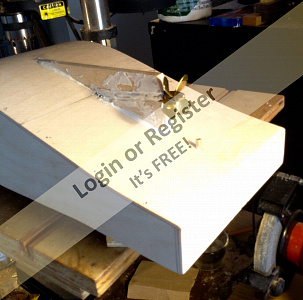
Next I traced the hull sides on to 12mm/1/2" Baltic birch plywood from Woodcraft store. I nailed two pieces together prior to cutting so as to match.
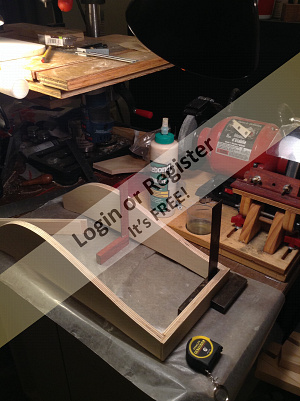
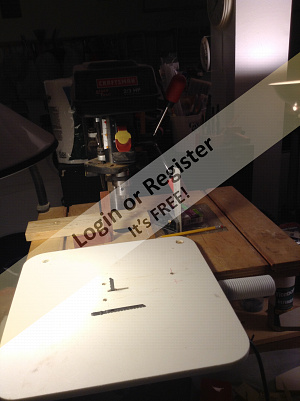
I don't have a scroll saw so I built a table mount for a jigsaw that attaches to my homemade drill press table. Cut them together, but the jigsaw does not cut well in terms of verticality. So I clamped them in a vise and hand sanded till they matched and were at 90 degrees.
I showed my simple rig for the sabre saw / jigsaw table. if you need detail, just ask.
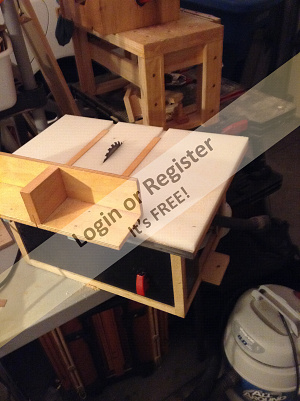
I also showed my custom made 4 1/2 table that I made because I could not find a scaled down table saw for model making. (Could not afford, I am retired and have a low budget.
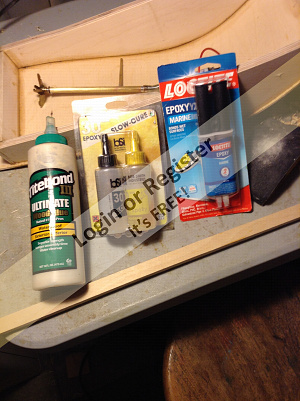
Glued up the sides and ends tonight with Titebond 3, temporary nails to help hold it into place.
Note: As to any joints whether it be electronic, woodworking, etc., a good practice is to use this both adhesive and mechanical fastener. I swear by these as one or the other will eventually fail This is as simple as using a screw, nail or rod, and the appropriate adhesive.
Model building, as most will say is cheaper than therapy.
Joe

Hello all,
Even though I am in the middle of several projects, including refitting two of my boats, I can't resist starting a new one. I am sure that I am not the only one with this affliction, I get bored quickly and jump from project to project. To keep them moving, I mostly work simultaneously.
So here goes, my first ever Build Blog, bear with me....
Picked the Springer Tug as it is very simple and it will just be used ss a backup recovery vessel. I intend to build it a zero cost from my parts box and scrap wood pile. I put together my extra props, driveshaft, gearbox, motor, esc and RX. May have to buy a SLA Battery to get descent run time.
Started last evening by making a template based on the plan in photo, credit goes to hull designer, see photo.
Then I determined my motor location and Drive Line Angle so I could design the stuffing tube. Constructed that the same night using a 3/16" SS steel drive shaft. Bronze bushings from local hardware store and brass tubing from my supplies. See photos...
Had the 500dc motor, Master Airscrew Gearbox, drive shaft, coupler and 2" brass prop. More to come.....
Joe
Day 2
Hello,
Next I traced the hull sides on to 12mm/1/2" Baltic birch plywood from Woodcraft store. I nailed two pieces together prior to cutting so as to match.
I don't have a scroll saw so I built a table mount for a jigsaw that attaches to my homemade drill press table. Cut them together, but the jigsaw does not cut well in terms of verticality. So I clamped them in a vise and hand sanded till they matched and were at 90 degrees.
I showed my simple rig for the sabre saw / jigsaw table. if you need detail, just ask.
I also showed my custom made 4 1/2 table that I made because I could not find a scaled down table saw for model making. (Could not afford, I am retired and have a low budget.
Glued up the sides and ends tonight with Titebond 3, temporary nails to help hold it into place.
Note: As to any joints whether it be electronic, woodworking, etc., a good practice is to use this both adhesive and mechanical fastener. I swear by these as one or the other will eventually fail This is as simple as using a screw, nail or rod, and the appropriate adhesive.
Model building, as most will say is cheaper than therapy.
Joe
▲
⟩⟩
Martin555
Hande of Espoo
figtree7nts
📝 Day Three
5 years ago by 🇺🇸 Joe727 ( Commander)
Commander)✧ 5 Views · 3 Likes
Flag
💬 Add Comment
Hi,
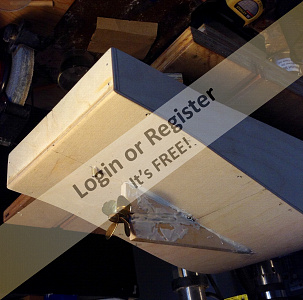
Using 3mm Baltic birch plywood, I skinned the hull. Used Titebond III wood glue, bent by hand, drilled and tacked in place with small brads. I cut the bottom oversized so it was easier to position, after drying 16 hours I cut the edges flush with the sides using a Japanese pull saw.
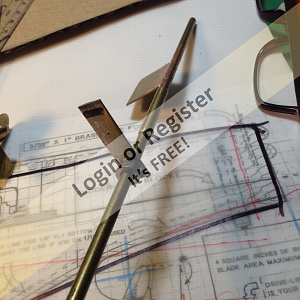
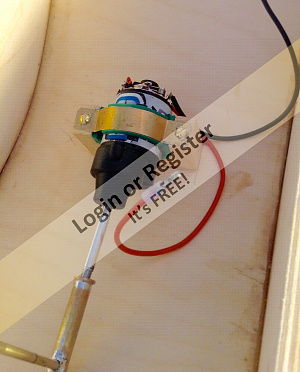
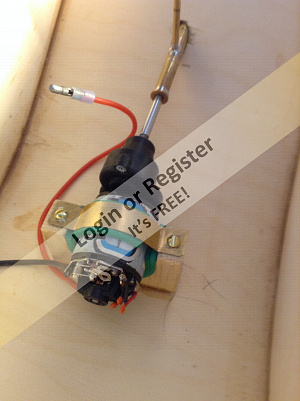
Built the core for my rudder, see photos, solder my own arm as I did not have one. Used a 3/16" set collar, filed the surface to expose brass and solder a piece brass. Will drill the second hole later. Attached brass plate that will be inside the actual rudder, will build from either plastic or wood.
Next, laid out the placement of the stuffing tube, then drilled the hull then I built a motor mount from wood and added some green foam to limit mount vibration and sound transfer. Set the rudder post and block. Time to let everything overnight.
Joe


Using 3mm Baltic birch plywood, I skinned the hull. Used Titebond III wood glue, bent by hand, drilled and tacked in place with small brads. I cut the bottom oversized so it was easier to position, after drying 16 hours I cut the edges flush with the sides using a Japanese pull saw.
Built the core for my rudder, see photos, solder my own arm as I did not have one. Used a 3/16" set collar, filed the surface to expose brass and solder a piece brass. Will drill the second hole later. Attached brass plate that will be inside the actual rudder, will build from either plastic or wood.
Next, laid out the placement of the stuffing tube, then drilled the hull then I built a motor mount from wood and added some green foam to limit mount vibration and sound transfer. Set the rudder post and block. Time to let everything overnight.
Joe
▲
⟩⟩
Martin555
Donnieboy
figtree7nts
📝 Moving along
5 years ago by 🇺🇸 Joe727 ( Commander)
Commander)✧ 4 Views · 2 Likes
Flag
💬 Add Comment
Merry Christmas to All!
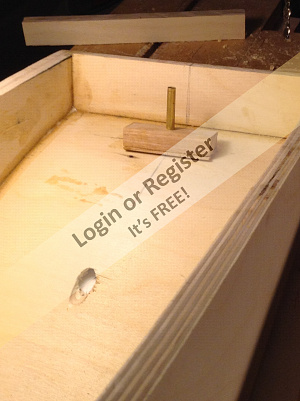
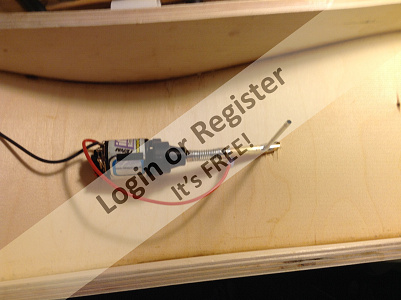
Yesterday I made a brass strap to secure the motor, then aligned the drive shaft and stuffing tube. Tacked tube in place with a gel superglue, will be covered with epoxy later. Used a short piece of aluminum tube to help align the motor and shaft. A coupler will be placed here.
Cut some plywood pieces to create keel at the shaft tube. White stuff is marine epoxy by locktite, just enough to set everything. I will then coat and finish this assembly.
Finished the day's work by constructing a rudder, no photo yet.
Enjoy Christmas!
Joe
▲
⟩⟩
Martin555
Donnieboy
📝 Cabin / Deck Designs
5 years ago by 🇺🇸 Joe727 ( Commander)
Commander)✧ 3 Views · 1 Like
Flag
💬 Add Comment
Hello,
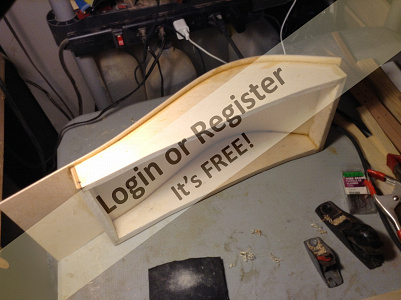
Thinking about deck and pilot house designs. Good thing to do while the glue dries. The attach drawing found on the net is making me think about a front ramp as I like these workboats.
Just need to keep in mind that it also needs to be a rescue vessel.
There is always a need to rescue a sailboat at the pond.
Joe
▲
⟩⟩
Martin555
📝 Deck, servo mount
5 years ago by 🇺🇸 Joe727 ( Commander)
Commander)✧ 6 Views · 4 Likes
Flag
💬 Add Comment
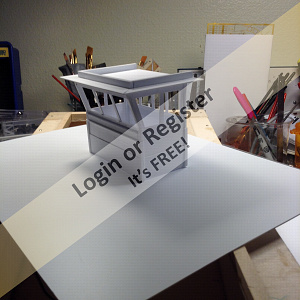
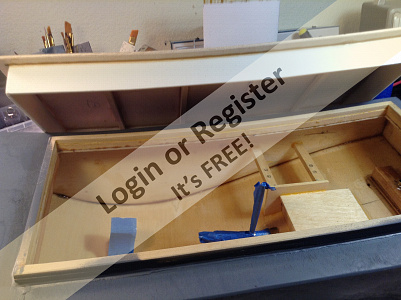
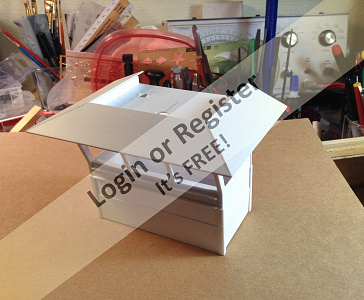
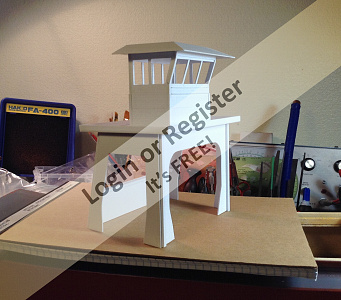
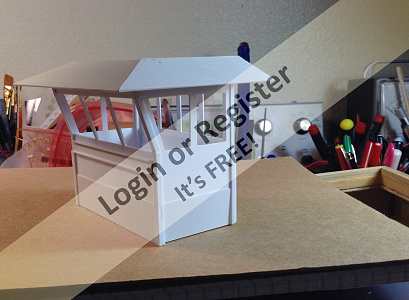
Put together a pilot house based on some tugs I've seen. Just freelanced it as I went. I build a lot with styrene so I am used to just cutting and building. I use liquid styrene cement that fuses the materials together. See photo, will trim it out as I mount it, need to add some detail at roof and some Navigational lighting.
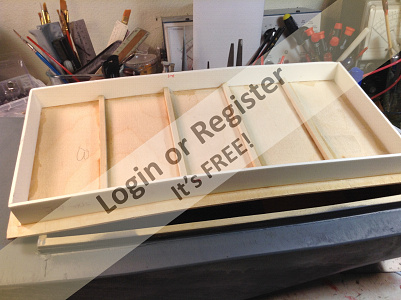
Put on on 3mm plywood deck, same as hull bottom. The deck is also curved (proper term is SHEAR) and I started to build up some wood edge at the opening. Will sand everything well, then start sealing and priming all surfaces.
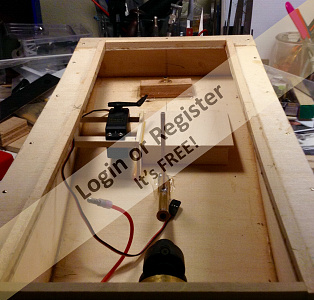
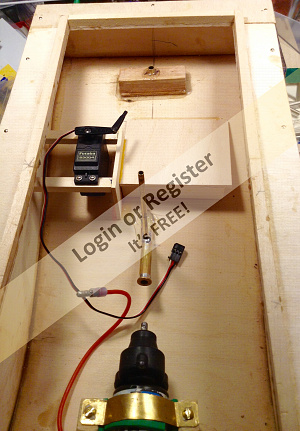
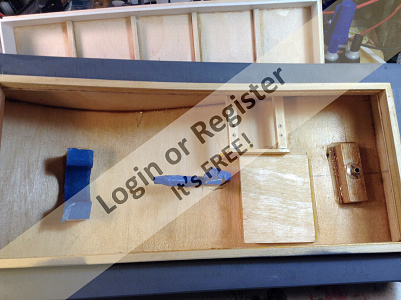
Made a bracket for the rudder servo mount and an adjacent platform for the ESC and RX.
Ordered two 6v 5ah SLA batteries. I will wire in parallel to stay with 6v and get 10ah. I like to stay with 6 volts as I want the motor to run slow like a tug should. Will wire in an in-line fuse. Haven't decided where I will put switch, up high somewhere to avoid water. I will show the wiring once I get to it.
This build is going fast because it's a simple design, just what I was looking for. I work on it late afternoons and into the evening while I watch basketball games. About 4 hrs a day.
Looking forward to building the hatch and getting some primer started tomorrow.
Regards, Joe 👍
Put on on 3mm plywood deck, same as hull bottom. The deck is also curved (proper term is SHEAR) and I started to build up some wood edge at the opening. Will sand everything well, then start sealing and priming all surfaces.
Made a bracket for the rudder servo mount and an adjacent platform for the ESC and RX.
Ordered two 6v 5ah SLA batteries. I will wire in parallel to stay with 6v and get 10ah. I like to stay with 6 volts as I want the motor to run slow like a tug should. Will wire in an in-line fuse. Haven't decided where I will put switch, up high somewhere to avoid water. I will show the wiring once I get to it.
This build is going fast because it's a simple design, just what I was looking for. I work on it late afternoons and into the evening while I watch basketball games. About 4 hrs a day.
Looking forward to building the hatch and getting some primer started tomorrow.
Regards, Joe 👍
▲
⟩⟩
Martin555
figtree7nts
Donnieboy
jugge
📝 Hatch & Tow Bitts
5 years ago by 🇺🇸 Joe727 ( Commander)
Commander)✧ 6 Views · 4 Likes · 2 Comments
Flag
💬 Add Comment
Last night I started on the large hatch that will cover the entire deck opening rather than several hatches, this is to keep with simple approach. The pilot house and whatever else I decide to add will be attached to this for easy removal and access for battery charging and maintenance. it's not as easy as a flat deck hatch as I curved the deck and wanted to curve the hatch as well. See photos, I cut curved sides, then I clamped it to blocks on the bench to bend , glued and let dry for 24 hours.
While that's setting up I started on building some tow bitts. These I am making from styrene that I had from my railroad scratch building. See two small for aft and 1 larger at the bow that is in progress.
In addition, I showed some shots of my Brooklyn Tug Bitts. These are heavy duty and were made of brass!
Still enjoying this simple build..... Joe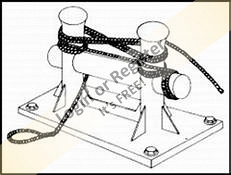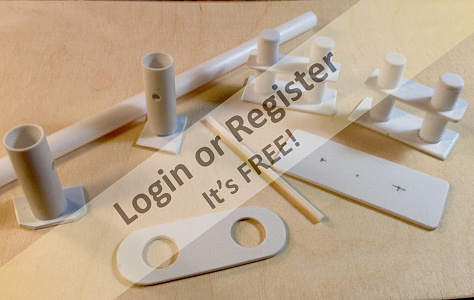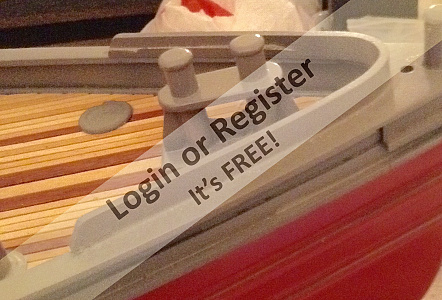
▲
⟩⟩
Martin555
figtree7nts
Donnieboy
jugge
|
💬 Hatch & Tow Bitts
5 years ago by 🇺🇸 Joe727 (
Commander)✧ 3 Views · 1 Like
Flag
Stour-Boy,
Hey, great tip, I hadn't thought of that! I like to salvage from anything I can find. You are right, these will solder well. Have to visit the local shop and see if I can get a couple of larger caliber casings. Makes me remember, I build sailboats as well and have found a great source for booms, flag poles, etc. ARCHERY SHOPs around here have ranges and tend to collect old shafts minus feathers etc. I let them know I am a model builder and could I buy some old shafts. They pull out a box of about 100 and say take what you want...free. They are mostly Carbon Fiber, so are insanely strong, cut with an abrasive wheel well, hold paint nicely. See my harbor, the SeaTurtle has these for booms. Some of the arrow shafts picked up were a nice aluminium. Regards, Joe ▲
⟩⟩
Donnieboy
|
|
💬 Hatch & Tow Bitts
5 years ago by 🇬🇧 Stour-boy (
 Leading Seaman) Leading Seaman)✧ 5 Views · 2 Likes
Flag
Hi, just to add a tip re making the bits, I used to do a lot of
Small bore rifle shooting and the spent .22 brass cases were very useful for making them,they cut,shape and solder easily and are strong. Have a good new year, Stourboy ▲
⟩⟩
Joe727
Donnieboy
|
📝 Priming Hull
5 years ago by 🇺🇸 Joe727 ( Commander)
Commander)✧ 5 Views · 3 Likes
Flag
💬 Add Comment
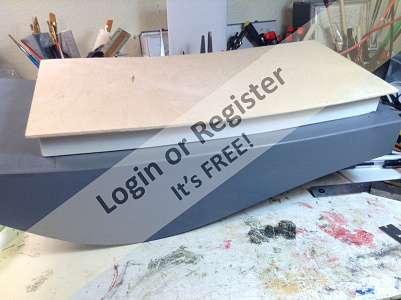
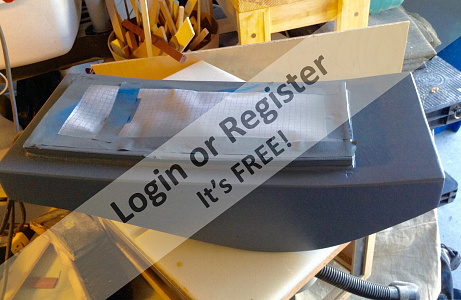
Hello, Not too many photos today as I am focusing on sealing the hull. Photo shows the gray primer in progress..... Haven't finalized the paint scheme yet, probably red, green, white, some gray. Thank you everybody for your interest, please ask questions, comments appreciated. if you see me doing something GOOFY, let me know...... Regards, Joe
▲
⟩⟩
Martin555
figtree7nts
Donnieboy
📝 Paint & Pilot House Structure
5 years ago by 🇺🇸 Joe727 ( Commander)
Commander)✧ 6 Views · 4 Likes
Flag
💬 Add Comment
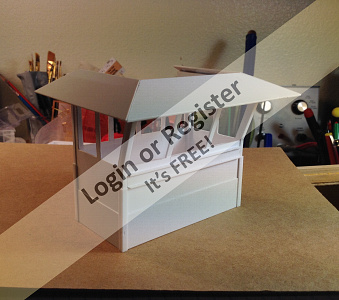
Hello, first photo is of deck hatch, painted. Rather than watch paint dry, I went back to building the pilot house and the structure below it. Comments welcome...,.
Joe

Joe
▲
⟩⟩
Martin555
jugge
RNinMunich
figtree7nts
📝 Electronics,wiring
5 years ago by 🇺🇸 Joe727 ( Commander)
Commander)✧ 4 Views · 2 Likes · 2 Comments
Flag
💬 Add Comment
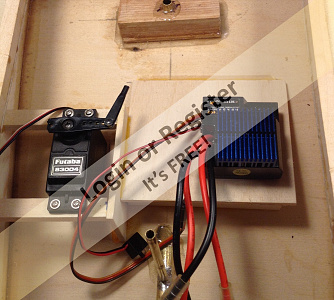
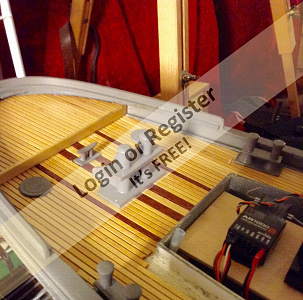
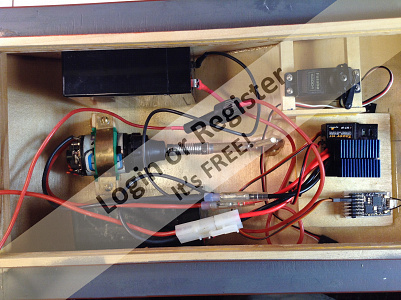
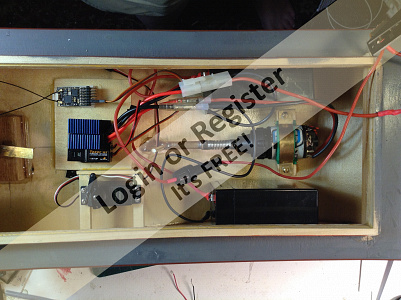
My batteries arrived, could not find locally so ordered through Walmart online. Two - 6volt 4.5AH, wired in parallel to give me 6v @ 9AH. Used inline fuse, prior to switch, then on to the esc, a Dynamite Tazar 15 T marine type. On/off switch will operate from outside so hatch will not have to be removed.
Had some real nightmares trying to program this esc! Setup lights would not come on, went through all procedures, slept on it tried ecpvery website, tried again today, nothing. I was about to look into a new purchase, THEN LIKE MAGIC.... I mistakenly switched it to my zBrooklyn Tug mod on th TX which uses the same esc, and it startled me with the motor running and rudder moving. Everything worked great. So I just copied all of the settings into this build on the TX. HAPPY NOW
Photo shows the mass of wires that allows me to shift the batteries for final ballasting, they will be tucked away neatly as build is finalized. Regards, Joe
▲
⟩⟩
Martin555
Donnieboy
|
💬 Electronics,wiring
5 years ago by 🇺🇸 Joe727 (
Commander)✧ 4 Views · 2 Likes
Flag
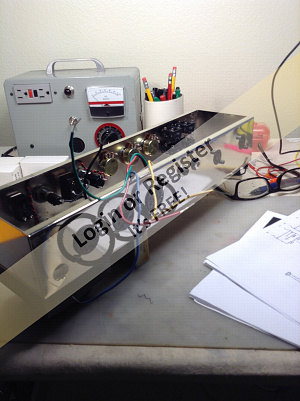
Ed, Very true, it's actually very orderly as I am meticulous when it comes to electronics, it does look like spaghetti now! I really enjoy it and this is a piece of cake compared to the vacuum tube / valve amplifiers that I design and build to challenge myself. Thanks for the comment.
Joe 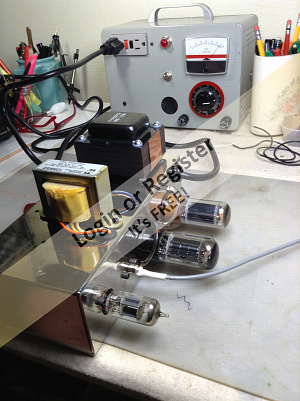
▲
⟩⟩
robbob
figtree7nts
|
|
💬 Electronics,wiring
5 years ago by 🇺🇸 figtree7nts (
 Admiral) Admiral)✧ 3 Views · 2 Likes
Flag
Spaghetti,
Isn't it interesting how one knows where all the wires go. Except someone else looking in!😉 Regards, Ed ▲
⟩⟩
Joe727
Donnieboy
|


Login To
Remove Ads
Remove Ads