Join Us On Social Media!

|

|

|
Download The App!
Login To
Remove Ads
Remove Ads
Login To
Remove Ads
Remove Ads
Model Boats Website
Baby Bootlegger
1 Post · 2 Followers · 8 Photos · 2 Likes
Began 3 years ago by
 Australia
Follow This Thread
Not currently following
> Click to follow
> Click to follow
Latest Post 3 years ago by
| Oldest posts shown first (Show Newest First) | (Print Booklet) |
📝 Baby Bootlegger
3 years ago by 🇦🇺 peterd ( Midshipman)
Midshipman)✧ 50 Views · 2 Likes · 8 Comments
Flag
💬 Add Comment
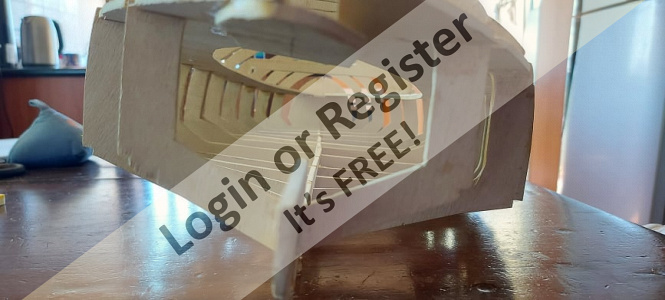
Three months ago i commenced building a Crandall Flyer. All going well till i discovered the instructions and the plans and the end result did not agree. Shelved for the moment and have taken on the Baby Bootlegger. Much better.
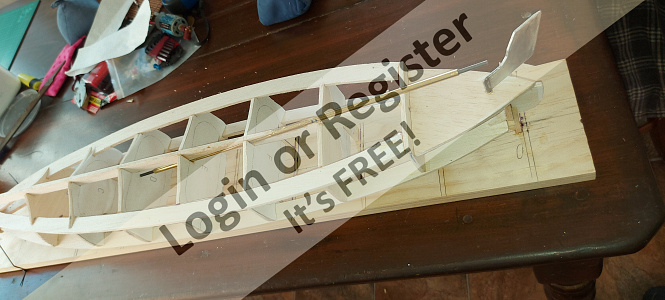
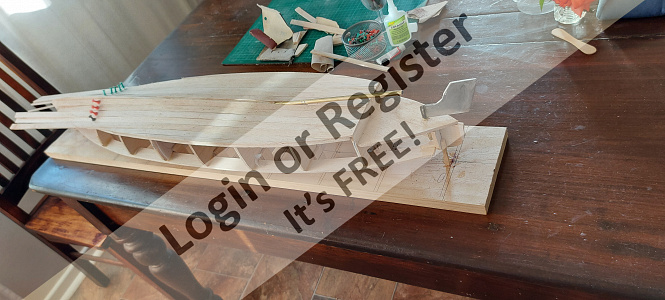
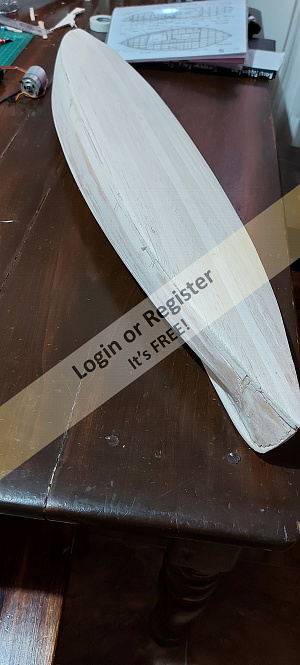
A scratch build from free plans, a few issues but nothing serious. It will still look similar. I have included a few photos to show where it is going. Hull is planked (1/2 in. wide balsa and next i have to plank again before cutting away the deck to allow access to motor, seating and the rear of the boat.
The original boat was planked in mahogany and the plans indicate 1/16 mahogany strips as a preference. Not available so I will be using lengths of veneer to give the impression and then coating that with resin. In the meantime, sanding, filling, sanding again. I will keep the images coming. (Who knows, we might even get the dining table back one day.)
▲
⟩⟩
jbkiwi
Martin555
|
💬 Re: Baby Bootlegger
3 years ago by 🇬🇧 Martin555 (
 Fleet Admiral) Fleet Admiral)✧ 24 Views · 0 Likes
Flag
Hi Peter,
It definitely sounds like an error on the plans. I hope you manage to sort the problem out and let us know how you achieved it. Good luck. Martin555. ▲
⟩⟩
No likes yet
This member will receive 1 point for every like received |
|
Login To
Remove Ads 💬 Re: Baby Bootlegger
3 years ago by 🇦🇺 peterd (
Midshipman)✧ 36 Views · 1 Like
Flag
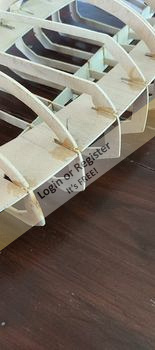
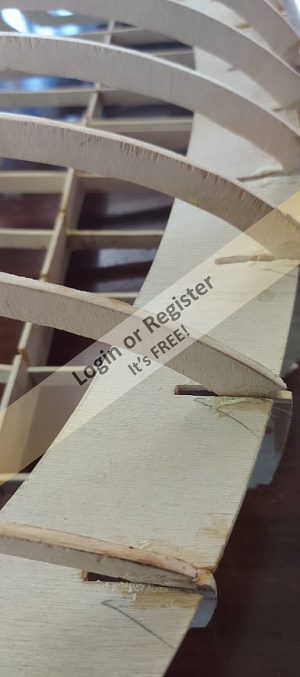
Crandall Flyer. Just a couple of images of the ribs and you will be able to see where I got to. All cutouts agreed with the plans however I had to expand them a tad to get the boat apart at one stage. I will be rebuilding, possibly using balsa and not the waterproof ply.
The shears are actually supposed to join - did not work. My final image shows where the shears meet the ribs on one side. If i tried to force the join, the shear ended up at an angle instead of sitting flat. I am no carpenter, but giving it a try. 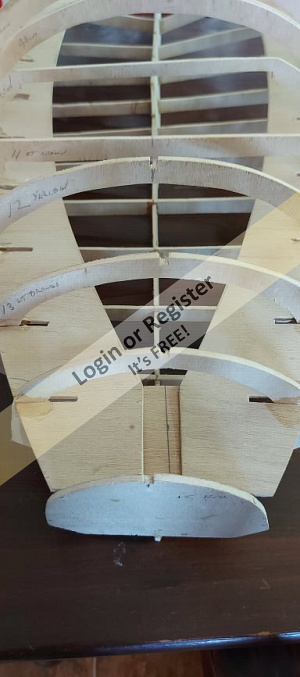
▲
⟩⟩
Martin555
|
|
💬 Re: Baby Bootlegger
3 years ago by 🇦🇺 peterd (
Midshipman)✧ 38 Views · 2 Likes
Flag
Hi, with regard to the Flyer, I used plans purchased from
▲
⟩⟩
Martin555
Dampfgerd
|

|
💬 Re: Baby Bootlegger
3 years ago by 🇦🇺 peterd (
Midshipman)✧ 38 Views · 2 Likes
Flag
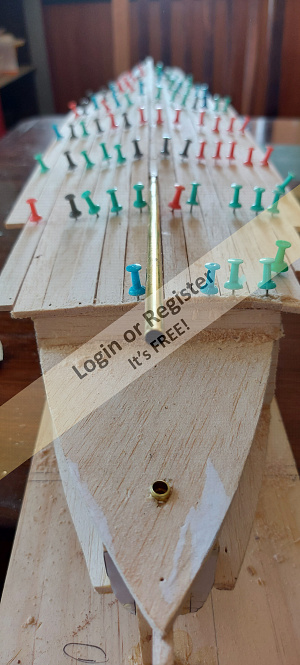
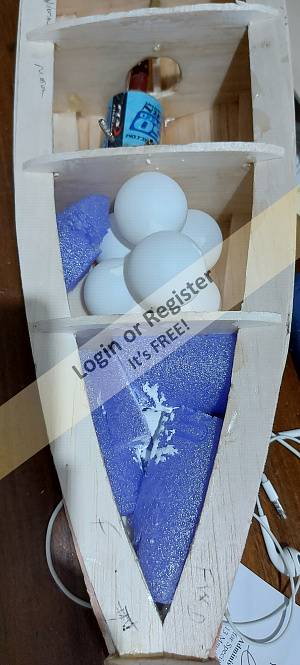
Hi Martin - a few comments on the Baby Bootlegger. Still moving forward on it and putting an electronic kit together at the moment. Motor (550) is in location but still to be secured, 2 x 5000maH batteries on order, all other electronic equipment to hand.
I could not get any of the mahogony timber locally, however was given veneer strips which i used. Big mistake as they are very stiff and did not give me the smooth finish i required. I am thinking of using around 6 or 7 coats of resin with a lot of sanding to reduce the ridges somewhat but a lesson learned. Would have been far better off using a second layer of balsa planking and then fibreglass. I have attached a couple of images to show where it is at - next step is to clean up the edges for the cutouts, fix a ledge inside for the covers, cut some thin brass strips to cover the edges of the planked sections cut out. I then have to work on sizing a section of ribs to accommodate the batteries followed by a general clean up prior to sealing with resin or fibreglass. All in all, it has been a learning experience - some errors, but worthwhile. I will transfer some images off my phone today and upload. ▲
⟩⟩
Martin555
jbkiwi
|
|
💬 Re: Baby Bootlegger
3 years ago by 🇬🇧 Martin555 (
Fleet Admiral)✧ 31 Views · 0 Likes
Flag
Hi Peter,
Do you have any updates for us to read ? Martin555. ▲
⟩⟩
No likes yet
This member will receive 1 point for every like received |
|
💬 Re: Baby Bootlegger
3 years ago by 🇩🇪 Dampfgerd (
 Petty Officer 2nd Class) Petty Officer 2nd Class)✧ 28 Views · 0 Likes
Flag
Hello
I'm just wondering what was said about the Hydroplane Flyer. According to the Crandall original plan, some full-size and large RC models have already been built What plan did you use? 
▲
⟩⟩
No likes yet
This member will receive 1 point for every like received |
|
💬 Re: Baby Bootlegger
3 years ago by 🇦🇺 peterd (
Midshipman)✧ 51 Views · 1 Like
Flag
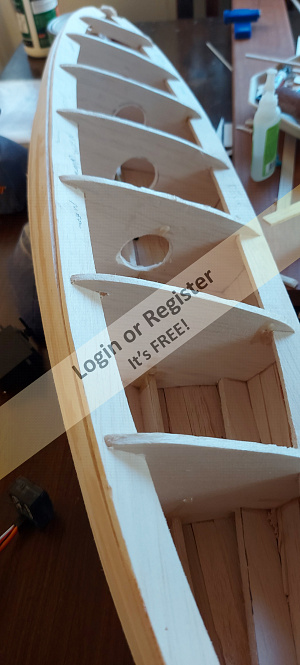
According to the plans you are quite correct. The issue I had was the frames are only balsa and the plans called for the larger cutouts to be put in after the planking was done to the bottom and sides. If i had done it using ply i would certainly have done it prior.
I am still considering doing a couple once i have the top opened up but the way the batteries are planned they will be located just in front of the step. 2 x six cell packs. (I may even change that to lipo. The jury has still to come home on that one.) ▲
⟩⟩
Martin555
|
|
💬 Re: Baby Bootlegger
3 years ago by 🇬🇧 Martin555 (
Fleet Admiral)✧ 44 Views · 0 Likes
Flag
Grate start Peter.
I am a little surprised to see you only cut holes in the frames instead of opening them up more so that you can move batteries, receivers etc around to help with the blasting. Martin555. ▲
⟩⟩
No likes yet
This member will receive 1 point for every like received |


Login To
Remove Ads
Remove Ads