Join Us On Social Media!

|

|

|
Download The App!
Login To
Remove Ads
Remove Ads
Login To
Remove Ads
Remove Ads
Model Boats Website
Mississippi River Tow Boat
13 Posts · 7 Followers · 67 Photos · 53 Likes
Began 2 years ago by
 United States
Follow This Thread
Not currently following
> Click to follow
> Click to follow
Latest Post 12 months ago by
| Oldest posts shown first (Show Newest First) | (Print Booklet) |
📝 Mississippi River Tow Boat
2 years ago by 🇺🇸 StanC ( Petty Officer 1st Class)
Petty Officer 1st Class)✧ 101 Views · 3 Likes
Flag
💬 Add Comment
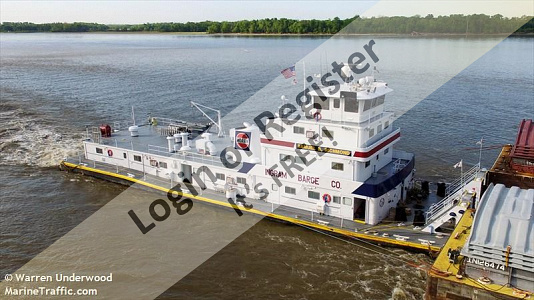
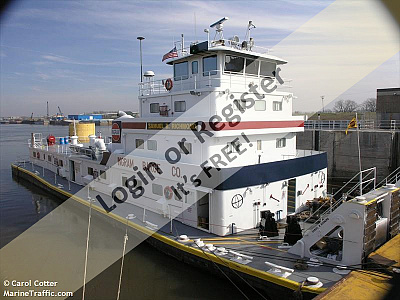
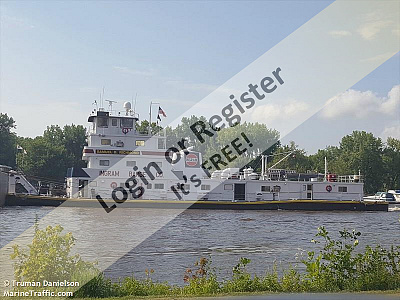
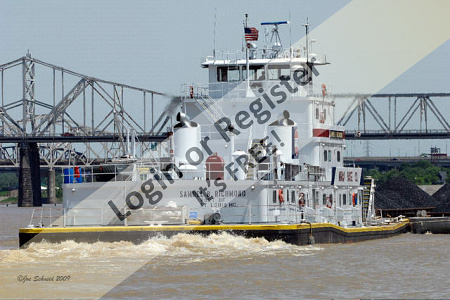
Modeled after a 145 ft length and 48 ft breadth 6000 hp twin screw kort nozzled river tow boat, The Samuel B Richmond was started in 2019. It was put to the side and some of the beginning photos were lost. It has found new life as I have restarted working on it, just in the past month. I grew up not far from the Mississippi river and I was always fascinated with the tow boats running the rivers as well as some of the wild tales you would hear from the locals. I spent my summers on the banks of the Ohio River dreaming of being Huck Finn. My grandfather worked in Paducah at a machine shop building parts for these massive beast. As an avid modeler I have built many scale rc aircraft as well as many different plastic models. I always wanted to build a tow boat but there were extremely few commercial kits available. Well ok only one that I ever actually found. This is a scratch built RC model, my first attempt at a ship. If I should come across some of the first photos showing the hand drawn plans and outlines of the hull I will post them. For now I will start with the oldest photos I do have on hand with a few simple descriptions up to the current point of the build.

▲
⟩⟩
Colin H
roycv
PeterJ
Login To
Remove Ads
Remove Ads
📝 The beginning
2 years ago by 🇺🇸 StanC ( Petty Officer 1st Class)
Petty Officer 1st Class)✧ 113 Views · 2 Likes
Flag
💬 Add Comment
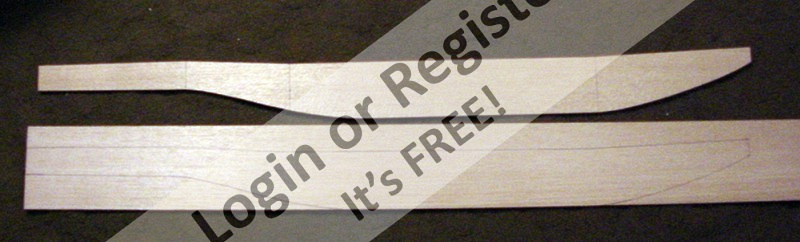
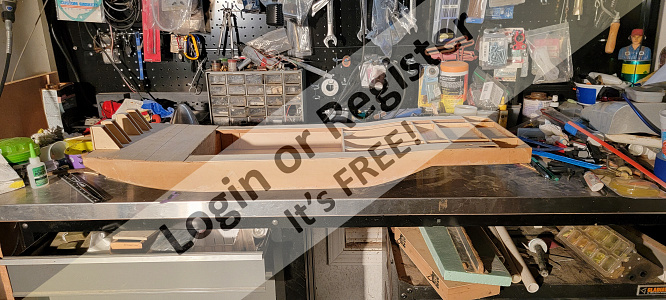
So, searching through my laptop I found a few of my beginning photos. The side profile and then the beginning of the hull layup. The actual boat that I was going to model after was an afterthought, after I began trying to determine a length for a scale boat. It left me basically 1 choice for the scale boat.
▲
⟩⟩
RNinMunich
Colin H
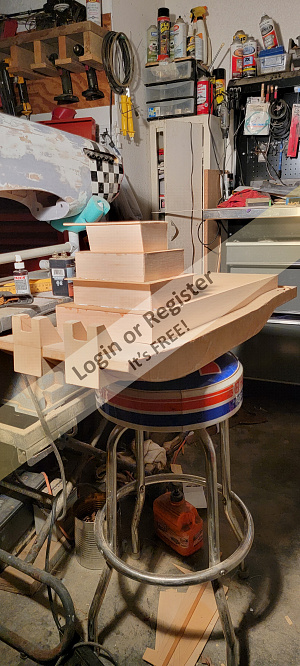
📝 Hull Build up
2 years ago by 🇺🇸 StanC ( Petty Officer 1st Class)
Petty Officer 1st Class)✧ 113 Views · 2 Likes
Flag
💬 Add Comment
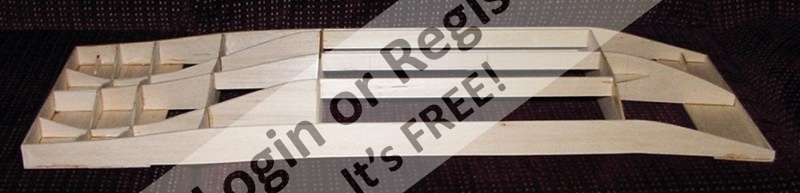
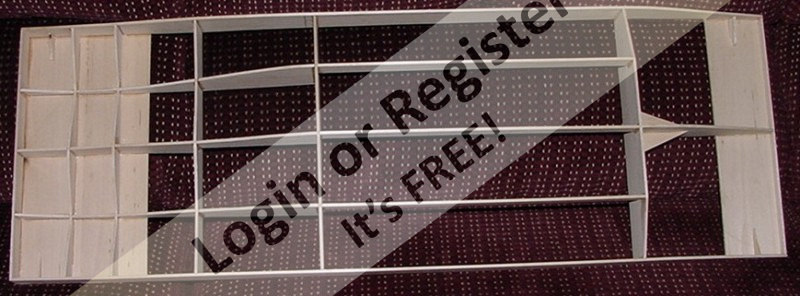
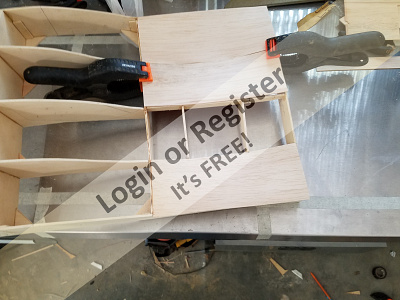
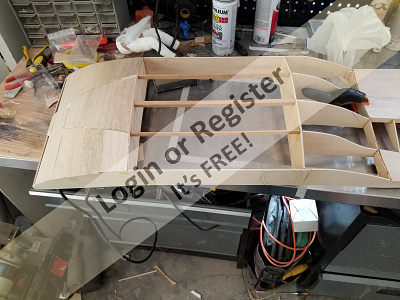
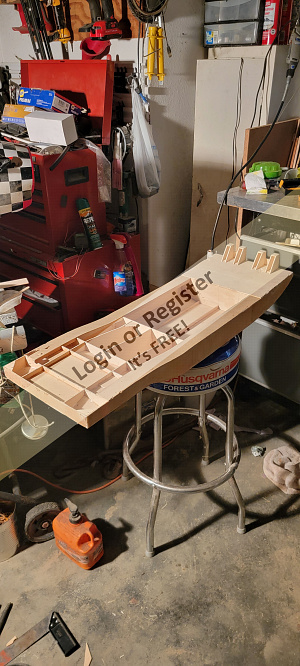
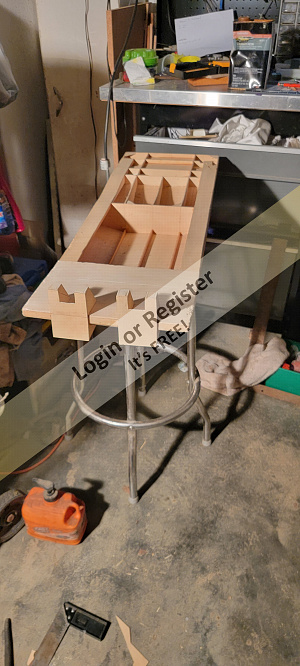
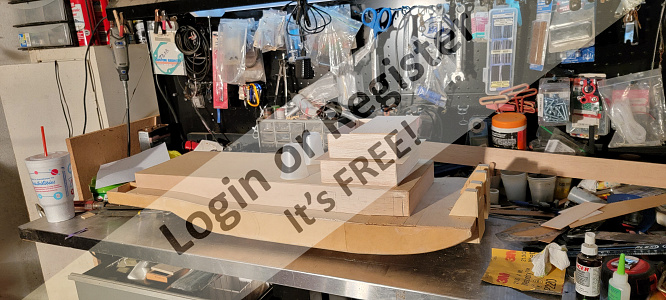
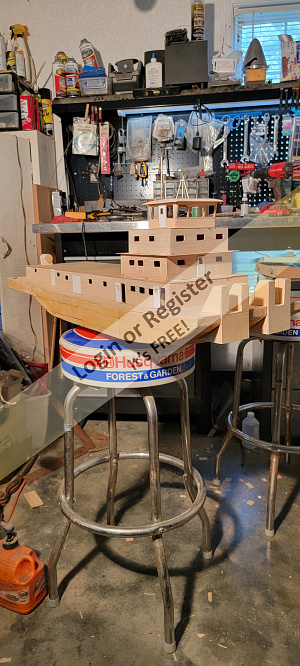
This post shows the hull sheeted and part of the superstructure built.

▲
⟩⟩
RNinMunich
Colin H
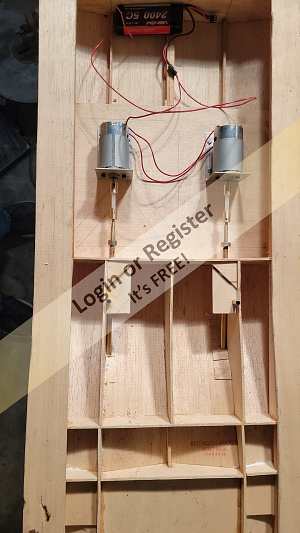
📝 Motor selection and placement
2 years ago by 🇺🇸 StanC ( Petty Officer 1st Class)
Petty Officer 1st Class)✧ 119 Views · 2 Likes
Flag
💬 Add Comment
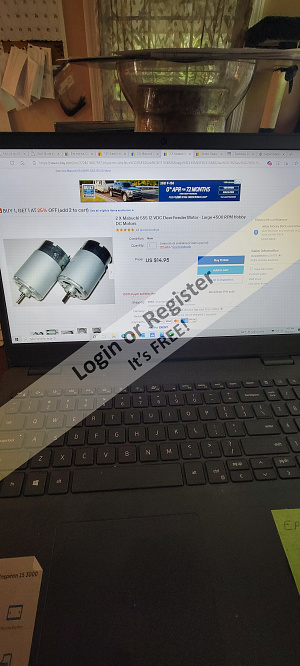
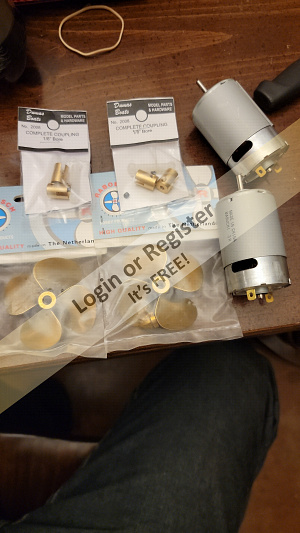
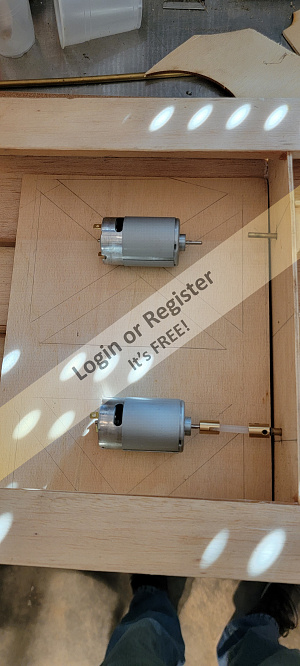
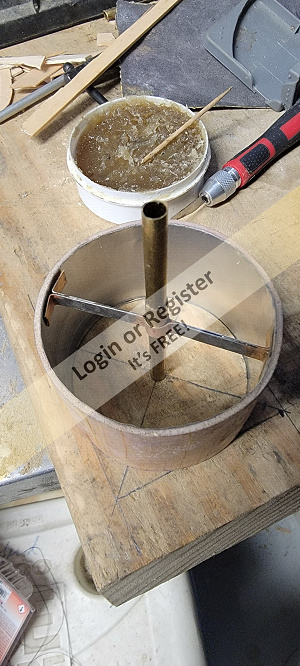
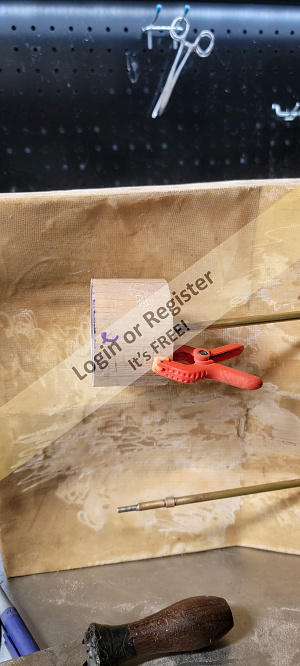
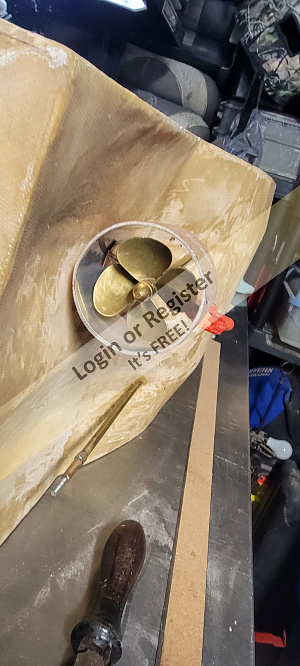
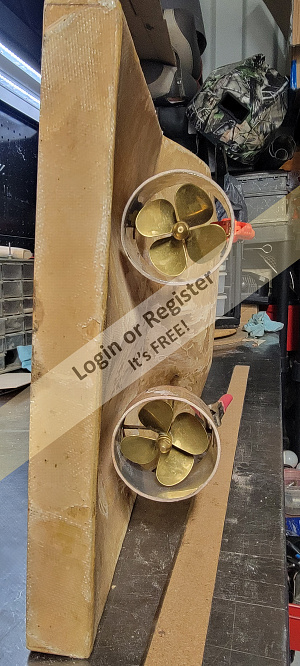
These photos show the motor selection and then the placement of them into the boat. I scratch built the shaft and stuffing box with grease tube out of brass tubing which unfortunately I fail to take photos of before mounting in the hull.
At this point I want to note a very helpful website in which I obtained a lot of useful information including how to build the propeller shaft.
Tow Boat Joes https://towboatjoe.tripod.com
I followed Joes blogs for a while, unfortunately, he has passed away, but his site is still up.


At this point I want to note a very helpful website in which I obtained a lot of useful information including how to build the propeller shaft.
Tow Boat Joes https://towboatjoe.tripod.com
I followed Joes blogs for a while, unfortunately, he has passed away, but his site is still up.

▲
⟩⟩
RNinMunich
Colin H
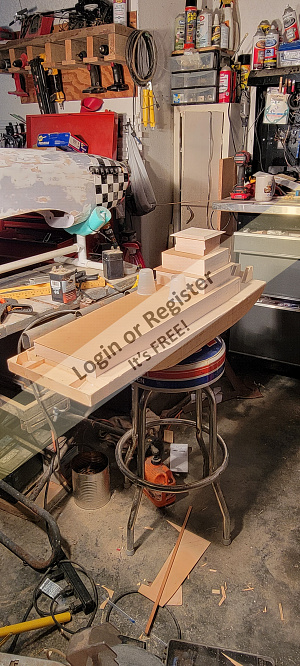
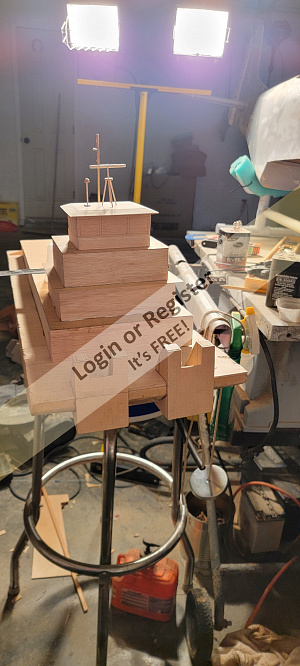
📝 Back to work on the superstructure and Pilot house
2 years ago by 🇺🇸 StanC ( Petty Officer 1st Class)
Petty Officer 1st Class)✧ 118 Views · 2 Likes
Flag
💬 Add Comment
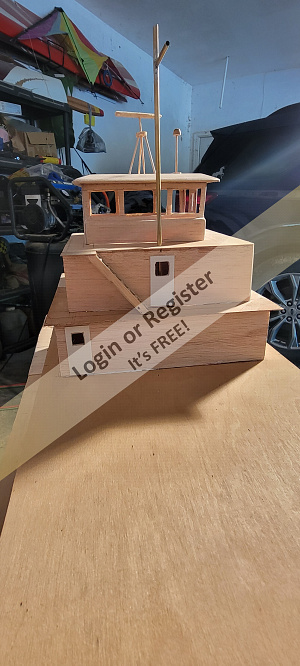
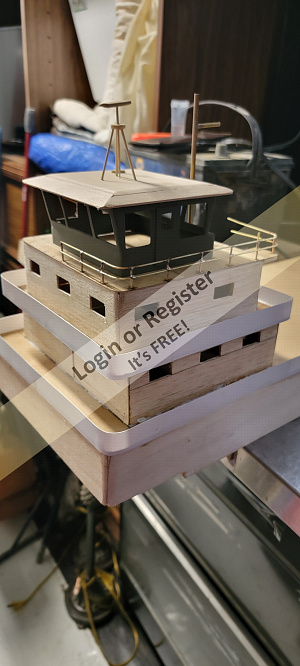
After blocking everything up I began cutting the doors and windows. I also began some of the detail parts, such as the radar and a gas storage tank noted in the photos.
▲
⟩⟩
Colin H
River Rat
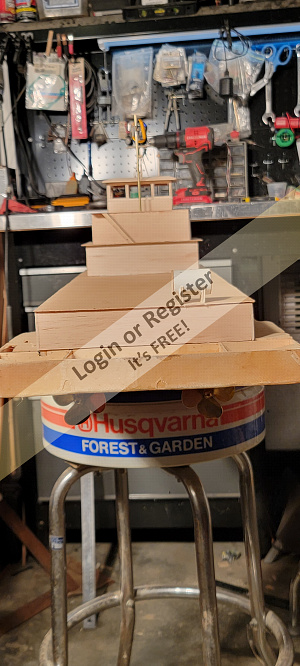
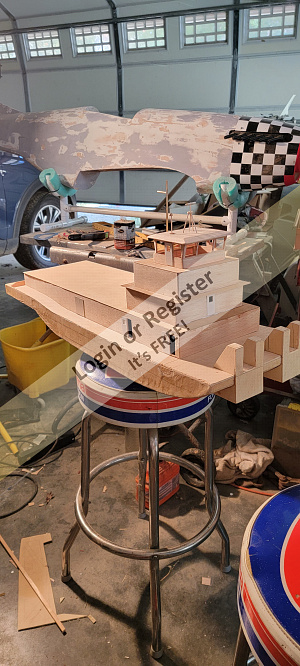
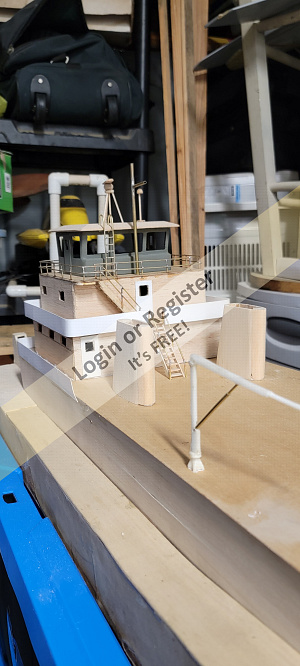
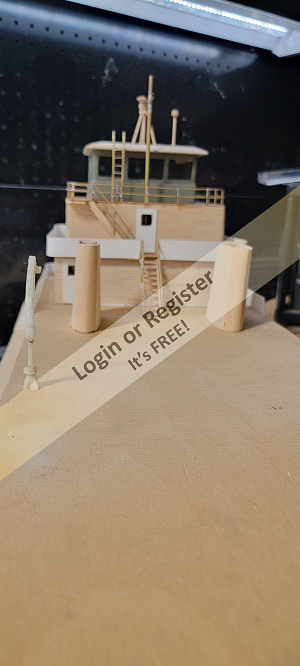
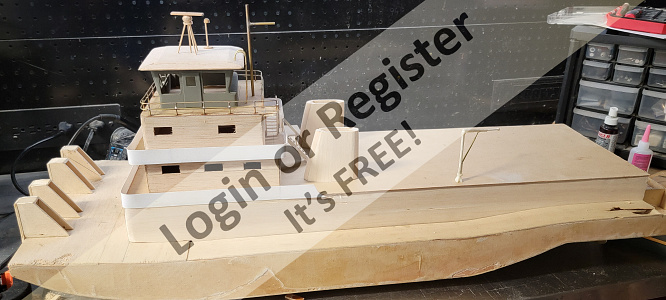
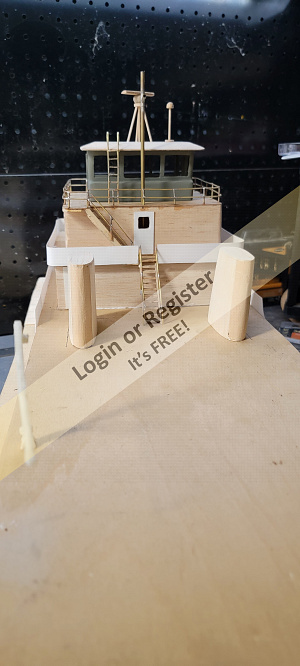
📝 More detailing up to the current state of the build
2 years ago by 🇺🇸 StanC ( Petty Officer 1st Class)
Petty Officer 1st Class)✧ 117 Views · 8 Likes · 1 Comment
Flag
💬 Add Comment
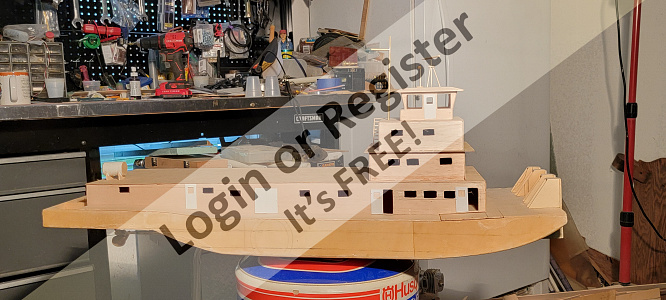
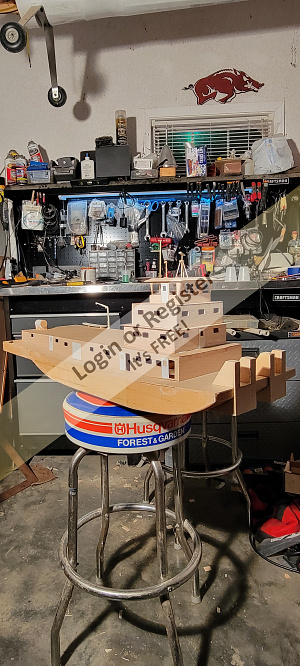
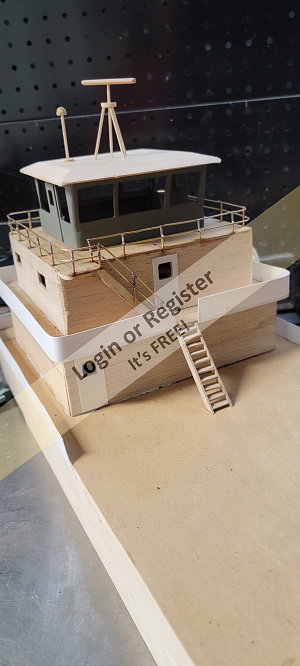
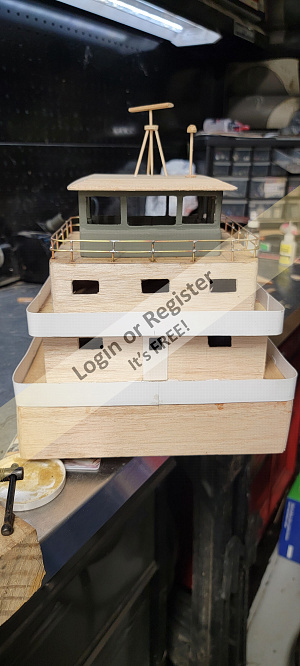
As the build goes on, you can see I started to add more and more. The first photo shows off a set of stairs, some doors, and the flagpole. From the side view you can see multiple windows and doors. Note the crane for the yawl or skiff. As you move through the photos I began the railings built out of styrene and brass rods. In the final few photos you can see the exhaust stacks which are not complete yet.
Whistling "It's starting to look a little like a tow boat"
So, we are now at the current stage of the build. I won't be able to show anymore photos for at least another week because I am working offshore on a work boat in the oil fields. I am a paramedic by trade and certain task offshore require a paramedic to be present due to the amount of time it would take to get a medical response from shore. I will go back through the photos on my phone and if I find any others that I think you might find interesting, I will post them.
Please feel free to comment on anything you find interesting or not😁.
▲
⟩⟩
RNinMunich
lindemann06
Len1
Black Shoe
jbkiwi
Graham93
Colin H
DWBrinkman
|
💬 Re: More detailing up to the current state of the build
1 year ago by 🇺🇸 DWBrinkman (
 Lieutenant Commander) Lieutenant Commander)✧ 112 Views · 0 Likes
Flag
That is awesome! It is going to be a beautiful boat when finished. What are the dimensions and/or scale of it?
Dave B ▲
⟩⟩
No likes yet
This member will receive 1 point for every like received |
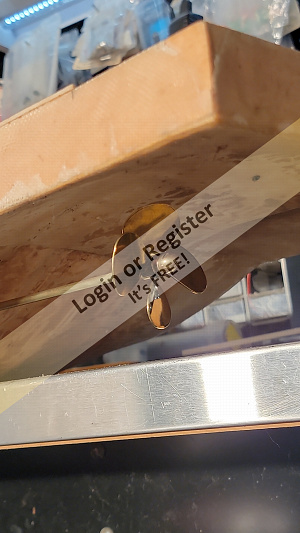
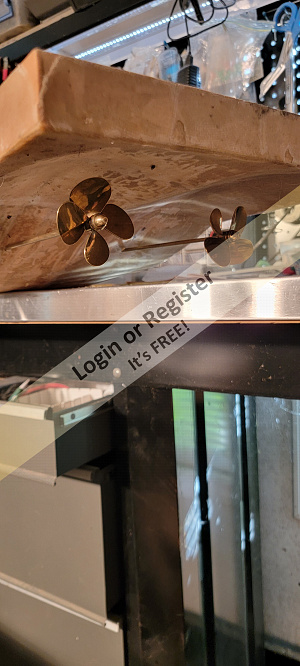
📝 Tow Boat Kort nozzles
1 year ago by 🇺🇸 StanC ( Petty Officer 1st Class)
Petty Officer 1st Class)✧ 103 Views · 4 Likes · 2 Comments
Flag
💬 Add Comment
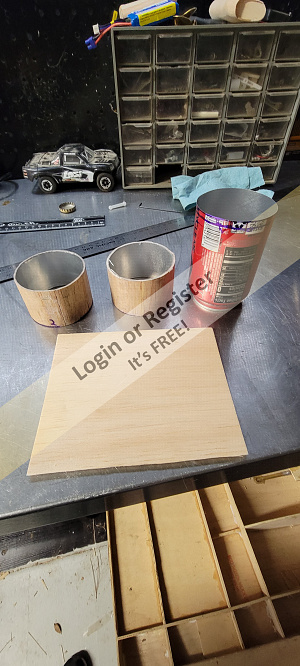
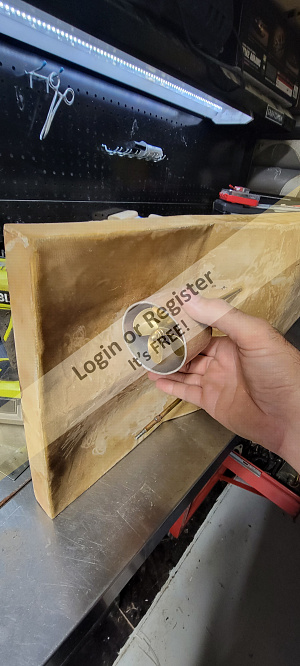
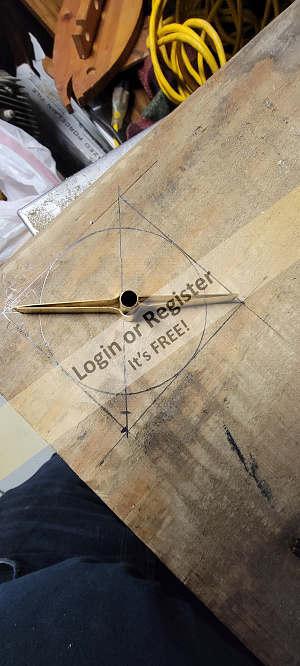
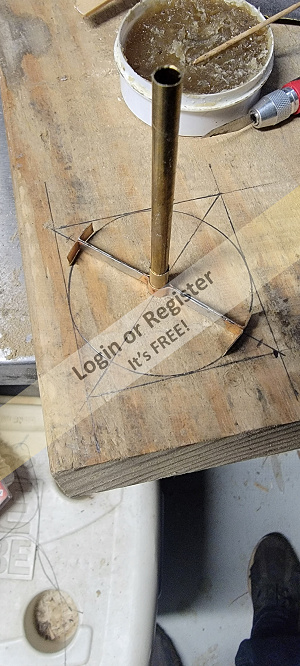
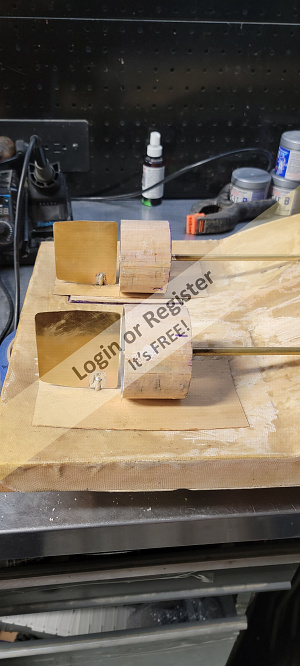
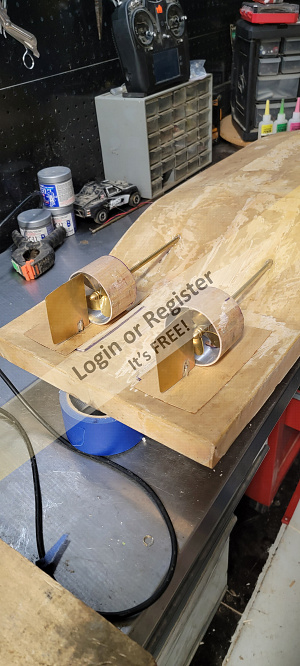
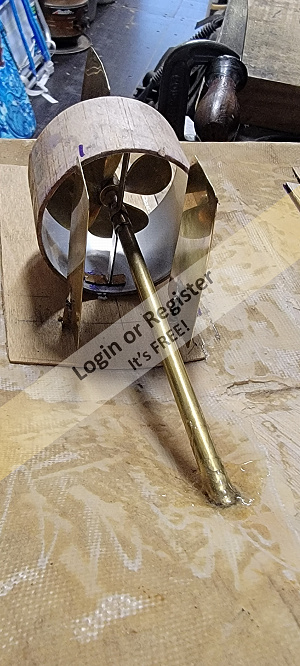
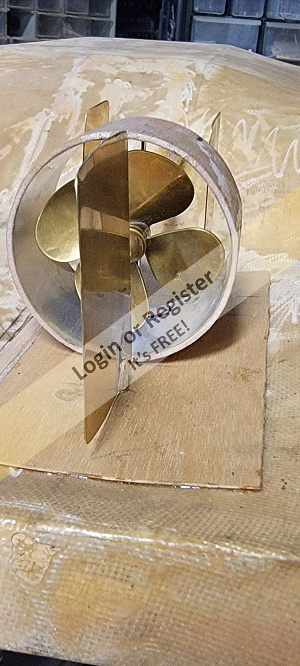
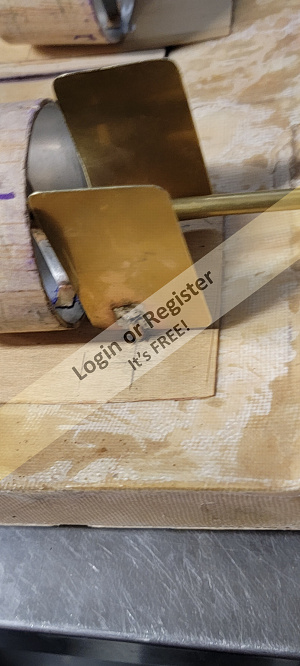
Well I've made it back ashore and made a little progress on the tow boat. I started by adjusting my shafts in the boat and once I was satisfied with the alignment I reaffixed them permanently. Then it was onto the Kort nozzles themselves. So what to use? After searching around the garage and looking at every can I could find I settled on a Dr Pepper can. To stiffen it up I then took balsa and epoxied it to the can. Using thin CA I then harden the balsa by soaking it with the CA. Caution do in well ventilated area! Measure and cut then file and sand. Time to figure out how to affix to the stuffing tube. More so how to center it. Tracing inside of the kort on a board measuring widest point then drawing a line along one edge then measuring out the same distance on each end then using a square finished my square. Draw straight line from corner to corner and repeat with other corners and you have the center of your kort. Drill tiny hole where the x marks the spot. Taking some flat brass strips and a piece of the left over brass from the stuffing box I bent the flat around the tube only half way the repeated with another piece. After shaping I then sanded lightly cleaned and soldered to halves together. A tip about soldering for those who haven't done much. Tin both parts of what you are soldering, whether wires or brass or copper, Tinning is nothing more than presoldering or adding solder to both parts first. Then add a small dot of solder to the iron and when you touch it to the parts it's almost instant that it melts. Learned this in a factory so many years ago. After parts were soldered then I used different scrapped brass stacked down to a small piece that fit in the hole on my board. Mark the ends of the brace split the two pieces of brass back to the mark and then test fit. Both braces were almost perfect first try. Extremely minor adjustment made, probably due to older age and failing eyesight! Once fitted in kort then was test fitted on the towboat and that's where we are today.

▲
⟩⟩
RNinMunich
lindemann06
Graham93
Colin H
|
💬 Re: Tow Boat Kort nozzles
1 year ago by 🇺🇸 StanC (
Petty Officer 1st Class)✧ 99 Views · 1 Like
Flag
Unfortunately my 3d printer is packed away. I am also still learning to use it. I haven't really designed anything other than simple shapes but have bought a few and downloaded a few free designs. I actually bought it about 3 years ago in hopes of learning it just for modeling. Maybe one day I'll get there.
▲
⟩⟩
RNinMunich
|
|
💬 Re: Tow Boat Kort nozzles
1 year ago by 🇺🇸 LewZ (
 Captain) Captain)✧ 109 Views · 1 Like
Flag
Stan, Glad to hear you are home safely!
I took a little different approach to mounting my Kort nozzle to our rescue boat. The boat originally did not have a Kort and I thought it could use more thrust for heavy pushing. My first Kort (3D printed) for this boat did not fit that well after I made a new 5-blade prop (also 3D printed). It had too much of a gap between the nozzle's inside to the tip of the propeller blades. So after a few measurements and I printed a new Kort nozzle (in the photos) and mounted it. This ABS nozzle has a flange on the bottom with four mounting holes. It is quite sturdy and work very well. This is one more advantage for having a 3D system, design software and printer, for making models. The design of the Kort nozzle for efficiency greatly affects the performance, at least on real boats as opposed to models. These nozzles are not just a thin ring shape extrusion, but they have a specific cross-section profile to reduce drag. This is quite similar to an aircraft wing section. Lew 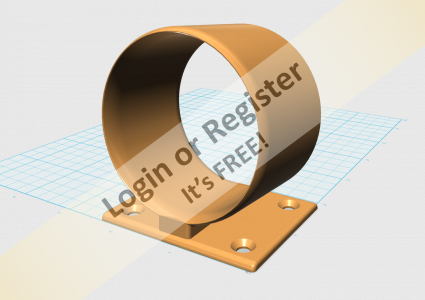


▲
⟩⟩
Colin H
|
📝 Rudders
1 year ago by 🇺🇸 StanC ( Petty Officer 1st Class)
Petty Officer 1st Class)✧ 89 Views · 3 Likes
Flag
💬 Add Comment
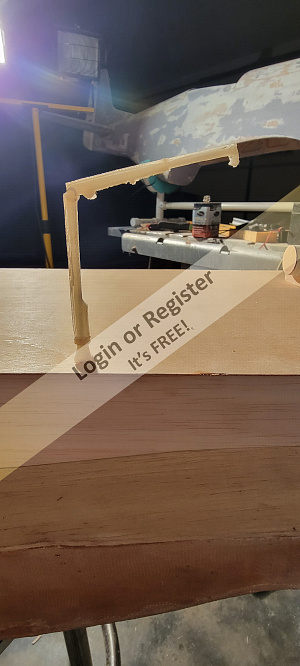
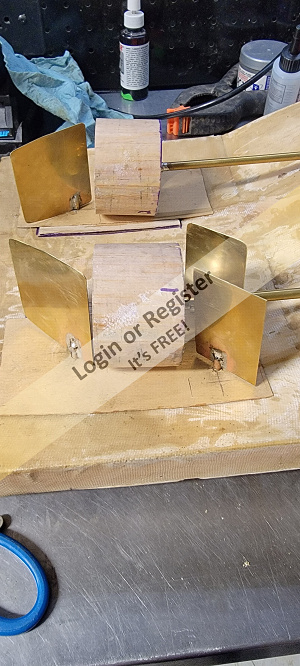
Well I've managed to get some rudders made. I've got both steering rudders and 2 of the 4 flanking rudders made. Tomorrow I hope to finish the other 2 flanking rudders. I just used some brass tubing and a flat sheet of brass.
▲
⟩⟩
lindemann06
Colin H
jbkiwi
📝 Float testing
1 year ago by 🇺🇸 StanC ( Petty Officer 1st Class)
Petty Officer 1st Class)✧ 83 Views · 7 Likes · 2 Comments
Flag
💬 Add Comment
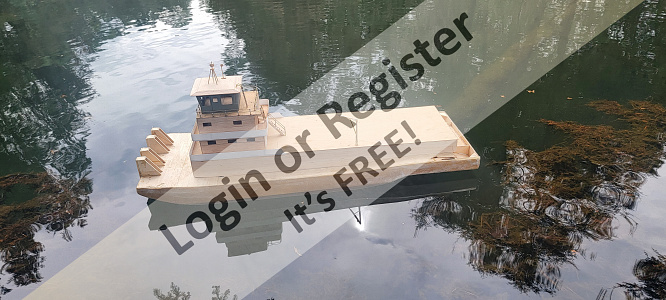
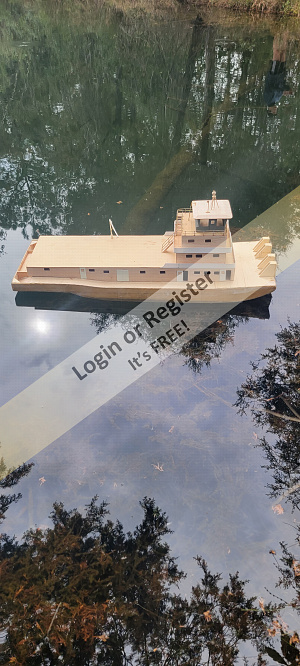
Well I've managed to finish the majority of the glass work still more sanding and preping for paint on the hull. I decided.to see where it was as far as the draft. Initially sitting it in the water it was floating way to light. after finding at best guess, about 1 1/2 pounds of rocks she was still floating high at which point I snapped these to photos. I'm thinking I'm going to have to add an additional 1 or 2 pounds of weight to get the water line right. But it's looking good sitting on thw water.
▲
⟩⟩
chugalone100
Skippydrew
Len1
jbkiwi
lindemann06
Peejay
Colin H
|
💬 Re: Float testing
1 year ago by 🇺🇸 StanC (
Petty Officer 1st Class)✧ 75 Views · 0 Likes
Flag
Yes sir the nephew wanted to see it float so we added a few rocks while at the pond no leaks found at this point so moving forward
▲
⟩⟩
No likes yet
This member will receive 1 point for every like received |
|
💬 Re: Float testing
1 year ago by 🇨🇦 RodC (
 Lieutenant) Lieutenant)✧ 86 Views · 1 Like
Flag
This is when using SLA batteries comes to the fore. You need ballast to achieve a good waterline?? Put in 1 or 2 gel-cells. A strip of Velcro allows for easy fore-aft, side-to-side positioning. LiPOs are a blessing in model aircraft, having hi energy density, but in a boat they dont help you at all as ballast🤓🤓🤓
▲
⟩⟩
Len1
|
📝 Rudder controls
1 year ago by 🇺🇸 StanC ( Petty Officer 1st Class)
Petty Officer 1st Class)✧ 67 Views · 2 Likes
Flag
💬 Add Comment
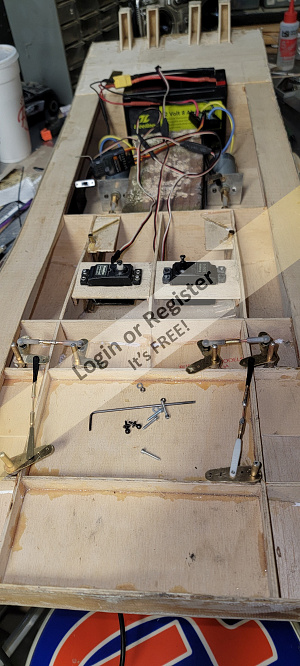
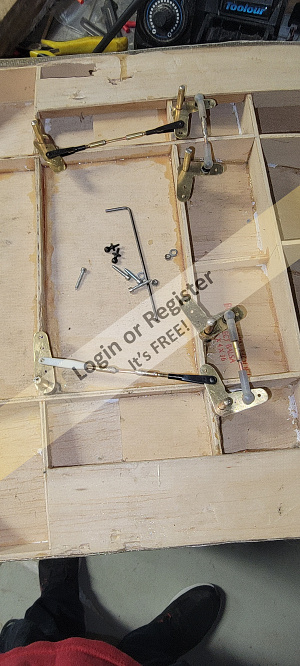
well I managed to get the rudders hooked up and working. Ended up with a bad speed control which almost burnt the boat up. Never fails, it seems one step forward and one step backwards.

▲
⟩⟩
chugalone100
Colin H


Login To
Remove Ads
Remove Ads