

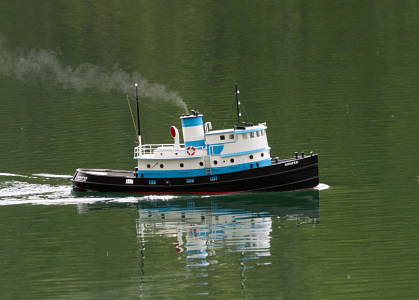
Nellie G.
I'm designing what I hope to be an interesting build. It's definitely challenging for me!
I started with the Freedom Song Boatworks kit of the Boothbay Harbor (Maine, US) ferry the Nellie G. But, the kit builds a 21" simplified, hard chine, version of this long-lived little ferry. First, I wanted to make the boat to 1:16 scale, so that it would be a nicer size on the pond. And, second, I just didn't want to live with the hard chine simplification of the graceful original hull.
Also, this kit has a nasty trick or two up its sleeve. While material IS provided for the bulkheads, PLANS for them are not. The widths of the bulkheads at the deck and chine are on the plan, and the side view gives the elevation of the chine. But, it's up to you to develop the actual shape of the bulkheads. Having developed the bulkheads, and then modified them for a round chine, I moved on to the cabin. That's where I found the second issue. The kit cabin sides are 1/2" shorter than the plans show. While the provided cabin sides DO cover the cut-out in the supplied deck, all the placement and size of the parts on the cabin roof would have to be fudged. Finally, the pilothouse roof and base provided are 1/4" shorter fore and aft than shown in the plans. I would not want to be a beginner or even a moderately experienced modeler and be faced with this kit.
I was left with the choice of which cabin and pilothouse to use. In the end, I went with the plans, as I think the larger cabin makes more sense. I originally drew the pilothouse to the kit parts, so it's shorter than the plans - I will likely alter this before finalizing the pilothouse.
I decided to draw the boat in Fusion and intend to laser cut the parts. She'll be balsa strip planked over bulkheads, and have a simple 2 channel RC setup - no smoke. Despite being launched as a steamer, she spent most of her life gas powered, and none of the photos I have show any visible exhaust. While I've got many years of CAD experience on making guitar parts, that experience was in Mastercam - which is to Fusion like a reciprocating steam engine is to a turbine. Mastercam doesn't have a timeline - it's just a database of objects. Fusion, on the other hand, keeps a history of each part and regenerates the state of the model each time you change anything - you can go back and change the shape of a part and the change echoes down all the later steps. But, first, it's buggy. And, second, that limits what it will let you do. I'm used to just throwing changes around, and every time I did that in Fusion, the model just fell apart.
It's been quite a learning curve, and to some extent, I think my prior CAD experience actually slowed me down, but I'm finally doing it with a moderate level of proficiency.
The images I have of her show her topsides in 3 very different configurations. First, with a low pilothouse, second with a low pilothouse somewhat further aft (OR this is perspective distortion), and third with a high pilothouse and presumably still the aft position. The kit makes the last of these configurations. In the end, I decided to go with the kit configuration - it seems to match the latest dated photo I found of the boat.
So, I scanned the kit parts and the plans, and started by just making a round chine version of the kit, but with a skeg-built keel (sharp corner where the keel meets the hull). I wasn't satisfied with that, so I re-drew the bulkheads for a traditional built-down keel, which looks a lot better. I created the bulkheads, a deck and a planking pattern. Then, I went and added the cabin and started on the pilothouse.
But, after all this work - I hit a major snag. Looking at the original photos, it's clear that the sheer in the kit is comically exaggerated at the stern in comparison with the prototype. While my eye originally wrote this off as hogging, as the vessel is over 20 years old in the side-on picture I have, I noticed that in other pictures she also showed that flat sheer aft. So, I had to re-draw the sheer line, the frames, and the cabin.
That's where I am now - working on the pilothouse. When that's done, I'll re-create the alignment holes in the subdeck for the frames and make sure the deck planking pattern still makes sense. And, then I'll get to cutting.