
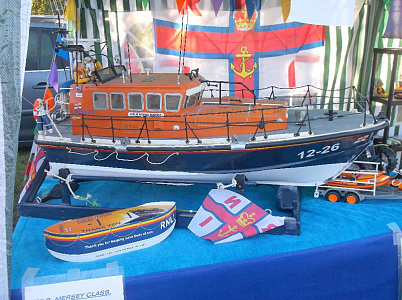
Well, finally got my hands on the boat. Ive uploaded some pictures of it and its condition. Lest just say its in dry dock for some refitting for now. The internal electrics are all there, albeit that some water has got inside the electrical connection block [choc blocks to you and me], so either I need to replace or come up with a better dryer solution [any clues]?
I will update as and when I start to repair/refit the vessel, so you can all see my own ideas on how to bring it back to original fully kitted version, plus add a few personal touches along the way.
[{"id":"1254868565","name":"1254868565.jpg","caption":"","url":"https:\/\/model-boats.com\/media\/1254868565\/l","thumbUrl":"https:\/\/model-boats.com\/media\/1254868565\/s","isImage":true,"ext":"jpg"},{"id":"1254868566","name":"1254868566.jpg","caption":"","url":"https:\/\/model-boats.com\/media\/1254868566\/l","thumbUrl":"https:\/\/model-boats.com\/media\/1254868566\/s","isImage":true,"ext":"jpg"},{"id":"1254868567","name":"1254868567.jpg","caption":"","url":"https:\/\/model-boats.com\/media\/1254868567\/l","thumbUrl":"https:\/\/model-boats.com\/media\/1254868567\/s","isImage":true,"ext":"jpg"},{"id":"1254868568","name":"1254868568.jpg","caption":"","url":"https:\/\/model-boats.com\/media\/1254868568\/l","thumbUrl":"https:\/\/model-boats.com\/media\/1254868568\/s","isImage":true,"ext":"jpg"}]
Well, finally got my hands on the boat. Ive uploaded some pictures of it and its condition. Lest just say its in dry dock for some refitting for now. The internal electrics are all there, albeit that some water has got inside the electrical connection block [choc blocks to you and me], so either I need to replace or come up with a better dryer solution [any clues]?
I will update as and when I start to repair/refit the vessel, so you can all see my own ideas on how to bring it back to original fully kitted version, plus add a few personal touches along the way.
pic to show hull electrics. I was not Impressed with having all the electronic controllers bonded to the lower hull panel, so will be moving them to higher ground and out of harms way, especially when I relocate the main battery pack further towards the rear engine room area to help with waterline level and balance .
[{"id":"1254868796","name":"1254868796.jpg","caption":"","url":"https:\/\/model-boats.com\/media\/1254868796\/l","thumbUrl":"https:\/\/model-boats.com\/media\/1254868796\/s","isImage":true,"ext":"jpg"}]
pic to show hull electrics. I was not Impressed with having all the electronic controllers bonded to the lower hull panel, so will be moving them to higher ground and out of harms way, especially when I relocate the main battery pack further towards the rear engine room area to help with waterline level and balance .
Ive now constructed a replacement rear hatch cover for the rear deck. Ive removed the motor controllers from their original hull floor position and remounted vertically on either side of the engine compartment, thus giving more free space to ensure main battery can be positioned to ensure huill sits level in the water, plus more space for larger capacity battery - this more playtime !
next job is the rear boat crane. My replacement crane kit from Robbe has arrived today, so will show construction and location shortly.
[{"id":"1254939798","name":"1254939798.jpg","caption":"","url":"https:\/\/model-boats.com\/media\/1254939798\/l","thumbUrl":"https:\/\/model-boats.com\/media\/1254939798\/s","isImage":true,"ext":"jpg"},{"id":"1254939799","name":"1254939799.jpg","caption":"","url":"https:\/\/model-boats.com\/media\/1254939799\/l","thumbUrl":"https:\/\/model-boats.com\/media\/1254939799\/s","isImage":true,"ext":"jpg"},{"id":"1254939800","name":"1254939800.jpg","caption":"","url":"https:\/\/model-boats.com\/media\/1254939800\/l","thumbUrl":"https:\/\/model-boats.com\/media\/1254939800\/s","isImage":true,"ext":"jpg"}]
Ive now constructed a replacement rear hatch cover for the rear deck. Ive removed the motor controllers from their original hull floor position and remounted vertically on either side of the engine compartment, thus giving more free space to ensure main battery can be positioned to ensure huill sits level in the water, plus more space for larger capacity battery - this more playtime !
next job is the rear boat crane. My replacement crane kit from Robbe has arrived today, so will show construction and location shortly.
unfortunately, my boat is missing its original read deck crane, used to lift the rescue boat on/off the deck and in to the water. I have purchased a replacement crane kit from Robbe, supplied by an internet company, please check out www.alwayshobbies.com . they can be sure to supply you with a majority of spares too.
Anyway, I've constructed the crane, made sure all the cable rollers and guides are free running as I will in time make sure the crane is operable, so it will rotate and lift/lower.
So it will be possible to lift the boat from the deck, swing over the side of the hull and lower to water level.
Now if I was really clever, id make a powered rescue boat too, then sail that away from the main craft ! Possible YES, by me, er, well, perhaps out of my league for now, perhaps if someone simply needed their own little boat taken out to the middle of a pol and then launched, a small delivery charge could be considered [ha ha].
Ok, so please see the pics for more details. As I start to construct the operating features for the crane, this will come online too.
[{"id":"1255016069","name":"1255016069.jpg","caption":"","url":"https:\/\/model-boats.com\/media\/1255016069\/l","thumbUrl":"https:\/\/model-boats.com\/media\/1255016069\/s","isImage":true,"ext":"jpg"},{"id":"1255016070","name":"1255016070.jpg","caption":"","url":"https:\/\/model-boats.com\/media\/1255016070\/l","thumbUrl":"https:\/\/model-boats.com\/media\/1255016070\/s","isImage":true,"ext":"jpg"}]
unfortunately, my boat is missing its original read deck crane, used to lift the rescue boat on/off the deck and in to the water. I have purchased a replacement crane kit from Robbe, supplied by an internet company, please check out www.alwayshobbies.com . they can be sure to supply you with a majority of spares too.
Anyway, I've constructed the crane, made sure all the cable rollers and guides are free running as I will in time make sure the crane is operable, so it will rotate and lift/lower.
So it will be possible to lift the boat from the deck, swing over the side of the hull and lower to water level.
Now if I was really clever, id make a powered rescue boat too, then sail that away from the main craft ! Possible YES, by me, er, well, perhaps out of my league for now, perhaps if someone simply needed their own little boat taken out to the middle of a pol and then launched, a small delivery charge could be considered [ha ha].
Ok, so please see the pics for more details. As I start to construct the operating features for the crane, this will come online too.
Last night I finally managed to get the boat in my bath at home. Ive now recieved the main power battery so decided to try all the main engine motor systems out. I had to use another radio system to the proper one I have for the boat, as trying to sort out throttle control on that at present, so had to sneak my radio car system on it for a short while! Anyway, fired up the drive motors, both worked although a bit noisey, sounded as if the gearboxes were going to explode, but disconnected one motor and drove the conected one for a while on low power, then did same for the other one, which really did play up for a long while, almost sounded as if either the gears were missing teeth or the motor had a flat spot on the aramature, but it cleared ok. I then reconnected both motors together and gave it some throttle. WHOOPS ! nearly emptied the contents of the bath over the floor as the props kicked in, boy did they create some wash!!
I found that up to half throttle it all worked fine, but any more power and it created too juch cavitation under the stern and the props ran out of water and surged loudly, so will have to wait for a full water test on some bigger water soon, but will have to watch out, it looks like it is capable of a fair turn of knots if Im not careful.
I will also say that I was surprised as to how much "ballast" this boat will take. Ive bought a 3kg 12v 12a/hr gel battery, which still does not fully fill the hull space I have and the boats still sits above the waterline by a good 1.5cms! so would take more. butr perhaps once the sound system and light boards and monitor servos are fully installed, this should take it down to correct sailing line.
[{"id":"1255638459","name":"1255638459.jpg","caption":"","url":"https:\/\/model-boats.com\/media\/1255638459\/l","thumbUrl":"https:\/\/model-boats.com\/media\/1255638459\/s","isImage":true,"ext":"jpg"},{"id":"1255638460","name":"1255638460.jpg","caption":"","url":"https:\/\/model-boats.com\/media\/1255638460\/l","thumbUrl":"https:\/\/model-boats.com\/media\/1255638460\/s","isImage":true,"ext":"jpg"},{"id":"1255638461","name":"1255638461.jpg","caption":"","url":"https:\/\/model-boats.com\/media\/1255638461\/l","thumbUrl":"https:\/\/model-boats.com\/media\/1255638461\/s","isImage":true,"ext":"jpg"}]
Last night I finally managed to get the boat in my bath at home. Ive now recieved the main power battery so decided to try all the main engine motor systems out. I had to use another radio system to the proper one I have for the boat, as trying to sort out throttle control on that at present, so had to sneak my radio car system on it for a short while! Anyway, fired up the drive motors, both worked although a bit noisey, sounded as if the gearboxes were going to explode, but disconnected one motor and drove the conected one for a while on low power, then did same for the other one, which really did play up for a long while, almost sounded as if either the gears were missing teeth or the motor had a flat spot on the aramature, but it cleared ok. I then reconnected both motors together and gave it some throttle. WHOOPS ! nearly emptied the contents of the bath over the floor as the props kicked in, boy did they create some wash!!
I found that up to half throttle it all worked fine, but any more power and it created too juch cavitation under the stern and the props ran out of water and surged loudly, so will have to wait for a full water test on some bigger water soon, but will have to watch out, it looks like it is capable of a fair turn of knots if Im not careful.
I will also say that I was surprised as to how much "ballast" this boat will take. Ive bought a 3kg 12v 12a/hr gel battery, which still does not fully fill the hull space I have and the boats still sits above the waterline by a good 1.5cms! so would take more. butr perhaps once the sound system and light boards and monitor servos are fully installed, this should take it down to correct sailing line.
Ok, so Ive now made a "silhouette" style main mast for my boat, but to enable operation off all the lights, Ive had to apply some artistic license! the mast is a little thicker in width simply to allow the cables to run through the inner core and exit through the roof panel of the main control cabin.
the mast is now rigged with 2 forward facing white marker lights and 3 flashing blue/red strobes. 1 is on the very top of the mast, the other 2 are on side jobs a little lower down. these will be linked in with some blue strobes fitted on the upper cabin bodywork, purely for "visual effect" when attending a river emergency.
one all the glue bonding [and sealing] the led's is set, I will then start painting the mast
[{"id":"1255638868","name":"1255638868.jpg","caption":"","url":"https:\/\/model-boats.com\/media\/1255638868\/l","thumbUrl":"https:\/\/model-boats.com\/media\/1255638868\/s","isImage":true,"ext":"jpg"},{"id":"1255638869","name":"1255638869.jpg","caption":"","url":"https:\/\/model-boats.com\/media\/1255638869\/l","thumbUrl":"https:\/\/model-boats.com\/media\/1255638869\/s","isImage":true,"ext":"jpg"},{"id":"1255638870","name":"1255638870.jpg","caption":"","url":"https:\/\/model-boats.com\/media\/1255638870\/l","thumbUrl":"https:\/\/model-boats.com\/media\/1255638870\/s","isImage":true,"ext":"jpg"},{"id":"1255638871","name":"1255638871.jpg","caption":"","url":"https:\/\/model-boats.com\/media\/1255638871\/l","thumbUrl":"https:\/\/model-boats.com\/media\/1255638871\/s","isImage":true,"ext":"jpg"}]
Ok, so Ive now made a "silhouette" style main mast for my boat, but to enable operation off all the lights, Ive had to apply some artistic license! the mast is a little thicker in width simply to allow the cables to run through the inner core and exit through the roof panel of the main control cabin.
the mast is now rigged with 2 forward facing white marker lights and 3 flashing blue/red strobes. 1 is on the very top of the mast, the other 2 are on side jobs a little lower down. these will be linked in with some blue strobes fitted on the upper cabin bodywork, purely for "visual effect" when attending a river emergency.
one all the glue bonding [and sealing] the led's is set, I will then start painting the mast
Ive now put the main mast on a trial fit on the upper hull. Ive decided to relocate the loud hailer speaker and set on the side of the mast, it seems to look more realistic there, rather than stuck to the roof panel. Ive also added a radar dome to the side of the main mast, plus fitted motorised rader dish to the original rader mount, this is powered by a 1.5volt geared motor, giving a semI realistic rotatoinal speed of about 30rpm, so really looks the part.
im yet to redrill the control room roff to add some led navigation lights, but once thats done, I can then start sorting out the witing loom for all the upper deck lights, but need ot get them all fitted first before deciding on cable routes to their respective controllers.
[{"id":"1255820103","name":"1255820103.jpg","caption":"","url":"https:\/\/model-boats.com\/media\/1255820103\/l","thumbUrl":"https:\/\/model-boats.com\/media\/1255820103\/s","isImage":true,"ext":"jpg"},{"id":"1255820104","name":"1255820104.jpg","caption":"","url":"https:\/\/model-boats.com\/media\/1255820104\/l","thumbUrl":"https:\/\/model-boats.com\/media\/1255820104\/s","isImage":true,"ext":"jpg"},{"id":"1255820105","name":"1255820105.jpg","caption":"","url":"https:\/\/model-boats.com\/media\/1255820105\/l","thumbUrl":"https:\/\/model-boats.com\/media\/1255820105\/s","isImage":true,"ext":"jpg"}]
Ive now put the main mast on a trial fit on the upper hull. Ive decided to relocate the loud hailer speaker and set on the side of the mast, it seems to look more realistic there, rather than stuck to the roof panel. Ive also added a radar dome to the side of the main mast, plus fitted motorised rader dish to the original rader mount, this is powered by a 1.5volt geared motor, giving a semI realistic rotatoinal speed of about 30rpm, so really looks the part.
im yet to redrill the control room roff to add some led navigation lights, but once thats done, I can then start sorting out the witing loom for all the upper deck lights, but need ot get them all fitted first before deciding on cable routes to their respective controllers.
Ive now decided to rid my boat of the incorrect deck colour, plus add the "sure grip/ antI slip decking the boat should have. I could of simply purchased some sheets of plastic replica "diamond plate" flooring, but think that looks a bit too artificial, plus a little over scale. So Ive followed some suggestions and used "cotton bandage" instead.
I initially dry cut some strips to length and then cut to shape to trim round all the handrail stantions, then applied a decent coat of matt grey paint to the deck floor, lowered the bandage strips on to the paint. then by carefully pressing down with the tip of a broad paint brush, moved the bandage stip in to its final position. then carefully over painting with paint till all the bandage is coated and has absorbed the paint. leave to dry for 24hrs and the resultant finish is acceptable as an antI slip deck. And at little cost too!
the photo's show the deck with bandage applied, its before final repainting to clean up the outer edges where grey deck meets red paintwork, but you can get the idea.
[{"id":"1256589129","name":"1256589129.jpg","caption":"","url":"https:\/\/model-boats.com\/media\/1256589129\/l","thumbUrl":"https:\/\/model-boats.com\/media\/1256589129\/s","isImage":true,"ext":"jpg"},{"id":"1256589130","name":"1256589130.jpg","caption":"","url":"https:\/\/model-boats.com\/media\/1256589130\/l","thumbUrl":"https:\/\/model-boats.com\/media\/1256589130\/s","isImage":true,"ext":"jpg"},{"id":"1256589131","name":"1256589131.jpg","caption":"","url":"https:\/\/model-boats.com\/media\/1256589131\/l","thumbUrl":"https:\/\/model-boats.com\/media\/1256589131\/s","isImage":true,"ext":"jpg"}]
Ive now decided to rid my boat of the incorrect deck colour, plus add the "sure grip/ antI slip decking the boat should have. I could of simply purchased some sheets of plastic replica "diamond plate" flooring, but think that looks a bit too artificial, plus a little over scale. So Ive followed some suggestions and used "cotton bandage" instead.
I initially dry cut some strips to length and then cut to shape to trim round all the handrail stantions, then applied a decent coat of matt grey paint to the deck floor, lowered the bandage strips on to the paint. then by carefully pressing down with the tip of a broad paint brush, moved the bandage stip in to its final position. then carefully over painting with paint till all the bandage is coated and has absorbed the paint. leave to dry for 24hrs and the resultant finish is acceptable as an antI slip deck. And at little cost too!
the photo's show the deck with bandage applied, its before final repainting to clean up the outer edges where grey deck meets red paintwork, but you can get the idea.
Ok, so Ive decided to simply make my fire monitors rotate and fire water. Ive left eh monitor so they wil actually raise and lower, so all the springs and pivots are still functional, but didnt want to add another 3 servos in the hull to actuate the fine nylon chords to raise and lower them. they seem to look better firing at maximum rake anyway.
So I decided to use the robbe rotating pulley sets, these give you a pair of pullies [large for the servo -small for the monitor], a good length of nylon chord and a spring, so you can pre load the chord to prevent it slipping when rotating.
Once built up its simply a case of re checking the "centre" position and then testing. the setup gives a good 200 degrees of rotation id say, so far better than trying to use a servo rod and link and get a misely 90 - 12 degrees.
Pics to follow .................
[{"id":"1257896058","name":"1257896058.jpg","caption":"","url":"https:\/\/model-boats.com\/media\/1257896058\/l","thumbUrl":"https:\/\/model-boats.com\/media\/1257896058\/s","isImage":true,"ext":"jpg"},{"id":"1257896059","name":"1257896059.jpg","caption":"","url":"https:\/\/model-boats.com\/media\/1257896059\/l","thumbUrl":"https:\/\/model-boats.com\/media\/1257896059\/s","isImage":true,"ext":"jpg"}]
Ok, so Ive decided to simply make my fire monitors rotate and fire water. Ive left eh monitor so they wil actually raise and lower, so all the springs and pivots are still functional, but didnt want to add another 3 servos in the hull to actuate the fine nylon chords to raise and lower them. they seem to look better firing at maximum rake anyway.
So I decided to use the robbe rotating pulley sets, these give you a pair of pullies [large for the servo -small for the monitor], a good length of nylon chord and a spring, so you can pre load the chord to prevent it slipping when rotating.
Once built up its simply a case of re checking the "centre" position and then testing. the setup gives a good 200 degrees of rotation id say, so far better than trying to use a servo rod and link and get a misely 90 - 12 degrees.
Pics to follow .................
ive attatched some pics that now show the full rotational ability of the robbe pulley kits, as you will notice, pic 1 shows full turn one way, pic 2 shows centre - neutral, pic 3 shows full turn opposite direction.
im Impressed with the robe pulley kits, plus you can turn the monitors as fast or as slow as you wish, if you use one of the "joystick" servo plugs.
now all I need is some target practise!
[{"id":"1257896336","name":"1257896336.jpg","caption":"","url":"https:\/\/model-boats.com\/media\/1257896336\/l","thumbUrl":"https:\/\/model-boats.com\/media\/1257896336\/s","isImage":true,"ext":"jpg"},{"id":"1257896337","name":"1257896337.jpg","caption":"","url":"https:\/\/model-boats.com\/media\/1257896337\/l","thumbUrl":"https:\/\/model-boats.com\/media\/1257896337\/s","isImage":true,"ext":"jpg"},{"id":"1257896338","name":"1257896338.jpg","caption":"","url":"https:\/\/model-boats.com\/media\/1257896338\/l","thumbUrl":"https:\/\/model-boats.com\/media\/1257896338\/s","isImage":true,"ext":"jpg"}]
ive attatched some pics that now show the full rotational ability of the robbe pulley kits, as you will notice, pic 1 shows full turn one way, pic 2 shows centre - neutral, pic 3 shows full turn opposite direction.
im Impressed with the robe pulley kits, plus you can turn the monitors as fast or as slow as you wish, if you use one of the "joystick" servo plugs.