Join Us On Social Media!

|

|

|
Download The App!
Login To
Remove Ads
Remove Ads
Login To
Remove Ads
Remove Ads
Model Boats Website
(Another) Crash Rescue Tender Restoration
10 Posts · 16 Followers · 52 Photos · 79 Likes
Began 1 year ago by
 United Kingdom
Follow This Thread
Not currently following
> Click to follow
> Click to follow
Latest Post 8 months ago by
| Oldest posts shown first (Show Newest First) | (Print Booklet) |
📝 (Another) Crash Rescue Tender Restoration
1 year ago by 🇬🇧 neilw ( Lieutenant)
Lieutenant)✧ 229 Views · 13 Likes · 8 Comments
Flag
💬 Add Comment
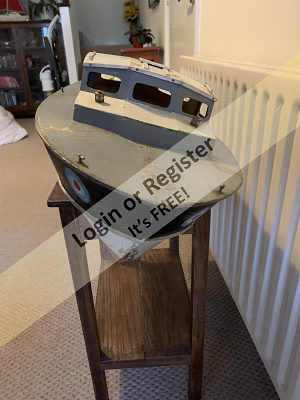
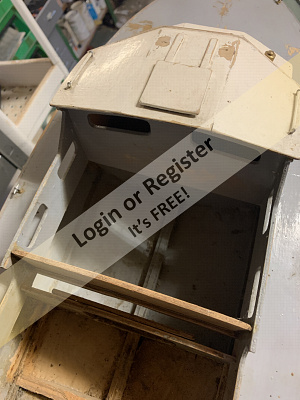
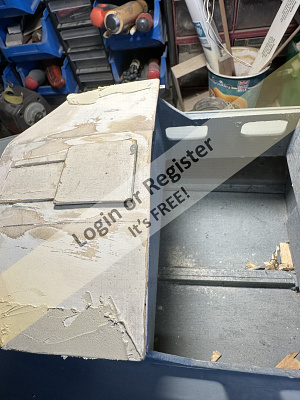
As I seem to be working on two models at the same time I thought I'd attempt the document the Crash Tender Restoration. It was the purchase of this one that led me to this site.
This one was also found by my wife, this time on FaceBook Marketplace for £35. so a quick trip to Paignton meant I'd bought another boat.
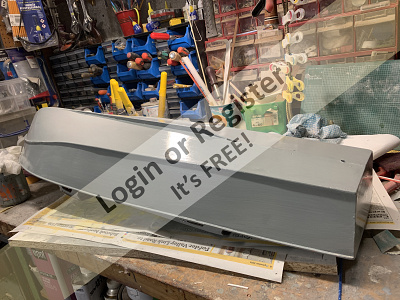
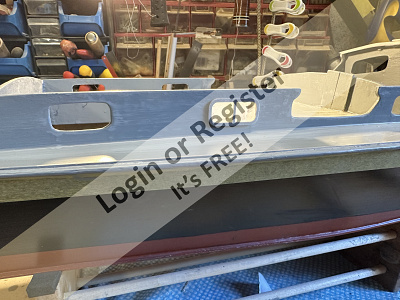
I suspect it is an old Aerokits 34" model, the panel pin heads are obvious in a few places. The hull was in decent condition, there was a dent each side soon disappeared with West + micro balloons.
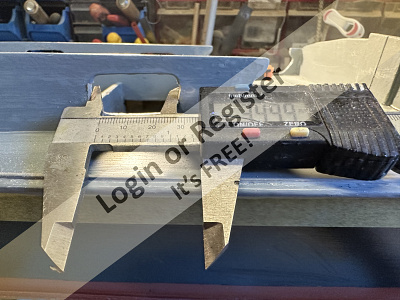
I pulled the prop shaft out and found that is was a 3.67mm dimeter shaft with plastic bearings that had an O/D of 6.28mm, the outer tube had an O/D of 8mm. The plastic bearings had a lot of wear but rather than try to source replacements I thought I'd replace the outer tube and prop shaft. Thinking I'd have a major job to remove the tube it was a very pleasant surprise to find that I could just twist it with a pair of pliers and easily slide it out. The rudder tube also came out very easily.
I've painted the hull withe Hempel Multicoat just to get all a uniform colour to see of any fairing is required. Seems to be a decently built hull requiring little work, so hopefully I'll make some progress on it when I'm waiting for paint or glue to dry on the Perkasa build.


This one was also found by my wife, this time on FaceBook Marketplace for £35. so a quick trip to Paignton meant I'd bought another boat.
I suspect it is an old Aerokits 34" model, the panel pin heads are obvious in a few places. The hull was in decent condition, there was a dent each side soon disappeared with West + micro balloons.
I pulled the prop shaft out and found that is was a 3.67mm dimeter shaft with plastic bearings that had an O/D of 6.28mm, the outer tube had an O/D of 8mm. The plastic bearings had a lot of wear but rather than try to source replacements I thought I'd replace the outer tube and prop shaft. Thinking I'd have a major job to remove the tube it was a very pleasant surprise to find that I could just twist it with a pair of pliers and easily slide it out. The rudder tube also came out very easily.
I've painted the hull withe Hempel Multicoat just to get all a uniform colour to see of any fairing is required. Seems to be a decently built hull requiring little work, so hopefully I'll make some progress on it when I'm waiting for paint or glue to dry on the Perkasa build.
▲
⟩⟩
DaveWhittaker
MouldBuilder
hermank
mturpin013
edulop
stevedownunder
jbkiwi
RonBMK2
Graham93
RNinMunich
PeterJ
Dragonlord
Colin H
|
💬 Re: (Another) Crash Rescue Tender Restoration
1 year ago by 🇬🇧 neilw (
Lieutenant)✧ 178 Views · 0 Likes
Flag
I’m using one intake in the prop wash for the watercooling of the ESC and the other pickup (position yet to be determined) for the pump for the monitor.
▲
⟩⟩
No likes yet
This member will receive 1 point for every like received |
|
Login To
Remove Ads 💬 Re: (Another) Crash Rescue Tender Restoration
1 year ago by 🇬🇧 Stephen T (
 Lieutenant Commander) Lieutenant Commander)✧ 189 Views · 1 Like
Flag
yes I have gone down the pump assisted system are you going to take the water from underneath using one inlet or two this is the confusing bit now I have rebuilt the hull some go under some go at the bottom of the stern and outlets at the top on the real thing there are variables as well
▲
⟩⟩
RodC
|
|
💬 Re: (Another) Crash Rescue Tender Restoration
1 year ago by 🇬🇧 neilw (
Lieutenant)✧ 177 Views · 0 Likes
Flag
I have a couple of water pickups ready to go in, just waiting for the water pump for the monitor to arrive from China. By then hoping the workshop will be a bit warmer!
▲
⟩⟩
No likes yet
This member will receive 1 point for every like received |
|
💬 Re: (Another) Crash Rescue Tender Restoration
1 year ago by 🇬🇧 Stephen T (
Lieutenant Commander)✧ 188 Views · 0 Likes
Flag
where are you going to get the water from are you going to take from underneath the prop as mine has a hole for that method my boat is 46 inch one after replacing the hull bottom and now a few of the inner panels due to woodworm I am making bit of progress at last
▲
⟩⟩
No likes yet
This member will receive 1 point for every like received |
|
💬 Re: (Another) Crash Rescue Tender Restoration
1 year ago by 🇬🇧 neilw (
Lieutenant)✧ 194 Views · 1 Like
Flag
Running out of space - the larger restoration project takes up space and time, and when it is varnishing time the workshop has to be dust free so can’t work on the models.
▲
⟩⟩
jbkiwi
|
|
💬 Re: (Another) Crash Rescue Tender Restoration
1 year ago by 🇬🇧 Stephen T (
Lieutenant Commander)✧ 191 Views · 1 Like
Flag
What only two I’ve five projects on the go at once boats trains and automobile
▲
⟩⟩
neilw
|
|
💬 Re: (Another) Crash Rescue Tender Restoration
1 year ago by 🇬🇧 mturpin013 (
 Admiral) Admiral)✧ 203 Views · 1 Like
Flag
Keep bringing them back to life!
▲
⟩⟩
neilw
|
|
💬 Re: (Another) Crash Rescue Tender Restoration
1 year ago by 🇩🇪 RNinMunich (
 Fleet Admiral) Fleet Admiral)✧ 206 Views · 2 Likes
Flag
"As I seem to be working on two models at the same time ..."
Some folks are gluttons for punishment Neil! Welcome to the club😉 So far so good👍 Be nice to fit twin shafts, as per original though. What you are doing reminds me of the ELCO PT Boat restoration I started some (too many) moons ago. Cheers, Doug😎 ▲
⟩⟩
neilw
Colin H
|
Login To
Remove Ads
Remove Ads
📝 (Another) Crash Rescue Tender
1 year ago by 🇬🇧 neilw ( Lieutenant)
Lieutenant)✧ 186 Views · 6 Likes · 1 Comment
Flag
💬 Add Comment
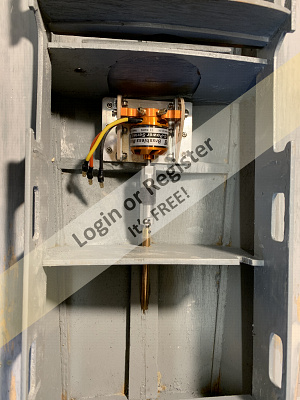
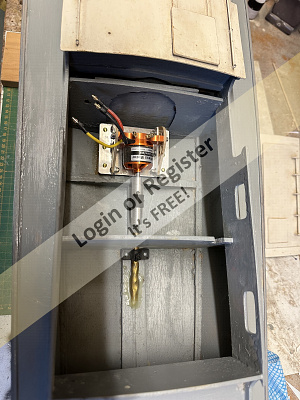
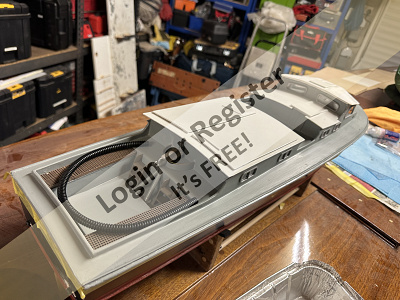
Decided to spend some money with Slecuk. New prop shaft, motor, coupling and ESC arrived this morning. Assembled the motor mount yesterday, impressed that it all fits, but only just. The supplied flexi coupling is quite long, but is a narrow diameter so doesn’t interfere with anything. There isn’t space to fit an oiler forward of the bulkhead so that will have to go in the next section behind the bulkhead.
Just need to fit a pair of longitudinal bearers to secure the motor mount plate. Next to find suitable locations for the water cooled ESC and LiPo.
Just need to fit a pair of longitudinal bearers to secure the motor mount plate. Next to find suitable locations for the water cooled ESC and LiPo.
▲
⟩⟩
DaveWhittaker
hermank
Peejay
jbkiwi
Colin H
neilmc
|
💬 Re: (Another) Crash Rescue Tender
1 year ago by 🇬🇧 Stephen T (
Lieutenant Commander)✧ 187 Views · 1 Like
Flag
hi i have in mind two in the Keel as per the original one was shorter than the other seems lot holes all in line but on my pre build there was narrow plate fixed down outer rudder then short intake and long intake its 1/2 inch difference why two who knows the put to outlets at the top of the stern what do you think
▲
⟩⟩
Colin H
|
📝 (Another) Crash Rescue Tender Restoration
1 year ago by 🇬🇧 neilw ( Lieutenant)
Lieutenant)✧ 163 Views · 6 Likes · 3 Comments
Flag
💬 Add Comment
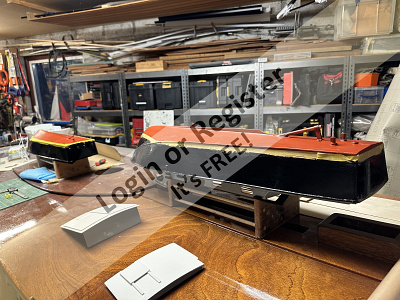
With the Perkasa nearly finished I'm able to dig out the Crash Tender again while the last few pieces of gluing and paintwork on the Perkasa dry off.
I have done a little of work on the Crash Tender a few weeks ago, but looks like I didn't take many photos.
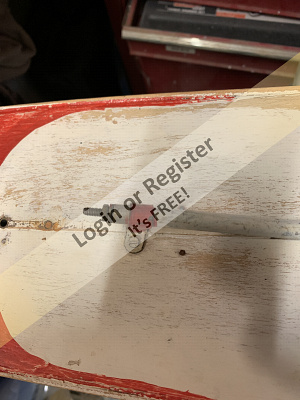
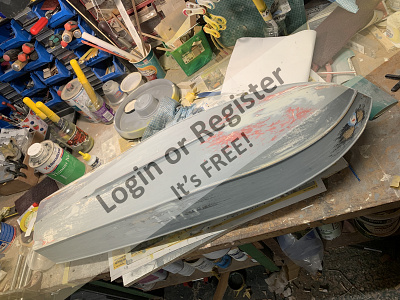
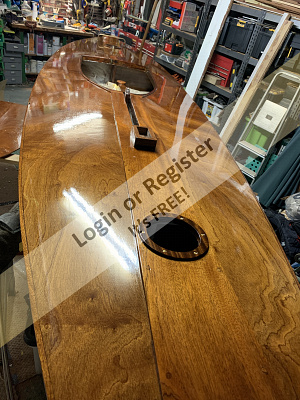
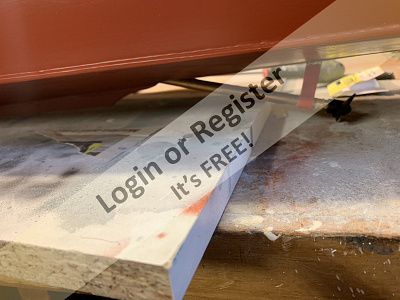
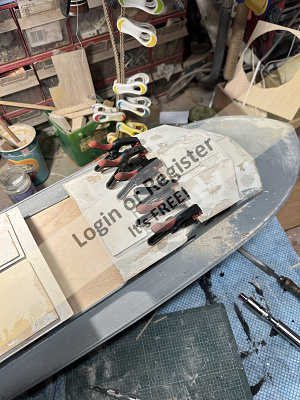
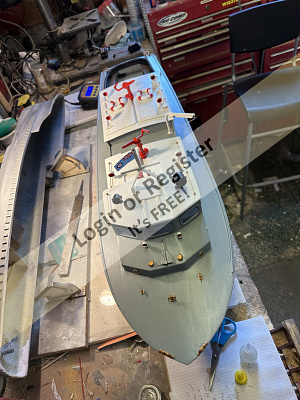
While fitting the new motor and prop shaft I read about using red primer for below the waterline so sprayed the bottom of the boat before fitting the prop shaft, also fitted a new rudder shaft as the original one was held in by paint only.
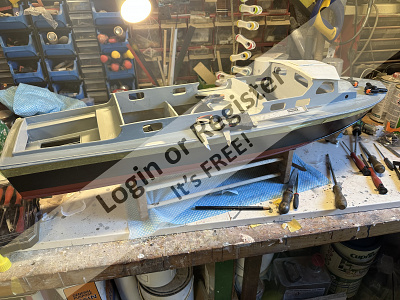
One of the jobs that took an age on the Perkasa was finding and scribing the waterline. As Amazon were doing an Xmas deal on laser levels I spent £15 on a cheap laser, set it up on a tripod and had the waterline sorted in a couple of minutes. The hull then got its first coat of black paint.
I have spent a fair bit of time looking at photos of the full sized boat and other models, decided to add a toerail, so glued a strip of 1/16" obeche in place.
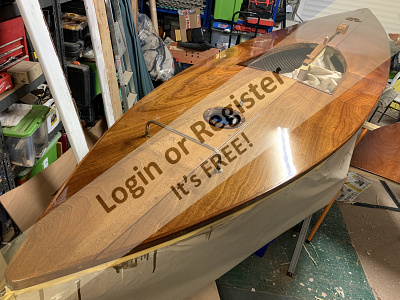
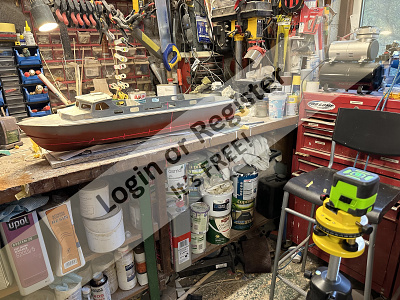
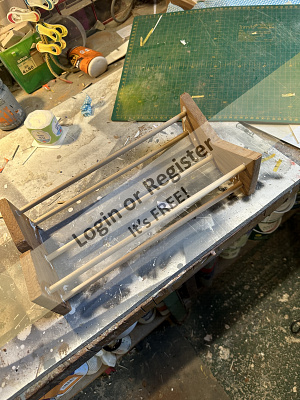
Today I knocked up a stand for the boat as it is now going to spend some time on the bench. Have to say it is lovely working on a smaller boat, the Perkasa got a bit unwieldy so it a delight to be able to easily pick this one up and move it about.
With the boat on the build stand I managed to get the decks sanded and primed, need to do a bit of fairing but there's not a lot to do to the hull and decks apart from paint.
I have done a little of work on the Crash Tender a few weeks ago, but looks like I didn't take many photos.
While fitting the new motor and prop shaft I read about using red primer for below the waterline so sprayed the bottom of the boat before fitting the prop shaft, also fitted a new rudder shaft as the original one was held in by paint only.
One of the jobs that took an age on the Perkasa was finding and scribing the waterline. As Amazon were doing an Xmas deal on laser levels I spent £15 on a cheap laser, set it up on a tripod and had the waterline sorted in a couple of minutes. The hull then got its first coat of black paint.
I have spent a fair bit of time looking at photos of the full sized boat and other models, decided to add a toerail, so glued a strip of 1/16" obeche in place.
Today I knocked up a stand for the boat as it is now going to spend some time on the bench. Have to say it is lovely working on a smaller boat, the Perkasa got a bit unwieldy so it a delight to be able to easily pick this one up and move it about.
With the boat on the build stand I managed to get the decks sanded and primed, need to do a bit of fairing but there's not a lot to do to the hull and decks apart from paint.
▲
⟩⟩
DaveWhittaker
Colin H
hermank
MouldBuilder
jbkiwi
Stephen T
|
💬 Re: (Another) Crash Rescue Tender Restoration
1 year ago by 🇬🇧 neilw (
Lieutenant)✧ 163 Views · 0 Likes
Flag
Hi Stephen,
The red primer is over a couple of coats of Hempel Multicoat, it has adhered nicely. I don’t spray big stuff in the workshop, the airbrush is mainly used for acrylics and I wear a very good respirator as I do a fair bit of GRP and epoxy work on the other boats. ▲
⟩⟩
No likes yet
This member will receive 1 point for every like received |
|
Login To
Remove Ads 💬 Re: (Another) Crash Rescue Tender Restoration
1 year ago by 🇬🇧 Stephen T (
Lieutenant Commander)✧ 181 Views · 0 Likes
Flag
Least you did not have the infestation problem I am going down the non red primer route whilst it looks right I am not sure about its waterproof qualities on a wooden boat fibreglass yes, I see you have the spray set being 😆asthmatic doesn't look right! I have to go with paint over sprays and any spraying I have a small home made booth for such jobs that vents out side the workshopI have a pile of spare white metal parts if your anything missing
▲
⟩⟩
No likes yet
This member will receive 1 point for every like received |
|
💬 Re: (Another) Crash Rescue Tender Restoration
1 year ago by 🇬🇧 Stephen T (
Lieutenant Commander)✧ 181 Views · 0 Likes
Flag
Least you did not have the infestation problem I am going down the non red primer route whilst it looks right I am not sure about its waterproof qualities on a wooden boat fibreglass yes, I see you have the spray set being 😆asthmatic doesn't look right! I have to go with paint over sprays and any spraying I have a small home made booth for such jobs that vents out side the workshop
▲
⟩⟩
No likes yet
This member will receive 1 point for every like received |
📝 Going to look worse before it gets better
1 year ago by 🇬🇧 neilw ( Lieutenant)
Lieutenant)✧ 154 Views · 5 Likes · 2 Comments
Flag
💬 Add Comment
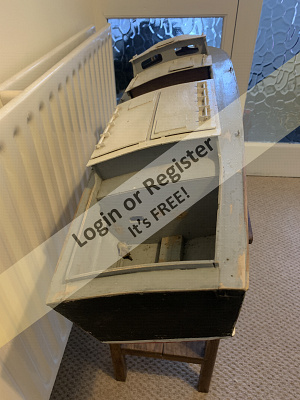
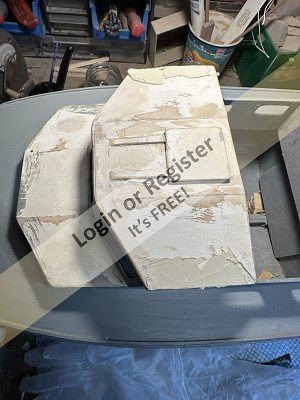
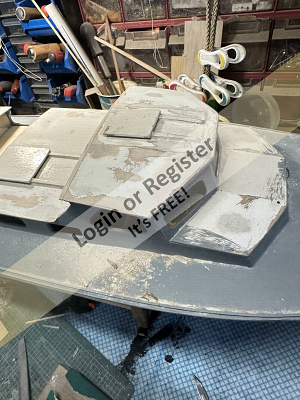
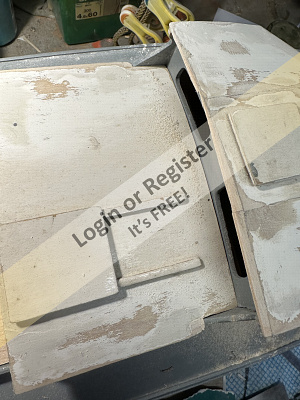
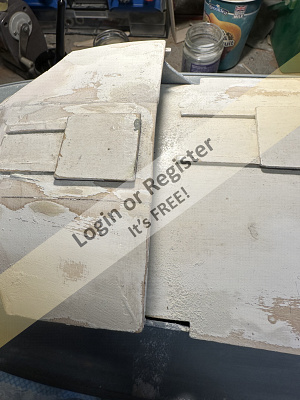
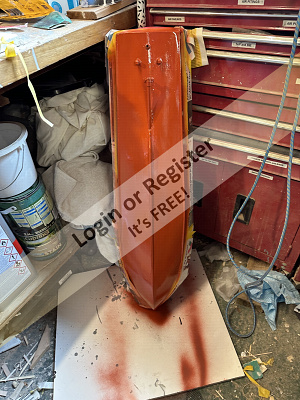
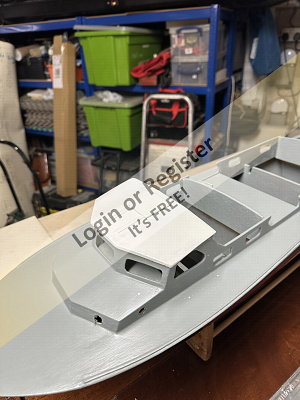
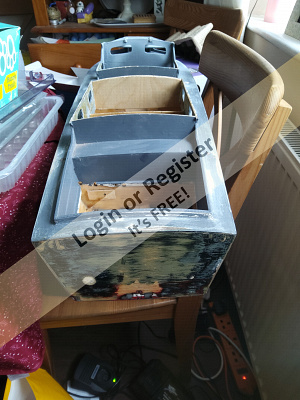
Now I have some time to look at the Crash Tender it’s noticeable that the superstructure isn’t square.
The front bridge roof was out by about 4mm so today has been spent getting the roofline sorted by adding some material on one side while removing excess on the other side. Also spent some time rebuilding and fairing in various edges than have worn over time.
Managed to find some ply to build the missing deck between the cabins, is a nice tight fit so is removable. Thanks to those replying to my question about this deck on the forum.
I’ve also removed all the hand rails and filled the holes left by taking out the fittings. I’ll fit new ones later as I want to fit the scramble nets.
Have several hours of fillings and fairing left to do before I tackle the false floor in the rear cockpit.
▲
⟩⟩
DaveWhittaker
Colin H
hermank
Graham93
MouldBuilder
|
💬 Re: Going to look worse before it gets better
1 year ago by 🇬🇧 neilw (
Lieutenant)✧ 152 Views · 1 Like
Flag
Hi Stephen
The two side panels of the roof are easy to remove, the centre panel is firmly fixed in place. I reckon there is enough room to fit windows and paint the interior with just the side panels removed. ▲
⟩⟩
Colin H
|
|
💬 Re: Going to look worse before it gets better
1 year ago by 🇬🇧 Stephen T (
Lieutenant Commander)✧ 172 Views · 2 Likes
Flag
Just a thought I trust you haven't pinned the cabin roof down as you have the windows to put in I made that mistake and had to take it off again, see these boats are not easy the law of all sods steps in when you don't want it
▲
⟩⟩
Colin H
neilw
|
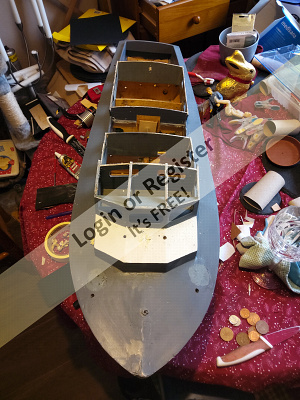
📝 Progress is being made
1 year ago by 🇬🇧 neilw ( Lieutenant)
Lieutenant)✧ 145 Views · 5 Likes · 6 Comments
Flag
💬 Add Comment
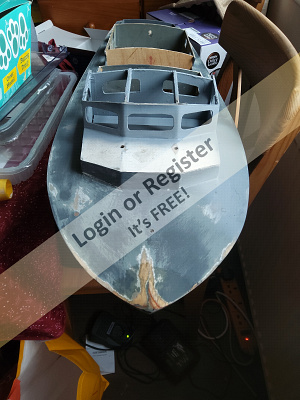
I’ve been working on this one along side the RTTL, but keep forgetting to update the blog.
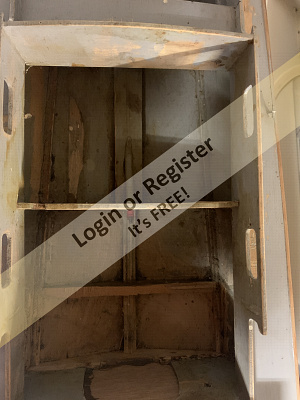
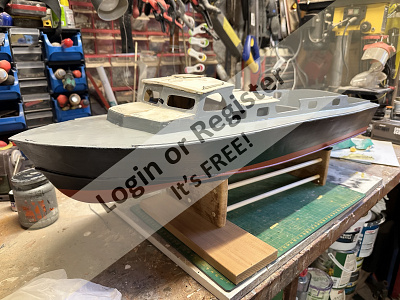
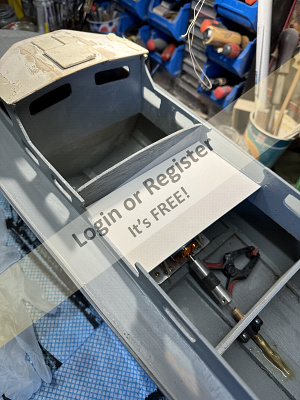
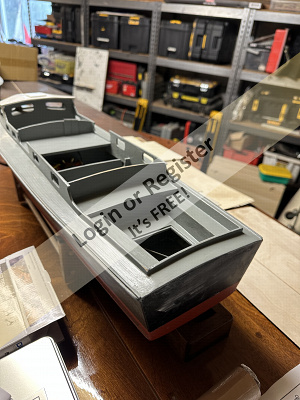
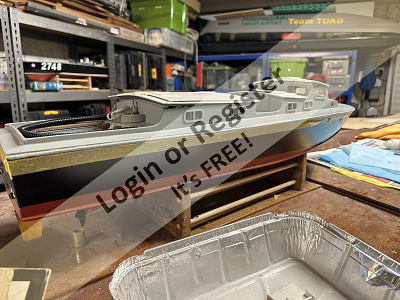
When the RTTL gets painted, the crash tender gets the same. Have done some other work though, the foreword port holes are cut, the bridge deck is in place and I’ve been sorting out the rear cockpit. This was slightly tricky as I’m working on an old hull so have to put the floor in where I can as the stringers were all ready in place, though I’ve levelled them up the best I can.
The hull now has the final coat of paint on the bottom of the hull, and the cabin roofs benefitted from the white painting session I had on the RTTL.
The next paint job is the final coats of black hull paint for this one and the RTTL
▲
⟩⟩
DaveWhittaker
jbkiwi
Colin H
TerryH
hermank
|
💬 Re: Progress is being made
1 year ago by 🇬🇧 Stephen T (
Lieutenant Commander)✧ 142 Views · 1 Like
Flag
I see that you have a way from standard aft with a hole in the floor rather than the whole floor lifting out is that your mod to get to where the servo is
▲
⟩⟩
Scratchbuilder
|
|
Login To
Remove Ads 💬 Re: Progress is being made
1 year ago by 🇬🇧 flaxbybuck (
 Captain) Captain)✧ 137 Views · 1 Like
Flag
I take it you used smooth finish black Hammerite Pete ? Did Hammerite react with oil based paint ?🙄
▲
⟩⟩
TerryH
|
|
💬 Re: Progress is being made
1 year ago by 🇬🇧 PeteJev (
 Master Seaman) Master Seaman)✧ 137 Views · 3 Likes
Flag
We are working in parallel !!! just painted my boat after trial fitting the gear. I have used what I had in stock but had a couple of mishaps with paint reactions. Lesson for the future do not mix paint types without testing. I found the black Hammerite very good and a reasonable finish. I will look forward to your updates - Pete


▲
⟩⟩
neilw
Colin H
flaxbybuck
|
|
💬 Re: Progress is being made
1 year ago by 🇺🇸 BarryS (
 Warrant Officer) Warrant Officer)✧ 144 Views · 1 Like
Flag
I have enjoyed your progress on the rebuild. It is nice to see an older boat brought back to life. Keep up the pictures!
Barry ▲
⟩⟩
neilw
|
|
💬 Re: Progress is being made
1 year ago by 🇬🇧 neilw (
Lieutenant)✧ 145 Views · 1 Like
Flag
Hi Terry
I’m now on a self-imposed ban from FB Market Place as if I see another project I end up buying them. ▲
⟩⟩
TerryH
|
|
💬 Re: Progress is being made
1 year ago by 🇬🇧 TerryH (
 Midshipman) Midshipman)✧ 146 Views · 2 Likes
Flag
I'm watching with interest. Picked a 35.5 inch one up today and started stripping everything off. Cabin roof came off quite easy with the help of a long thin bladed knife
▲
⟩⟩
Colin H
neilw
|
📝 You can have any colour as along as it is black
1 year ago by 🇬🇧 neilw ( Lieutenant)
Lieutenant)✧ 141 Views · 6 Likes · 5 Comments
Flag
💬 Add Comment
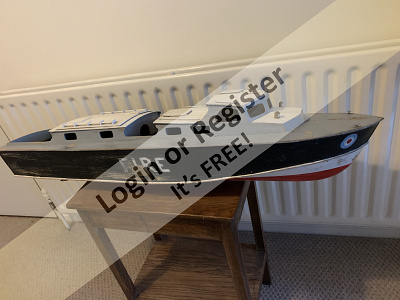
Today was very much a black paint day. Both the Crash Tender and the RTTL had the black hull paint cut back with 240 wet and dry and hopefully the last top coat applied. The Crash Tender is looking good, the RTTL might need another coat, will have to make my mind up in the morning.

▲
⟩⟩
Scratchbuilder
Stephen T
Colin H
PeteJev
TerryH
hermank
|
💬 Re: You can have any colour as along as it is black
1 year ago by 🇬🇧 neilw (
Lieutenant)✧ 122 Views · 0 Likes
Flag
Well, that wasn’t quite the last coat. Needed a little bit more depth and to be more black so flattened both hulls back with 240 wet and dry and applied two thin coats in quick succession with a Jenny Brush. Looks to be a nice flat black now, which is what I was looking for.
▲
⟩⟩
No likes yet
This member will receive 1 point for every like received |
|
Login To
Remove Ads 💬 Re: You can have any colour as along as it is black
1 year ago by 🇺🇸 BarryS (
Warrant Officer)✧ 137 Views · 2 Likes
Flag
Painting two at one time is efficient. Also, my wife's favorite color is black, odd though it seems she will always pick black.
I know when I pass through the pearly gates she will have me in a black suit . . . ▲
⟩⟩
neilw
Colin H
|
|
💬 Re: You can have any colour as along as it is black
1 year ago by 🇩🇪 RNinMunich (
Fleet Admiral)✧ 136 Views · 2 Likes
Flag
"do I repaint the lids which are all original and have never been repainted .. they came up quite nice using hand sanitizer "
Well, if they've already been de-bugged ... leave well alone👍 😎 ▲
⟩⟩
Colin H
neilw
|
|
💬 Re: You can have any colour as along as it is black
1 year ago by 🇬🇧 TerryH (
Midshipman)✧ 138 Views · 5 Likes
Flag
Well after finding the leak in the hull yesterday I floated resin around the inside and can now say she's water tight again.. I plugged stern up and used a thin coat of resin over the top, repaired the damaged bow and section of superstructure.. now question is do I repaint the lids which are all original and have never been repainted .. they came up quite nice using hand sanitizer
▲
⟩⟩
jbkiwi
Stephen T
neilw
hermank
Colin H
|
|
💬 Re: You can have any colour as along as it is black
1 year ago by 🇧🇪 hermank (
Captain)✧ 141 Views · 2 Likes
Flag
Neil W are you a family member of mister Ford the famous car manufacturer he always said you can choose any colour as long as it is black!!!
Black is beautifull as they say and it’s through ▲
⟩⟩
neilw
Colin H
|
📝 Window fettling
11 months ago by 🇬🇧 neilw ( Lieutenant)
Lieutenant)✧ 125 Views · 11 Likes · 4 Comments
Flag
💬 Add Comment
I’ve been working on this one alongside the RTTL, it now needs the final coat of grey deck and cabin side paint.
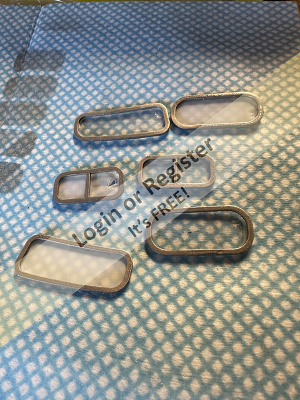
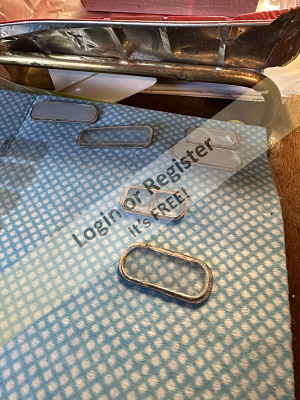
The job I couldn’t put off was the dry fitting of the windows. This needed to be done before the last coat of grey paint as I knew I’d have to make some adjustments to the window apertures. One of the problems of working on an older boat is the lack of control over what the previous builder has done and what dimensions were used in the original kit.
All the window apertures were fine in terms of height but all needed extending by a 1mm - 2mm to take the windows I have for the boat
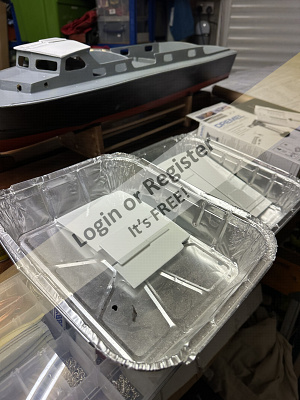
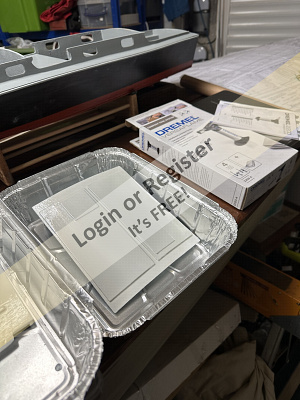
I’d bought the window kit from SLEC and sprayed the frames an aluminium colour and glued the acrylic windows onto the inside face of the frames. In theory the acrylic should fit into the aperture and the frame only sits proud of the cabin side.
So today has mostly been spent using a selection of small files to adjust all the apertures so they will accommodate the SLEC windows. Very fiddly but very satisfying when the window and frame slot in nicely into the aperture.
The job I couldn’t put off was the dry fitting of the windows. This needed to be done before the last coat of grey paint as I knew I’d have to make some adjustments to the window apertures. One of the problems of working on an older boat is the lack of control over what the previous builder has done and what dimensions were used in the original kit.
All the window apertures were fine in terms of height but all needed extending by a 1mm - 2mm to take the windows I have for the boat
I’d bought the window kit from SLEC and sprayed the frames an aluminium colour and glued the acrylic windows onto the inside face of the frames. In theory the acrylic should fit into the aperture and the frame only sits proud of the cabin side.
So today has mostly been spent using a selection of small files to adjust all the apertures so they will accommodate the SLEC windows. Very fiddly but very satisfying when the window and frame slot in nicely into the aperture.
▲
⟩⟩
DaveWhittaker
StephenT
Fred
Scratchbuilder
flaxbybuck
Len1
Double Rum
chugalone100
PeteJev
hermank
Colin H
|
💬 Re: Window fettling
11 months ago by 🇬🇧 flaxbybuck (
Captain)✧ 109 Views · 2 Likes
Flag
Apologies for not being clear in my last post. I have been making window frames for a boat which is under construction. After trying a number of different methods unsuccessfully I used thin ply. The apertures were created first, and using a small sanding drum on my Dremell were very carefully shaped to the final profile. The outer profile was then cut and sanded to shape. This had to be done really carefully to achieve the correct frame width without taking off too much. Not an easy task.😉
▲
⟩⟩
neilw
Scratchbuilder
|
|
Login To
Remove Ads 💬 Re: Window fettling
11 months ago by 🇬🇧 flaxbybuck (
Captain)✧ 111 Views · 3 Likes
Flag
I like the look of your completed window frames. I have spent a long time trying to get some looking right for the boat. The choice of paint makes such a difference. My final choice was a 'chrome effect' spray paint. At first sight, close to, it looks to be dark grey, but when viewed from a distance it does give the same effect as chrome plated frames. Very satisfying.😉
▲
⟩⟩
neilw
Scratchbuilder
hermank
|
|
💬 Re: Window fettling
11 months ago by 🇬🇧 neilw (
Lieutenant)✧ 123 Views · 0 Likes
Flag
Hi Pete
I remember reading somewhere about aluminium frames and as I had a can of the silver hicote paint it seemed a good idea. I’m trying to get this one done as cheaply as possible so am using paint and I have left lying around. ▲
⟩⟩
No likes yet
This member will receive 1 point for every like received |
|
💬 Re: Window fettling
11 months ago by 🇬🇧 PeteJev (
Master Seaman)✧ 116 Views · 2 Likes
Flag
Hi Neil - I am doing exactly the same job on my fire tender, using the SLEC windows and have been putting it off as it seems very fiddly. The forward cabin widows on my model were much too big and I have had to insert some infill pieces. Much appreciate the pictures it has helped significantly. I have painted the surrounds white, should they be aluminium colour? all the best
Pete ▲
⟩⟩
neilw
Scratchbuilder
|
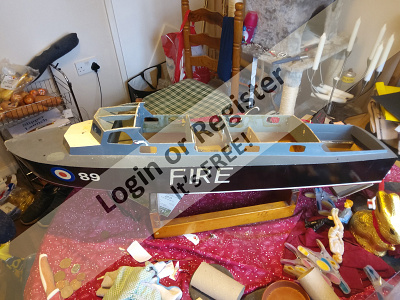
📝 Yet more bits and pieces
10 months ago by 🇬🇧 neilw ( Lieutenant)
Lieutenant)✧ 100 Views · 8 Likes
Flag
💬 Add Comment
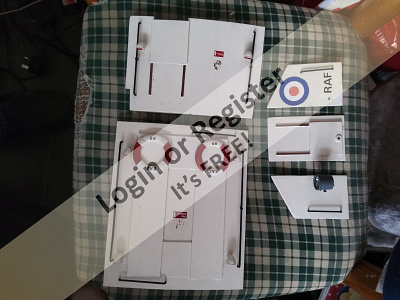
I’ve been away for a couple of weeks on holiday in and around the Norfolk Broads.
Now I’m home it is time to finish the Crash Tender.
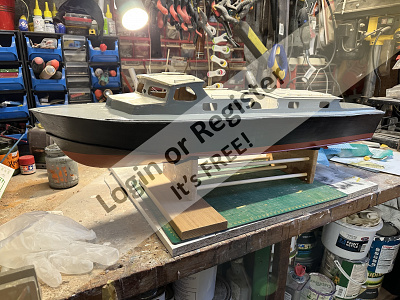
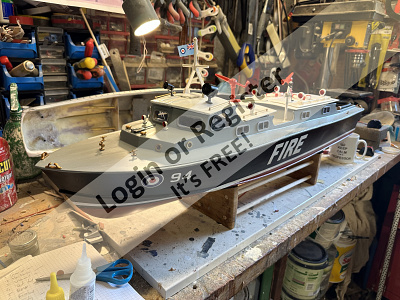
All the windows went in OK and the decks are nearly there, just a final coat to apply. I’m happy with the cabin sides and cockpit, the deck needs one more coat.
I’ve moved the outlet from the water cooling to the transom as the side exit I had on the RTTL looked wrong (will be moving the RTTL exit later). Have all the plumbing in place for the water cooling and the monitors, have a water pump installed for each circuit.
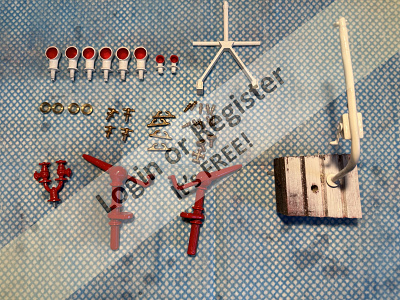
The fittings are a combination from SLEC and from this site. The rear cockpit ladders needed shortening as I was limited by the original 1960s build for the position of the cockpit floor.
Have spent a while cleaning up the metal fittings and have sprayed them a brass colour, possibly not authentic but I like the way they look.
Have all the fittings painted, so next week I should get all the fittings on the boat.

Now I’m home it is time to finish the Crash Tender.
All the windows went in OK and the decks are nearly there, just a final coat to apply. I’m happy with the cabin sides and cockpit, the deck needs one more coat.
I’ve moved the outlet from the water cooling to the transom as the side exit I had on the RTTL looked wrong (will be moving the RTTL exit later). Have all the plumbing in place for the water cooling and the monitors, have a water pump installed for each circuit.
The fittings are a combination from SLEC and from this site. The rear cockpit ladders needed shortening as I was limited by the original 1960s build for the position of the cockpit floor.
Have spent a while cleaning up the metal fittings and have sprayed them a brass colour, possibly not authentic but I like the way they look.
Have all the fittings painted, so next week I should get all the fittings on the boat.
▲
⟩⟩
DaveWhittaker
StephenT
Scratchbuilder
jbkiwi
PeteJev
Norway
Colin H
chugalone100
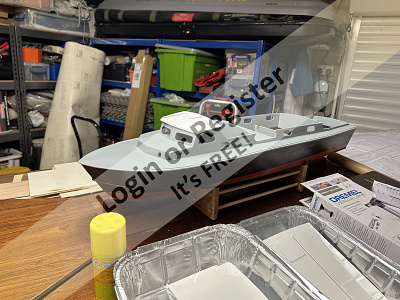
📝 Finished (hopefully)
8 months ago by 🇬🇧 neilw ( Lieutenant)
Lieutenant)✧ 89 Views · 13 Likes · 7 Comments
Flag
💬 Add Comment
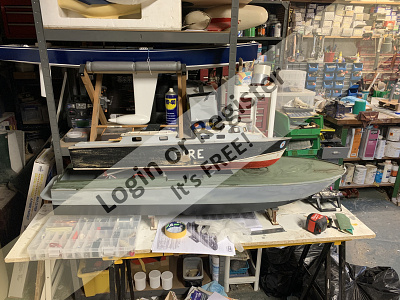
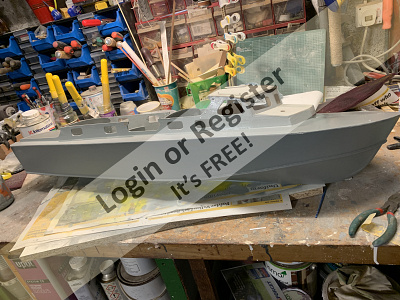
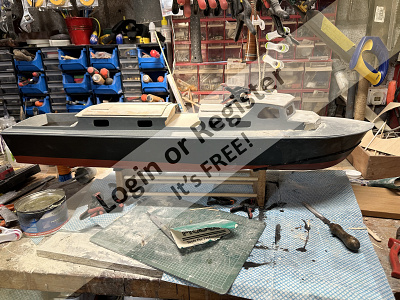
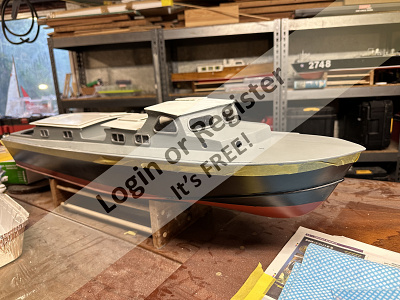
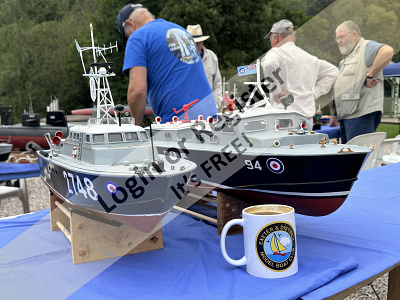
This one was mainly completed a couple of weeks ago, finally got the last few fittings on today ahead of my club’s open day tomorrow. Hopefully I’ll get some decent pictures/video of her on the water.
She has been out a couple of times, the first time was OK but the battery was too far forwards and was sailing bow down. I repositioned the battery, ESC and pumps and took her out last week, and she flew.
She still needs a little adjustment of the waterline but I’m quite happy with her now.

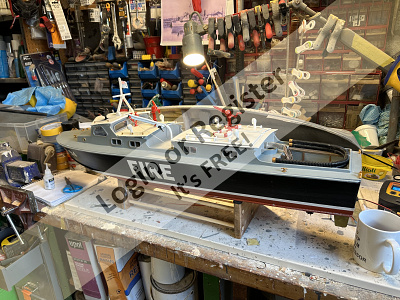
She has been out a couple of times, the first time was OK but the battery was too far forwards and was sailing bow down. I repositioned the battery, ESC and pumps and took her out last week, and she flew.
She still needs a little adjustment of the waterline but I’m quite happy with her now.
▲
⟩⟩
DaveWhittaker
TonyB1
Len1
flaxbybuck
RNinMunich
dave976
boatmam
Doogle
luckyduck
Scratchbuilder
Fred
PeteJev
Colin H
|
💬 Re: Finished (hopefully)
8 months ago by 🇬🇧 flaxbybuck (
Captain)✧ 66 Views · 1 Like
Flag
She's looking really good. Patience with the detail and finishing has paid off. Great ! 😉
▲
⟩⟩
neilw
|
|
Login To
Remove Ads 💬 Re: Finished (hopefully)
8 months ago by 🇺🇸 Hhager2 (
Midshipman)✧ 68 Views · 0 Likes
Flag
Meant hull behind ship
▲
⟩⟩
No likes yet
This member will receive 1 point for every like received |
|
💬 Re: Finished (hopefully)
8 months ago by 🇬🇧 Doogle (
 Commodore) Commodore)✧ 78 Views · 2 Likes
Flag
Looks great Neil, have a great time sailing her and looking forward to seeing some photos of her on the water 👍
▲
⟩⟩
neilw
Scratchbuilder
|
|
💬 Re: Finished (hopefully)
8 months ago by 🇬🇧 Scratchbuilder (
 Vice Admiral) Vice Admiral)✧ 74 Views · 2 Likes
Flag
First class build Neil.
It would be good to see a shot of her on the water. Regards Bill ▲
⟩⟩
Doogle
neilw
|
|
💬 Re: Finished (hopefully)
8 months ago by 🇬🇧 Tall Paul (
 Petty Officer 1st Class) Petty Officer 1st Class)✧ 74 Views · 2 Likes
Flag
It’s looking good with great colouring and all its bits.
I had the 46” version … a bit underpowered but I did Enjoy sailing it. Hope you have successful sails. ▲
⟩⟩
neilw
Scratchbuilder
|
|
💬 Re: Finished (hopefully)
8 months ago by 🇬🇧 neilw (
Lieutenant)✧ 86 Views · 0 Likes
Flag
The hull behind is a Sirmar BYMS
▲
⟩⟩
No likes yet
This member will receive 1 point for every like received |
|
💬 Re: Finished (hopefully)
8 months ago by 🇺🇸 Hhager2 (
Midshipman)✧ 78 Views · 1 Like
Flag
What is hill behind the ship? What brand n is it for sale? I think I can build that into a minesweeper
▲
⟩⟩
neilw
|
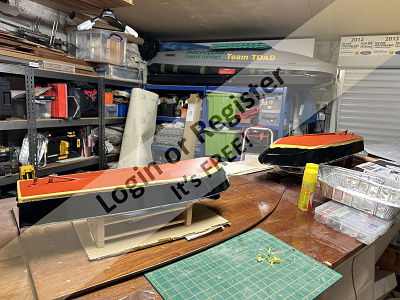
📝 Success
8 months ago by 🇬🇧 neilw ( Lieutenant)
Lieutenant)✧ 71 Views · 6 Likes · 5 Comments
Flag
💬 Add Comment
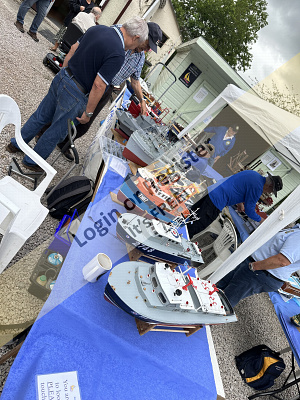
Got both the RAF RTTL and the Crash Tender out today at the club open day. Should have some video later in the week.
▲
⟩⟩
DaveWhittaker
Fred
Scratchbuilder
PeteJev
boatmam
Doogle
|
💬 Re: Success
8 months ago by 🇬🇧 Scratchbuilder (
Vice Admiral)✧ 56 Views · 1 Like
Flag
Neil.
Thank you for all that info. I shall investigate further.It’s always good to get 1st hand knowledge 👍👍 Regards Bill ▲
⟩⟩
neilw
|
|
Login To
Remove Ads 💬 Re: Success
8 months ago by 🇬🇧 neilw (
Lieutenant)✧ 66 Views · 1 Like
Flag
Bill, I made the mistake of using the term GoPro when I should have said Faux Pro, a few years ago I spent a lot of money going down the GoPro route as we were doing endurance 4x4 events and I was doing some serious dinghy racing in the Finn Class.
Had some decent results but the GoPro stuff was expensive. Changed to GoPro copies as cheaper if I lost or broke them also got fed up with GoPro pricing. Found the 4k Akosa were very robust, waterproof and if I destroyed one it wouldn’t be the end of the world. Have fitted these to paddle boards, racing dinghies and Land Rovers, have yet to break one! This is what I’ll mount one one of my boats ▲
⟩⟩
Scratchbuilder
|

|
💬 Re: Success
8 months ago by 🇬🇧 Scratchbuilder (
Vice Admiral)✧ 57 Views · 1 Like
Flag
Neil.
I would be interested to see what camera you fit and where you get it from please. Bill👍 ▲
⟩⟩
neilw
|
|
💬 Re: Success
8 months ago by 🇬🇧 neilw (
Lieutenant)✧ 67 Views · 1 Like
Flag
Planning to fit a GoPro to one of my plastic boats as an attempt to get some decent video as it’s impossible to steer the boats at speed whilst taking video.
▲
⟩⟩
Scratchbuilder
|
|
💬 Re: Success
8 months ago by 🇬🇧 PeteJev (
Master Seaman)✧ 54 Views · 2 Likes
Flag
Well done Neil they look great, I look forward to seeing them in action. You have beaten me hands down in the building process, I have just got my windows in!!!😀
▲
⟩⟩
neilw
Scratchbuilder
|


Login To
Remove Ads
Remove Ads