
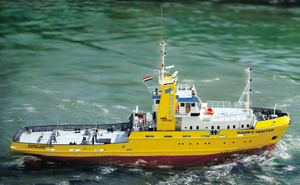
Brooklyn Tugboat

By figtree7nts 180 entries 3 Feb 2018 — 28 Jan 2021
467Likes
385Comments
Chapter 51 / 180

180 chapters · Page 6 of 18

Glue from Humbrol!

Just got an email from Cornwall Model Boats.
They're going to refund the price of the glue from Humbrol!
Turns out the one's they had on there shelves were also dried in the bottles as well! I'm still a fan of Cornwall Model Boats....👍😊
Liked by Martin555

Fascis Board and Molding!

Fascis Board and Molding in place.
It took about an hour to put it on.
Had to keep from gluing my fingers to the boat!

This is why I ordered the Hombral glue applicator!
But I made out ok. if you move your finger quick enough.
It really doesn't stick sort of.....
No finger prints on the boat. 👍
Liked by Martin555 and Colin H and

Cabin Aft!

Cabin aft is now completed!
I had to use a bit of Bondo (P38).
To tidy up the seam that was left.
From joining the two pieces of Balsa wood!
The Balsa wood made it very easy to shape the cabin aft!
The Port lights are optional in this kit. They give two more Port light, if you want to port them on.
I used the measurements given then.
I drew a circle with my compass. About 1/2" or so. I didn't have a 1/2" drill. So I improvised. I use a 1/32" drill. went around the circle. Then cut the balsa wood with my exacto! Then routed the hole with my Dremel!

Next is the moulding that goes around the bottom of the cabin!
Liked by Martin555 and Colin H

Placed the Moulding on Cabin!

It helps to have small hands for this task
Tweezers help a lot as well.
The moudings is made up of 1mm x 2mm plastic strips!
Oh, I neglected to say good eye's as well!
It only takes about 30 minutes. to glue the moulding on.
But keeping your fingers from gluing to the model.
Is a task on it's own!

The clear plastic that is vertical.
Is simulated rivet plating!
It was a different kind of challenge.
But it kept me busy!

For those who are going to venture.
In this model be prepared for a good amount of challenges!
They'll keep your on your toes!!!
Liked by Martin555 and mturpin013 and

SkyLight!

The skylight is completed. But not glued in place yet!
The picture in the middle show the skylight without detail.
Because it has to be painted!

I placed 1/4" squared pieces of wood to center the skylight assembly! I'm putting lights on my tug so now.
I know where to place the switch! I'm placing it under the skylight! The skylight will be removable to gain access to the switches!

The forth picture is of the underneath of the skylight.
Just to show what it looks like. And how I used the squared pieces of wood. To center the skylight!
Liked by Martin555 and mturpin013 and

The Caprail Guards

The caprail guard are used like chaffing gear!
Those are the tan pieces you see on top of the caprails!
Towards the bow and Stern. but I feel it's going to get in the way!
What do you think?
Should I put the caprail guards on?
Liked by Martin555 and mturpin013

Caprail Guards in place!

The caprail guards are in place.
They are the thin piece of plastic.
You see going far and aft!

Hi Doug, Couldn't see if it was on the original.
But saw it was on tugs of that era!

It should prove to be interesting.
Painting the caprail guards!
Liked by Martin555 and mturpin013

Main Forward Ladder!

Made up the main forward ladder!
After carefully gluing it together.
I had to cut off all the outer rungs!
There are two more ladders to be made up.
There's a 3 rung ladder and a 4 rung ladder.
There not bad to work with.
But I wish they would have been made of plastic!
Liked by Martin555 and Donnieboy

Bollard Hieght!

The bollard height on the Brooklyn.
Is off by about 1/8" towards the bow.
And a little over 1/8" towards the stern!
If you use the recommended height.
Given the bollards don't have enough to bite on.
So I compensated by adding 1/8" to the bollards!
Now by adding the thickness the bollards needed.
The bollards are in their right height....

I've seen this inaccuracies on prier Brooklyn's built!

If you take a look at the picture of the Brooklyn.
You can see that person followed the Dumas instructions.
Which gives the bollards incorrect height!

My bollards will be at the correct height required! 👍
Liked by Martin555 and RNinMunich

Main Mast!

Main mast in place. Dumas has the mast being held by small staple you have to make! I guess if your going to make the mast removable ok! But I'm going to put wires on my mast! So the mast has to be a bit more stable and more secure in it's place.
So, I made a support base using 1/8" ABS. Which I laminated to give it more gluing surface. This I then glued to the cabin! I put angles to keep the piece from moving port or starboard. This made the mast feel solid!

Eventually I'll start painting her! But for now I'll keep working on her!

The mast is suppose to have one light suspended above the deck.
But I’m going to run wires to power one light aloft.
I believe it’s the steaming ahead light….

Note:
When you go to lower the main cabin on to the main deck.
Start by lowering the main cabin. From the back (Aft)!
Then lower the front (Bow) of the main cabin!
To be flush withthe main deck!
Liked by Martin555 and Colin H and

Delete this post?

It will be removed from the site.

Discard this draft?

Your draft will be deleted and cannot be recovered.

You have an unfinished draft

What would you like to do with it?