

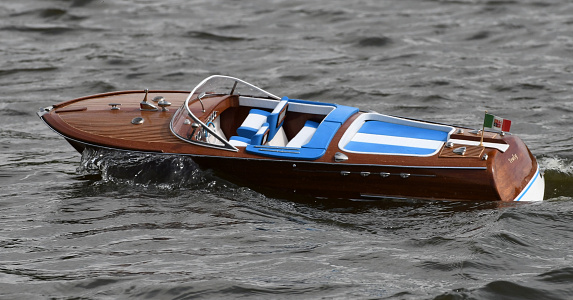
FLYING Christine II
This is a build of a HA-Kits Flying Christine II which is a model of the St. John's Ambulance service boat which is used to take patients from the Isle of Guernsey (UK) for treatment elsewhere - probably with more facilities! I'm getting my nearly twelve year old grandson to build it with just guidance from myself and I assisted with cutting of the tabs off the laser cut parts on the thicker plywood. We need to get the younger generation interested in our great hobby!
The box contains all the plywood laser cut parts on varying thicknesses of plywood. In addition there is a bag of plastic window frames and plastic window inserts. There is no propeller shaft, rudder or other bits to complete the model.
Construction so far seems to be fairly straight forward and it is something that my grandson is enjoying doing. It is the first model of any kind that he has built.
As he doesn't live near us he is here for just 10 days and we hope to get it completed by the time he goes home. The kit says use thick and thin cyno or Aliphatic glue. I have chose to use Aliphatic so we don't get little fingers stuck together! It will be slower but hope to speed up the process by starting building the cabin whilst the hull is fully curing before adding the skins - the order laid out in the instruction.
BEWARE when initially gluing both halves of the deck together it says you may strengthen the joint by gluing some scrap on the back of the joint. We unfortunately chose a piece about 2mm too long so later in the build it came into contact with one of the bulkheads - so we had to trim it back!
The only other thing was the instructions didn't clearly mention gluing two of the cabin bulkheads together to make one. After a bit of thought and looking at the cabin layout it became obvious that C2 and C3 needed to be first glued together. Having said that when attaching to the cabin frame C3 follows C1 (as one part) and C2 is then before C4!
Make sure you use plenty of masking tape to ensure that the cabin structure doesn't get glued onto the deck! See photos
So this is where we are at the end of Day 2 - more to follow!
Apologies in that the photos are not in the correct sequence!
The box contains all the plywood laser cut parts on varying thicknesses of plywood. In addition there is a bag of plastic window frames and plastic window inserts. There is no propeller shaft, rudder or other bits to complete the model.
Construction so far seems to be fairly straight forward and it is something that my grandson is enjoying doing. It is the first model of any kind that he has built.
As he doesn't live near us he is here for just 10 days and we hope to get it completed by the time he goes home. The kit says use thick and thin cyno or Aliphatic glue. I have chose to use Aliphatic so we don't get little fingers stuck together! It will be slower but hope to speed up the process by starting building the cabin whilst the hull is fully curing before adding the skins - the order laid out in the instruction.
BEWARE when initially gluing both halves of the deck together it says you may strengthen the joint by gluing some scrap on the back of the joint. We unfortunately chose a piece about 2mm too long so later in the build it came into contact with one of the bulkheads - so we had to trim it back!
The only other thing was the instructions didn't clearly mention gluing two of the cabin bulkheads together to make one. After a bit of thought and looking at the cabin layout it became obvious that C2 and C3 needed to be first glued together. Having said that when attaching to the cabin frame C3 follows C1 (as one part) and C2 is then before C4!
Make sure you use plenty of masking tape to ensure that the cabin structure doesn't get glued onto the deck! See photos
So this is where we are at the end of Day 2 - more to follow!
Apologies in that the photos are not in the correct sequence!