
Chapter 01 / 23

23 chapters · Page 1 of 3

DuncanP Opening post 3

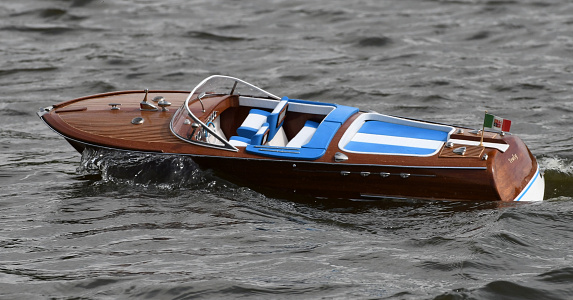
Amati Riva Aquarama

Started the build of this boat in April 2021. Followed the instructions implicitly until now but realised that fitting the optional motorising kit I needed to deviate! Dry running the fitting of the motors, gear boxes, rudders and rudder linkages were very difficult even before any planking. I've therefore decided to blog my deviation from the instructions since they indicate fitting these components on completion. I think otherwise this would be near impossible so I'm going to blog my method and hope it works! Hopefully it might be useful for anyone else building this Amati kit.
I've just installed the motors and prop shafts as I needed to use the space where the planking would be fitted in order to get them into place! I've wrapped the motors and gear boxes in a plastic bags to protect them until the boat is finished. I will complete the bottom planking and then fit the rudders as again access once planking is complete will make the job almost impossible. The clamps are holding strengthening pieces in place in order to hold the props in correct alignment. This again is a modification plus I've filed out the wood close to where the outer motor terminals are located. Otherwise attaching the wires to the motors would again be difficult.I plan to cover the bottom of the hull with the mahogany planks so I can attach the rudders and linkages before planking the sides.
Liked by Mike Stoney and Commodore-H and

Planking

Picture of me applying another plank with an Amati pin pusher. I usually get the nail started with the pin pusher and the complete with the hammer. I'm thinking of applying some expoy resin to the underside of the planks (under the cabin area) as soon this will be unreachable - just in case in future any water gets ingressed into those areas. Has anyone got any thoughts on this please ? This is my first build of a planked hull so any experience greatly received.
Liked by hermank and DaveWhittaker and

Preventing water damage

Haven't done much since my last post as it has been too cold in my garage Workshop. Trying to be careful with the electric radiator with the high cost of electricity!! I've put masking tape on the planks and frames to stop any varnish getting on them and then possibly causing problems later when glueing more planks on. As you can see from the photos I soon won't be able to get into protecting the inside of these bottom planks from any ingress of water. Hopefully that won't happen but just in case I have put 2 coats of quick drying satin varnish on the inside of these bottom planks. In order to do this I've put a pvc glove on and applied it with a bent finger!! A brush wouldn't touch the inside of the planks. Next stage will be to continue with the planking when it gets warmer! By the way Happy New Year everyone and happy constructing and sailing! Cheers Duncan
Liked by hermank and Mike Stoney and

Riva Aquarama - extra bouyancy

Decided to fill the parts of the hull which will be inaccessible after planking with some extra bouyancy - just in case the unthinkable happens! Had some yellow pool noodle and also some foam packaging that arrived in a parcel this week. Thought it was worthwhile doing before doing any more planking. In my previous post I had treated the underside of the current planks with 2 coats of varnish. Cheers Duncan
Liked by hermank and DaveWhittaker and

Riva Aquarama - planking the bottom

Riva Aquarama slowly coming along. First layer of a planking on the bottom of the hull nearly finished. Needs some filler in places and yet more sanding- ugh! Going to do the 2nd mahogany planking on the bottom so I can get access through the sides of the hull in order to assemble the rudders and linkages. Once the side planks are in place this job will be difficult if not impossible! This is not as per instructions though but I think they are bias towards a display model. I've protected the rudder tubes with greased bbq skewer sticks - a perfect fit! There is masking tape on the prop shafts to protect them. During sanding I've protected the inside of the hull with A4 plastic pockets taped together. Happy sailing and building everyone.
Liked by hermank and Colin H and

Riva Aquarama 2nd photo -

2nd photo- said run out of memory when I tried to upload with the previous photo not sure which end is at fault!??
Liked by hermank and Colin H

Second layer of planking

I have started the second layer of planking on my Amati Riva Aquarama. It is the first time that I have built a planked model but having looked at some previous methods I have adopted the following method which is a combination of other ways and seems to be working well. I have purchased off Ebay some BLUNT needles and syringes which are quite cheap. The needles allow you to carefully control the amount of glue applied and enable you to get into the tight gaps. First of all, I glued the bow end with CA glue for a length of about 2" making sure I have a tight fit and let the CA go off. Using the syringe filled with Aliphatic glue I then apply a thin bead of this glue for the rest of the length of the plank onto the hull.( I find using CA glue I end up sticking my fingers!) The needle lets you get glue very close to where the plank is already fixed with the CA glue. Because of the curvature of the hull I have found that the plank will bend and make a tight fit to the preceding plank. I then press it down wiping excess glue away and apply wide masking tape to keep the plank firmly in place - and give it time to set. I didn't want to use nails as shown in the instructions because I didn't want holes showing when the planks are finally finished with varnish. If the CA glue needle gets blocked just burn off the blockage with a lighter. I haven't found the Aliphatic glue blocks the needle but in both cases I always replace the plastic covers on the needles between applications. Next stage is sanding and applying 2 x sanding sealer followed by varnish. I will then fit the rudders, rudder horns and linkages before completing the sides if the boat. This is so I can get my fingers in through the sides of the boat in order to carry out this task - otherwise I think it will be near impossible!!
Liked by hermank and DaveWhittaker and

Amati Italian Runabout (Riva Aquarama) for use on water

I've completed the second layer of mahogany planking on the bottom of the hull and have now applied the first coat of Chestnut Sanding sealer which will require sanding before another coat is applied. Before applying the sealer I applied Vaseline to the BBQ bamboo skewers to ensure they didn't get stuck in the rudder tubes (they are a perfect fit!) and also applied the yellow masking tape around the last planks fitted in order to ensure a raw wood edge when I'm gluing the side planking on after fitting the rudders and linkages (This method of build is the only way I believe I can get my fingers in to fit these parts!). My plan then is to do another coat of sanding sealer and then two coats of yacht varnish. Not sure whether I should also apply a finishing epoxy resin coat before doing the varnishing. Any thoughts? The bottom of the hull will then be painted with white enamel - Humbrol. The sides once fitted will be the beautiful mahagony. That is my thoughts so far. Any comments please?
Liked by hermank and DaveWhittaker and

1st coat of varnish

Hi Everyone, Just a small update on progress. Having applied several coats of Cellulose Sanding sealer I have now applied one coat of yacht varnish. Hopefully you can see from the photos the reason I decided to apply the masking tape. This was to protect a raw wood edge in order to get a good bond to glue to when I start the side planking. I'm pleased with the overall finish so far. I forgot to do a test of the varnish on the sealer so there were a few anxious hours of waiting hoping that they wouldn't react with each other!
Liked by hermank and DaveWhittaker and

Overcoming difficulty of fitting rudders and linkages

Hopefully the photos that I'm attaching will explain why I'm not following the instructions for a radio control version! The Amati instructions indicate that the rudders and control linkages are fitted at the end of the hull construction. I decided that this will be virtually impossible to get your hands in to accomplish this task so I have planked almost up to the waterline with both 1st and second planking in order to still have some reasonable access to carry out this task. In order to protect the rudders whilst the rest of the hull is completed I've cut out a polystyrene block (or could be balsa blocks) and covered it in gaffer tape to go over the prop shafts and rudders to provide the protection.
It still took all afternoon to get the supplied R/C rudders in place. I've C/A glued a nut onto the bottom of each rudder horn. I found that with the shape of the hull, the rudders when turned fully were catching the bottom of the hull so I've added two small 2mm white plastic spacers which I made from some tubing. Hope this will help anyone else who attempts to build the R/C version of the kit! Next stage is to epoxy the inside below the waterline before continuing with the rest of the planking. I've also installed a 3mm light in the cabin and also added 3mm bulbs for the headlights rather than using the dummy headlights.
Liked by hermank and DaveWhittaker and

Delete this post?

It will be removed from the site.

Discard this draft?

Your draft will be deleted and cannot be recovered.

You have an unfinished draft

What would you like to do with it?